'49 5 HP Atlas Royal Restoration

Status
Not open for further replies.

rexlange

Cadet
Joined
Jul 10, 2010
Messages
20
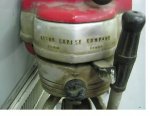
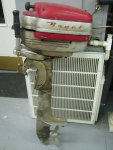
I picked up a 1949 Atlas Royal 5 HP a couple days ago. I just joined, so I'm THG (the new guy)...I'm restoring it and I need some feedback about replacing spark plug wires (soild wire core...mice ate the insulation covering) to the coils. It looks to me like I just have to buy the wire and solder it in place, connect ends to the plugs and I'm good to go.

Oops! I checked with a local who said to just solder the wires and use 'em.
They didn't have boots...should I put some on?

Well that worked! It runs like a banchee...original plugs and all. Wow. Now I have a real problem. The "wobbler" impellor seems to be workin' fine cause there's plenty of water goin' through the LE but I'm not getting much water out of the pee hole. I tried some monofiliment and got it about 4 1/2 inches in but still gettin' just a spit of water so I can't run the engine long or it will overheat and there goes the head gasket (we don't want that). Any other suggestions or will I have to tear down the power head to clean out the gunk and corrosion?

BTW, I've got lots of pictures if anybody wants to see the resurrection.
 
M

mrcrabs

Guest
Re: '49 5 HP Atlas Royal Restoration

we defiantly want to see the pics, I don't know for sure if its advisable but I have used "lime away" to get ride of corrosion and rust in cloged water tubes before but that was my motor and not yours so don't take my word for it.
someone else will chime in here with more experience. Also you may have pieces of a old water pump impeller in there so use extreme caution and check really good.
 

rexlange

Cadet
Joined
Jul 10, 2010
Messages
20
Re: '49 5 HP Atlas Royal Restoration

Thanks for the reply....Lime Away (maybe CLR would work too?). That's a start. I also thought I'd add the Model, S/N and get you guys some pics.
2A7 304432
BTW, if you want to get off the old gas stains (shellac, varnish) don't use Carb Cleaner...it took the decals off the tank:(
WD 40 did a pretty good job but Neverdull really did the trick and doesn't harm the paint or decals. I also need to find the right paint (matching the old Royal Red, Aluminum isn't a problem) but for now I may just run it like it is.

Now, I have to go find decals and the red ones don't seem to be around (I did find gold ones though). I may have to go back to my sign painting days and hand letter them!
 

Attachments

  • Atlas Front View.jpg
    Atlas Front View.jpg
    20.4 KB · Views: 0
  • Royal Atlas Outboard.jpg
    Royal Atlas Outboard.jpg
    12.9 KB · Views: 0
M

mrcrabs

Guest
Re: '49 5 HP Atlas Royal Restoration

Now thats a keeper and a beauty. she will be the bell of the ball when you get her spruced up.
 

Tom @ Buzzard Bluff

Petty Officer 1st Class
Joined
Apr 7, 2010
Messages
375
Re: '49 5 HP Atlas Royal Restoration

<Now I have a real problem. The "wobbler" impellor seems to be workin' fine cause there's plenty of water goin' through the LE but I'm not getting much water out of the pee hole.>

Please explain just how you know that you're getting enough flow if the tell-tale isn't showing much???

Have you performed a physical inspection of the waterpump rotor and eccentric? Note that there must be a tight fit between the rotor and the eccentric that drives it or it won't pump efficiently! The little odd shape rubber fitting at the top of the waterpump that the tube to the motor plugs into is famous for 'growing' to the point that it cannot pass the full flow to the tube and thence to the motor. Trimming with an Exacto knife or similar is the normal fix.

Brian Wilcox <http://www.chrystine.com/impellers/order.html> makes new rotors for a VERY reasonable cost but you must call him rather than e-mail. I think he may even have those pesky growing grommets too.

<I tried some monofiliment and got it about 4 1/2 inches in but still gettin' just a spit of water so I can't run the engine long or it will overheat and there goes the head gasket (we don't want that). Any other suggestions or will I have to tear down the power head to clean out the gunk and corrosion?>

Yes-send pics of the powerhead so we can verify the following.

That appears to be a Gale built 5 horse. Commonly referred to as a 'Gale wedge' due to the shape of the cylinders.

If it IS a Gale wedge it has no separate cylinder head as cylinders with head are cast in one piece.

But the caveat on the wedges is that you should NEVER take the side covers off of the cylinders. Gale specifically warned against doing that as a field repair and said the engine would have to be returned to the factory for the covers to be properly resealed. The factory hasn't been open in many years.

So try flushing, back flushing and high pressure shop air but don't remove those side covers. And don't ask how I know!:redface:

The Gale wedge was a very good motor---in some ways better than the 'higher price spreads' from parent OMC. There are tons of good ones available---usually very cheap---so a parts motor with a good powerhead is a very doable deal should yours continue to overheat. The very BEST place to find one would be at an antique outboard club meet where I've even seen them on offer for free. Check to see if there are any events near you at: <http://www.aomci.org/events/>
 

rexlange

Cadet
Joined
Jul 10, 2010
Messages
20
Re: '49 5 HP Atlas Royal Restoration

Thanks for the info. Yeah, well I lied a little about the water pump inspection cause I ran into trouble after I took the prop off. The cone outward of the pump housing cover slides out about 3/4" of an inch and then stops. I left the prop off for my tank test and there were lots of bubbles so I figured there must be water cycling through. Since I don't have the service manual yet (and I haven't been to the library to look at the "old outboards manual" I didn't want to force off the prop cone. If you have an idea about how to dislodge and remove it, let me know. I was only able to sneek a peek under the pump housing cap cover and the pump rotor looked good (visually from the side angle) so I cleaned all sand and debris from the cover, inlet and water port but I guess I really need to remove the prop cone (?) and pump housing cap cover before I can really see if water can pass. Then, if I need to open it up a bit I can use an exacto knife as you suggested.

Here's another problem I'm working on.....when I removed the flywheel to inspect the magneto and coils it was tight and popped off with a light rap. When I replaced it I tightened it down hard. Now there's much less gap between the flywheel and engine plate and it also scrapes which it didn't do before. If I take the flywheel off and hand tighten it only the gap between the flywheel and engine plate is correct but as soon as I put a turn on it with a socket (now) the gap closes and it scrapes again! The only solution I can think of is a shim on the shaft to keep it high (correct spacing) or lock tight when I hand tighten. Your thoughts?

Yeah, I know I should focus on one screw up at a time:) BTW...should I put on spark plug boots (there were none when I took the covers off).
 

Tom @ Buzzard Bluff

Petty Officer 1st Class
Joined
Apr 7, 2010
Messages
375
Re: '49 5 HP Atlas Royal Restoration

<I ran into trouble after I took the prop off. The cone outward of the pump housing cover slides out about 3/4" of an inch and then stops.>

Very common at the shear pin or cotter key holes, but could be independent of them. Simply use a fine cut file to remove the high spot. There may be more than one. The propshaft needs to be smooth as a babys behind or you'll ruin seal and bearing when you remove them.

<---I guess I really need to remove the prop cone (?) and pump housing cap cover before I can really see if water can pass. Then, if I need to open it up a bit I can use an exacto knife as you suggested.>

Yup---until you do so you're just guessing.

<I left the prop off for my tank test---->

See the holes at the base of each prop blade? Those feed water to the waterpump intake and removing the prop could account for poor pump efficiency.

<Now there's much less gap between the flywheel and engine plate and it also scrapes which it didn't do before.---The only solution I can think of is a shim on the shaft to keep it high (correct spacing) or lock tight when I hand tighten. Your thoughts?>

Don't do that!!!!!
The tapers in the flywheel and on the crank MUST be tightened to each other. The key serves mainly to align things before tightening and will shear and ruin both flywheel and crankshaft unless the tapers are properly mated. 'Properly' implies that there be no rough areas on either taper to inhibit complete contact between them. If in doubt I lap them together with a dab of fine valve grinding compound until both tapered surfaces look 'frosted' and I avoid getting the grinding compound anywhere else while doing so followed by a complete cleaning. 'Properly' also means that the tapers are free of any traces of grease or oil. They must be dry and clean for the tapers to lock flywheel to crankshaft. Be sure too that the threads on the flywheel nut and crankshaft are dry because the factory torque recommendation requires it. DO use a torque wrench! Nothing will spoil a day on the water like a flywheel departing the motor at 4,000 RPM.
You need to find out WHY the flywheel is dragging on the mag plate first. Pull it back off (and for goodness sake get a harmonic balancer puller so you can pull the flywheel without beating on the crank!) and see if the mag plate is in the right position. It may have gotten loose and worked it's way up on the mount. BTW---never use a 3 finger outside puller on a flywheel either-- unless you WANT to ruin it!

<BTW...should I put on spark plug boots (there were none when I took the covers off)>

All of my old Gales have plug boots.

Before you screw something up beyond repair get a shop manual! That's too nice an old motor to ruin it through willful ignorance.
 

rexlange

Cadet
Joined
Jul 10, 2010
Messages
20
Re: '49 5 HP Atlas Royal Restoration

Absolutely... a shopmanual is on the list. I don't understand what happened when I tightened the flywheel (or over tightened? maybe). I'll check the mag plate and see. I do have a Hamonic Balancer (puller) and I'll use it. What ft lb is the torque setting for the flywheel?

BTW, I tried to attach pics but they're too big (jpeg files) so I'll have to come up with some more at lower resolution I guess. You have it right though, it is a Gale "Wedge" and no, I already read the posts about the covers so they aren't going anywhere. I'll also check the prop shaft to see if there are any high spots and get a look at the pump rotor.

I'm surprised to hear that there are a slew of these around. I thought I was pretty lucky getting the same outboard that my Dad had when I was a kid (the one got away, somewhere). I like the lines of the Atlas...it has an Art Deco look. I checked events in NJ (Gale Mfg was in Newark, NJ) and there are a couple later this year so I'll check them out.

Help me out with the Lean vs Rich settings. After it warms up it really revs as I richen the mixture to the #4 setting or so on the front dial. I haven't a clue about running this motor, I'm only going by ear until it sounds like it's running smoothly. Many thanks for your help, where do you hail from?
 

Tom @ Buzzard Bluff

Petty Officer 1st Class
Joined
Apr 7, 2010
Messages
375
Re: '49 5 HP Atlas Royal Restoration

<I don't understand what happened when I tightened the flywheel (or over tightened? maybe).>

Nope. It can only go so far without splitting the flywheel at the keyway. (I've seen that!)

<I do have a Hamonic Balancer (puller) and I'll use it.>

GOOD!

<What ft lb is the torque setting for the flywheel?>

480-540 inch pounds. Divide by 12 for ft. lbs.

<I'm surprised to hear that there are a slew of these around.>

You must remember that Gale was the OMC division that supplied engines to anyone who wanted to sell them under their own brand name and could pay the contract. The ex GIs coming home from the war in the postwar era wanted small outboards to take them fishing to help them enjoy life and forget the war so the demand was high and many wanted to get in on the sales boom. So the Galeville, IL plant churned them out in huge quantities with many different names on them. The boom lasted into the 60s before bigger motors became the rage and OMC shut down the Galeville outboard production after the 1963 model year and turned it into the OMC inboard sterndrive branch because the bean-counters had decided that it was counterproductive to allow others to compete with their flagship brands of Evinrude & Johnson.
FWIW 1956 was the year that saw the highest sales of outboards before OR since.

<I thought I was pretty lucky getting the same outboard that my Dad had when I was a kid (the one got away, somewhere). I like the lines of the Atlas...it has an Art Deco look.>

You were incredibly fortunate to find one that nice. Polish it up and don't be tempted to repaint it. They're only original once!

<Help me out with the Lean vs Rich settings. After it warms up it really revs as I richen the mixture to the #4 setting or so on the front dial. I haven't a clue about running this motor, I'm only going by ear until it sounds like it's running smoothly.>

That's the way I do it!

<Many thanks for your help, where do you hail from?>

A native Texan of many generations I left the Dallas area to escape the ills of city life @ 20 years ago. I'm now a 'naturalized Hillbilly' in N. AR.
 

rexlange

Cadet
Joined
Jul 10, 2010
Messages
20
Re: '49 5 HP Atlas Royal Restoration

Here's what's up Doc....

The vent holes in the gas cap were corroded shut so gas wouldn't flow. Cleaned 'em out with a pick and then some wire. Now the cap vent works just dandy.

I cleaned the pee tube with vinegar (it's all I had on hand) using a syringe and plastic tubing forcing enough vinegar through so it came out down below. Now I know that the passages are clear. Then.....

I managed to remove the prop cone after some coaxing. There is a drift pin inside to align and turn it and the prop. The shaft had some rust (cleaned up now) and it's pretty smooth but I'll take some extra fine emery to it in daylight. After removing the pump housing cap cover I inspected the rotor. It's really in fine shape; flexible and there is spacing so water should go through.....except, thanks to some keen observation, I discovered that the keyway that holds the eccentric little "wobbler" in place so it wobbles as the shaft turns (that key fits next to the shaft and there is no slot that I can see)....is missing in action! It's no wonder there was no water rising to the powerhead. The eccentric doesn't turn, no water moves. Problem solved. Whew! Now, do I need to go looking through the LE for the key cause it's probably sitting in there somewhere? Dunno'. You be the judge.

I live next to an auto parts store so I'll get a key in the morning and put the prop back on. I'm pretty sure that it'll work just great and I'm looking forward to it. I need to grease the shaft, rotor, etc. up before I lock it all together right? I will anyway just to give it a good start. Gearcase is full of grease so that's taken care of.

Then it's on to the Magneto Plate which did move upwards by the way. Put that on the list of reasons to use a harmonic balancer;) Torque the flywheel, mount the tank and cowls then we're ready to go.

Can't wait for morning to arrive so I can test this one more time before takin' it out on the water. Thanks again for the suggestions and all your help. I'll work on pics for everyone. It's cleaned up real pretty so far. TTYL
 

F_R

Supreme Mariner
Joined
Jul 7, 2006
Messages
28,226
Re: '49 5 HP Atlas Royal Restoration

I can't help wondering where you are finding a pee hole on that motor---there isn't any! When it is running, it should slobber water out the slots on the rear, about half way down--at all speeds, including slow idle.

If you are calling that little pipe at the base of the powerhead a pee hole, it isn't a pee hole. It is a crankcase drain to get rid of oil that settles in the crankcase. You had better hope there is no water coming out of it, because if there is you have serious problems. But it will spurt drops of oil/fuel mix out of there.

I would discourage you from putting acids and potions in the cooling system. It is unlikely that it needs it, and even if it does it probably won't do any good. Remember, mess it up inside and it becomes a junker because you can't take it apart. All things are possible, but offhand I can't remember one actually being plugged up. And this is a salt water town.

The numbers on the knob mean nothing because the knob can be installed in any position. Once it is running and warmed up, turn the knob to the right till it starts to lose power, then turn it back to the left till it regains power. That is the correct setting.

You might be interested to know that my '53 Gale 5hp was 20% faster than my '53 Johnson 5hp. And a lot noisier.
 

rexlange

Cadet
Joined
Jul 10, 2010
Messages
20
Re: '49 5 HP Atlas Royal Restoration

Ahaa! So thats what that is...I just assumed it would be like modern outboards and water should flow out of there rather than below. Yes, it spits small amounts fuel mixture so it's working properly and there is no water in it. I haven't had a chance to get it running today but I'll look for water from the slots on the LE (stupid me, I just thought that was for the exhaust). Thanks again for the tips...that goes for everyone:)
 

rexlange

Cadet
Joined
Jul 10, 2010
Messages
20
Re: '49 5 HP Atlas Royal Restoration

Okay, water pump is fixed and functioning (spitting water out the slots with the exhast, not a lot but I enough (?) I guess) so that's done. But I'm still having issues with the flywheel / magplate clearance. I can't move the screw tightener on the bottom of the magplate to adjust it's position so that's out. Now what?

Here's the deal...the flywheel is scraping on the magplate and it is especially noticable when I move the throttle lever to the slow and stop positions. These's a scraping noise and ringing from the flywheel as it stops and there are noticable (new) scrapes marks on the magplate. I took "before" pictures and there was maybe 1/16 - 1/8" clearance all the way around. Now it's only about a 1/32 at best and tighter than that on the sb side where it scrapes. Is it possible that the flywheel isn't seated correctly cause it only scrapes on the one side? How do I correct this problem? Any thoughts?
Thanks in advance.
 

Tom @ Buzzard Bluff

Petty Officer 1st Class
Joined
Apr 7, 2010
Messages
375
Re: '49 5 HP Atlas Royal Restoration

Okay, water pump is fixed and functioning (spitting water out the slots with the exhast, not a lot but I enough (?) I guess) so that's done. But I'm still having issues with the flywheel / magplate clearance. I can't move the screw tightener on the bottom of the magplate to adjust it's position so that's out. Now what?

Here's the deal...the flywheel is scraping on the magplate and it is especially noticable when I move the throttle lever to the slow and stop positions. These's a scraping noise and ringing from the flywheel as it stops and there are noticable (new) scrapes marks on the magplate. I took "before" pictures and there was maybe 1/16 - 1/8" clearance all the way around. Now it's only about a 1/32 at best and tighter than that on the sb side where it scrapes. Is it possible that the flywheel isn't seated correctly cause it only scrapes on the one side? How do I correct this problem? Any thoughts?
Thanks in advance.

The taper make getting the flywheel cocked off kilter virtually impossible. So that leaves the mag plate. Strip it down----flywheel AND mag plate and find out the cause and correct it. Think logically---it really helps!:D
 

F_R

Supreme Mariner
Joined
Jul 7, 2006
Messages
28,226
Re: '49 5 HP Atlas Royal Restoration

There are really only a few possible scenarios here.

1. The mag plate is not down where it is supposed to be. You may have to work harder on that screw. Talking about the one with the spring on it.

2. Some cretin has put an impact wrench on the flywheel nut and spread the taper. That probably is not the case, since you seem to indicate that it changes when you run it. Never run it without tightening the nut to specs, even briefly. Spec is 40-45 foot pounds.

3. That same cretin may also have used a puller that grabs the outside diameter of the flywheel and bent it. But again, that doesn't account for it changing position when you run it.

There is only one cure for a spread taper or bent flywheel--replacement.

I agree, you are going to have to take a closer look and figure out what is wrong. We can't see it from here.
 

rexlange

Cadet
Joined
Jul 10, 2010
Messages
20
Re: '49 5 HP Atlas Royal Restoration

Thanks. Sorry guys...I've done cars, motorcycles and lawnmowers in my younger days...this is my first outboard teardown. I'll strip it down again and see if I can't get to the magplate clamp. I hope that does it. In the event that I need a flywheel, from what I've read, parts are available from an OMC dealer? Or is it best to get in touch with the antique outboard folks?

BTW, tightening down the flywheel (to torque) it was suggested that I wedge a 2x4 by the cavitation fin to hold the prop and I've also heard that a rope around the prop does the trick...what's the best way or do you suggest a better approach? ?

Also, how long can I run it in a tank to test it? I've been limiting my time to just less than 5 minutes or so 'cause the water gets cloudy and I change the water. Sorry if these questions seem mundane but I worry a lot:( I really want to get this motor out on the open water to really let the horses out.
 

Tom @ Buzzard Bluff

Petty Officer 1st Class
Joined
Apr 7, 2010
Messages
375
Re: '49 5 HP Atlas Royal Restoration

<In the event that I need a flywheel, from what I've read, parts are available from an OMC dealer? Or is it best to get in touch with the antique outboard folks?>

Free Webvertise section on the AOMCI site would be most effective and least expensive.

<BTW, tightening down the flywheel (to torque) it was suggested that I wedge a 2x4 by the cavitation fin to hold the prop and I've also heard that a rope around the prop does the trick...what's the best way or do you suggest a better approach? ?>

Strap wrench. Buy one from member FR or make your own or try Horror Freight. Do NOT impose the flywheel torque on the entire drivetrain!

<Also, how long can I run it in a tank to test it? I've been limiting my time to just less than 5 minutes or so 'cause the water gets cloudy and I change the water. Sorry if these questions seem mundane but I worry a lot:( I really want to get this motor out on the open water to really let the horses out.>

Think about it Rex! Water is water---whether in a barrel or a lake. The only limit is temperature of the engine. If you run it in a small amount of water for a long time it may heat the water enough for the cooling to suffer---otherwise water is water!

Just slow down and think your way thru things---they're really not much more complicated than a lawnmower. Getting in a rush usually proves counterproductive in the long run. Trying to fly blind without a manual only makes it virtually certain that you'll screw up something and then the time to get on the water will REALLY expand as you are forced to chase down obsolete parts. It requires MUCH less time to do it right than do it over.

Listen to FR like his advice is Gospel----because it is! He has FAR more experience than I do and he is THE MAN when it comes to Gales. He's the guy I often turn to when stumped or ignorant! And he makes and sells some really high quality special tools for outboards too.
At very reasonable prices I must add.
 

rexlange

Cadet
Joined
Jul 10, 2010
Messages
20
Re: '49 5 HP Atlas Royal Restoration

I'll check with FR (if he's watching over my shoulder) for the strap wrench or I may be able to find one locally if I knew what I was lookin' for. I suspect he's on the right track with a spread taper so I'm researching flywheel replacement or buying a junker to have parts to spare. I've slowed way down to get this whole thing right and now I'll just bide my time till I can get a flywheel and then proceed. Manual is on the way, then I can read up. You and FR have been real pals. Thanks for your patience and great advice.

As to the tank test, I was pretty sure that I could run it all day long ( I understand what you're saying and being over cautious as I guess my way through. The oil in the water isn't really a problem but just a by product of a 2cycle). Just thought I check (and recheck) things with you experienced guys as I'm just getting my feet wet when I'm askin' about basics.

I know you guys are gonna' hate this question, but any idea why a good mechanic couldn't rebuild one of these "wedge" motors? I know I've heard over and over about the side covers and that it had to be sent back to the factory to have that work done. FR says don't touch the powerhead at all in his previous post. Since these guys (Gale) aren't in business anymore...didn't they pass the "secret" along? Speaking from complete ignorance of what they did in '49, it looks like they used a gasket (maybe) and permatex to seal the covers. Glues and sealants have come a long way since then. We have epoxy and permatex is still available. 'Dunno, just askin'.
 
Status
Not open for further replies.
Top