1969 Sea Ray SRX Pachanga Build Thread

Propellerhead

Petty Officer 3rd Class
Joined
Nov 15, 2013
Messages
94
2CB33E04-D2C5-4564-A284-8F18B7D8F3E8.jpg


Same thing on the other side.


BAAC437E-ACA5-46DB-AAD7-A3EF0F038240.jpg


I laid down a payer of CSM cut to fit the entire floor, and overlapping the 1708. I started wetting it out at the bow, and unrolled it as I worked my way toward the stern so I didn't paint myself into a corner. I ended up in the engine compartment.


2EFCDCD3-1D32-4C31-9D10-64166400FFEC.jpg


Totally covered.


7CC877A4-3996-4108-9747-563BB9D9776E.jpg


4A6519BB-8507-4DDB-AA21-104843428BD5.jpg


The last step for the floor was to add one more layer of 1708 over the seams for reinforcement.
 

jbcurt00

Moderator
Staff member
Joined
Oct 25, 2011
Messages
25,111
Poly resin has little value w/out glass of some type. Even if its just overlapped smallish scraps of CSM. Cover it all. If it gets polyester, it should get glass too. Another difference between the 2 resins, epoxy is a stand alone waterproofing. Depending on application, epoxy and glass is better still.

FYI You can make a rough milled fiber for use as a filler by cutting CSM scraps into 1/4" +/- cut fibers. Wont be as fine a texture, but is a way to save a little $ and reduce waste.
 

Propellerhead

Petty Officer 3rd Class
Joined
Nov 15, 2013
Messages
94
E2F6EB10-971E-4E04-B1DB-E7400ABD72C9_1.jpg


Here's another shot of the floor with the the last layer of tabbing in progress.


A74E33A9-F252-43B2-BF0D-7D4BC0E954EE.jpg


While I was working inside the boat, I took my shoes off, so I didn't track dirt all over the floor that I was laying fiberglass over. Yeah, you can bet I accidentally fiberglassed my socks to my feet.


3809901C-8C84-4C64-862F-2BA2D6F4A6BC.jpg


Took a little too long with that batch. Oops. Haha.


CFA5A8E8-9569-4135-AC0B-5DD9821DC0DF.jpg


While the floor was curing, I got to work assembling the bench seat base from the parts that I coated earlier. Here's the new base next to the old rotted one.


AAE04236-3C7E-47D2-9F08-780D80B56F30.jpg


It passes the fit test.
 

Propellerhead

Petty Officer 3rd Class
Joined
Nov 15, 2013
Messages
94
FBC9323A-7D43-4FA5-8BD8-8943E47E297B.jpg


Back to the interior panels, I did a test fit and these guys didn't pass. This panel is supposed to slide forward until it lines up with the sharpie mark on the deck. Since it doesn't, that only means one thing. The speaker boxes are interfering again. Instead of measure once cut twice, this is turning into measure three times, cut three times.


83EA89C8-C6B9-4529-B206-C938144C8BEB.jpg


It looks like it's just that front bottom corner that's hitting the hull.


E42A4EF1-B49D-4C12-B8ED-8EE883886348.jpg


I used a grinder to clearance that one corner. I'll add the strength back in with csm.


499A8068-3575-4824-A15F-6228151BA892.jpg


Now the panel slides up to the mark and a little past. Good deal.


43BC9EDD-019B-482C-9224-0B5AD4B2D2DF.jpg


So I made the other side match.
 

Propellerhead

Petty Officer 3rd Class
Joined
Nov 15, 2013
Messages
94
B581CBFC-5036-42D9-84BB-75FADD89DE91.jpg


DABFBB7B-8C07-4CAB-8901-7966EEB74B74.jpg


Finally, I'm done fabricating these panels. They fit great, and all they need is to be waterproofed and upholstered.


88D02999-0B7C-4459-88D9-8D6BB2606377.jpg


It was getting a little late and as I look around, I noticed thousands of dead bugs all over everything. I had the doors open to the shop, and I'm wondering if they were attracted to the ceiling lights and then dropped dead from all the fumes rising to the ceiling. Good thing I was wearing a mask. Still, thought of this as my canary in a coal mine, and it was getting late, so I called it a night and went home.


746DF1EA-895D-4B04-BC1B-46012791B277.jpg


I came back the next day to finish up a couple details. I screwed and tabbed in the bow supports.


15C89DD7-3190-4078-87DF-74D590C279BE.jpg


I also tabbed in and covered the kick panel on that step in the floor up under the bow.


9C428E35-21FE-4E77-9D59-684BB0DA8F9A.jpg


The floor is done! Phew. That is nice to have out of the way.
 

Tnstratofam

Commander
Joined
Aug 18, 2013
Messages
2,679
That's allot of work done in what seemed like a short amount of time. I'm sure you're glad to have the deck back in. It's always nice to be able to walk around on a constant flat surface versus trying to navigate over stringers and the bottom hull.
 

jbcurt00

Moderator
Staff member
Joined
Oct 25, 2011
Messages
25,111
Poly resin has little value w/out glass of some type. Even if its just overlapped smallish scraps of CSM. Cover it all. If it gets polyester, it should get glass too. Another difference between the 2 resins, epoxy is a stand alone waterproofing. Depending on application, epoxy and glass is better still.

FYI You can make a rough milled fiber for use as a filler by cutting CSM scraps into 1/4inch +/- cut fibers. Wont be as fine a texture, but is a way to save a little $ and reduce waste.
Bump
 
Last edited:

Tnstratofam

Commander
Joined
Aug 18, 2013
Messages
2,679
++1 to what jb said. Resin alone offers very little waterproofing. Even though you're " wetting out" the interior pieces, without some glass it won't stand up to moisture for very long.
 

Propellerhead

Petty Officer 3rd Class
Joined
Nov 15, 2013
Messages
94
Thanks JB. I didn't see your first post in my flurry of updating. Ok, that's good to know. These interesting nuances of different materials. It does seem like I did a lot in a short time. In reality, I did about 4 days worth of work and then got around to updating the thread. However, since everything I'm posting is work that is already done, it's a little late to turn back. I really don't want to grind and re-coat the interior pieces with fabric, maybe I'll just throw a coat of paint over them for some extra protection. Thoughts? I mean, it's the interior, they're not going to be wet unless I get caught in a rainstorm, and even then, they're getting covered with vinyl...

Here are some final shots of the pieces that I finished up wetting out today. (Before I saw the responses, of course.)


archbuilder

Vice Admiral
Joined
Sep 12, 2009
Messages
5,697
Your work is looking really nice. If you didn't used waxed resin, you should be able to put on a layer of CSM and resin without grinding. That is assuming the parts haven't set for a long time. FYI for next time, you can use an epoxy without the reinforcing. I coated my seats in a few coats of a System Three clear coat. It drys very slowly and soaks in pretty well.
 

Propellerhead

Petty Officer 3rd Class
Joined
Nov 15, 2013
Messages
94
I'm back at it. I seem to go in waves of productivity and then let it sit for a bit. I had a week off of work so I decided to get back out there and make some progress. It's about time, since my last post was in October. I headed down to the shop and found a nasty surprise.


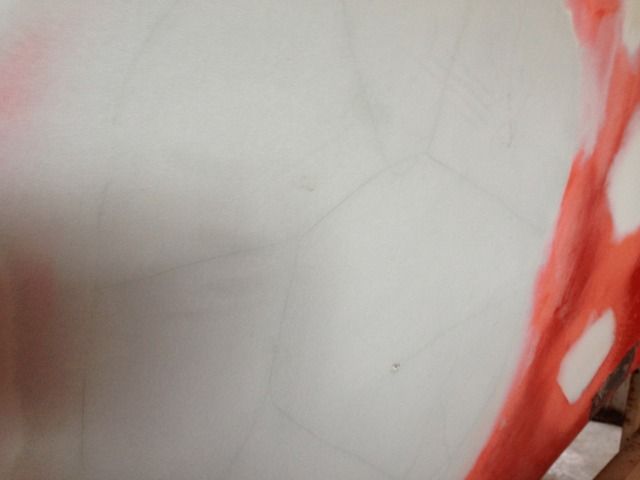
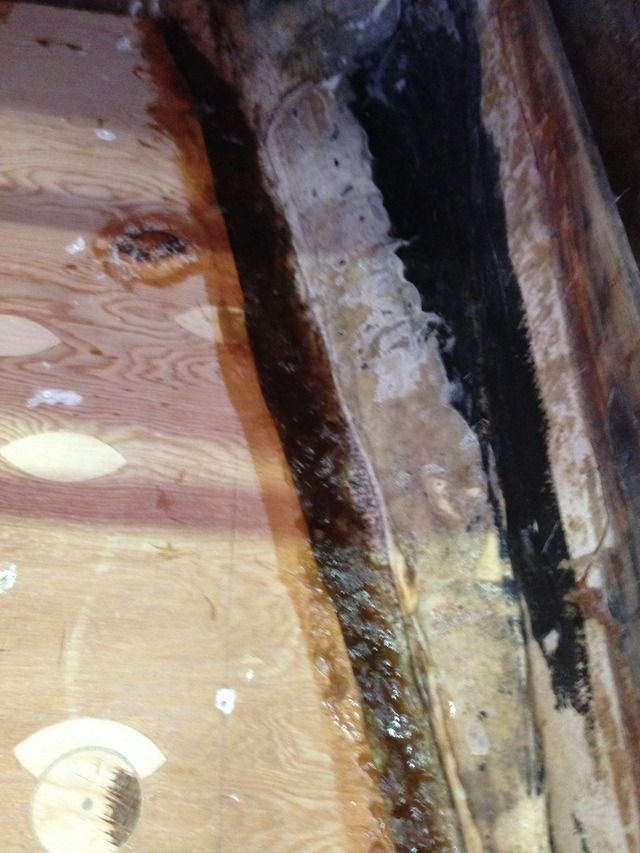
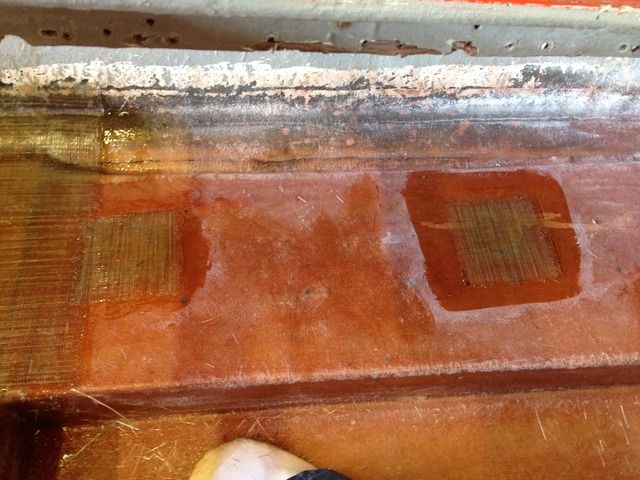
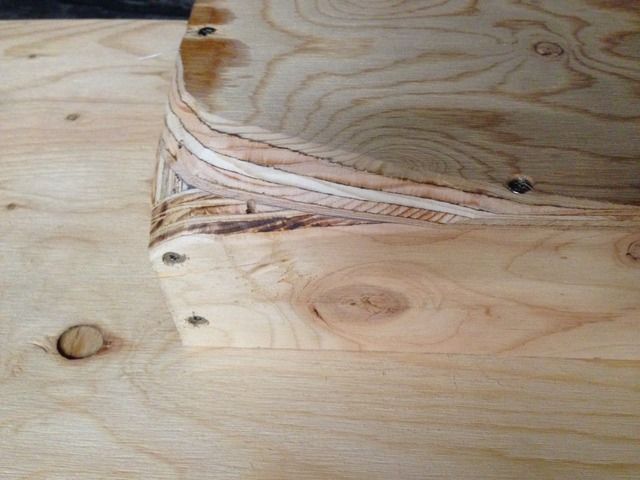
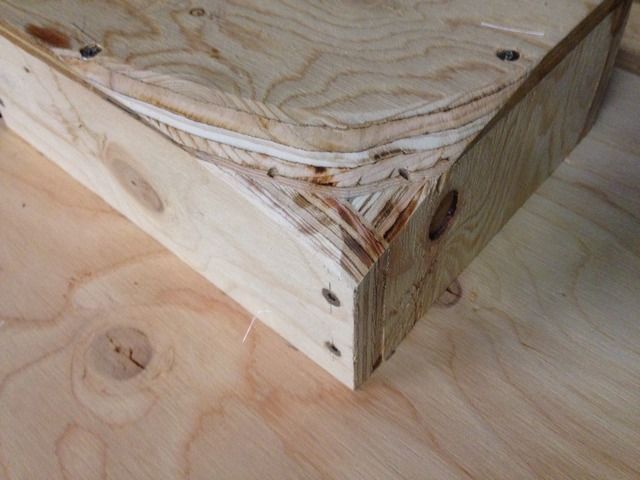
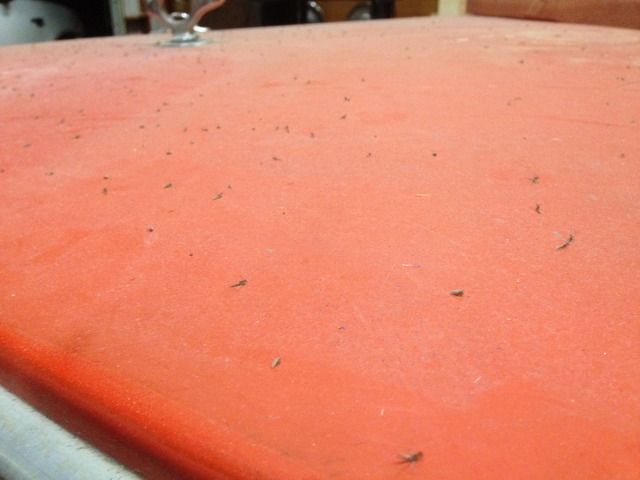
It appears that a lot of the repair that I farmed out to that other shop has cracked over the winter. It looks like where the filler was super thick, it contracted when the temperature changed.


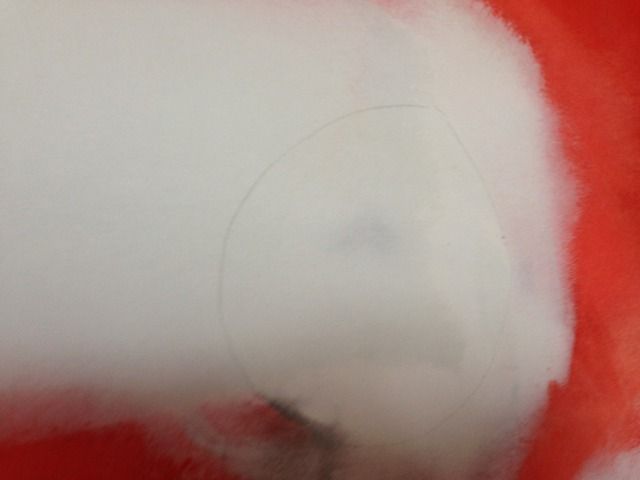
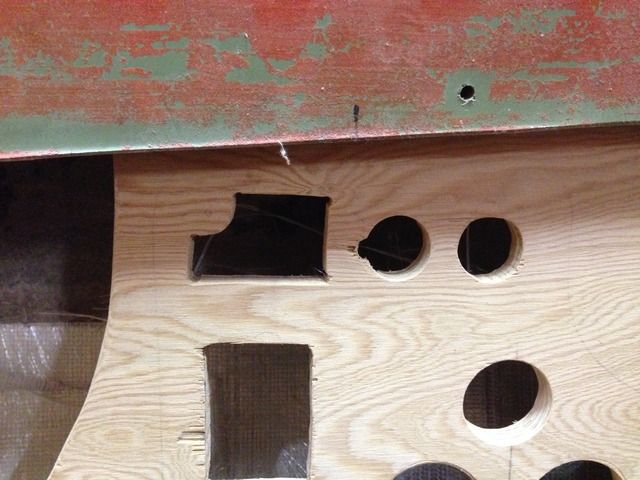
Here's another place that's cracking out. My two thoughts are, I'm glad it happened before I painted the boat, and I don't think I'm going to use that shop again.


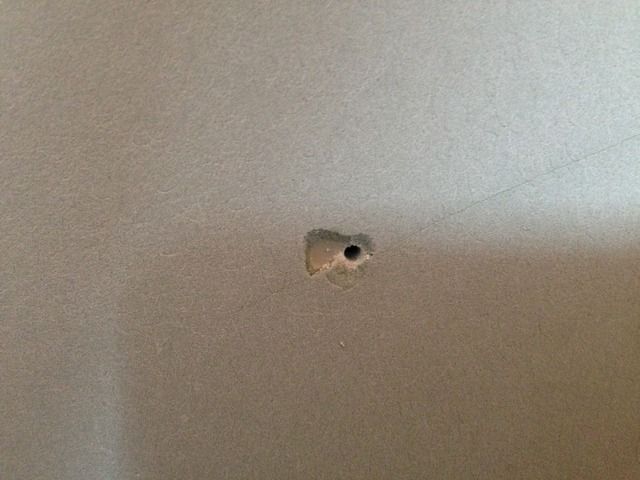
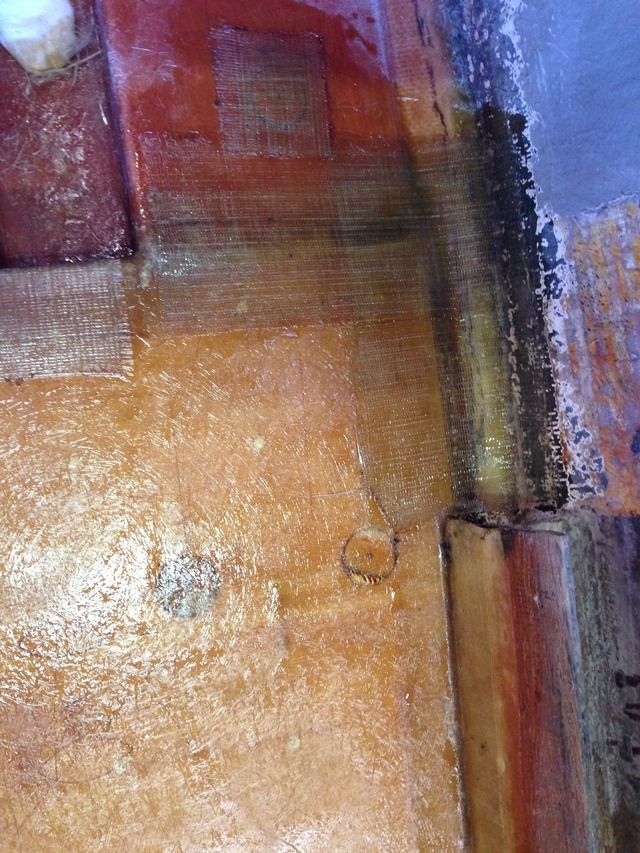
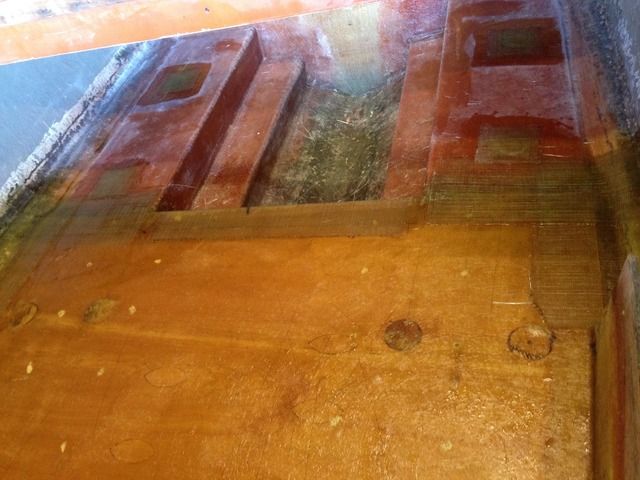
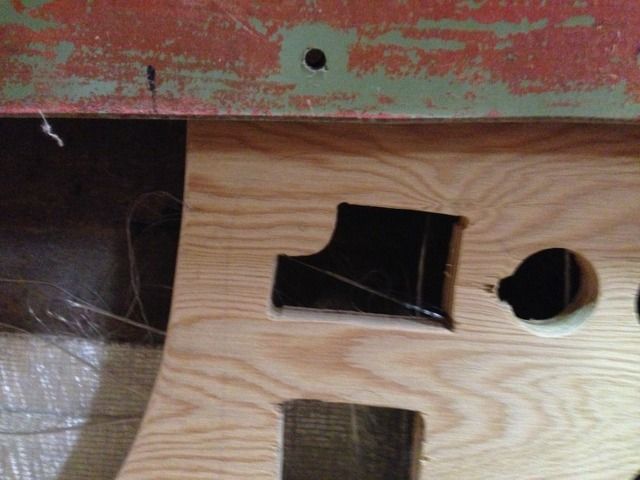
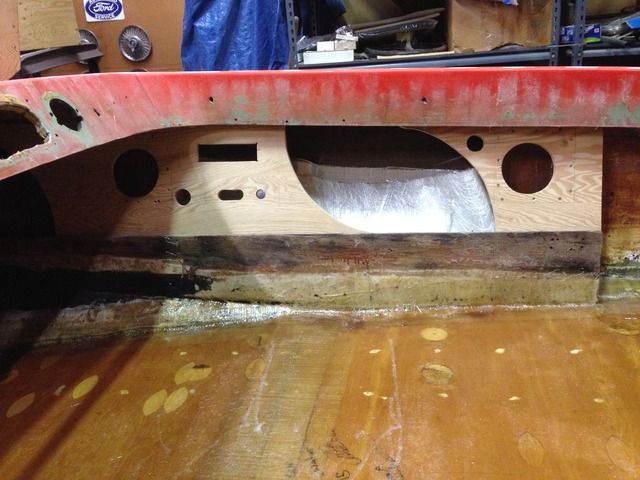
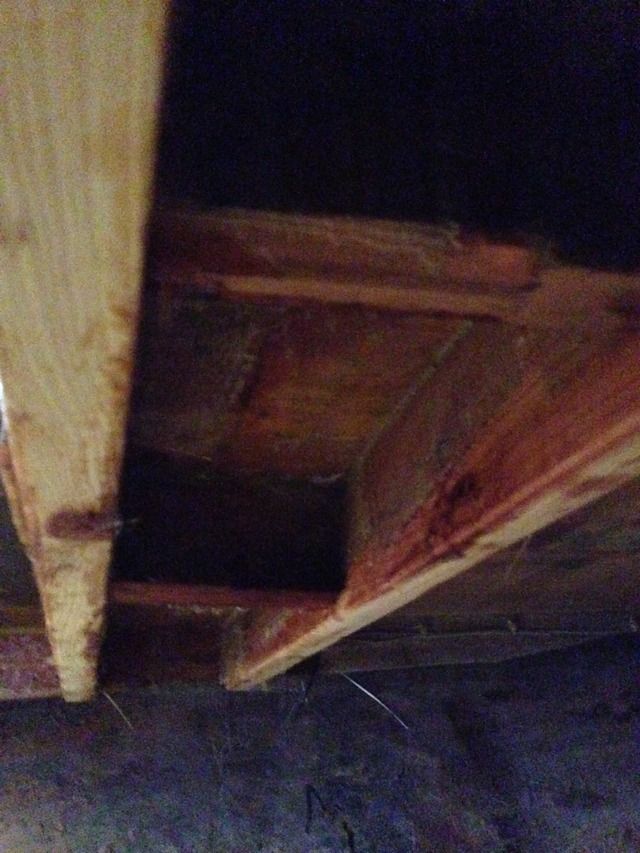
I drilled out my reference hole for the X-dimension and a chunk of filler cracked out around it. Obviously I'm going to have to re-do this work. I could take it back and make them fix it. I don't know, I'm going to have to decide what I want to do. As for now, the next task that I was planning on doing, was cutting the keyhole in the transom. I paused for a moment to consider whether or not I wanted to re-do the cracked area first, but I decided to go ahead and cut the keyhole because after all the work I've done, I'm probably going to have to do some tweaking to the transom anyway to get the thickness between 2 and 2 1/4 inches as per Mercruiser's specs. I can just do it all at the same time. I've looked around for the drill jig that Mercruiser makes to cut the correct hole, and the cheapest I can find it is $200. That's pretty expensive for a tool I'm only going to use once, so I started checking around locally to see if anyone could help me. I found a shop here in Salt Lake called Davidson Marine. Bastian over there was super cool guy and quoted me $50 to drill the bolt holes and cut the center out.


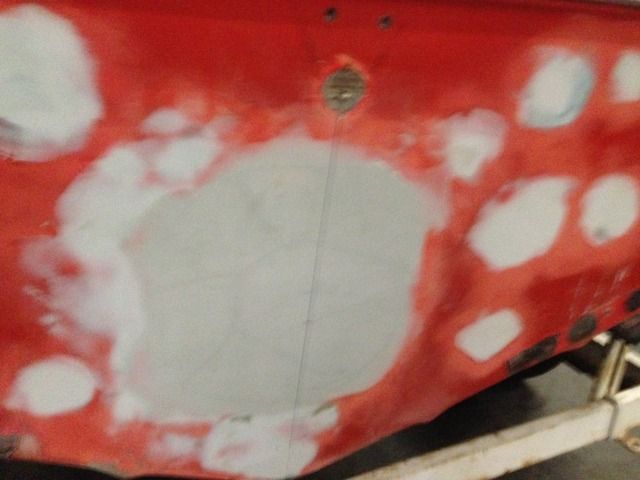
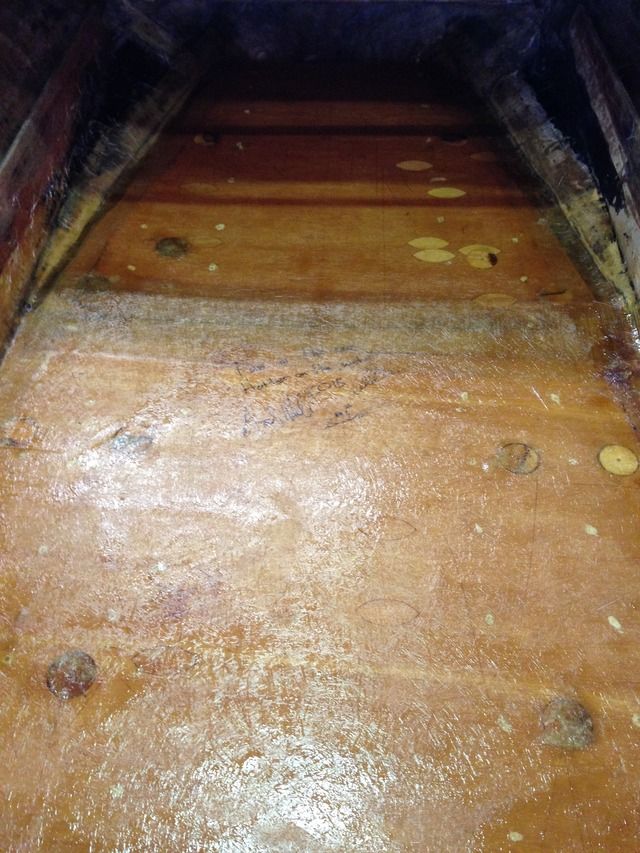
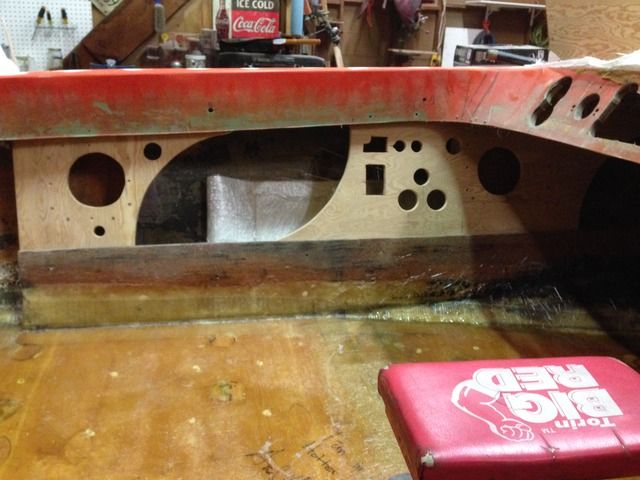
The centerline is re-drawn.


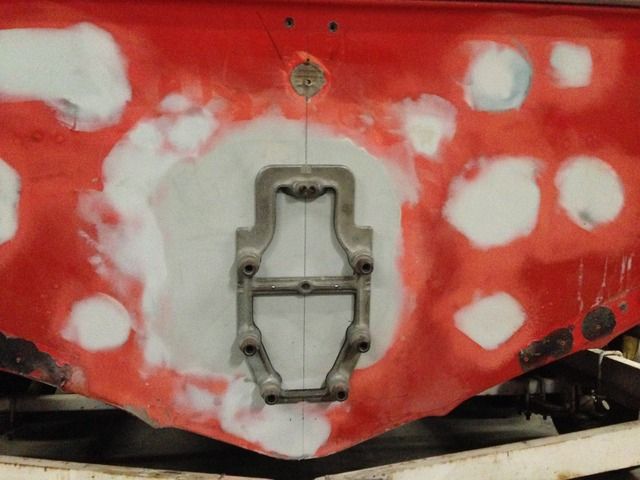
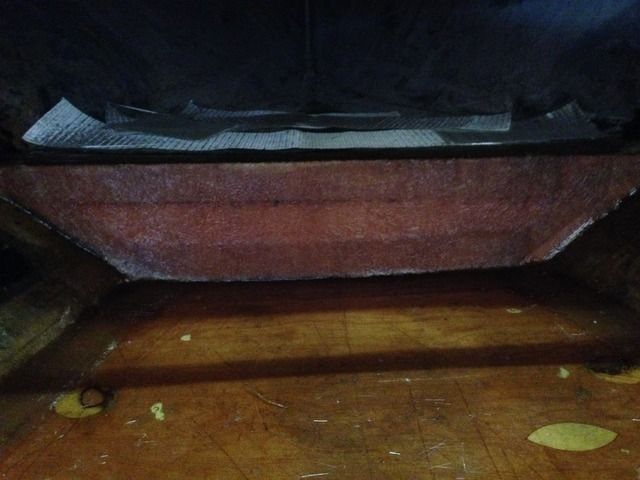
The jig is attached to the transom.
 

Propellerhead

Petty Officer 3rd Class
Joined
Nov 15, 2013
Messages
94
By the way, it's worth mentioning that even though I was really careful about measuring the X-dimension (which is what locates this jig up and down) it was a while ago, so I double and triple-checked that I had it right.


The drilling has begun! There are six large bolt holes for the transom plate bolts, and then there are two smaller reference holes on top that serve as a guide for a 1 3/4" hole saw that's drilled at a 60 degree angle to create clearance for the steering arm.


The inside of the jig was traced with pencil, and the inside hole was cut with a jig saw.


This is the hole up to this point. As a side note, you can see where the old OMC outdrive was, because that's where the large, square, grey patch is. Look how off-center it was! It's really far off to port.


I kept part of the the transom from the Galaxy parts boat to use as a reference. The two holes look pretty similar.
 

Propellerhead

Petty Officer 3rd Class
Joined
Nov 15, 2013
Messages
94


The two reference holes were drilled out.


And finally, the little notch that remained between the two holes is removed. You can see how the hole ends up with a taper to become larger on the inside.


Bastian was great. He even dressed the edges and coated the bare wood with resin. I'd definitely recommend Davidson Marine to anyone who's looking.
 

Propellerhead

Petty Officer 3rd Class
Joined
Nov 15, 2013
Messages
94
Alright. Back to my shop for the rest. The next step is to test-fit the outdrive and engine and see how everything fits. I also want the engine in place so I can make the motor mounts.


First things first, this is my first chance to measure transom to see what the thickness ended up being after all this work. As you can see, it's just shy of the 2-2 1/4" range that Mercruiser recommends. I'll have to laminate another piece of plywood on the inside to get the desired thickness. Not the end of the world, I ended up being pretty close.


I bolted on the gimbal. Man, does it look good! It's starting to look like a boat again. It's worth mentioning, that as carefully as we were when it came to drilling the keyhole, I still needed to do some tweaking. Luckily the hole erred on the small side. It's a lot easier to make a hole bigger than smaller. There were just a couple edges that I needed to grind ever so slightly, so it was a matter of fitting the gimbal, noting what area needed to me clearanced, removing the gimbal, grinding, and repeating. I probably had the gimbal out and in a dozen times just so I could get the fit perfect.


Once I had it bolted in for good, I noticed on the inside, that I needed to grind the bottom a little to create some more clearance for the bottom two Y-pipe bolts. They were touching the wood. So I traced the transom plate and marked where the bolts were for reference later.
 
Last edited:

Propellerhead

Petty Officer 3rd Class
Joined
Nov 15, 2013
Messages
94


Next step: engine! I pulled the 305 from the Galaxy parts boat out of the lineup. I'm not planning on using the 305, I'm planning on using the 350 next to it, but the 305 has all the Mercruiser stuff on it right now, so it'll be just fine for a test-fit.


The adjustable motor mounts were set for the the Galaxy parts boat that it came out of, so I took them off, cleaned them up, and re-installed them in the center of their adjustment range.


Then I hoisted the engine into place.


I grabbed my Mercruiser engine alignment tool. My plan is to use it to position the engine exactly how it will be in the final product, and then I can see how big I need to make the wood motor mounts in the engine compartment.


This is the alignment tool going through the gimbal bearing.


It took some work, but I finally got the engine located perfectly. You can see the alignment tool passing through the gimbal bearing and into the back of the engine.
 

Propellerhead

Petty Officer 3rd Class
Joined
Nov 15, 2013
Messages
94


She looks good in there! I didn't get a good picture of it, but the bottom of the adjustable motor mounts were exactly 2.5 inches above the little step in the floor. This means that I'm going to have to make wood motor mounts that are 2.5 inches tall, and as wide as the step (6.5 inches wide). This is the information I needed!
 

Propellerhead

Petty Officer 3rd Class
Joined
Nov 15, 2013
Messages
94
Last post for the night. I still had a little energy left, so I decided to do a couple more things on the transom.


I got a new stern light. It looks a little shinier than the old one.


I drilled the hole to mount it. I think it looks pretty good above the outdrive. Although above the light are two bolt holes that were used to mount the tow eye. Now that everything in back is all perfectly centered, you can really see how off they are. That's going to bother me, so I'll have to fix it. Not tonight, though.


Last thing for the night is I drilled the holes to mount the tie-down eyes on the transom. I've never been so excited to drill a bunch of holes in my boat. Ok, that's it for this week. Hopefully I'll get some more done soon.
 

Scott Danforth

Grumpy Vintage Moderator still playing with boats
Staff member
Joined
Jul 23, 2011
Messages
50,234
looking good. however are you going to paint it prior to final assembly?
 

archbuilder

Vice Admiral
Joined
Sep 12, 2009
Messages
5,697
Looks like we sort of in the same neck of the woods. I'm putting my 6 in tonight. Sorry to hear about the filler, that is really weird. I have seen it shrink ever so slightly from heat, but that isn't noticeable unless you have it painted.....and is a very very small amount. The only time I have seen it crack is when it is flexed a lot! Maybe too much harder or just bad filler? Where did you get the tie downs by the way?
 
Top