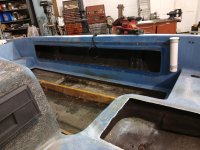
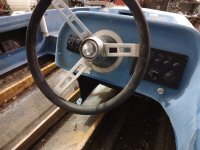
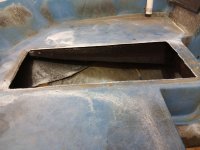
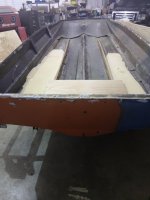
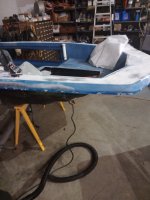
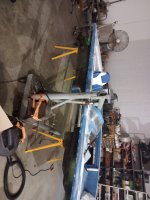
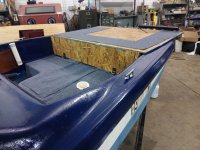
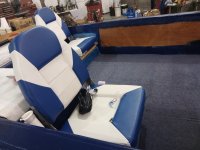
Starting a 1974 Tri-Hull Restoration, it's a Stryker Mark IV model. Need help with any information or an owners manual.

MikeSchinlaub

Petty Officer 1st Class
Joined
Jan 14, 2025
Messages
341
I'm just coating the plywood underneath that'll be touching the stringers with flex seal
That's even worse. The rubber will just trap moisture against the wood and make it rot faster. Do a layer of csm on the bottom of the floor and that will give you plenty of water protection. Or at least as much as all of the other wood anyway.

Kept well it will last 20 years or more.
 

Pvaughan23

Cadet
Joined
Jun 26, 2025
Messages
17
I really appreciate all the help and advice I've been given, and I will definitely need some time first to gather up the materials needed to actually start working on it. But I've got the raptor Lining, working on getting the Fiberglass & Resin for the repairs around the trim, then it'll be onto the flooring and such. While I foresee it maybe going to at least 5k for everything I need to do, it definitely won't take me too long to get it all done. I'm already about 1k in between the first few materials, and getting the boat/trailer with the titles. I'll still keep it updated when I can, but it might be about a month or less before I'm actually starting on it
 

todhunter

Canoeist
Joined
Sep 15, 2020
Messages
1,337
The flex seal and raptor lining is a bad idea. It won't soak into the plywood and adhere well. Do it right - buy some polyester resin, coat every side of the wood in resin, then encapsulate the plywood in a layer of CSM. The materials aren't that expensive (I recommend shopping at US Composites). Save the flex seal and raptor lining for another non-boat project, or sell it, or just eat the cost. If you plan on keeping the boat as long as you say, future-you will be cussing current you when you're having to replace a soft floor again in a few years.

I think a lot of people try to initially avoid polyester because it's the fear of the unknown (not saying that's your case, but maybe?). It's really a very forgiving material, and I was afraid of working with it at first too. This is the right place to be to ask questions on how to use it. It's really a great material, and the right material to use.
 

Pvaughan23

Cadet
Joined
Jun 26, 2025
Messages
17
I've revised the plan, the fiberglass is coming in, and when it does I'll put up some pictures of the Transom because I feel like there's supposed to be a bit more of a connection with the cap and just need to figure out at least a baseline to go off of with the new fiberglass and resin.
 

Pvaughan23

Cadet
Joined
Jun 26, 2025
Messages
17
Finally got to work for outlining my next steps of fiberglass and making it more personable for myself. I might add extra fiberglass to the stringers when I remove the cap tomorrow but I definitely plan to just fuse the cap and transom into being one piece so getting all the immediate things first to mount, then I'll be working on the rest slowly. I plan on adding foam to where the outer most stringers are, just since I'll have a bit more weight now.
1000000845.jpg1000000846.jpg
 

Attachments

  • 1000000843.jpg
    1000000843.jpg
    2.2 MB · Views: 3

Pvaughan23

Cadet
Joined
Jun 26, 2025
Messages
17
The previous guy, or someone cut into it and I don't have any good pictures to rebuild it while it's off, so I'm just going to seal up that part and reinforce it. It's past the spillwell, where the cap connects to the Transom, covered by a metal strip for the motor
 

Pvaughan23

Cadet
Joined
Jun 26, 2025
Messages
17
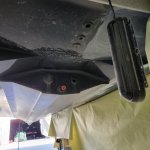
Does anyone know how to hook up an outboard through the Transom, like what holes are for what, where I can put my bilge pump outlet, stuff like that
 

redneck joe

Supreme Mariner
Joined
Mar 18, 2009
Messages
12,277
Holes for motor into think we're standardized by them if you go with an age appropriate motor.

Bilge typically runs out the side at the stern.
 

Pvaughan23

Cadet
Joined
Jun 26, 2025
Messages
17
I know the four smaller holes are the mounts, the two at the bottom, one is for the Live-well and the other for the drain plug. Just not sure about the one in the middle
 

MikeSchinlaub

Petty Officer 1st Class
Joined
Jan 14, 2025
Messages
341
Some pics of the actual rear of the boat would help.

Edit: The rear pic was dark and I missed it at first, just saw the interior.

Engine wires and hoses should be routed through a hole in the splashwell. Sometimes in the center, sometimes on the right side.

Livewells should pump out through thru hulls in the side or rear of the cap. They could also be on the lower part of a transom that goes past the drain plug, like a bass boat.

Livewell intakes should have a screened intake on the lower transom.

20250723_100615.jpg
 

Pvaughan23

Cadet
Joined
Jun 26, 2025
Messages
17
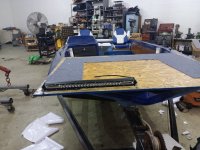
I've found out that I've made a mistake. I couldn't set the cap on the flooring but instead have to recut the floor and set it on top of the pre existing outline and then screw it in. But I'm working on it and getting it done the right way
 

MikeSchinlaub

Petty Officer 1st Class
Joined
Jan 14, 2025
Messages
341
Ok, I'm sitting here and checking this out again to remember what this project is.

I think I see now why you think the transom should be glassed to the cap, and why it appears cut into. Some boats use thickened epoxy where the cap and transom meet, and set the cap on top of it, basically gluing them together. I'm not really sure if it's necessary to do that, but we've always put them back as they were.

The transom, where the engine mounts, is weird to me. The only thing I can think of is should it have a jack plate? But I've only seen those on bass boats. I have no other ideas for why there would be a hole in the middle. Either the engine mount or jack plate would cover it.
 
Top