1981 Springbok 18' Restoration/Renovation

SlipperyOar

Petty Officer 2nd Class
Joined
Apr 12, 2024
Messages
163
Looks great. I’m mounting a new FF and it’s going to be right in front of me when I’m driving.
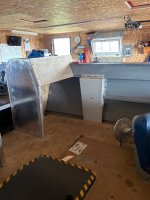
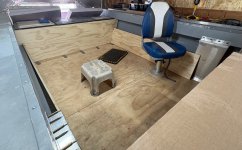
Thank you, I look forward to the day where I’m mounting my electronics and the fabrication and building portion is done.
 

SlipperyOar

Petty Officer 2nd Class
Joined
Apr 12, 2024
Messages
163
Just finished the major part of my consoles. Drove solid rivets into the sheets and angle aluminum frame, and welded all of the seams together. Only have a few more little things to do with making them all appear smooth and then all that’s left is to mark out the console dashboards.
IMG_3166.jpegIMG_3167.jpeg
 

SlipperyOar

Petty Officer 2nd Class
Joined
Apr 12, 2024
Messages
163
Excuse my welds, I had reached out on this aluminum tig group asking some questions and already told they were dogsh*t lol. I’m leaving the welds around the edges to keep the material there for strength. I started plug welding all the solid rivets and then made the surface flush to remove the appearance of having rivets. Hoping it looks like a fully welded console without rivets showing.
IMG_3174.jpegIMG_3175.jpeg
 

MikeSchinlaub

Senior Chief Petty Officer
Joined
Jan 14, 2025
Messages
736
Dude, those look great. You want bad welds? Here's what I did to my rocker panel, one of my first times welding, and I forgot to turn on the gas for most of it.
20231227_115350.jpg

20231228_114257.jpg
 

eggs712

Petty Officer 1st Class
Joined
May 8, 2012
Messages
369
Those welds will hold just fine from what I see. Most aluminum welds crack from the crater being underfilled and/or work hardening from repeated stress.
 

SlipperyOar

Petty Officer 2nd Class
Joined
Apr 12, 2024
Messages
163
Those welds will hold just fine from what I see. Most aluminum welds crack from the crater being underfilled and/or work hardening from repeated stress.
thanks, definitely no underfilling going on with my unsteady hands. Been trying to figure out a more consistent filler rod feed technique but it doesnt always work lol
 

SlipperyOar

Petty Officer 2nd Class
Joined
Apr 12, 2024
Messages
163
Dashboards cut, looking for some insight/advice if anyone has any answers here. At first I planned to install screws from behind the wood and using specifically sized ones to not come all the way through, essentially hiding the fasteners. I used 1/2” marine ply for the wood, I didn’t know if some adhesive around the edges with adequate fasteners would do the trick or if I’m better off using blind rivets to hold them in. Yes the rivets would show from the front but it also would hold them on much more securely.

The passenger side has the same shape except I’ll be using a piano hinge to create an opening glovebox essentially to create a storage space.
IMG_3193.jpeg
 

MikeSchinlaub

Senior Chief Petty Officer
Joined
Jan 14, 2025
Messages
736
Assuming the wood will be wrapped before fastening in place, out of those options I would use screws from the back.

Another option, machine screws with finish washers from the front, nuts and washers in the back. Stronger connection and they wont come loose as the wood swells/shrinks or eventually rots.
 

SlipperyOar

Petty Officer 2nd Class
Joined
Apr 12, 2024
Messages
163
Working on cleaning my garage out a bit with the stretch of nice weather we’ve got here. I found my muffs so I thought I’d fire up my outboard to let it run as it’s a 93’ two stroke.
If anyone knows how to upload a video please share as I’d like to post the video of it. The motor fired up first turn of the key with no troubles whatsoever. The sound and smell of a two stroke will always be my favourite. Can’t wait to finish up the interior of my boat so I can paint it and finally hang this merc on the back.
 

SlipperyOar

Petty Officer 2nd Class
Joined
Apr 12, 2024
Messages
163
Got some side panels made up today. Needed something to cover up the sides of the hull and also give me a spot to mount my motor controls. Used aluminum sheets and a brake form them. I had to cut the top and bottom tabs off and weld them back on since my brake won’t make the bends with the two side bends in the piece.
 

Attachments

  • IMG_3328.jpeg
    IMG_3328.jpeg
    386.1 KB · Views: 5
  • IMG_3330.jpeg
    IMG_3330.jpeg
    363.4 KB · Views: 5
  • IMG_3331.jpeg
    IMG_3331.jpeg
    302.6 KB · Views: 5

SlipperyOar

Petty Officer 2nd Class
Joined
Apr 12, 2024
Messages
163
Got some more interior work done yesterday which included adjusting the fit-up of the port console glovebox and getting the panels rough cut to their approximate size. For the first time in this restoration it looked like a boat again so yesterday was a good day. I'll have a ton of wood to seal and wrap yet but we're getting closer to everything being dry assembled together before i can remove everything, paint the inside and assemble it!
 

Attachments

  • Boat.jpg
    Boat.jpg
    653.9 KB · Views: 3
  • Glovebox.jpg
    Glovebox.jpg
    1.3 MB · Views: 3

SlipperyOar

Petty Officer 2nd Class
Joined
Apr 12, 2024
Messages
163
Needing some advice here. My floor will be made from 1/2” plywood that’s going to be sealed and wrapped in marine vinyl. Under the floor I made a subfloor structure to beef it up enough to allow for 1/2” ply and provide tons of support. I’m getting to the point where I’m looking to drilling the holes and determining where and how my seat pedestals will be. I won’t have access to the underside of my floor once it is down. The exception being if I attach the seat bases with a backing plate prior to installing the floors. At first my thought was to use a T-bolt of rivnut secured in the sub flooring. Would anyone have any sort of input or past experience in doing the same? It wouldn’t be hard for me to add additional bracing as required so that there is sub flooring exactly where each bolt hole is from the seat base. 1777505752180.jpeg
 

Ifishmuskie2

Seaman
Joined
Oct 5, 2025
Messages
69
I had this problem. I put an extra layer of 1/2” plywood 20” square under each seat. I used toggle nuts to attach the seat bases after the floor was installed.

I like pedestals so I can move my feet around during the course of the day. I often tuck my feet under the seat just to change positions. For this reason I don’t like seats mounted on boxes.
 

MikeSchinlaub

Senior Chief Petty Officer
Joined
Jan 14, 2025
Messages
736
Aluminum boats have square sheets of aluminum screwed to the bottom of the floor under the pedestal locations. I would suggest this, as the seats won't come loose if and when the floor rots. T nuts or doubled ply would still allow fasteners to come loose, potentially leading to an occupied seat pulling through and falling back under acceleration.
 

SlipperyOar

Petty Officer 2nd Class
Joined
Apr 12, 2024
Messages
163
Aluminum boats have square sheets of aluminum screwed to the bottom of the floor under the pedestal locations. I would suggest this, as the seats won't come loose if and when the floor rots. T nuts or doubled ply would still allow fasteners to come loose, potentially leading to an occupied seat pulling through and falling back under acceleration.
Makes sense, what exactly is attaching through the sheet and floor to the pedestal? Is there an effective way to bolt it down without T-nuts?
 

MikeSchinlaub

Senior Chief Petty Officer
Joined
Jan 14, 2025
Messages
736
They just use stainless wood screws, #14 I think. Pre drill the holes, and run the screws in. Trying to use T nuts would require way too much precision. You would have to dry fit the floor, take it back out, put the nuts on the bottom, and put everything back in without any shifting at all. They always shift a bit.
 
Top