1956 Evinrude Fleetwin freshen-up

RogersJetboat454

Commander
Joined
Jul 9, 2010
Messages
2,964
Suppose I will add another thread about the humble little Fleetwin.

IMG_0262.jpg

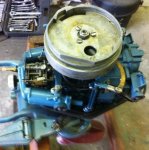
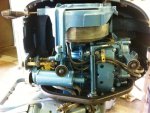
This is my cousin's motor, and in fact the first motor I got to operate solo some 15+ years ago. I have fond memories of taking her out to explore the lake (in our general area of course), as well as my cousins I'm sure. Well one of my cousins is a proud papa, and his boy is getting near the age of being able to take the tiller for the first time. The old Evinrude has been sitting dormant for the past 7 or 8 years, and I think it's time to wake her up and get her ready. I owe it to her!


The last year she was in service, I had replaced the leg with a donor from a Johnson. The old leg had cracks, leaked, and didn't have a great working reverse. Plus it eventually locked up from moisture intrusion. So the new leg was put together, along with a impeller kit. But for some reason it dribbled oil. This will be something I will be addressing this time around. The other thing I also noticed was the power wasn't all that great (maybe my expectations were a bit high). So I plan on cleaning up the carb, checking over the ignition system, and taking a peak inside the cylinders.

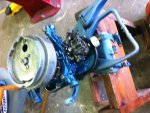
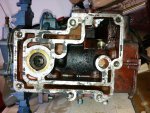
I took it apart today with some free time at work.
IMG_0263.jpg
IMG_0264.jpg
IMG_0265.jpg
 

RogersJetboat454

Commander
Joined
Jul 9, 2010
Messages
2,964
Re: 1958 Evinrude Fleetwin freshen up.

Re: 1958 Evinrude Fleetwin freshen up.

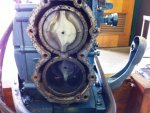
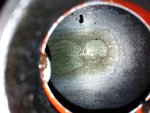
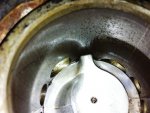
Eventually I worked my way down to this:

IMG_0274.JPGIMG_0266.JPG

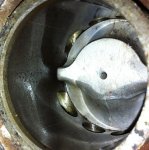
Mighty clean pistons. Looks almost as though they were just pulled out of the box. Me thinks shes been steam cleaning her self. The thing is, the first suspected culprit really didn't look all that bad;

IMG_0277.jpg

So my thoughts are this may be the issue;
IMG_0282.jpg

That's what remained in the tank yesterday after I got rid of the quart or so of old fuel left in the tank. I will have to swab the rest of that out. But not a bad looking pressure tank (or bomb as some people consider them), and is even still capable of pressurizing the lines.

The other potential bugaboo is this;
IMG_0269.jpg

Some pitting in the upper cylinder wall for the top piston. Of course I didn't do a compression test on this before gutting it :facepalm:. My 200 something dollar MAC tools compression tester is resting comfortably in my tool box at home :rolleyes:.

So this will be something I'm going to mull over. Should I leave well enough alone (the rings are all nice and free, and no major scoring otherwise). Or... should I pull her apart, clean her up with a ball hone, and toss in a fresh set of NOS rings for the fun of it (at $45 bucks a cylinder). I'm pondering, and suggestions are welcome. There will be no act's of heroics performed for her either. I guess you can say she's got a living will with a DNR. Perhaps someday If I had a boat load of cash, and a better power head came my way, I would swap it out. But as it is, I will keep her comfortable, and running the best she can.

Oh and you may ask "What about the infamous coils?". Well it appears that someone has replaced them in the past. I will get a pic up of the ignition system eventually. But currently, the coils are looking OK, with only the points, condensors, and wires being considered as "needs replacement".
 

oldybutagoody

Petty Officer 1st Class
Joined
Dec 30, 2011
Messages
207
Re: 1958 Evinrude Fleetwin freshen up.

Re: 1958 Evinrude Fleetwin freshen up.

It's a shame you didn't do the compression test. You'd know if that pitting was causing uneven compression. Might be worth it to invest in a sacrificial head gasket, put it back together and test it before you go down the road of cracking it open, and putting in new rings. I'd remove and inspect the exhaust port cover to see if if has a lot of carbon built up in there. That could rob a lot of power. I made my own gaskets with gasket material from autozone and a hole punch set from harbor freight and an exacto knife. (You have to buy a real head gasket). You'll want to do a reseal on the lower unit too. Not too hard or too expensive. Do a search, there's lot of info here in prior threads. Finally, that is a GREAT old Classic engine and it looks to be in pretty good condition. I would definitely give it a new life with a new ignition, carb rebuild and lower unit reseal. It'll go another 60 years.
 

Mas

Lieutenant Commander
Joined
Oct 3, 2006
Messages
1,656
Re: 1958 Evinrude Fleetwin freshen up.

Re: 1958 Evinrude Fleetwin freshen up.

I guess you can say she's got a living will with a DNR.

DNR....whhhaaaatt??? How can you pull the plug on fond memories???

I know...gotta draw the line somewhere. One thing always leads to another! I agree...just put a new head gasket...and see what you've got. You may be able to get away with not torquing the head all the way (maybe 75-80% torque) for testing purposes only...then reuse it later if you do have to break her down at correct torque. Those are great motors...I've got a fine looking one too. See what you can do to keep her going.

As far a steam cleaned...there could be a hole in the exhaust baffle too if the head is not the culprit? Be very wary about those screws, they break easy...use an impact driver and hammer if you decide to remove the cover.

Good luck,
Mas
 

RogersJetboat454

Commander
Joined
Jul 9, 2010
Messages
2,964
Re: 1958 Evinrude Fleetwin freshen up.

Re: 1958 Evinrude Fleetwin freshen up.

Fella's

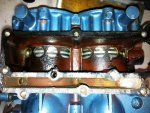
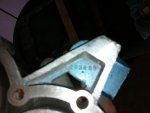
I pulled the exhaust cover off. No impact driver needed, she has always been a lake engine. Actually felt guilty chipping some of the paint off the screws. Most of her hasn't been apart since she was put together over 50 years ago. Some more engine porn for you though;

IMG_0283.jpg IMG_0284.jpg

No carbon buildup. Exhaust baffle looked fine. No scoring the full length of the pistons, and the rings look OK.

Here is a little better shot of the pitting in the upper cylinder;
IMG_0286.jpg

Not quite as dramatic looking as the close-up I posted. Has a peppered look to it. Whether or not it's lowering compression is debatable. I may have a go at throwing the head back on, and spinning it over with a drill to get some numbers. Just need to make a trip to where my tool box is stored to pick up my tester. Regardless if the compression is truly off, it's nagging me to fit her with a new set of rings while the opportunity is present. One side of me says if it ain't broke, don't fix it. The other says there may be room for improvement with a deglaze, and a fresh set of rings that haven't been under tension for a half century.

I agree this is a classic worth saving. It's never going to be tossed, or parted out. It ran like it was, and will continue to run that way. If the compression figures are truly dismal (which I suspect they aren't), it will be run till it doesn't, and hung back up until the means to fix it are available.

Here's a shot of the ignition system;
IMG_0285.jpg

All OMC parts, including the replacement coils. Points are filthy, actually to the point that it's a wonder that it ran. Looks like a good amount of residue on the mag plate. I suspect who ever touched this last got a little too liberal with the grease. It will all be cleaned up. Points and condensers replaced along with the wires.
 

oldybutagoody

Petty Officer 1st Class
Joined
Dec 30, 2011
Messages
207
Re: 1958 Evinrude Fleetwin freshen up.

Re: 1958 Evinrude Fleetwin freshen up.

Since it sounds like cash is an issue (when isn't it, right?) I'd recon you'll get more bang for your buck out of new points, carb rebuild and plugs and wires than out of a ring job. Like you said, rings aren't cheap. You could do the ignition and carb for less than $50, the lower unit reseal for $30ish and be done for less than a Franklin. Throw in the ring job and you're adding another $150 at least. Your call but the rings aren't broken or stuck and the cylinder isn't scored. Over-all I think that little old Fleetwin looks great for it's age. Sure would make your decision easier if you knew the compression.
 

Chinewalker

Fleet Admiral
Joined
Aug 19, 2001
Messages
8,902
Re: 1958 Evinrude Fleetwin freshen up.

Re: 1958 Evinrude Fleetwin freshen up.

Just an FYI - your motor looks like a 1956, not a '58...

As for the pitting, with the 20:1 oil ratio you SHOULD be running in that, you will mask any compression loss from those little pits pretty easily.

I'd guess your low power might have been due to lack of spark on one cylinder - the most common low power issue with these old motors.
 

RogersJetboat454

Commander
Joined
Jul 9, 2010
Messages
2,964
Re: 1958 Evinrude Fleetwin freshen up.

Re: 1958 Evinrude Fleetwin freshen up.

Just an FYI - your motor looks like a 1956, not a '58....

Yeah... Just found that out on my own :redface:
For some reason I though I remembered the model number as being 7524, but a second look confirmed it's a 7520. I will have to PM one of the Mod's to change the title. :D

As for the pitting, with the 20:1 oil ratio you SHOULD be running in that, you will mask any compression loss from those little pits pretty easily.

I have no qualms about running it at 20:1, that was what I was considering (16:1 seemed a little excessive, especially in light of how far oils have come).

I'd guess your low power might have been due to lack of spark on one cylinder - the most common low power issue with these old motors.

That's what I'm thinking, along with the presence of water in the fuel. So I gather your opinion is to leave the rings alone?

Question/opinion on the tank;

In peoples experience, how is the rubber diaphragm in these tanks holding up to E10? This tank is still priming the line perfectly, but it's never had E10 fuel in it before. Is it worth changing out the diaphragm for the sake of being sure it will continue to work fine, or is it a waste of time? The fuel/air line was changed out when I swapped the leg over 7 or 8 years ago, because the old line was splitting. Don't know if it was ethanol friendly rubber (bought it from vintage outboard), but I would think it would be better then an original line for alcohol resistance. I will need to do a search for changing the O-rings in the connector. I know I've seen it some place with the BRP part #'s for the "good" O-rings.
 

Chinewalker

Fleet Admiral
Joined
Aug 19, 2001
Messages
8,902
Re: 1958 Evinrude Fleetwin freshen up.

Re: 1958 Evinrude Fleetwin freshen up.

Yep, I'd leave the powerhead alone until you have good reason to dive deeper...

As yet (knock on wood) I have not had issue with the diaphragms on my pressure tanks coming apart due to ethanol. I run regular E10 87 octane pump gas in my '56 5.5 Johnson and '58 Evinrude 10 and have not had any issues with the tank. I also drain my tank periodically to remove any built up water due to "breathing" caused by temperature changes/condensation, etc. As a pressure tank, I do not leave it with the cap tight so it won't build up pressure in the sun, so it will breath with the temp shifts & humidty, etc.
 

HighTrim

Supreme Mariner
Joined
Jun 21, 2007
Messages
10,486
Re: 1958 Evinrude Fleetwin freshen up.

Re: 1958 Evinrude Fleetwin freshen up.

I agree with Chinewalker, I would personally leave the powerhead be for the time being. Clean up the carbon (OMC Engine Tuner is great for this, or Deep Creep), install the covers with new gaskets (can get the torque values if you need them), clean up,dress the points (put them in a vice, wrap emory cloth around a hacksaw blade and run it over the contact areas to refresh the convex surface), clean the carb and change fuel lines, change the water pump impeller, change gear oil and take her for a rip. If water intrusion is now present, reseal gearcase.
 

RogersJetboat454

Commander
Joined
Jul 9, 2010
Messages
2,964
Re: 1958 Evinrude Fleetwin freshen up.

Re: 1958 Evinrude Fleetwin freshen up.

Gentlemen, thank you for the input.

I will leave the rings well enough alone.
Gasket set, carb kit will be ordered next paycheck (girlfriends birthday this Friday, need to save my cash for that ;) ).

I will try my best to clean what little carbon there is off what you see in the photos. Despite the fact she was run pretty heavy handed with oil, not much in the way of deposits. Going to also track down some sheets of emery cloth to at least dress the head. Gotta get the baked on head gasket off first. I hope soaking the gasket with some PB helps, but any other suggestions would be welcome.

I'm going to be taking the lower off the mid-section to take a look and see if I can find where it's leaking gear oil. I would rather do this while it's all apart since this is one of the model's that needs the power head removed in order to completely drop the lower unit. The lower was completely re-sealed when it was changed over, but it was done under less then favorable conditions. If need be, I will rig up a pressure tester. From what I can tell, it seems as though its leaking out of the exhaust passage (and no it's not spent fuel/oil ;)). I will also be critically checking the impeller out. It was also replaced when the lower was done, and I would be shocked if it had more then an hour of run time on it, but that doesn't mean it hasn't taken a set.

I like your idea of saving the points High, but on closer inspection, these look like they are worn unevenly. They are most likely older then me, and don't owe us anything. Points are cheap! I will also be paying a visit to the auto parts store next door for some wires. Let's see if I get a vacant look from the dude across the counter when I ask for a couple lengths of bulk copper core wire. :D
 

oldybutagoody

Petty Officer 1st Class
Joined
Dec 30, 2011
Messages
207
Re: 1958 Evinrude Fleetwin freshen up.

Re: 1958 Evinrude Fleetwin freshen up.

You're on the right path. Keep walkin'. You might have trouble finding the copper core wires at an auto store. I failed in that regard at Autozone and Pep-Boys. Ended up finding a box of six (good for three engines) at Tractor Supply. The sell them for old tractors. Nice ones with the spark boot already on them. Just cut to length. They were $17 for the box.
Gentlemen, thank you for the input.

I will leave the rings well enough alone.
Gasket set, carb kit will be ordered next paycheck (girlfriends birthday this Friday, need to save my cash for that ;) ).

I will try my best to clean what little carbon there is off what you see in the photos. Despite the fact she was run pretty heavy handed with oil, not much in the way of deposits. Going to also track down some sheets of emery cloth to at least dress the head. Gotta get the baked on head gasket off first. I hope soaking the gasket with some PB helps, but any other suggestions would be welcome.

I'm going to be taking the lower off the mid-section to take a look and see if I can find where it's leaking gear oil. I would rather do this while it's all apart since this is one of the model's that needs the power head removed in order to completely drop the lower unit. The lower was completely re-sealed when it was changed over, but it was done under less then favorable conditions. If need be, I will rig up a pressure tester. From what I can tell, it seems as though its leaking out of the exhaust passage (and no it's not spent fuel/oil ;)). I will also be critically checking the impeller out. It was also replaced when the lower was done, and I would be shocked if it had more then an hour of run time on it, but that doesn't mean it hasn't taken a set.

I like your idea of saving the points High, but on closer inspection, these look like they are worn unevenly. They are most likely older then me, and don't owe us anything. Points are cheap! I will also be paying a visit to the auto parts store next door for some wires. Let's see if I get a vacant look from the dude across the counter when I ask for a couple lengths of bulk copper core wire. :D
 

RogersJetboat454

Commander
Joined
Jul 9, 2010
Messages
2,964
Re: 1958 Evinrude Fleetwin freshen up.

Re: 1958 Evinrude Fleetwin freshen up.

You're on the right path. Keep walkin'. You might have trouble finding the copper core wires at an auto store. I failed in that regard at Autozone and Pep-Boys. Ended up finding a box of six (good for three engines) at Tractor Supply. The sell them for old tractors. Nice ones with the spark boot already on them. Just cut to length. They were $17 for the box.

No plan's of "getting in the zone", or seeing the puke boys. I honestly don't even like stepping foot in either one of those stores (mostly garbage parts, especially at AZ). I have a local chain parts store next door that may or may not have something. There are also a couple others like that in town. Worst case, vintage outboard sells a nice lead kit for short money that includes the boots and spark plug clip.
 

Mas

Lieutenant Commander
Joined
Oct 3, 2006
Messages
1,656
Re: 1958 Evinrude Fleetwin freshen up.

Re: 1958 Evinrude Fleetwin freshen up.

Points are filthy, actually to the point that it's a wonder that it ran. Looks like a good amount of residue on the mag plate. I suspect who ever touched this last got a little too liberal with the grease.

Might be blowing by top crank seal to produce a lot of oil residue...might consider replacing if in agreement. A special tool is likely required if done pproperly.

Mas
 

RogersJetboat454

Commander
Joined
Jul 9, 2010
Messages
2,964
Re: 1958 Evinrude Fleetwin freshen up.

Re: 1958 Evinrude Fleetwin freshen up.

Might be blowing by top crank seal to produce a lot of oil residue...might consider replacing if in agreement. A special tool is likely required if done pproperly.

Mas

That did cross my mind. Going to take a look at it when it's time to focus on the ignition.
 

oldybutagoody

Petty Officer 1st Class
Joined
Dec 30, 2011
Messages
207
Re: 1958 Evinrude Fleetwin freshen up.

Re: 1958 Evinrude Fleetwin freshen up.

I replaced a top crank seal without any special tools buy drilling a couple small holes through the top of the seal and inserting two small 1" screws a few turns in (being very careful not to scratch the crank shaft) then I just used a claw hammer to lever out the seal. Worked great.
Might be blowing by top crank seal to produce a lot of oil residue...might consider replacing if in agreement. A special tool is likely required if done pproperly.

Mas
 

Chinewalker

Fleet Admiral
Joined
Aug 19, 2001
Messages
8,902
Re: 1958 Evinrude Fleetwin freshen up.

Re: 1958 Evinrude Fleetwin freshen up.

There is no top seal on the 7.5... Just uses the bronze oilite upper bearing as a sealing surface.
 

oldybutagoody

Petty Officer 1st Class
Joined
Dec 30, 2011
Messages
207
Re: 1958 Evinrude Fleetwin freshen up.

Re: 1958 Evinrude Fleetwin freshen up.

Good point Chinewalker. It was my Fastwin that I used that seal removal technique on.
There is no top seal on the 7.5... Just uses the bronze oilite upper bearing as a sealing surface.
 

RogersJetboat454

Commander
Joined
Jul 9, 2010
Messages
2,964
Re: 1956 Evinrude Fleetwin freshen up. **UPDATE**

Re: 1956 Evinrude Fleetwin freshen up. **UPDATE**

It's been a while since I did anything with this thread, time for an update (I'm sure you guys were waiting with baited breath :D).

Well, yesterday I decided to peel the head gasket off the head. That original head gasket was surely baked on there. I got a feeling it's asbestos based too, but with the careful help of an exacto knife and razor blade, I managed to get it off. It was eureka moment once I saw this;

Hdgskt.jpg

As shown by the arrow, there was a decent sized notch missing from the head gasket for the bottom cylinder. You can also see where exhaust has been entering the cooling passages around the head and leaving the tell tale black carbon behind. So my little friend has been sipping lake water, and that would explain why the pistons are so clean.

Time to clean the head up. The following is my process for truing the head. I figured this may help any future visitors to this thread that happen to have one of these, or something similar that they need to clean up.

First step, I pulled out a piece of tempered glass (regular plate glass would have worked fine too) that I had tucked away for just such an occasion. It was originally part of a now deceased entertainment center, and worked perfectly for my needs. The paper I used was purchased on the cheap at Harbor Freight. It was a multi-pack of Silica Carbide wet/dry paper. Not quite emery cloth (they didn't have the right grits of emery for this job) but it worked fine. I started off with 500 grit paper affixed to my glass plate with the handyman's secret weapon.
IMG_0310.jpg

After a couple minutes of sanding in all different directions (OMC recommends figure 8's, but it's a PITA to do even on a full sheet of paper), I got to see where my high and low spots are;
IMG_0311.jpg

As you can see the top, bottom, and upper left were starting to be clean bare metal, but there were certainly some low spots. Of particular concern is the low spot between the two cylinders. This very well may be where water was crossing between the cylinders, and causing the upper to have a steam cleaned piston as well.

Continuing on with the 500 grit paper, something else became apparent. The wings on either side of the head that help to hold the motor cover were interfering with the sanding process. Paint was being removed from them, and it was clear that they were higher then the sealing surface of the head. Purest may balk at this next move, but since they do not require a critical smoothness or thickness, I simply took an angle grinder to them and carefully relieved the wings down below the sealing surface of the head;
IMG_0312.jpg

Back to sanding with 500 grit (5 sheets total were used for this process) for a few more minutes. The head was cleaning up real nice, but it was still evident that some low spots were present as marked;
IMG_0313.jpg

To be continued...
 

RogersJetboat454

Commander
Joined
Jul 9, 2010
Messages
2,964
Re: 1956 Evinrude Fleetwin freshen up. **UPDATE**

Re: 1956 Evinrude Fleetwin freshen up. **UPDATE**

So I kept going untill all the low spots appeared to go away, but did they really? The thing about this paper I was using is it does form dust (like most sand paper) while cleaning the head. If this dust builds up, it can fill in the gaps between the low and high spots, which will clean the lows and make it appear that they are now true. So after a good cleaning with soap and hot water, a little trick I like to use is this;
IMG_0314.jpg

Paint the head? Huh? The old timers around here probably know this one. This works with any surface that you want to true, cylinder heads, intakes, body panels, etc. In essence, you are discoloring the areas again, and when you place it back down on the paper, theoretically if there are any high spots remaining, they will be missing paint first while the lows will still retain the paint, as shown here;
IMG_0315.jpg

Back to the 500 grit paper, about 2 more sheets worth, and about 10 more minutes of work. Just to be 100 % sure it was completely true, I painted it one more time. If anybody wants, I can post the picture of the second time I painted it, but it looks just like the first time :p.
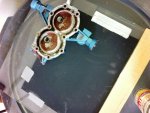
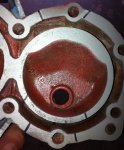
Eventually I ended up with this; IMG_0319.jpg
Good enough by my standards, and probably good enough by OMC's standards too considering the tooling marks that were present on the sealing surfaces when I first started working with this head.

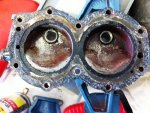
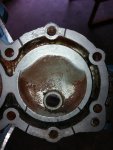
So after the initial meat was removed from the head, I did about 3 minutes worth of polishing with 1000 grit, and 3 more minutes with 1200. Another good bath in hot soapy water, and a bit of carburetor cleaner to remove the remainder of the paint I sprayed into the combustion chambers, and this is the finished product;
IMG_0320.jpg

Not too shabby. As you can see there is still a hint of pitting around that bottom cylinders surface, but I figure with a nice doughy head gasket that's neither here nor there. It should seal up fine.

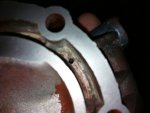
One thing I will also mention for anybody that digs this thread up, and is in the process of cleaning up their head; take a look in the cooling passages below the combustion chamber for the bottom cylinder. There is a small relief hole down below in the passage, that connects the passage to the cast in water tube on the back side of the head. Mine was restricted with scale deposits, but they were easily removed with a paper clip.
IMG_0321.jpg

Next will be cleaning up the cylinder deck, and power head base...
 
Top