1968 Starcraft Holiday V 18'. I need stringer and deck replacement advice/opinions

adamjr

Petty Officer 1st Class
Joined
Jul 23, 2009
Messages
272
Hello Starmada. I have a mostly gutted 18 foot Holiday V I/O in my yard that I really want to get into the water by the end of the season. My plan is to replace the above deck Mirax steel fuel tank with a below deck 26 gallon aluminum model. As all of you whom have removed the deck knows, there isn't a whole lot of room down there, I toyed with the idea of leaving the deck height the same and building a storage platform and live well over the fuel tank in order to prevent it from being a dangerous tripping hazard. But when I started mocking it up I didn't like the way it looked or the lost walking space on the deck and it would have made working on the front of the motor a real pain. So I decided I would raise the deck.

Initially I purchased rectangular aluminum tubing that was 1" X 1.5" 0.125 thick. It was a pain and I gave up on that project. I will re-task the tubing for other things. I called around metal fabricators and am going to have new stringers formed, The original material is 5052 aluminum 0.065" thickness. The question though is whether I should stay with the same thickness. Initially I was quoted on 0.125" thickness but I have concerns about the angles not holding up over time. Should I stick with the 0.065" or should I step up one thickness to 0.080"? In addition to the main stringers I'm also having stringers fabricated for the end of the ribs to support the outer edges of the deck.

Now for the deck. The original deck was 1/2" I would like to replace it with 3/4" to add stiffness but I am not certain if there is enough benefit to justify increasing the deck weight by 50%.

The thoughts of anyone that has done something similar or considered it would be greatly appreciated. Thank you in advance for your input.
 

Watermann

Starmada Splash of the Year 2014
Joined
Jan 12, 2013
Messages
13,822
Welcome aboard the Starmada, I think you know that there's a price of admission that must be paid in full. :D

I put a belly tank in my Chief and had to raise the deck height 1". I went the easy route though and for the ribs I used 2 marine plywood firing strips that were sealed heavily. I used rivets to secure the first run and ss screws for the 2nd and then used screws for the decking into the 1" thick strips. The tank was wider than the stringers/deck supports so I moved them which of course raises the height too and all was good without needing new ones. You just have to add cross supports so the floor isn't like a trampoline.
 

adamjr

Petty Officer 1st Class
Joined
Jul 23, 2009
Messages
272
I plan on taking some additional photos to pay the price of admission over the weekend. Using firring strips or strips of plywood certainly seems appealing and much less expensive than what the stringers will cost me. The admiral asked and I asked her if she really wanted to know. I didn't want to tell her the quote was $400. Thankfully she decided she didn't need to know. Since I already have the aluminum rectangular tube started maybe I'll finish with that and use the firing strips to get to the two inch height. That will leave a lot more money for a pair of batteries and the decking. The new tank fits nicely between the original stringers. Thanks Waterman for giving me something to think about.
 

jbcurt00

Moderator
Staff member
Joined
Oct 25, 2011
Messages
25,109
2 inches is quite a bunch of lift, do you need the 2in to fit a tank you already have?

Rob (Watermann) only raised the deck about an inch to fit a fairly sizeable tank
 

Watermann

Starmada Splash of the Year 2014
Joined
Jan 12, 2013
Messages
13,822
Yeaj I would use the tubing you have to raise the stringers, mark, drill and rivet the tubing on top. Here's what my belly tank looked like and you can see the firing strips too.

IMAG1446.jpg
 

oldhaven

Chief Petty Officer
Joined
Aug 30, 2015
Messages
578
I am doing the same thing right now, but with an O/B Chief, and will be using 3/4 by 1 1/2 1/8 wall aluminum tubing at the rib ends and moving the stringers outboard by an inch to meet the new deck height. I will be riveting the tubing to the ribs and this will stiffen the hull by distributing the single rib load to adjacent ribs. The deck will be riveted to the tubing and does not need to be fastened at the rib locations, so I may use additional rivets beyond the original number of one at each rib. The tubing will also provide a solid under deck foundation for the side walls to be fastened. This approach raises the underside of the deck by 3/4. With 3/4 decking instead of 1/2 the new deck will be 1 inch higher on top. I did not need much added height to use the belly tanks, but I did have to move the stringers for the tank width. I have to do some additional playing around with how the deck meets the cabin bulkhead, so I am not sure what if anything that means for your Holiday. Is there any way to put the tank fill/vent and gauge under the front of the dog house to avoid the extra height? Mine will end up behind the splash well doors at one end and in the cabin for the other, making my door shorter and access more difficult, but I am OK with that

http://forums.iboats.com/forum/owner...archief/page15

Ron
 
Last edited:

adamjr

Petty Officer 1st Class
Joined
Jul 23, 2009
Messages
272
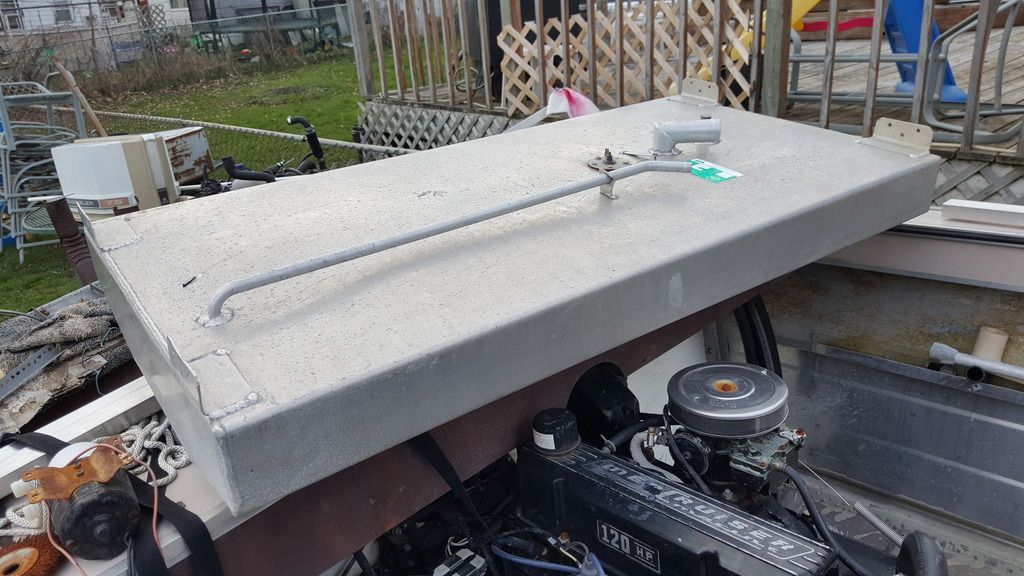
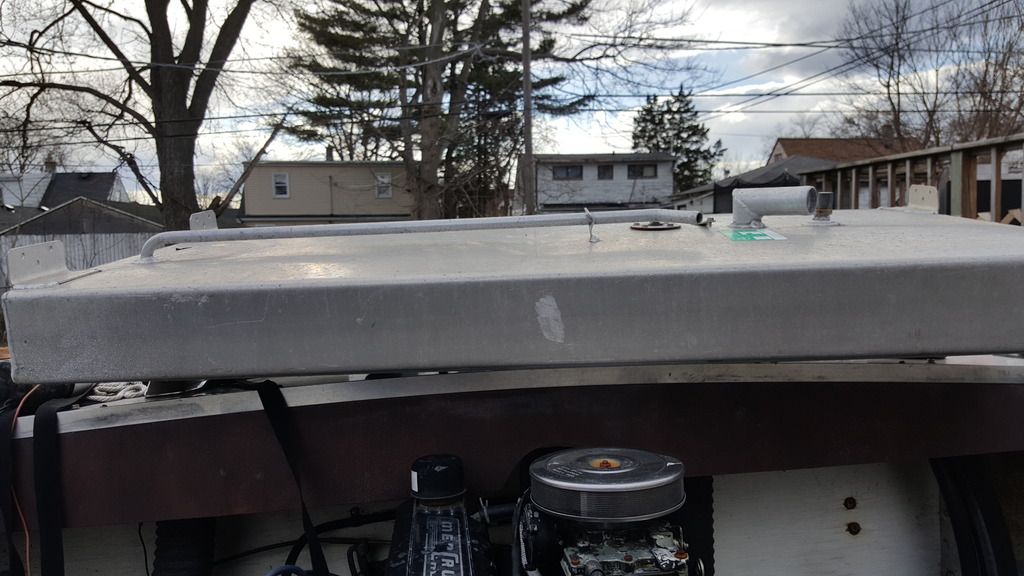
I purchased the tank in a leap before I looked kind of deal. It fits between the stringers as they sit but it has a vent line that goes from bow end to stern end and is raised about an inch and a half above the top of the tank. If not for that the tank would barely come over the stringers. Before I considered switching to a belly tank I went about replacing broken rivets that attached the stringers to the ribs. About a quarter of them were broken off. I doubled up when I replaced the rivets. I will be adding a gauge to the dash. The dash itself will be replaced. I will likely use a piece of sealed oak 1 X 10 to do so. I also have a bunch of Caring switches to replace the ratty old toggles. I just need to come up with an efficient design.
 

adamjr

Petty Officer 1st Class
Joined
Jul 23, 2009
Messages
272
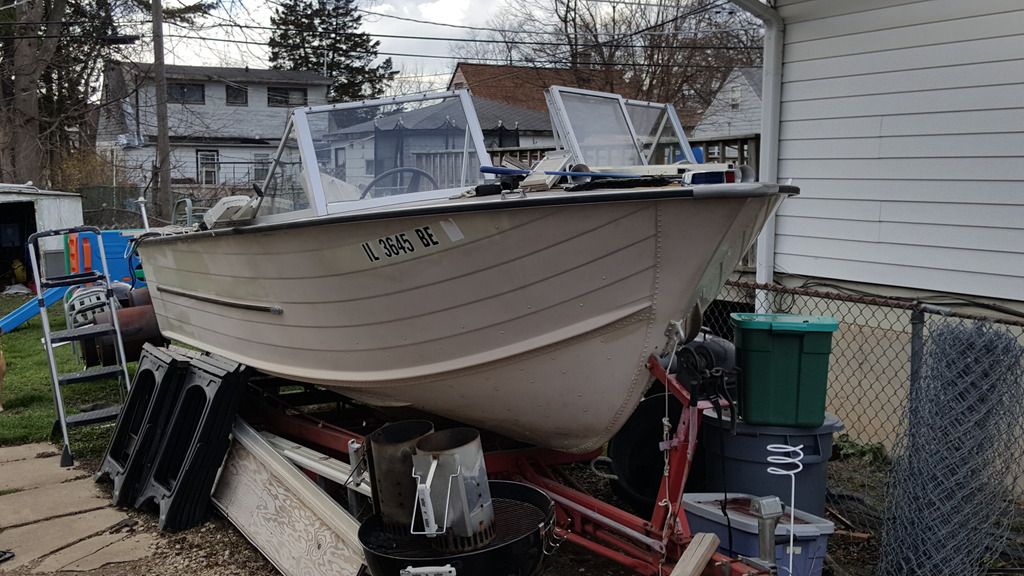
So here are a few pictures. First, here is the boat as she sits not quite looking glorious, yet.


Next, here are two photos of the fuel tank from different angles.


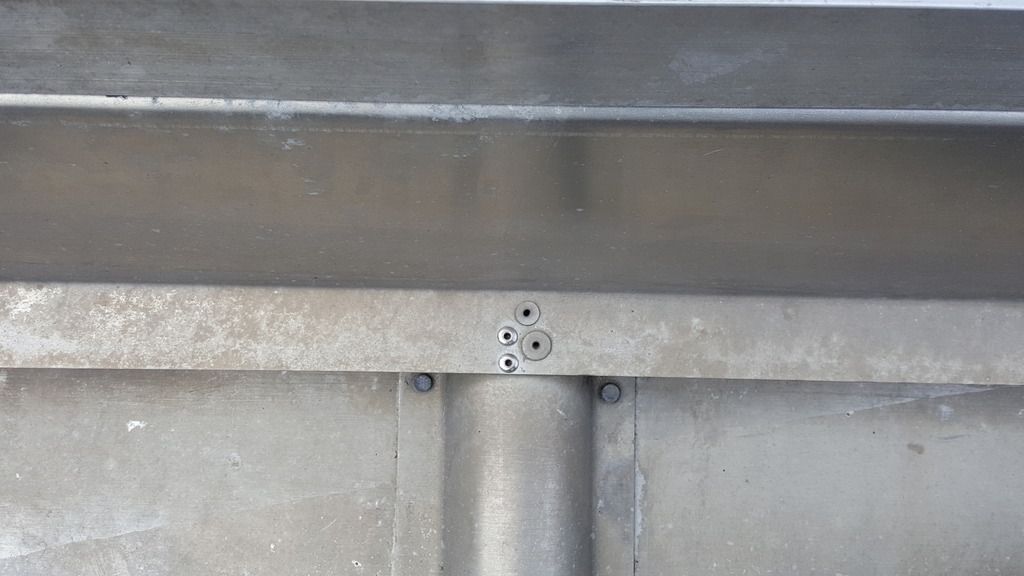
Rivet (ree-vits) added to the stringers.


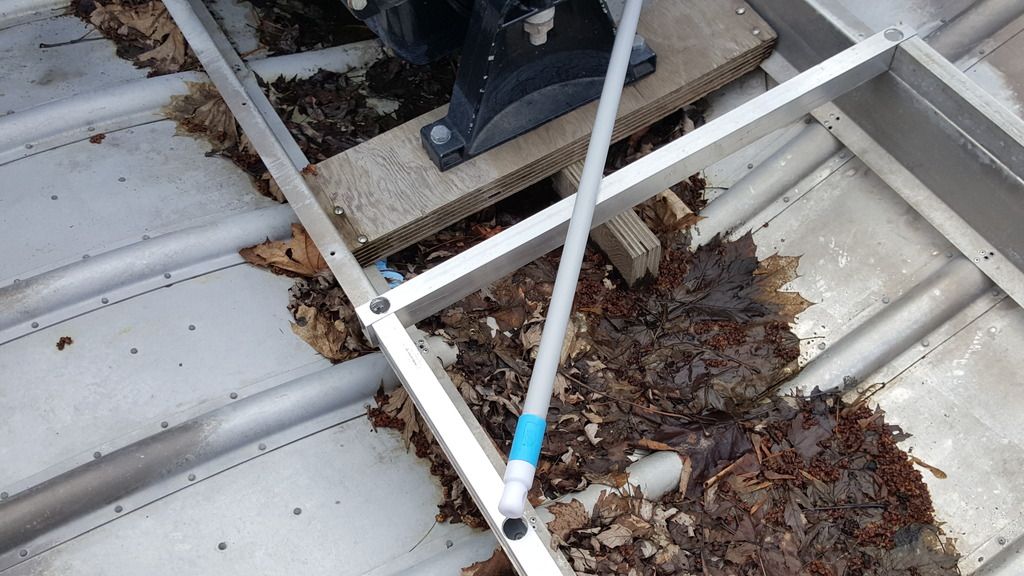
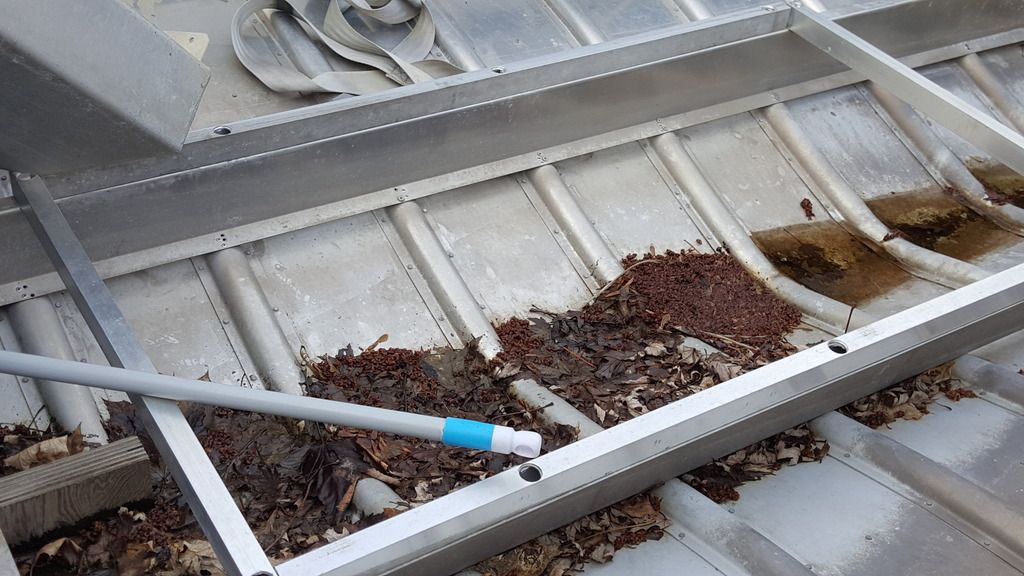
A couple of the stringers that show the 1 X 1 1/2" rectangular tubes attached Please excuse the broom handle and leaves. I uncovered her the last time I thought the snow was done for the season


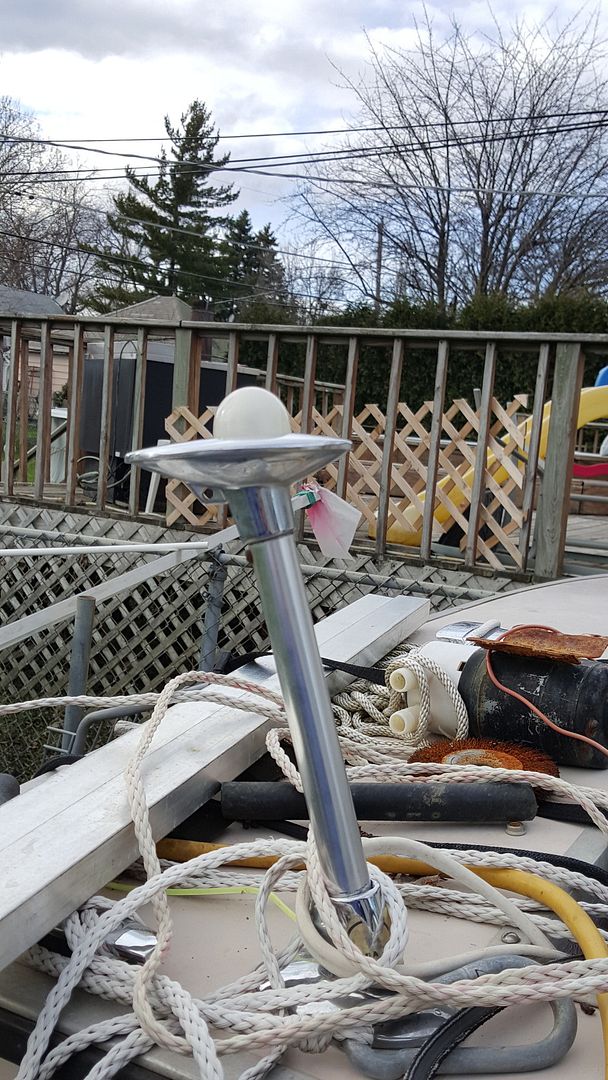
Last, here's something I am glad I kept from the Chieftain I let go after I gutted it and found this Holiday V. I wanted to keep both but the admiral wouldn't let that fly. Or should I say float?


Watermann

Starmada Splash of the Year 2014
Joined
Jan 12, 2013
Messages
13,822
Hey she's a nice IO Holly, you should see the 3 or 4 piles my SS is in if you think something looks bad at the moment. :lol:

I wish you would've come by before drilling all those holes in your ribs, it really weakens them giving rise to future cracking and possible failure. Sometimes less is more. .. There's one SC being worked on right now in the forum with a bunch of cracked ribs that he's having to repair and the cracks started at the rivet holes. I worry about the extra ones I drilled up from the originals but so far so good. I just try not to hit big wakes at speed to lessen the chances.

Speaking of cracks and such be sure to inspect the rib ends very closely for any signs of cracking. 18'rs and up have some issues under certain circumstances.
 

oldhaven

Chief Petty Officer
Joined
Aug 30, 2015
Messages
578
Oh man, that classic Jetson light is killing me. nice touch.

Ron
 

adamjr

Petty Officer 1st Class
Joined
Jul 23, 2009
Messages
272
Thanks guys. I thought you'd get a kick out of the Jetson light. The Chief had the two prong pullout style. The Holiday is wired in. I like the mount. Maybe next winter I'll pull off the chrome pieces and have them replated.

Waterman, I inspected all of the ribs and found no cracks. I was gentle. I think she was used mostly on the Rock River for the first 20-some years before going into storage.

The guy I bought her from was a transitional owner. The boat was in a warehouse for 19 years before he bought it. He couldn't get it started after doing a tune-up with cheap automotive parts. I took a chance and dragged her home. When the plug wires came off the cap with no effort it was clear he was over his skis just on part selection. My local NAPA store had everything marine grade. I cut the fuel line from thpe old steel fuel tank and dropped it into a gas can. With the help of some starting fluid and a battery booster (car battery) I got her to start. I rebuilt the carb thanks to a kit found on IBoats. She started and ran great until the fuel pump stopped pumping. Finding a rebuild kit for the old Carter was more challenging. A local marina had one of those. Just in time to winterize. I gutted and covered her. Last year I had to remodel my kitchen and it took a lot more time than i estimated and I did nothing last year. But now I have the itch. I want to get her going by the end of the season mechanically. A couple shakeout cruises on small water. Then next season I want her on Lake Michigan. My work is cut out for me.
 

Watermann

Starmada Splash of the Year 2014
Joined
Jan 12, 2013
Messages
13,822
Super no cracks! That's always a huge plus not having to do a ton of hull repairs after the tear down. The clean up alone takes 100's of hours but you have a piece of history that didn't cost 40k!
 

bob johnson

Rear Admiral
Joined
Feb 25, 2009
Messages
4,306
personally, Id go with a tank that fits under the floor rather than lift the whole floor 1" or more.....

there are sooooo many variations of tanks.....

bob
 
Top