1969 Sea Ray SRX Pachanga Build Thread

Propellerhead

Petty Officer 3rd Class
Joined
Nov 15, 2013
Messages
94
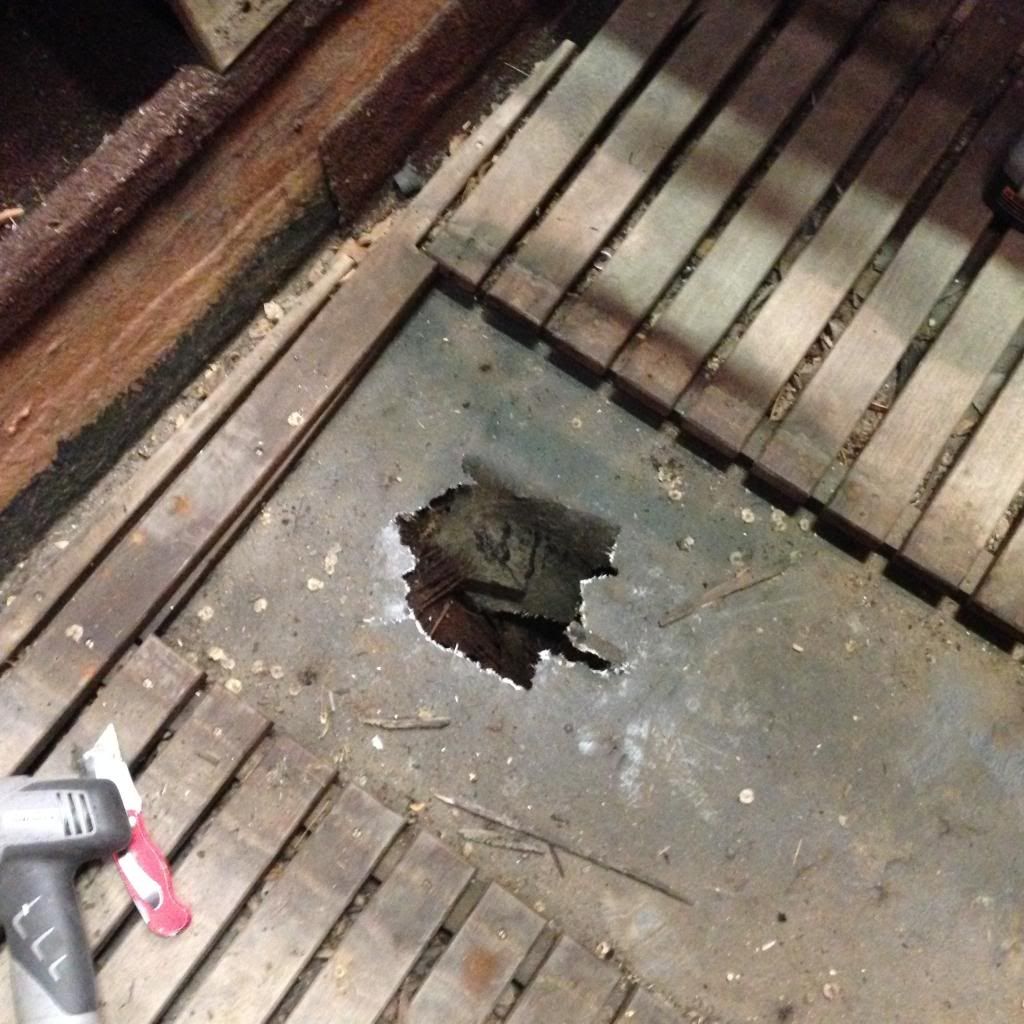
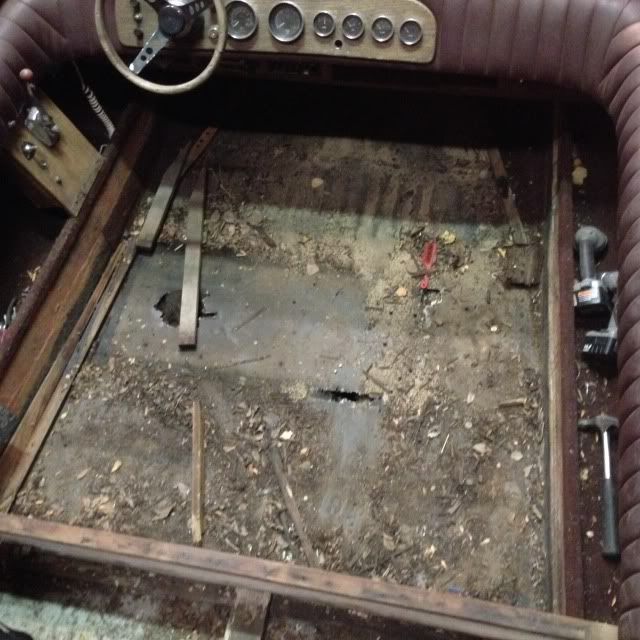
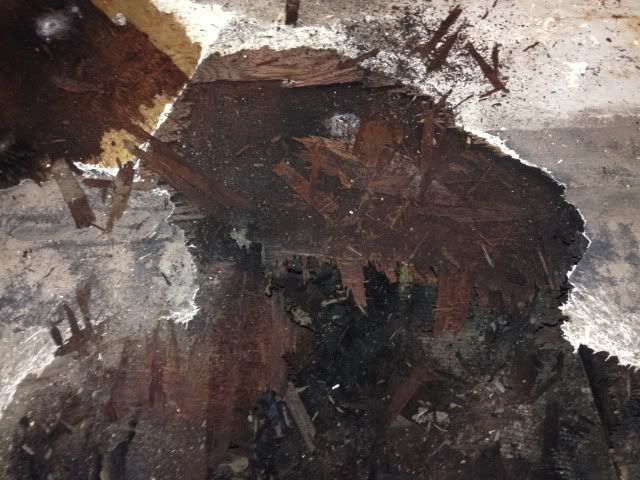
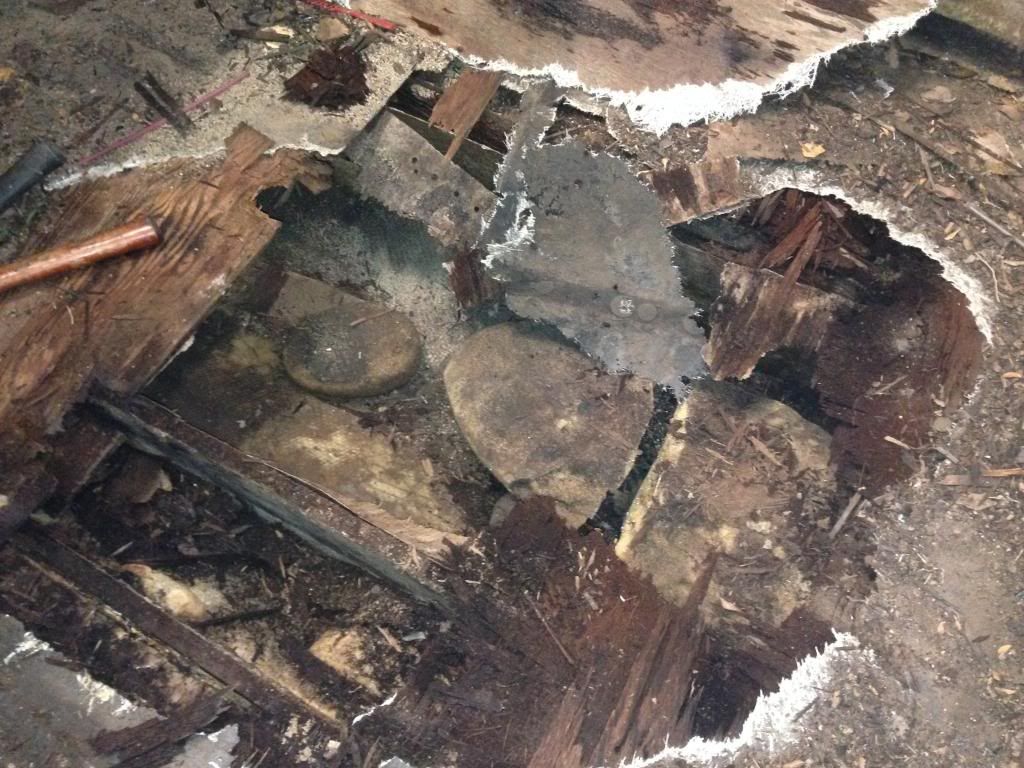
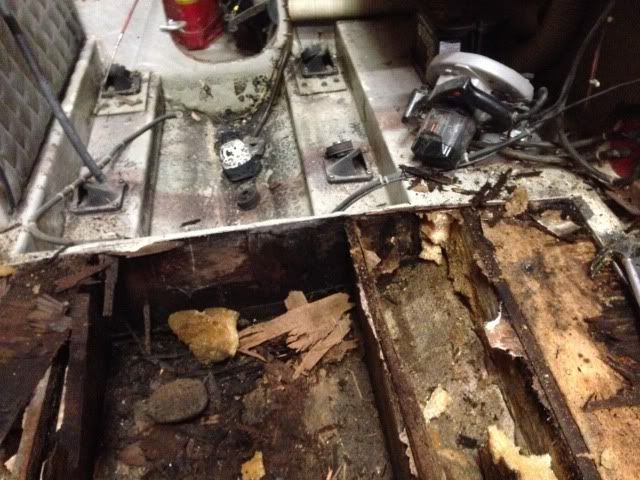
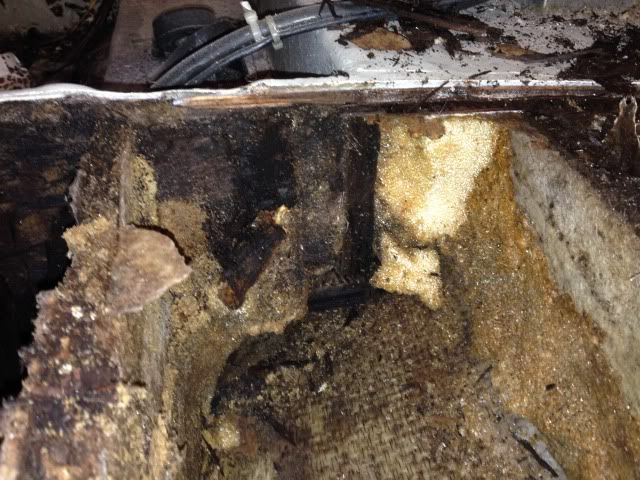
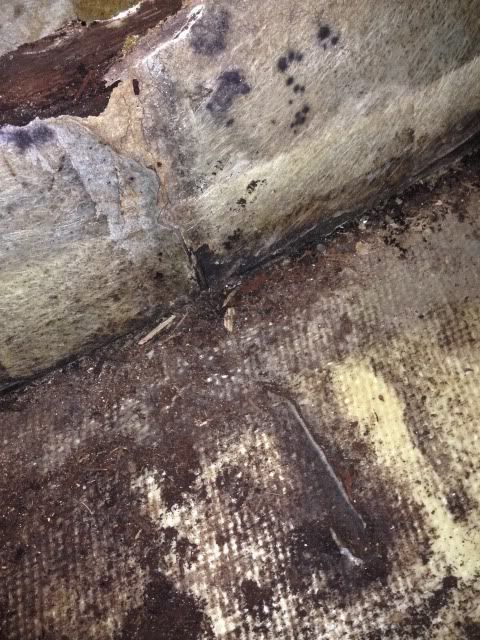
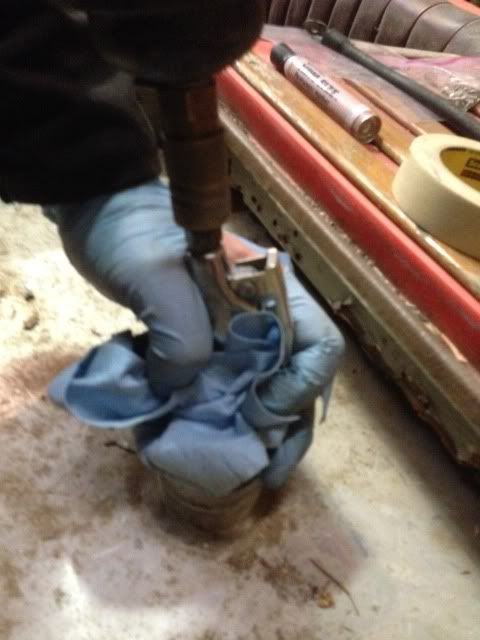
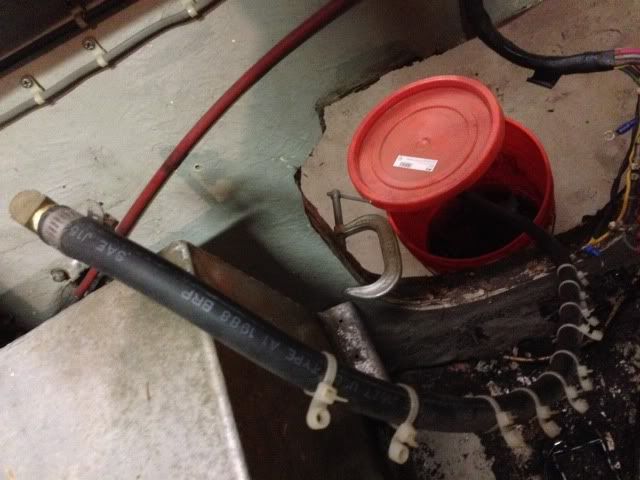
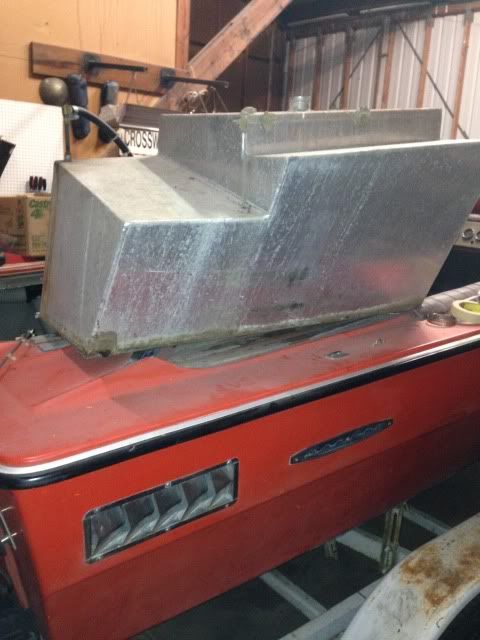
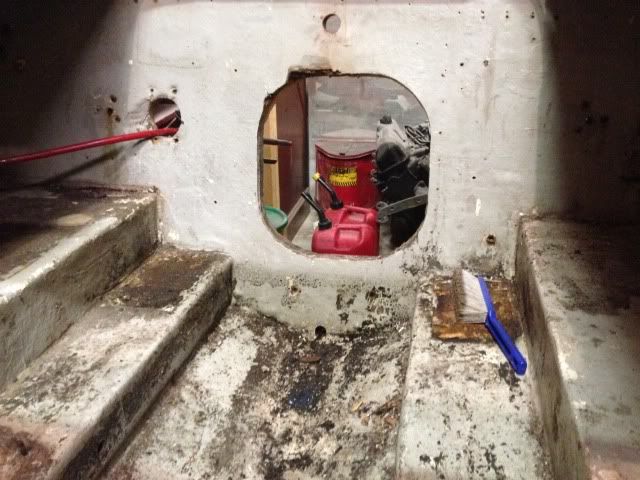
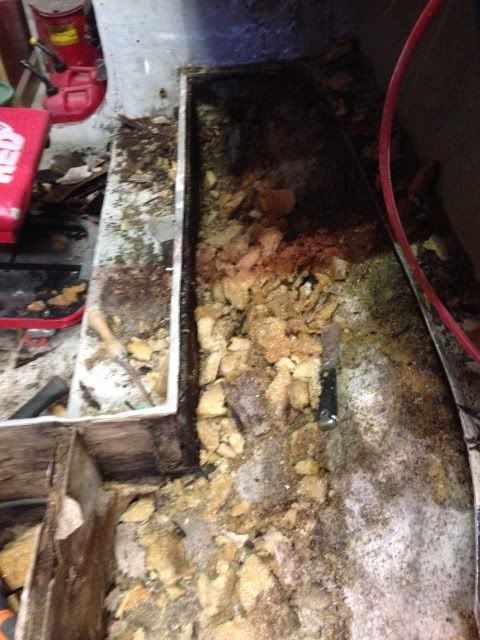
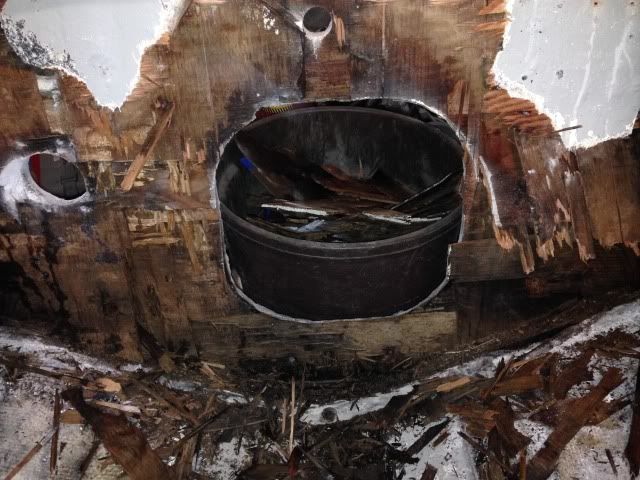
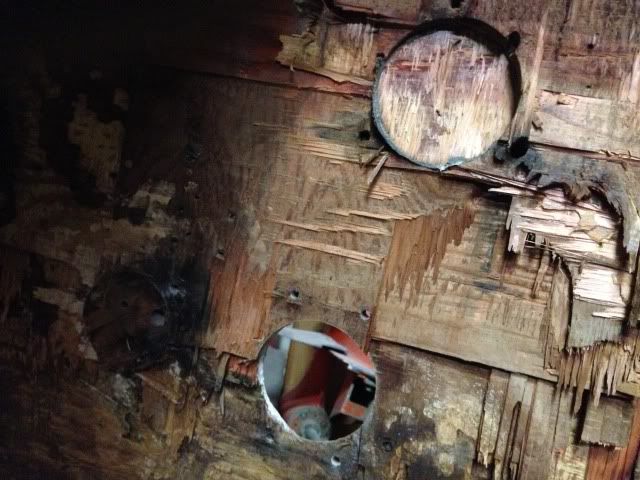
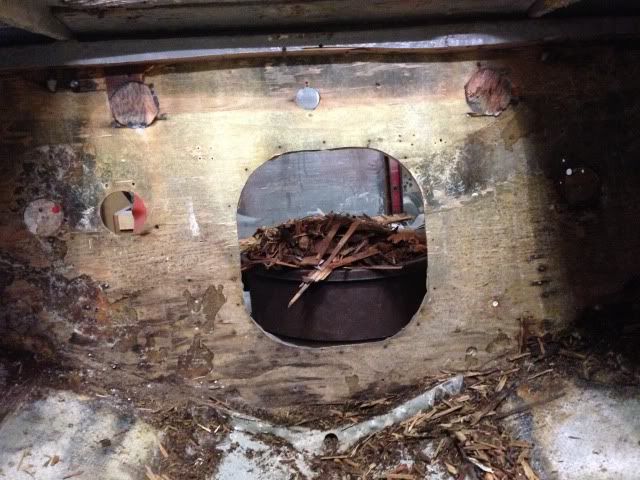
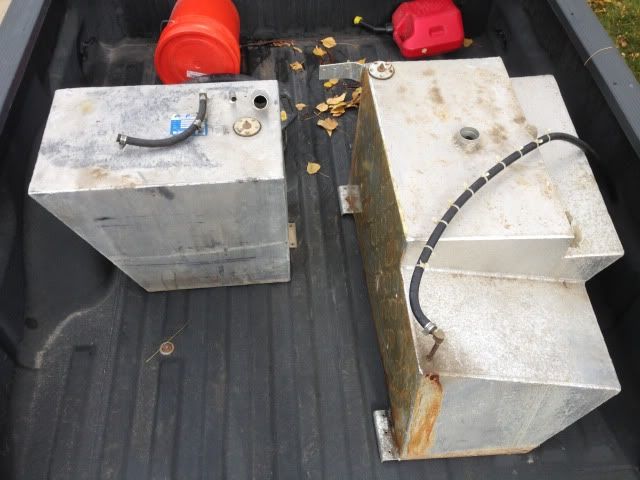
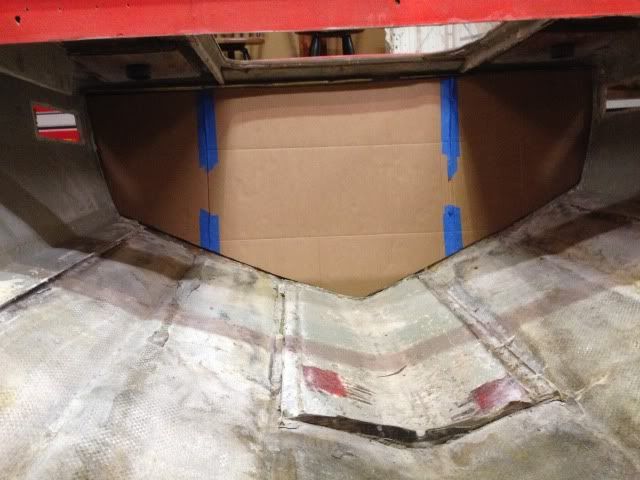
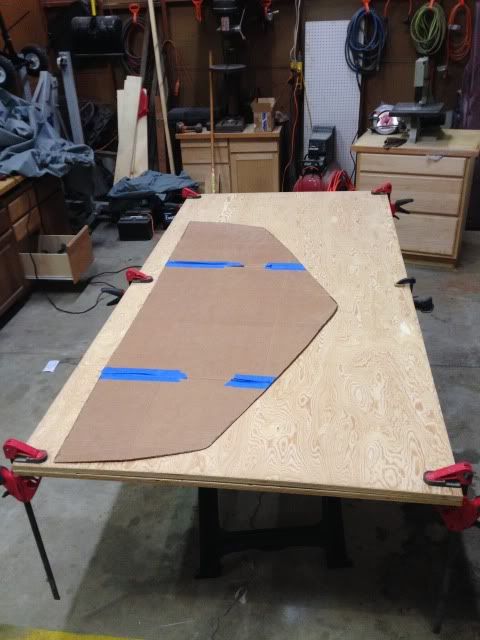
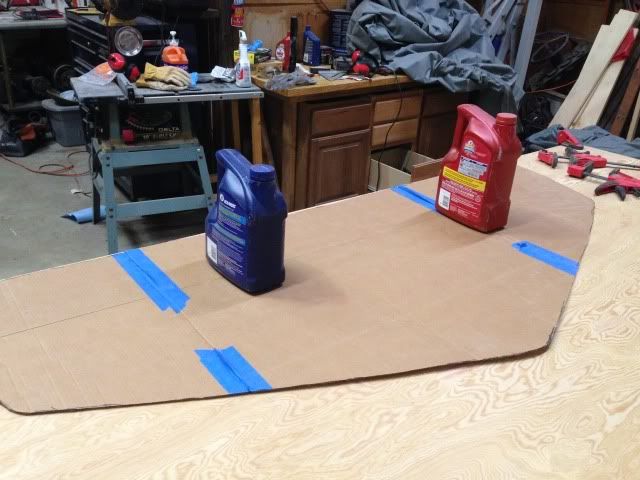
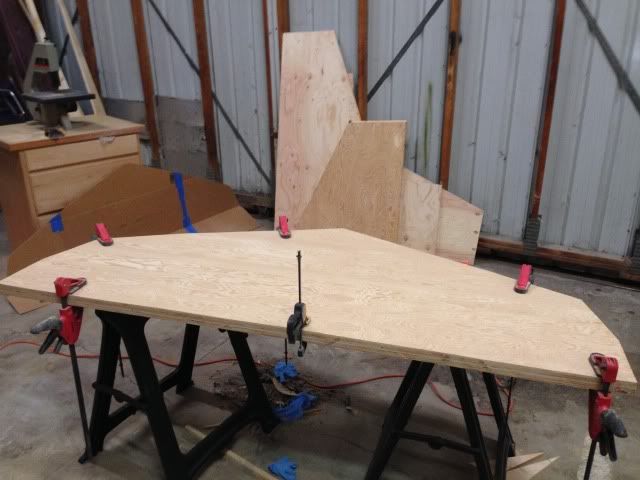
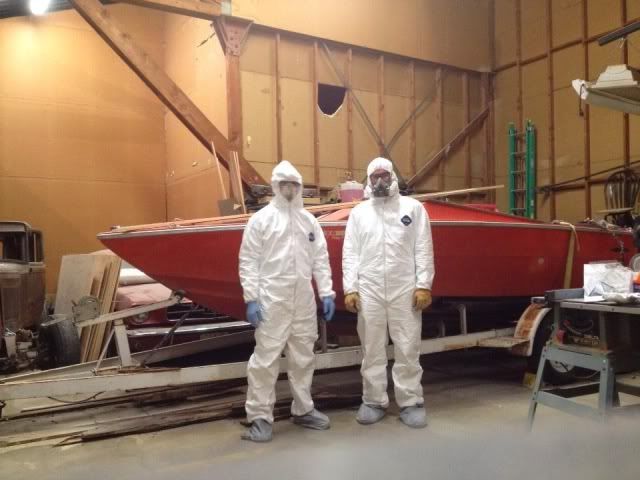
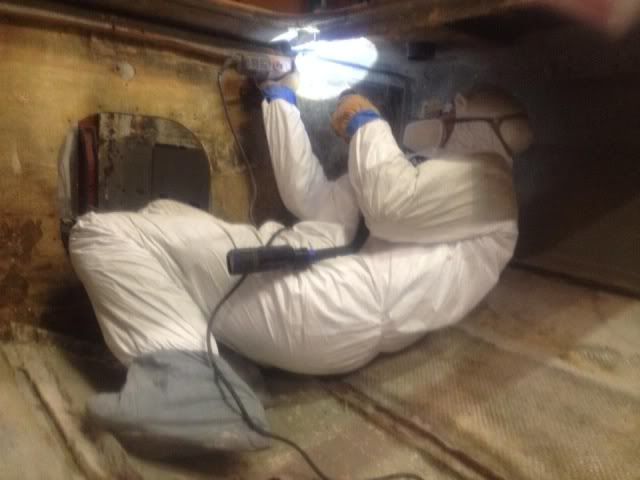
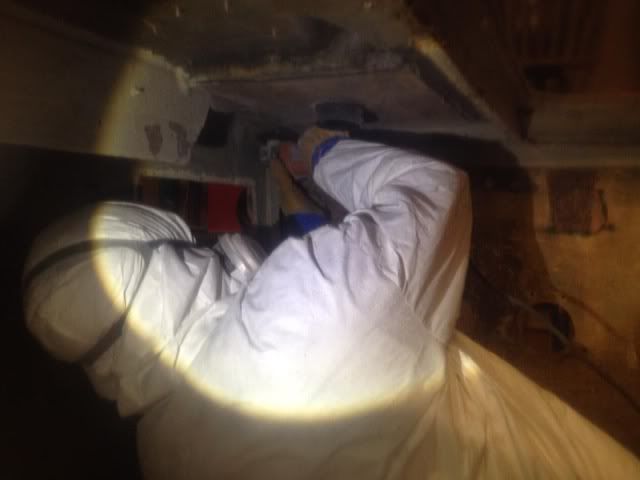
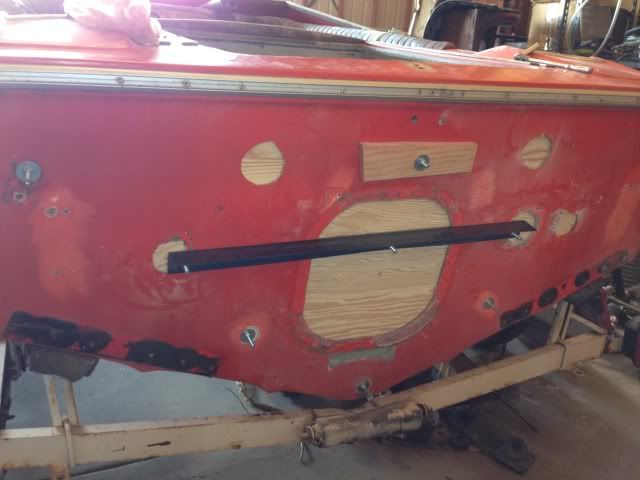
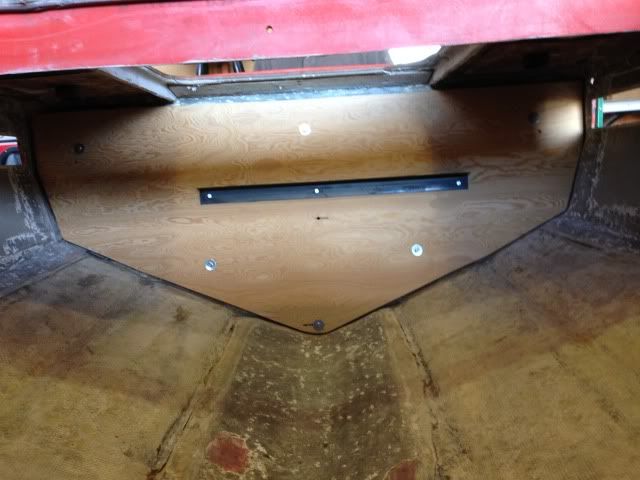
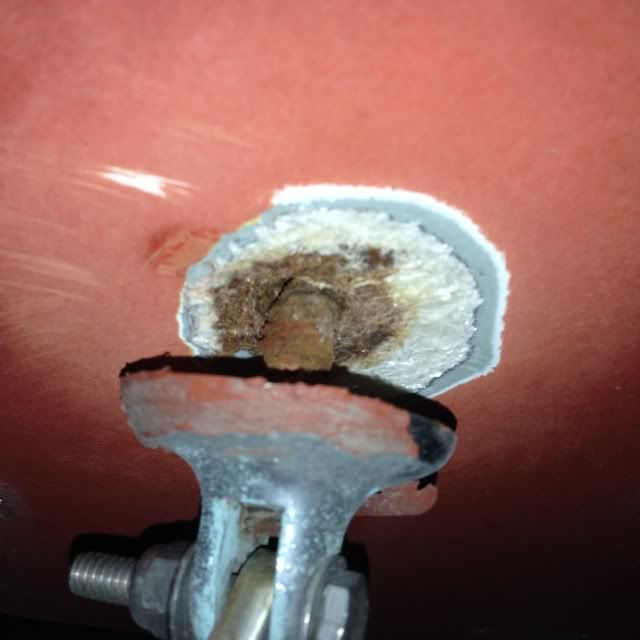
Hey guys, I've been working like crazy on this boat over the last couple weeks. So much so that I haven't had time to post anything. So I'll get everyone caught up on the progress, starting with a little back story.

f76d193f.jpg


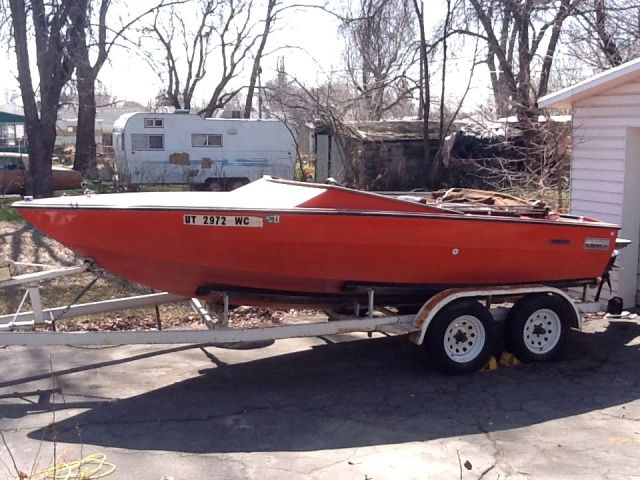
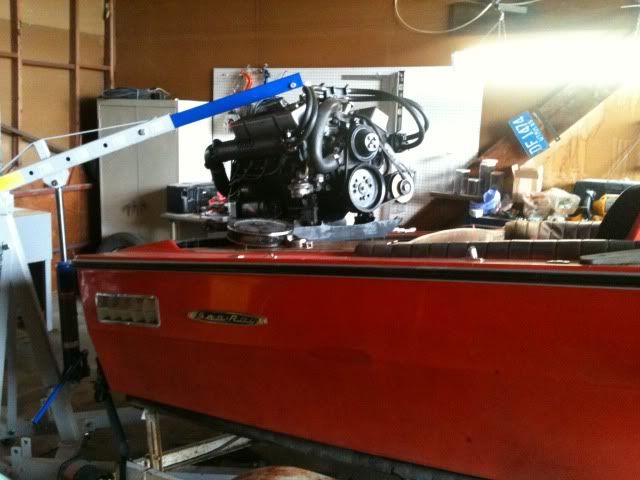
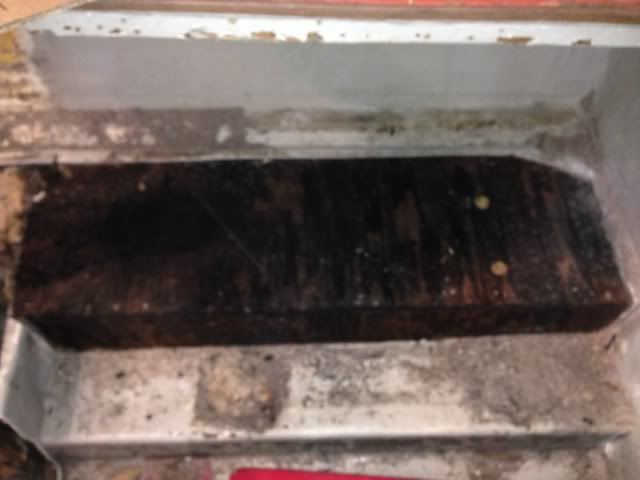
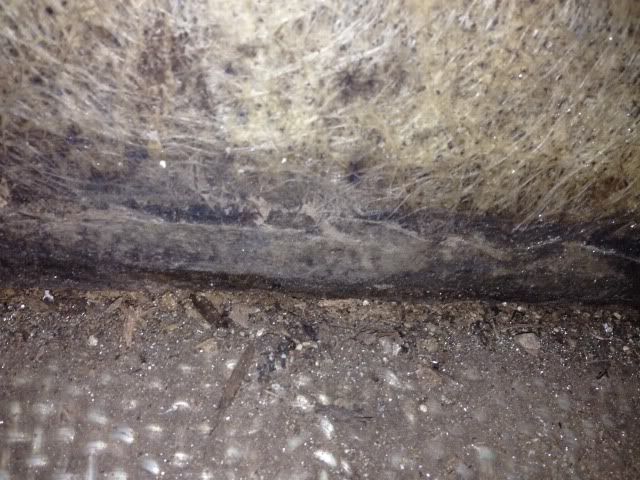
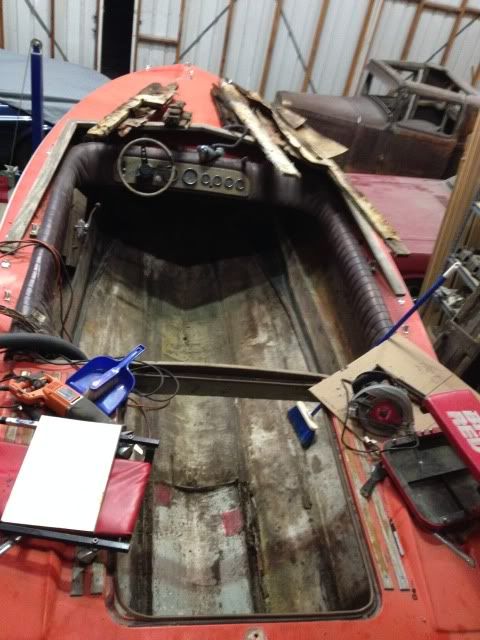
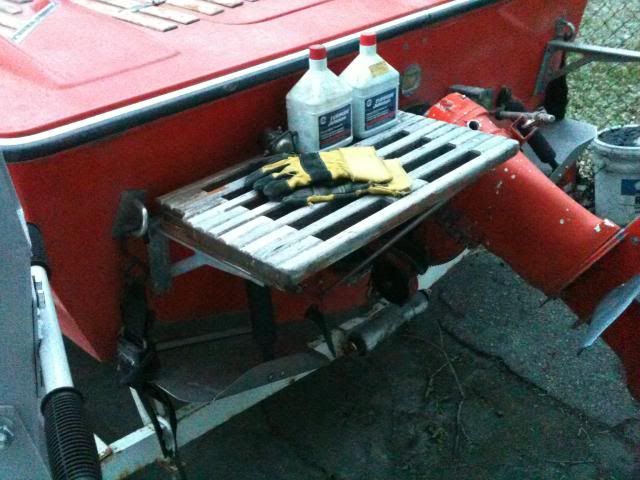
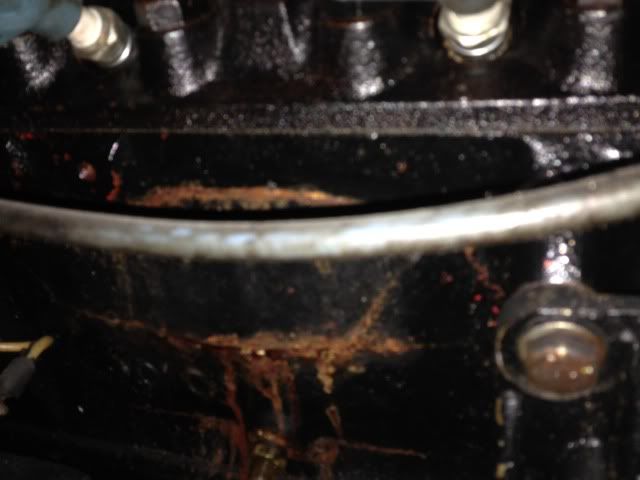
This boat belonged to a friend of mine, and he needed to get rid of it quick due to a problem with the city. All he knew is that it was an 18-foot 1969 Sea Ray. It had a Chevy 350 and an OMC outdrive. The motor and outdrive were in good condition. I didn't hear it run, but I trusted him. At this point I was hoping to get away with a cosmetic restoration (paint and interior). I really didn't know much about it, but the lines were cool, and it had the makings of a pretty fun boat. Plus, the price was right. Here's a couple more photos.

3dbbe8ab.jpg


9aa21550.jpg


IMG_0737.jpg


0c261d90.jpg


null_zps99d370ef.jpg


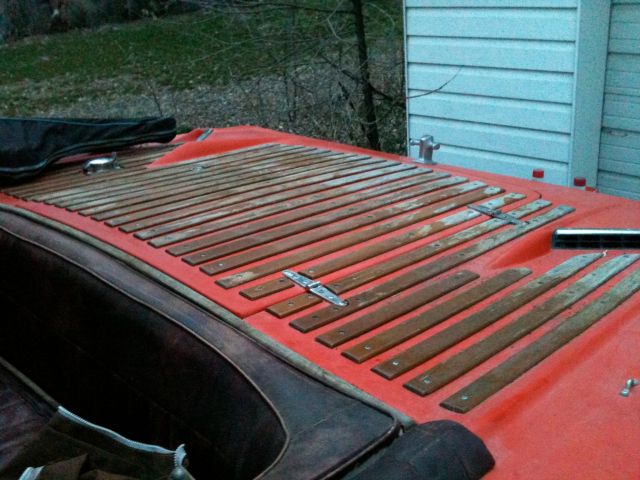
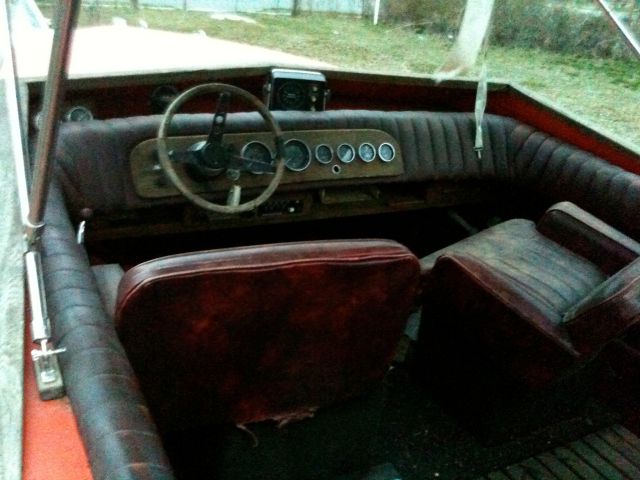
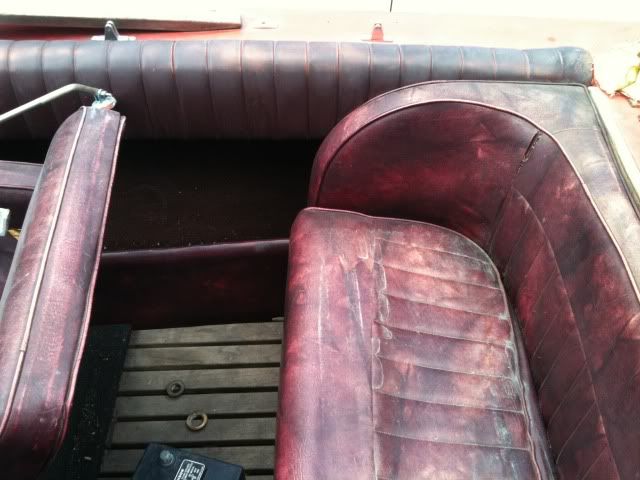
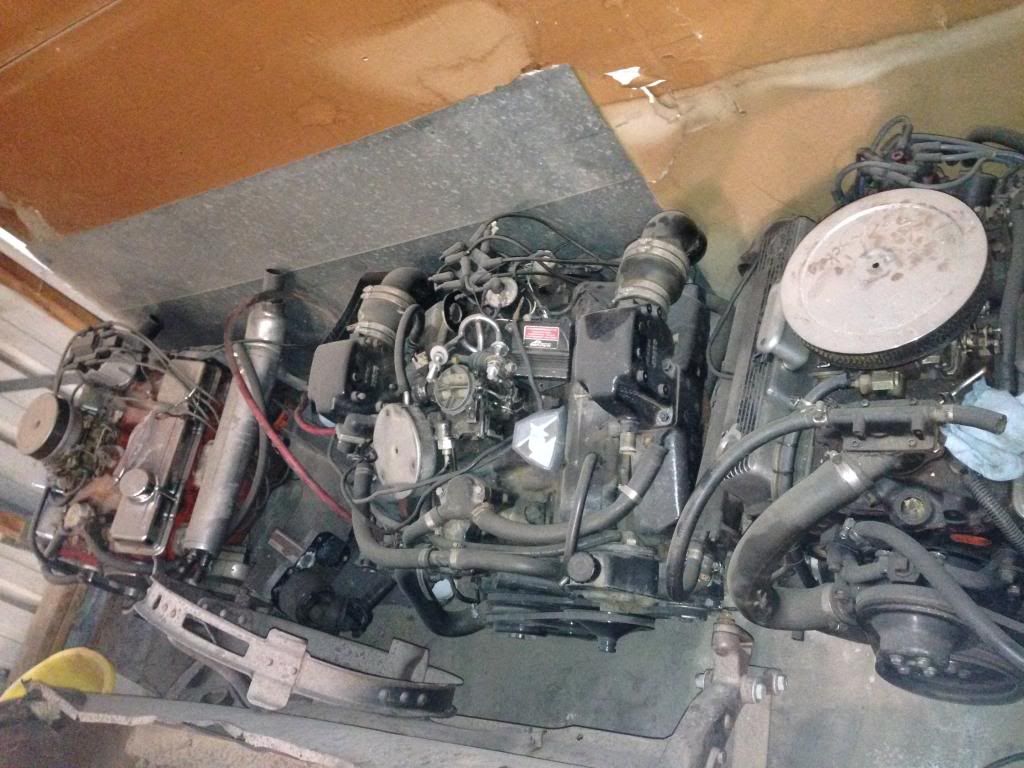
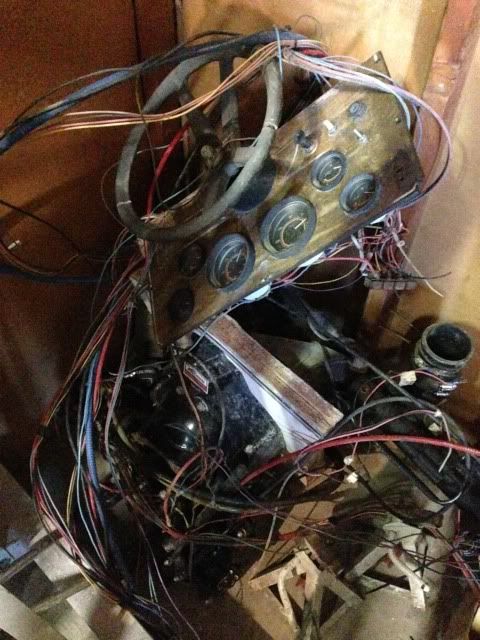
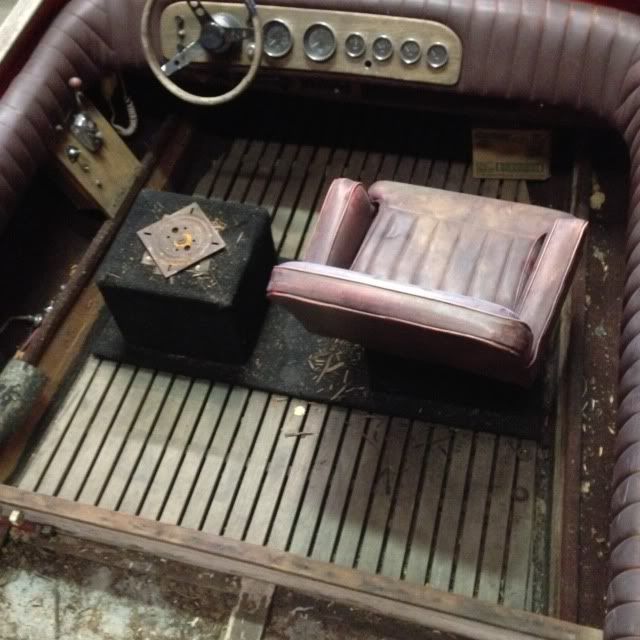
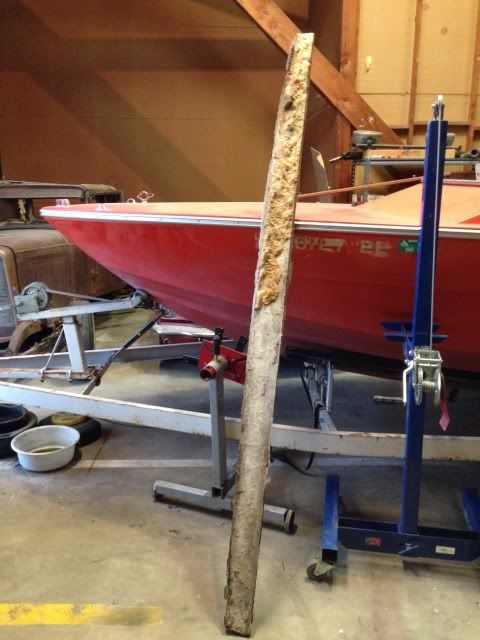
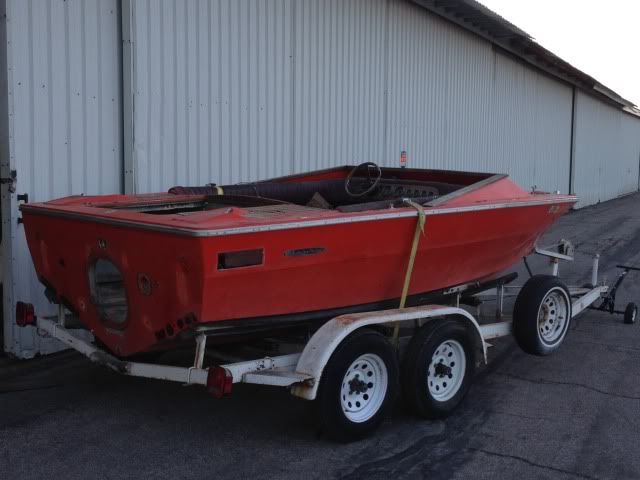
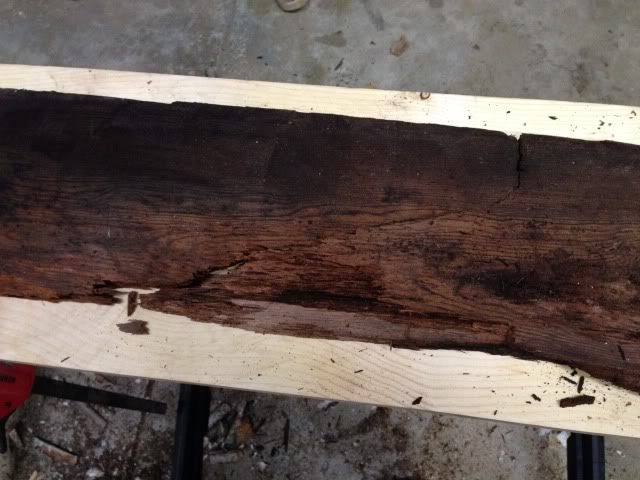
So I did some more research. It turns out that it's an SRX Pachanga. It was pretty much the flagship of the Sea Ray line back then. They only made 500 of them over a period of 3 years, 69, 70, and 71. You could tell a '69 from the lack of a bow rail, but they also usually had a two-piece engine cover, and this one has a one-piece. So maybe this is a late '69? Or maybe it was switched out at a later date. The engine options were an OMC inline-6, and OMC V8, or an Olds 455 with a Berkley jet drive. I'm thinking I'm glad I ended up with the one that I did. I do know that at some point in this boat's life it was heavily customized. This is not the original interior, plus the teak on the stern and the fiberglass windshield fairing are aftermarket.
 

Propellerhead

Petty Officer 3rd Class
Joined
Nov 15, 2013
Messages
94
Re: 1969 Sea Ray SRX Pachanga Build Thread

null_zpsdfce0fc7.jpg


You can see that the windshield fairing is cracking out, (it was never installed very well) so it's going in the dumpster. These didn't come from the factory with a windshield, but you could get them as a dealership accessory. So if anyone knows where I can find an original Pachanga windshield, let me know.

Before I decided to buy it, I gave it a once-over. Now, I'm not a boat expert necessarily, so I did my best. Other than the fiberglass issues around the windshield, the rest of the 'glass was in pretty good shape. I knew the transom was a little iffy, but that's to be expected with a boat of this age. It had a dead battery, which prevented me from starting it, but all of these things seemed like pretty easy fixes, so I took the plunge. Of course, it's never that simple, right?

I took it home and really started investigating. It had those cheesy teak swim platforms which I didn't really like, so I went to take them off and as you can see, they pulled right out.

null_zps4ebc453c.jpg


Whoever installed them didn't use any sealant of any kind, or even stainless hardware. So basically water crept right in and rotted the wood. Ok, I'm looking at a new transom, but I knew it was iffy. Still ok, right? I decided to put a battery in it and try to get it running. Lucky me, the boat came with the OMC garden hose attachment, so I could run it in the driveway. Apparently, they are kind of hard to find. So, I hooked up the garden hose and cranked it over, but I wouldn't start. It cranked really slowly, and the battery and starter were getting too hot to touch. So I looked around and this is what I found.

null_zps60d15e7b.jpg


That's right. The side of the block had cracked out from water freezing. So much for a running 350. It's always something, right? Ok, so now it's decision time. It's definitely more of a project than I was anticipating. But at the end of the day, I like the boat. Now that I did a little research, I think it's financially and historically worth fixing up. Also, I just flat like the boat. It's like a muscle car for the water. So I took a step back and came up with a plan. The transom is no good, the engine is no good. The outdrive was freshly rebuilt, but OMC's are notoriously crappy and expensive to fix, so this looks to me like a great candidate for a mercruiser conversion. I know it's not original, but it will work better, probably increase the value of the boat, and I feel ok because I'm putting the rest of the boat back to [close to] original condition. (With a few strategic upgrades such as a nice stereo and hopefully girls in bikinis if I can step this boats game up.) :)

http://i693.photobucket.com/albums/vv297/andymichie/Pachanga/null_zps787526e3.jpg

null_zps6423a066.jpg


And the engine comes out.
 

Propellerhead

Petty Officer 3rd Class
Joined
Nov 15, 2013
Messages
94
Re: 1969 Sea Ray SRX Pachanga Build Thread

So I looked around to see what I could find for a replacement motor. I'd love to buy everything new, but I don't have that kind of budget. Within a couple months time I collected a few options:

null_zpsda96af8c.jpg


The engine on the right is what I pulled out of the boat.

The engine on the left is the result of an online classified for a marine 350. The guy was selling it out of his boat, so I asked him he could tow it down to my shop. I'd like to hear the engine run before I popped for the $500 he was asking. Well, after an afternoon of trying, he couldn't get it to start. It was having starter issues and it was starting to leak water from the side. Naturally, I thought it probably was also cracked from incorrect winterization, so I told the guy that I'm sorry but I wasn't interested. At this point he was feeling pretty dejected and he told me that it was already here and he didn't want to bring it back, so I could just have it. Well, I was kind of surprised, but you can't say no to a free engine, so there it sits in the corner of the shop. I did a l little investigative surgery and found that it had an incorrect starter, and the water was coming from a leaky freeze plug. :0 I'm hoping this is a running 350, and the one I'm going to use for the boat.

The engine in the center is the result of another online classified. This time it's an entire boat. Yep, I don't have any pictures, but I bought a 1985 19-foot Galaxy open bow ski boat. The condition of the boat was not the best. The gelcoat was chipped and faded, the wood was rotted, the interior was junk. But, it had a complete, running Chevy V8/Mercruiser Alpha One setup. This is just what I needed. I don't want to piece everything together. I need it all assembled and working so I can just switch it over. The best part is that I only paid $350 for the whole thing. Now, the motor is only a 305, but it's a good backup if I need it. I'm planning to switch all the accessories over to the 350. So, I took out the engine, outdrive, and fuel tank, then I used a circular saw to cut out the entire transom/gimbal assembly with the umbilical (wire harness/steering cable/throttle cable) still attached to the dash. I have the entire thing still assembled so I can mix and match and use what I need. At this point the Galaxy was junk so I towed to to the landfill and they disposed of it. I then sold the trailer online for $150. So in summary: my total expenditure for a complete Chevy 350/Mercruiser setup, with the wiring harness and an extra motor: $200. I'm feeling pretty proud of myself for that one.

null_zps567fbf36.jpg


That's the gimbal/transom/dash/umbilical setup looking like a piece of junk in the corner of the shop.

So I caught you up to about 3 weeks ago. So now here comes the really crazy stuff. The result of some solid 15-hour days. Now that I know what my plan is, it's time to really dive in with some disassembly to see what I'm actually dealing with. I started with the interior. It was actually easy to remove because whoever put it in (probably the same numb nuts that's responsible for the swim platforms) didn't use stainless screws and most of them simply broke off. Although, the ones that did come out also didn't have any sealant on them. Now I'm starting to get nervous because we all know what that means.

null_zps47c5bee5.jpg


4a78c0c3-d99f-4ceb-891a-33eafc4c070d.jpg


I took the seats out and when I stepped where they used to be, my foot went through the floor.

null_zps9c95fbb2.jpg


I took all the teak off of the floor and found that none of it could support my weight. The teak was hiding the fact that there was absolutely no support.

null_zps299c9f4b.jpg


I started pulling back the fiberglass and found nothing but black mulch that used to be plywood.
 

Propellerhead

Petty Officer 3rd Class
Joined
Nov 15, 2013
Messages
94
Re: 1969 Sea Ray SRX Pachanga Build Thread

1baa3cce-26b4-4e08-8972-2aa13532dbbd.jpg


Also, the old flotation foam was broken off and just drifting around in the bottom of the boat.

null_zps2cba745a.jpg


null_zps1f7392d7.jpg


Nasty!

null_zps575c7ceb.jpg


I found some evidence in the form of old fiberglass tabbing of a bulkhead that just flat did not exist anymore.

null_zps3407184d.jpg


I filled up three pickup beds full of rotten wood and flotation foam. So I started noticing how Sea Ray put this thing together and it was kind of confusing. To their credit they did actually fiberglass the bottom of the floor and tab it to the stringers. But it looks like they assembled the entire floor upside down so they could get all the tabbing and mat done, and then flipped the whole assembly right side up and glued it to the bottom of the boat. Well that's fine and good except for the fact that the glue didn't hold, so all the stringers were loose in the bottom of the boat. But, the good part of that is that even though the stringers were rotten, I could probably pull them out whole to use them as a template. So that's what I did. The first thing that needed to happen is that the giant (I'm guessing 50-gallon) fuel tank needed to come out. But it was still pretty heavy with gas.
 

Propellerhead

Petty Officer 3rd Class
Joined
Nov 15, 2013
Messages
94
Re: 1969 Sea Ray SRX Pachanga Build Thread

null_zps30a39b18.jpg


null_zpsc678716a.jpg


If anyone is looking for a slick way to empty a fuel tank, plug the vent and use an air gun (sealed with a shop towel) to pressurize the tank. All you have to do is run the fuel line that usually goes to the carb into an appropriately sized bucket. All you have to do is pressurize it and wait for the flow to start. Once it starts, it will develope a siphon and you can remove the air gun and wait for the fuel to drain. I didn't think there was too much gas in there, but I filled up 2 5-gallon buckets and another 3 portable gas cans.

null_zps56f4e0e2.jpg


Here's the tank out.

null_zps4ca2e09b.jpg


The engine compartment with all the equipment out. Ready for the circular saw.
 

Propellerhead

Petty Officer 3rd Class
Joined
Nov 15, 2013
Messages
94
Re: 1969 Sea Ray SRX Pachanga Build Thread

null_zpsa1d338d1.jpg


null_zpsb1a706c8.jpg


null_zps06d1f02a.jpg


I'm somewhat surgically taking everything out so I can figure out how to put it all back together.

null_zpsc23d6d8b.jpg


Here's the bottom of a stringer. It's covered in fiberglass, but it's only attached to the boat with some busted glue.

null_zpseb32d635.jpg


I was able to carefully extract all the stringers in one piece.

null_zps650144c7.jpg


I also made some diagrams so I could remember how it all went together.
 

Propellerhead

Petty Officer 3rd Class
Joined
Nov 15, 2013
Messages
94
Re: 1969 Sea Ray SRX Pachanga Build Thread

null_zps01c366e6.jpg


Finally! All the old wood, fiberglass, and foam are out of the boat.

null_zpsd64aca52.jpg


null_zpsd6ea0fda.jpg


I took the boat down the street to the car wash so I could clean and degrease the bottom of the hull.

null_zps64c5f95e.jpg


All nice and clean!

All right, that's it for me tonight. I still haven't caught everyone up yet, but I'll continue tomorrow. At least the project is under way. Step one to girls in bikinis is complete!
 

greenbush future

Lieutenant Commander
Joined
Aug 28, 2009
Messages
1,814
Re: 1969 Sea Ray SRX Pachanga Build Thread

That's one nice looking classic, I had no idea they made Pachanga's in the 60's, I've seen newer models from the late 90's I think at 23 feet with big blocks in them. They had some issues with being over powered (the big block ones)and not being strong enough around the transom/hull to support the engine twist or torque/ My buddy managed to get his 23 footer airborne on some waves and it cracked the hull about 1 foot from where the transom ties in to the hull. They totaled the boat out and he was darn lucky he didn't sink. Your 19 footer looks just awesome, I'm tagging along just to see the outcome, very nice lines on that classic.
 

Propellerhead

Petty Officer 3rd Class
Joined
Nov 15, 2013
Messages
94
Re: 1969 Sea Ray SRX Pachanga Build Thread

Thanks guys!

That's one nice looking classic, I had no idea they made Pachanga's in the 60's, I've seen newer models from the late 90's I think at 23 feet with big blocks in them. They had some issues with being over powered (the big block ones)and not being strong enough around the transom/hull to support the engine twist or torque/ My buddy managed to get his 23 footer airborne on some waves and it cracked the hull about 1 foot from where the transom ties in to the hull. They totaled the boat out and he was darn lucky he didn't sink. Your 19 footer looks just awesome, I'm tagging along just to see the outcome, very nice lines on that classic.

I had no idea that the later Pachangas had those problems. They are cool looking boats, and they are the ones that mostly come up when I'm trying to research the early ones.

Well, at this point in the project it's time to dig the transom out.

null_zps01e13115.jpg


You can see the lower have is mostly black and nasty. There's a little bit of solid wood in there, but not much.

null_zps42c8b010.jpg


As I chisel out the layers of plywood, I'm noticing a whole lot of large holes that have been "repaired." (As in filled in with epoxy and painted over. I'm going to use this as an opportunity to get everything right. I don't know why a transom needed 7 three-inch holes, but that's what I count, not including the holes for the outdrive, trim cylinders, etc.

null_zps666d63d3.jpg


Here it is with most of the wood out.
 

Propellerhead

Petty Officer 3rd Class
Joined
Nov 15, 2013
Messages
94
Re: 1969 Sea Ray SRX Pachanga Build Thread

In the meantime I took the fuel tanks to the radiator shop to have them boiled out and pressure tested.

null_zps2996ed07.jpg


The tank on the right is the original one from the Pachanga. The tank on the left is the 25-gallon tank from the 1985 Galaxy parts boat. Since the Galaxy tank fits perfectly in the other side of the engine compartment, my plan is to use both of them. It's a ton of fuel, (probably more than I really need), but I plan on using this boat in a location that's some distance away from a marina or gas station, so I figure the more fuel capacity, the better.

I did a little research on the USCG rules for marine fuel systems, because I don't want to have to deal with two fuel pumps, and selector valves, and fillers, etc. I want to figure out a way for the auxiliary Galaxy tank to gravity feed into the. Pachanga tank with no work load on my part. Besides, if the tanks are fairly level, the fuel level will still read accurately from the original sender unit. I figure it works for airplanes, why not boats. Well, this necessitated drilling the tanks for transfer lines, and my concern was that I'd need some sort of anti-siphon device. But, luckily, according to the Coast Guard's website, anti-siphon feed lines or valves are only required on rubber lines to the engine. So, I'll do the transfer lines in a hard (coated) steel.

I marked the tanks for two lines, one 3/8 feed/transfer line at the bottom, and one 5/16 vent line at the top. My plan is to orient the two tanks in the boat much like they are in the picture, with the forward sides lined up, and the aft side of the Pachanga tank extending lower. This will turn the aft part of the Pachanga tank into a sort of "collector box" for both tanks to gravity feed into. Hopefully this makes sense, I'll try to take some more pictures of the system when it's installed.

null_zps1eaad18e.jpg


null_zpsbf0ace83.jpg


The tanks are marked for the radiator shop to weld in pipe thread bungs.

null_zps92c907e7.jpg


I also marked the sending units so I could remember which way they went back in.

null_zps8f21b34d.jpg


Some seriously long floats.
 

Propellerhead

Petty Officer 3rd Class
Joined
Nov 15, 2013
Messages
94
Re: 1969 Sea Ray SRX Pachanga Build Thread

So now it was time to start making the new stringers, bulkheads, and floor.

null_zps0edae2f6.jpg


null_zps809365e1.jpg


null_zpse24a7e0a.jpg


null_zpsbd9f9db1.jpg


Remember those stringers that I was able to extract [mostly] in one piece? Well, I was able to lay them down over the top of the new wood to trace the pattern. You can really see the difference between the new and old. I'm using fir where I can except the two inboard stringers are too long, the lumber place didn't have what I needed, so I'm using pine for those.
 

Propellerhead

Petty Officer 3rd Class
Joined
Nov 15, 2013
Messages
94
Re: 1969 Sea Ray SRX Pachanga Build Thread

null_zps30860c6c.jpg


You can see where the straight edge that mates to the floor is mostly just gone. This piece is lined up on the new wood in a way that you can really see just how much is missing.

null_zpsbf78fd49.jpg


This stringer did actually break, so we had to line it up the way it was to get the pattern.

null_zps4859524a.jpg


Here's another little trick that worked pretty well. For the sections that were completely missing on the bottom side, we used a metal straight edge on its side to follow the curve and trace it onto the board.
 

johan75

Seaman Apprentice
Joined
Jul 31, 2011
Messages
34
Re: 1969 Sea Ray SRX Pachanga Build Thread

What a sweet looking boat, man I love those classic lines! When you're done she's going to be crazy fast and when looking at how well you're doing with the restore, that's not too far in the future.
 

Pmccraney

Lieutenant Commander
Joined
Jul 26, 2011
Messages
1,734
Re: 1969 Sea Ray SRX Pachanga Build Thread

Signing on to follow along.... Looks like a cool boat and worthy of restore...
 

archbuilder

Vice Admiral
Joined
Sep 12, 2009
Messages
5,697
Re: 1969 Sea Ray SRX Pachanga Build Thread

Hmmmm this all looks familiar, lol! Great looking boat, I'm looking forward to seeing your progress!
 

Propellerhead

Petty Officer 3rd Class
Joined
Nov 15, 2013
Messages
94
Re: 1969 Sea Ray SRX Pachanga Build Thread

Thanks everyone!

null_zps4d9ed2a0.jpg


null_zps78076aeb.jpg


We did a test fit of the new stringers. Obviously, it won't be exact since the transom isn't there, but you can get an idea, and they look pretty good. We were able to line everything up with a straight-edge and clamps.

So now it was time to make the new transom.

null_zpsaf392301.jpg


Since the old one was in a million pieces, I used a large cardboard box to make a template. It took quite a while of fitting, trimming, fitting, trimming, etc. but I got it.

null_zpsd32cbaf6.jpg


null_zpsfff6915e.jpg


I laid the template over two pieces of 3/4 inch AC plywood. Mercruiser recommends a transom thickness of between 1 7/8" and 2 1/8". I'm thinking this will be just about right when you include the added thickness of the original fiberglass, plus 3 layers of new mat. I weighed the template down so it wouldn't move while I traced around it.

null_zpsfe34286d.jpg


Some circular saw/jig saw time later, we have a new transom.
 

Propellerhead

Petty Officer 3rd Class
Joined
Nov 15, 2013
Messages
94
Re: 1969 Sea Ray SRX Pachanga Build Thread

Now was the moment I was dreading. Grinding the fiberglass on the inside of the hull so it would bond with the new stuff.

null_zpsd2ad4db3.jpg


I cleared Harbor Freight out of their supply of 40-grit flap discs.

null_zps46bd63d6.jpg


Time to suit up to prevent the itchies.

null_zps0abb7e40.jpg


null_zps9ad27ceb.jpg


null_zpsf0e122cc.jpg


null_zps9eed3fa2.jpg


Lots of dust and grinding and general misery.
 

Propellerhead

Petty Officer 3rd Class
Joined
Nov 15, 2013
Messages
94
Re: 1969 Sea Ray SRX Pachanga Build Thread

null_zps6c87e2aa.jpg


Me after hours of sitting in a loud, dusty, vibrating, uncomfortable fiberglass bucket. I think it took about 3 days of consistent work. But at least it's over (for now). I finally got smart and just left the shop vac running with the hose nearby to collect the dust as I was making it. Even so, each hour or so, the filter would get clogged and I'd have to empty it. It's still a lot better than laying in so much dust it felt like I was at the beach. A really crappy beach.

null_zpsad7f0535.jpg


null_zpsa36de996.jpg


Now that everything was nicely scuffed and vacuumed, I did a test fit of the new transom. I know some people use 2x4s for clamping, but they often aren't straight, so I used 2" angle iron that's bolted through the transom with bolts and fender washers. I supplemented it with more bolts and fender washers in places where the transom was going to be drilled through anyway such as the drain plug, transom light, and tow hooks.
 

Bamaman1

Lieutenant Commander
Joined
May 15, 2011
Messages
1,895
Re: 1969 Sea Ray SRX Pachanga Build Thread

I have read of a number of stringer, stern and decking reconstructions on this website over the years. Have you researched how to fiberglass stringers and rebuild this boat? Doing such a reconstruction can be a 150 hour job, not including reupholstering the boat.

Do you know about modern fiberglassing techniques, including how to epoxy the stringers to the hull? Are you using the right wood for your stringers? (You leave a gap off the floor and fill it with epoxy.) The supplies you will use have changed since your boat was built. Many builders will use the West System, or comparable products.

If you are winging it, please stop and do some serious research on reconstruction of fiberglass boats. So far, you've done the job right. But you're at the point right now where you can really screw up.

One thing I would never do us use hardware store plywood on any boat, as it's got too much water in it. Marine plywood is better to use in any boat, and will last a long time. To use common plywood, there are a number of waterproofing steps required.

Another thing I would have done is keep the donor boat assembled, and remove the outdrive, engine and transom mount piece by piece and to swap to the other boat . My memory cannot remember where everything goes very long. And it's going to be quite sometime before the hull will be ready for the running gear.

You for sure will want to have a 350 cubic inch motor in the boat. I'm not an engine builder, however my grandson is really good at building dragsters. I would be getting him to disassemble the intended motor, and rebuild the engine completely.

I would also be looking for a qualified marine mechanic to guide me in putting the inboard outboard components back in the hull. I've never been very good at getting the bellows on I/O's sealed up, and a professional can handle that part of the job better than me, the amateur.

What's nice to say is that Sea Rays are classically styled boats, and their fiberglass is substantially thicker than other boats. You're taking on a monumental job rebuilding this boat, but when finished a properly rebuilt quality boat can be better than when it was new. Good luck to you on this one. My hat's off to you keeping a great boat from where all old fiberglass boats go--to the city dump.
 
Top