1974 Bayliner Discovery 1850 Restore

74bayliner

Chief Petty Officer
Joined
Aug 23, 2011
Messages
607


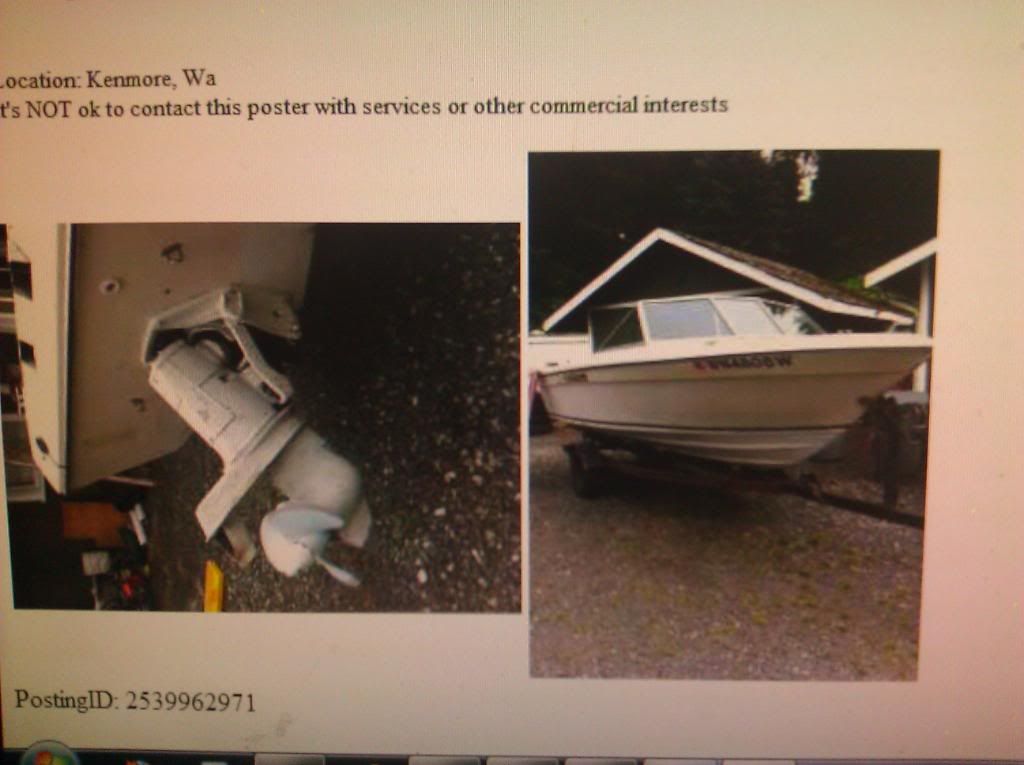
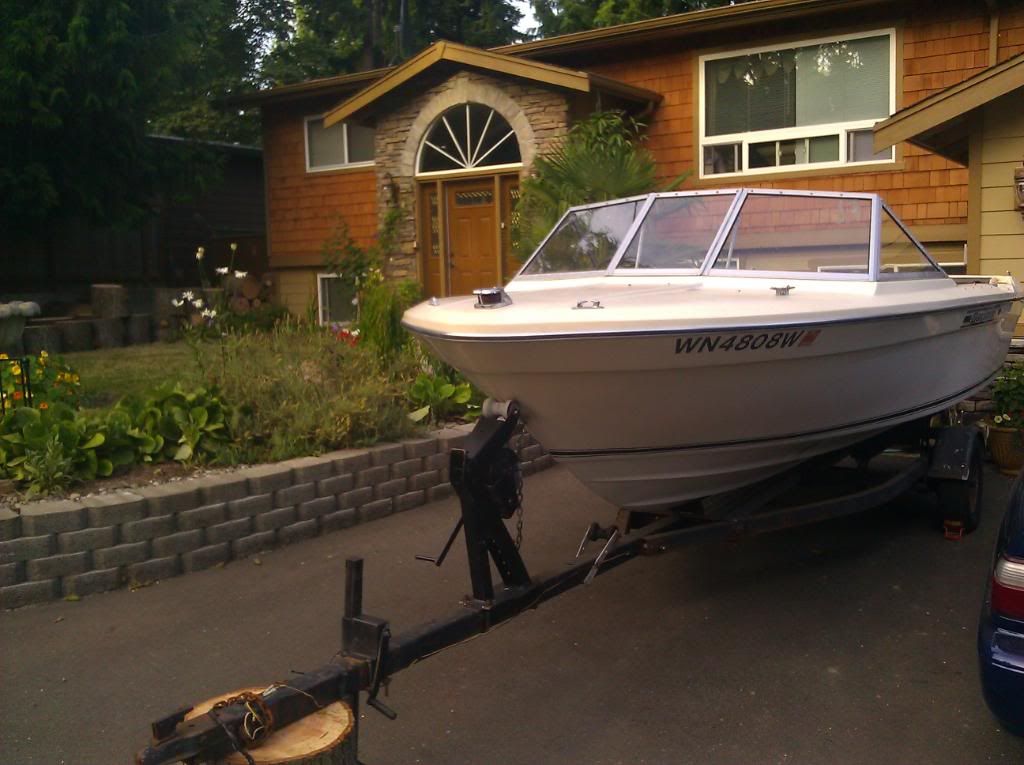
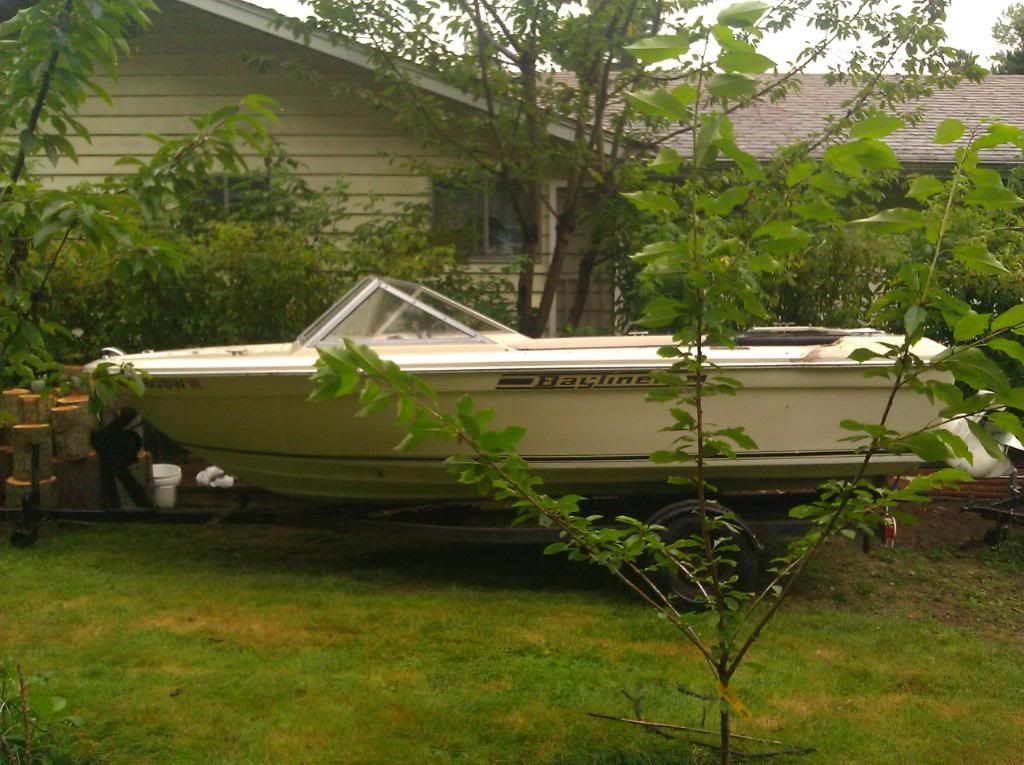
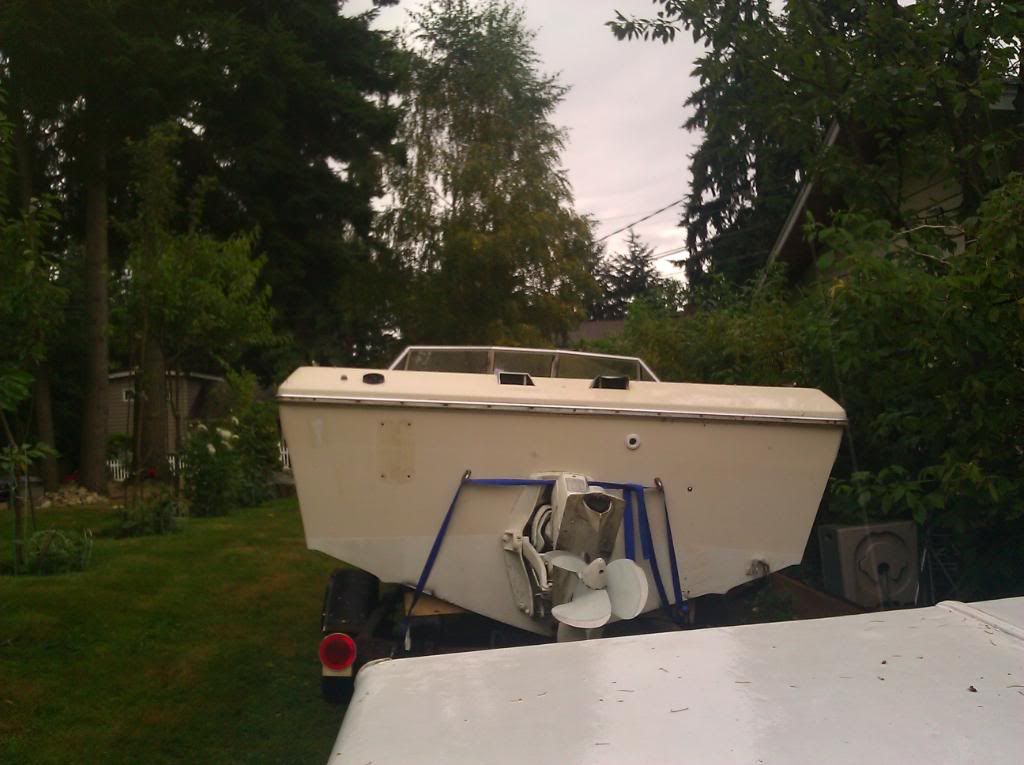
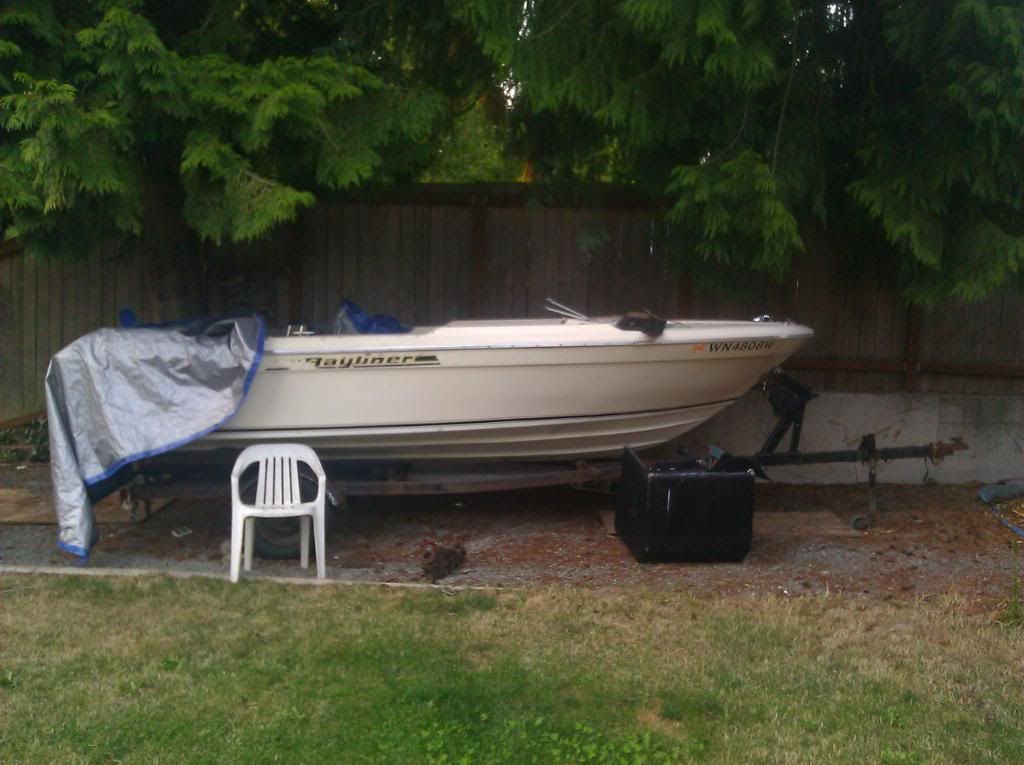
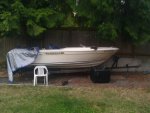
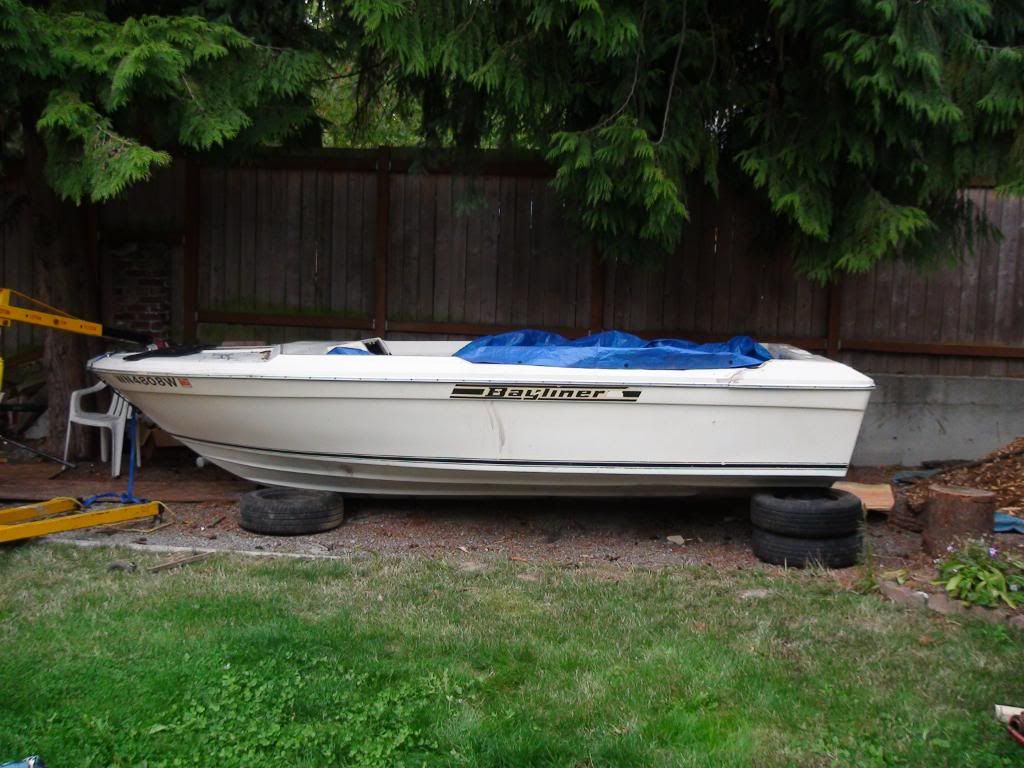
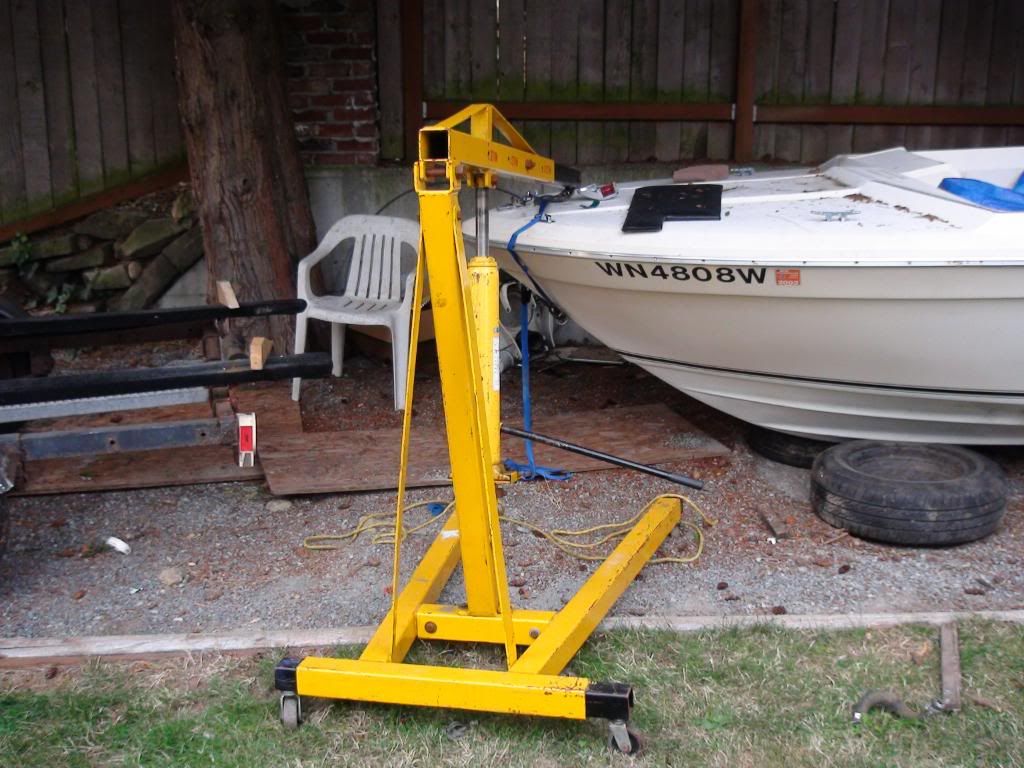
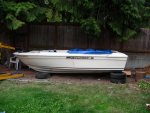
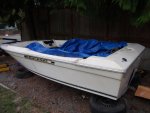
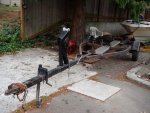
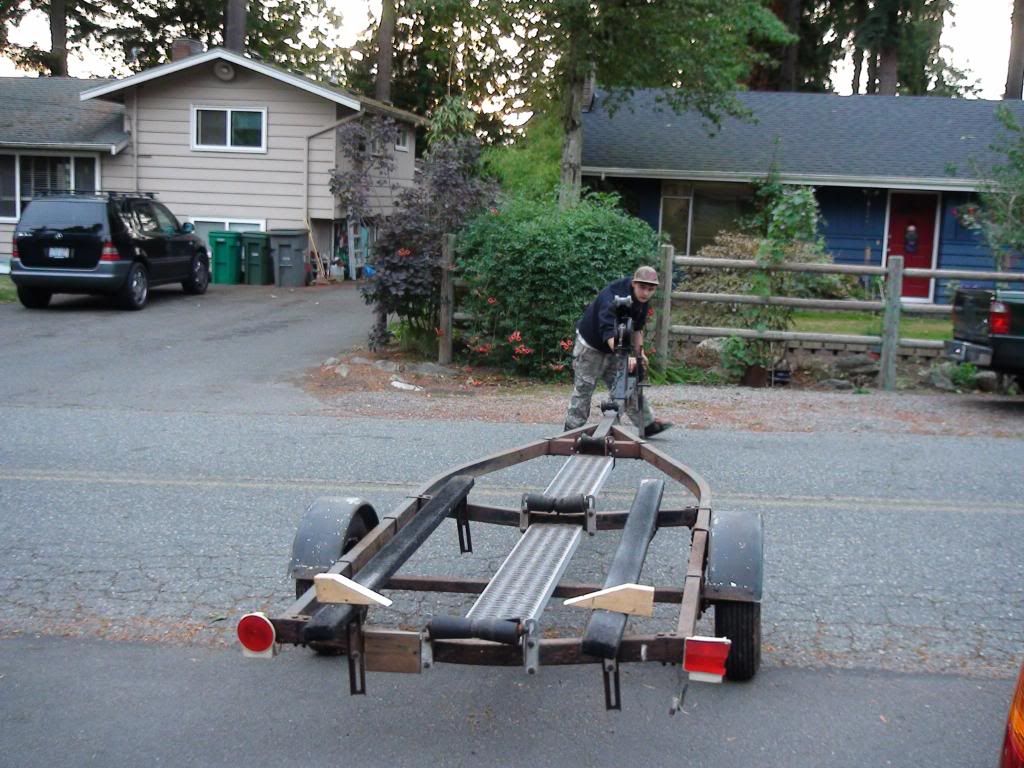
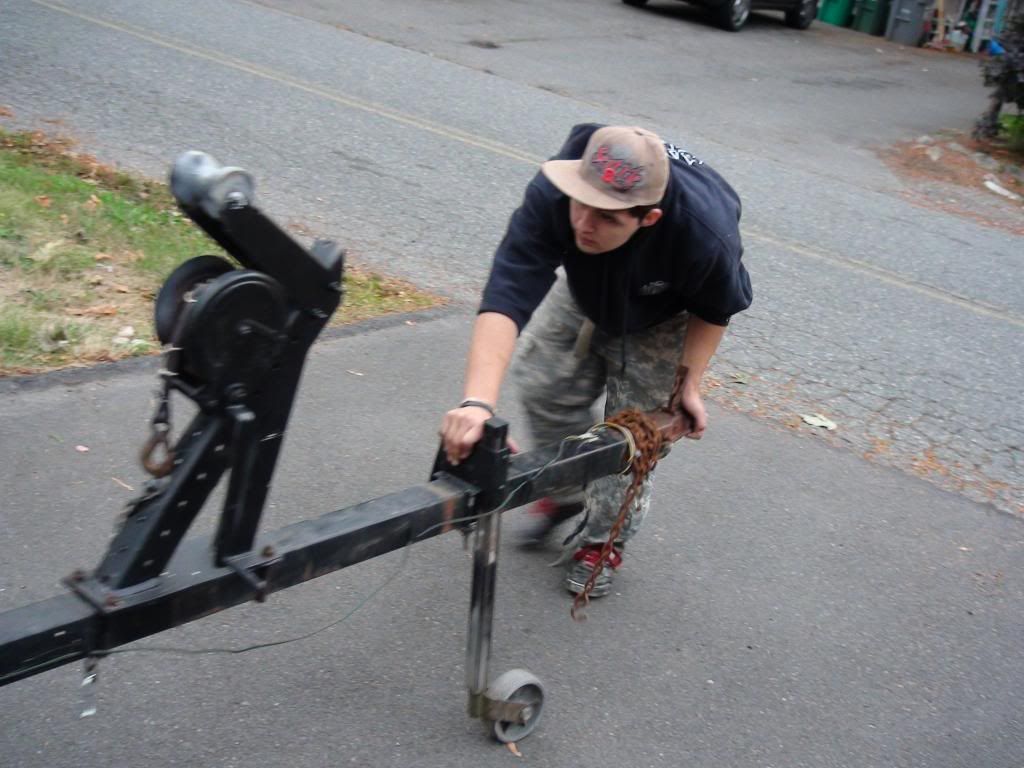
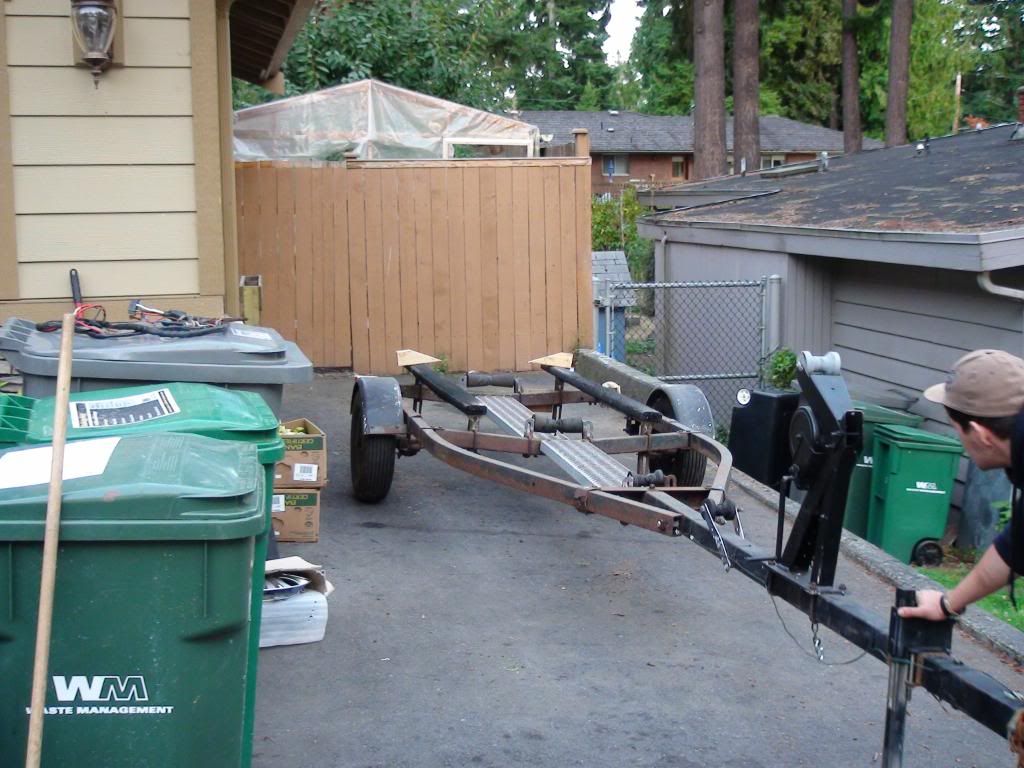
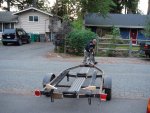
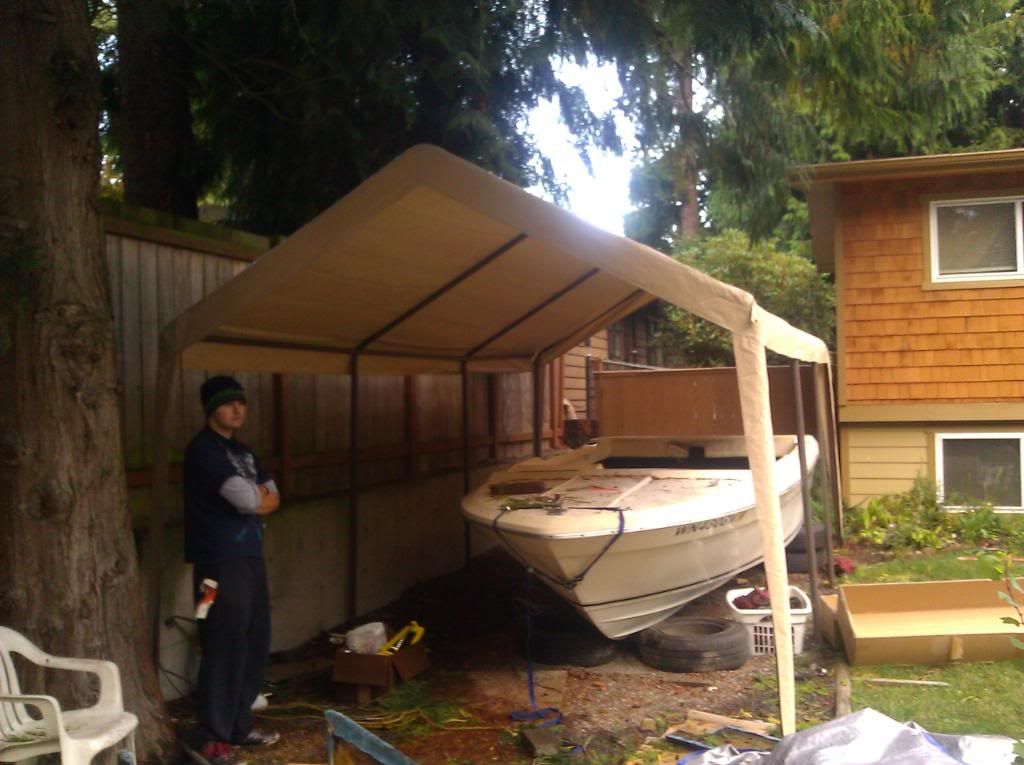
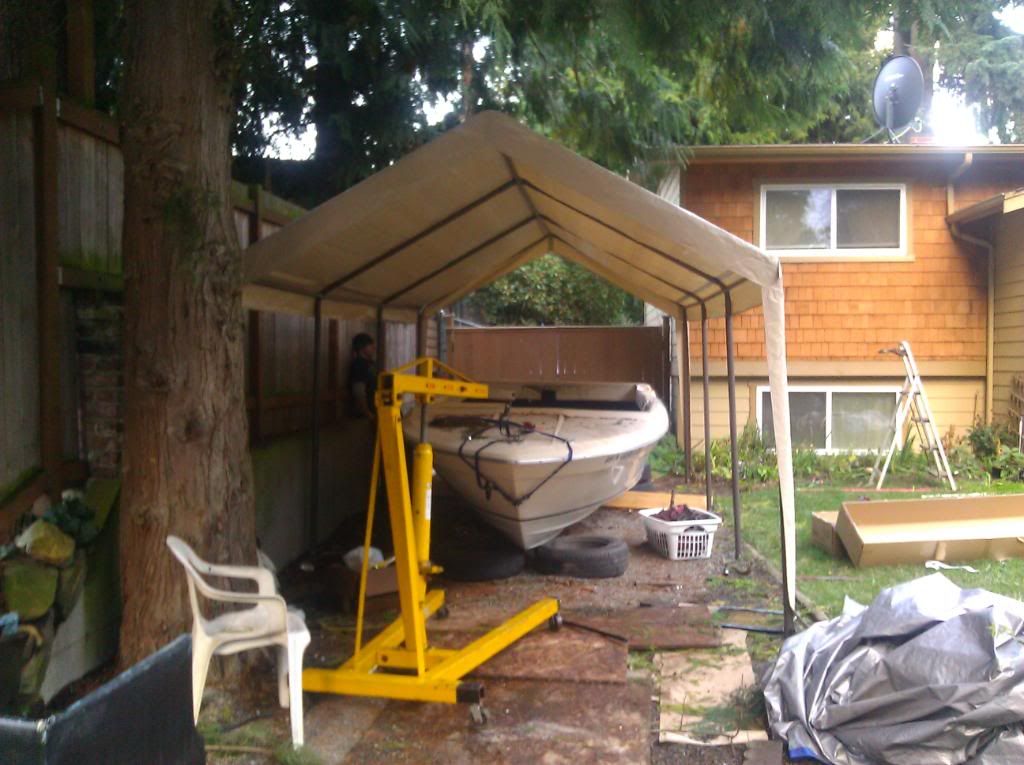
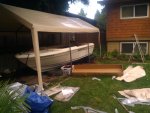
Hello. My name is vlad i am 22 years old and i live in the city of Everett, Wa. I recently purchased a boat & trailer package for 50 dollars from a gentleman from Kenmore, WA. I have never really had an interested in boats until i bought this baby. Old and rusty as it may be, it is still mine and i am going to transform it into something that i love.
I have been doubted by many around me and personally i have had a few doubts of my own. I will be taking this journey one step at a time and hopefully I will splash it next summer, and in the future i may do some more work on it. Most of the work needed is on the following:

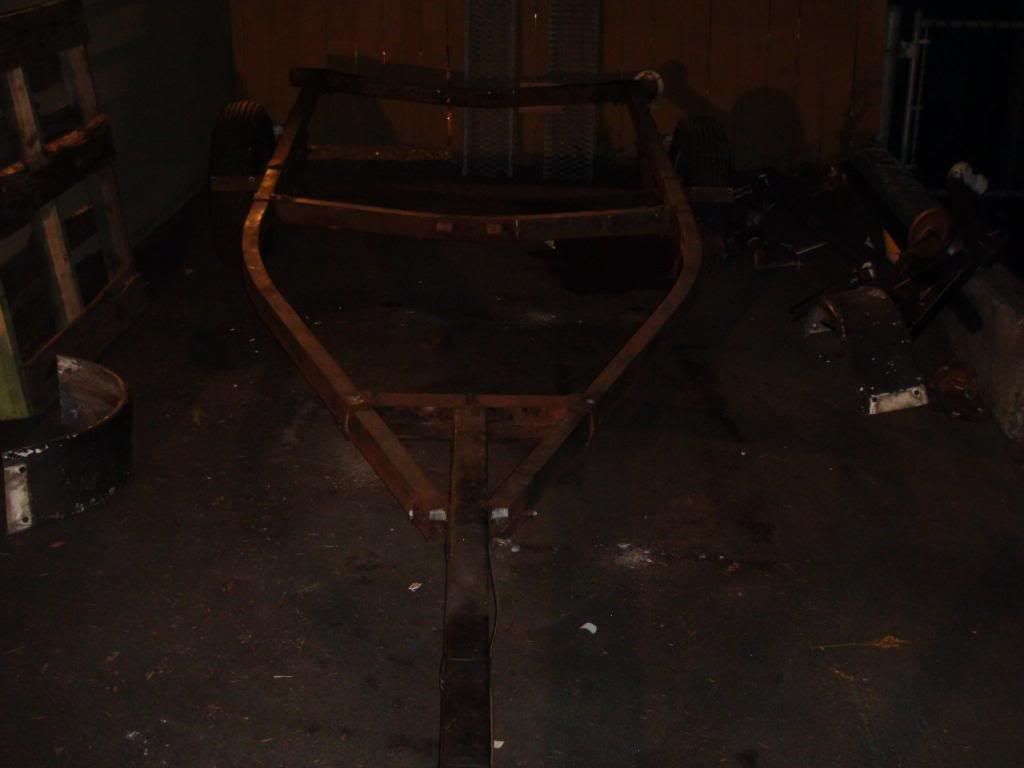
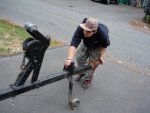
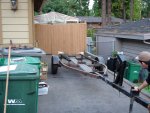
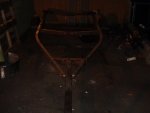
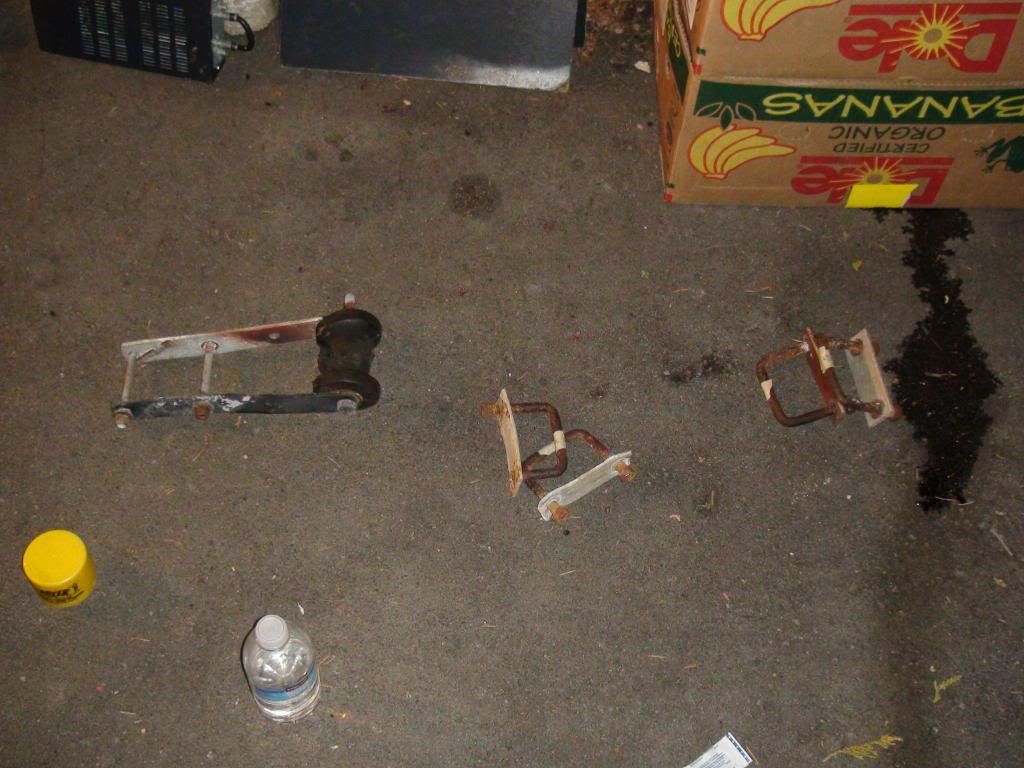
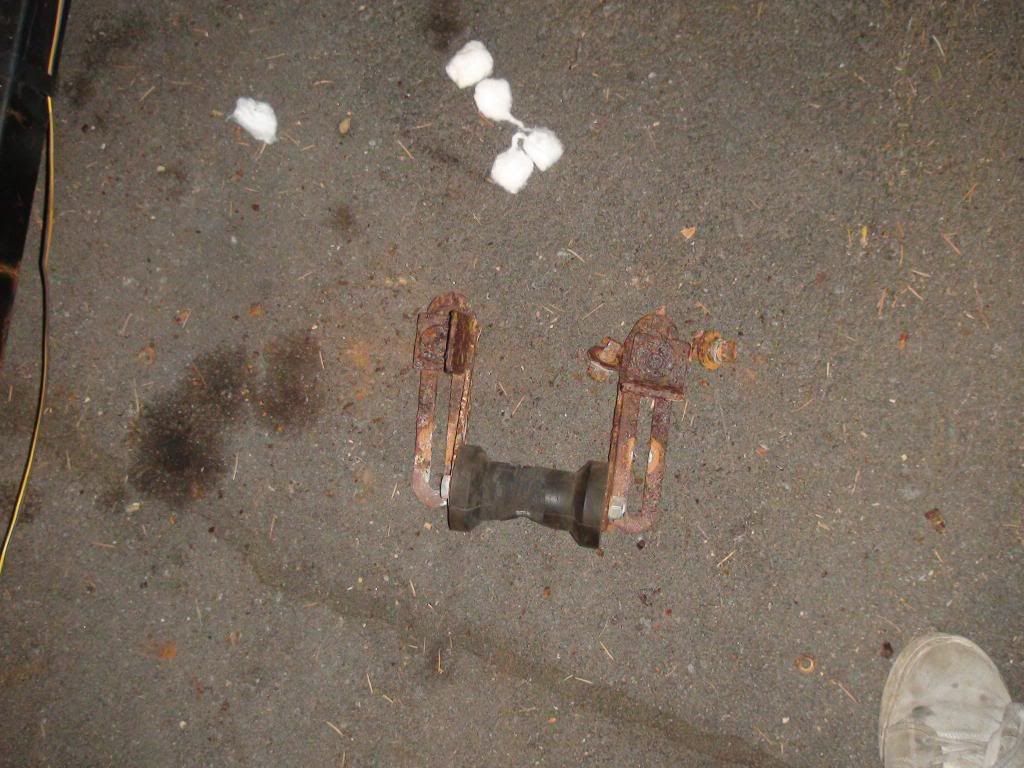
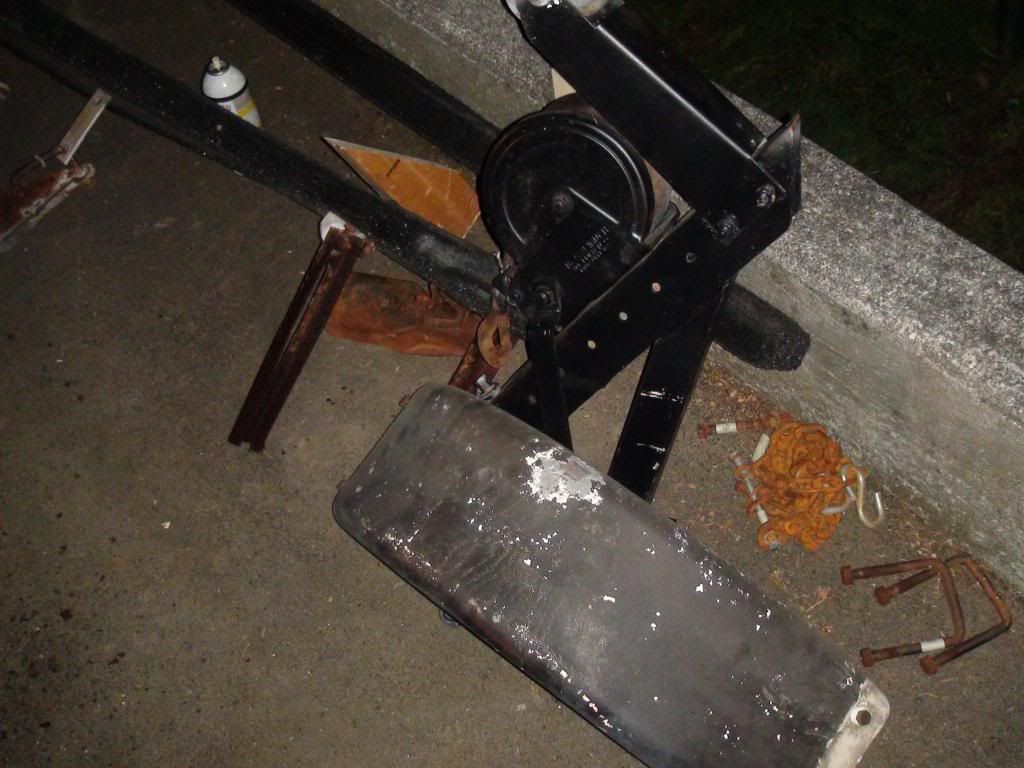
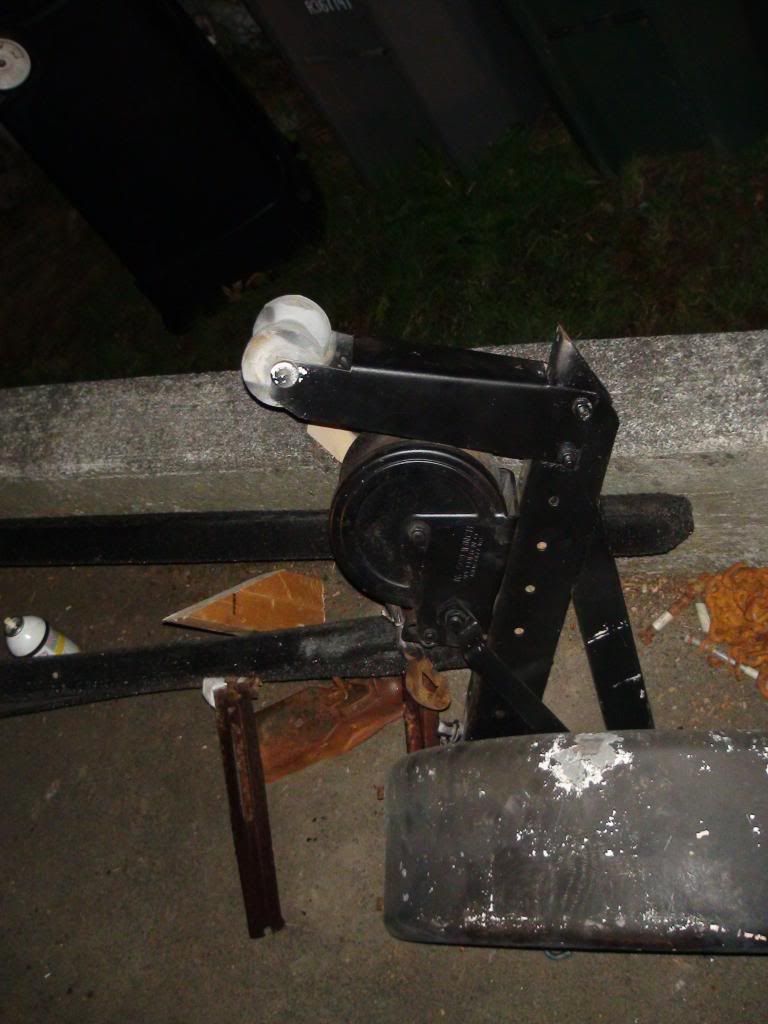
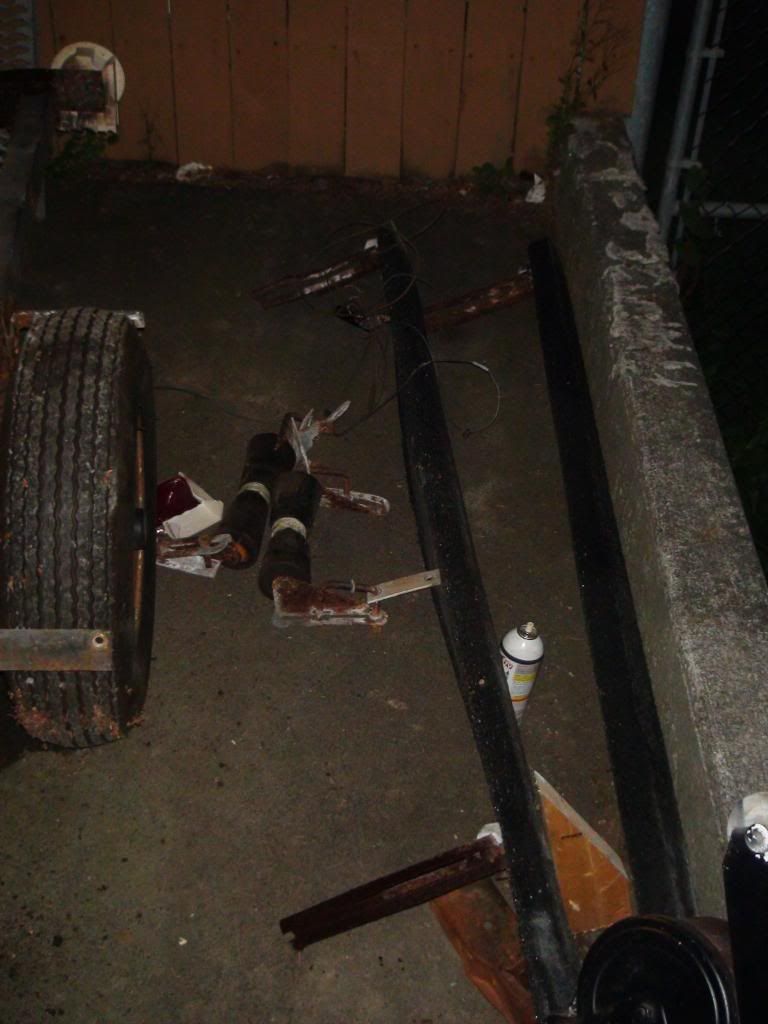
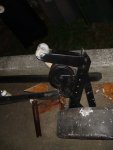
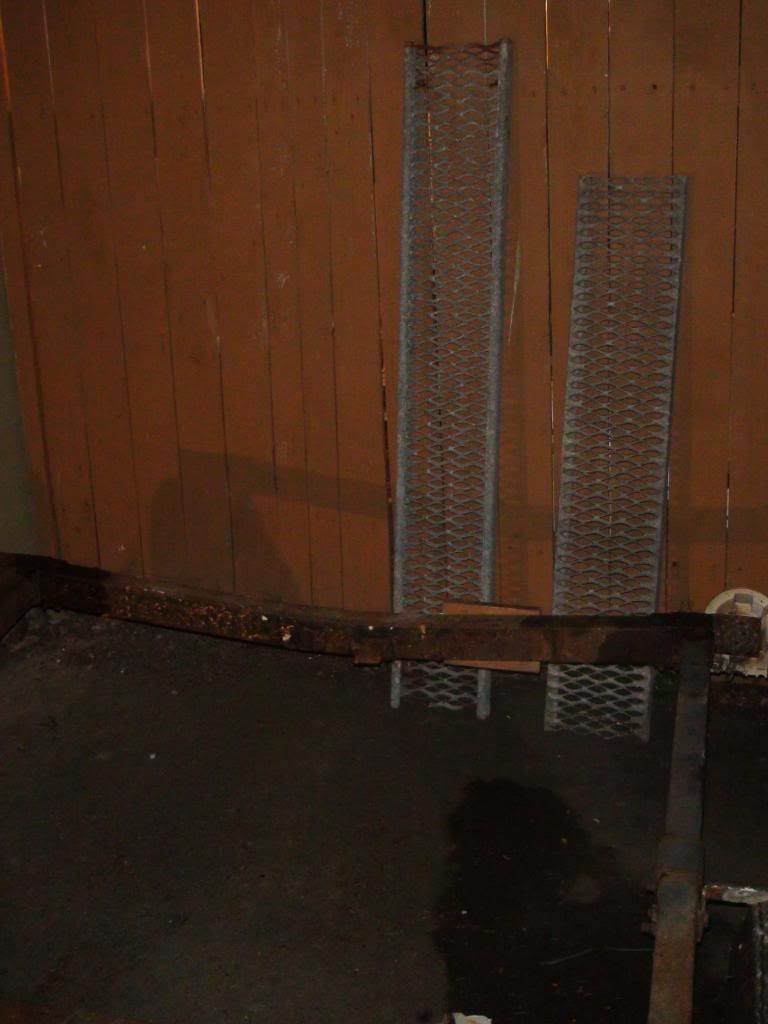
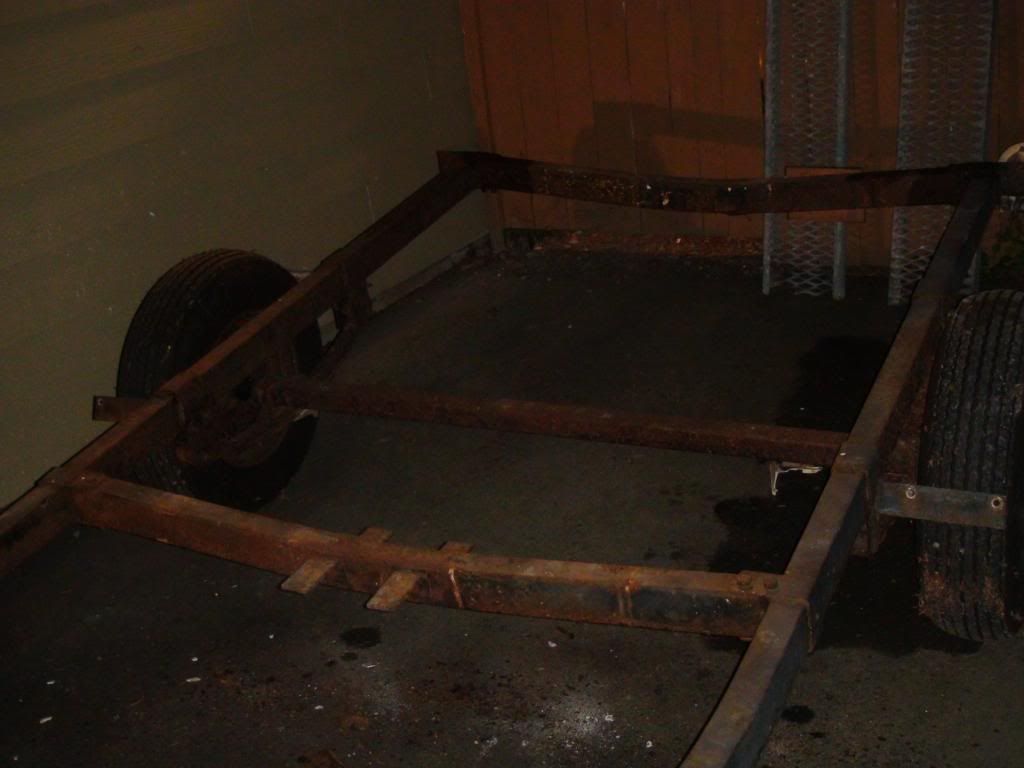
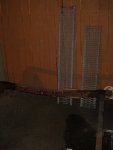
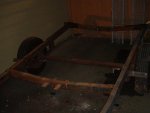
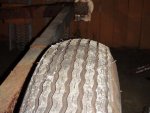
Trailer (Rebuild, new lights, bolts, derust and prep&paint)
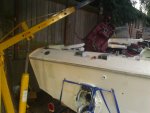
Boat Exterior (fix dings, spider cracks, sand prep&paint, new accesories)
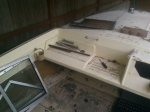
Boat interior (lay down more glass for reinforcement, new flooring, new engine cover, new seating, new dash, fiberglass moulding new accesories)
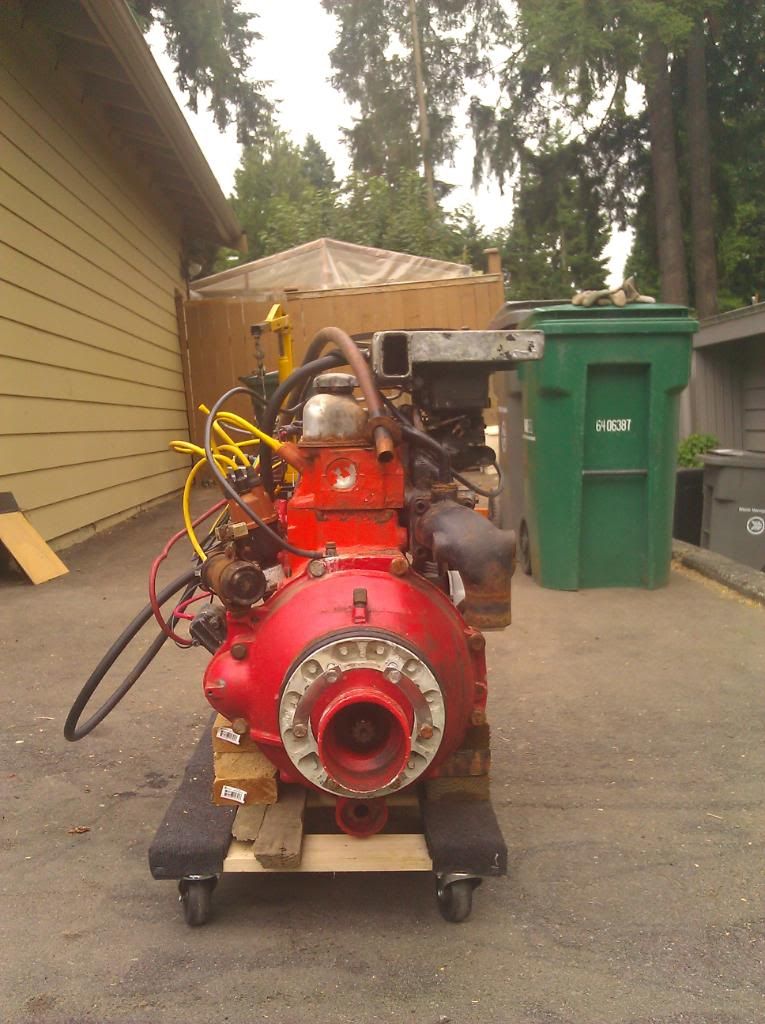
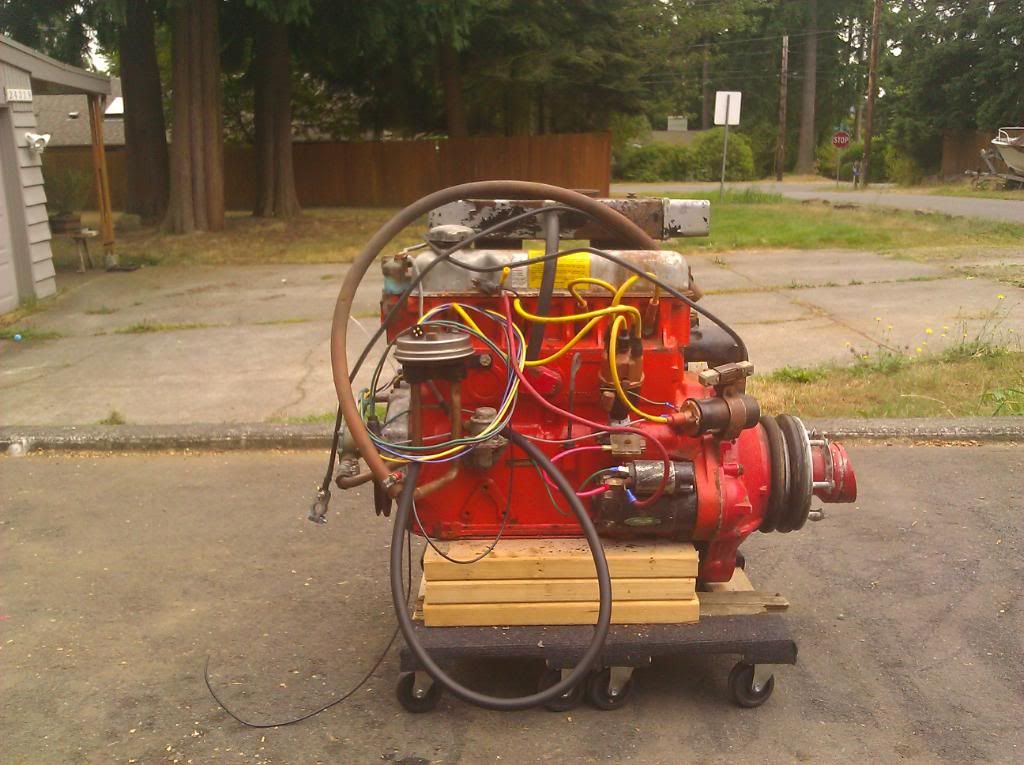
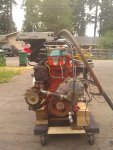
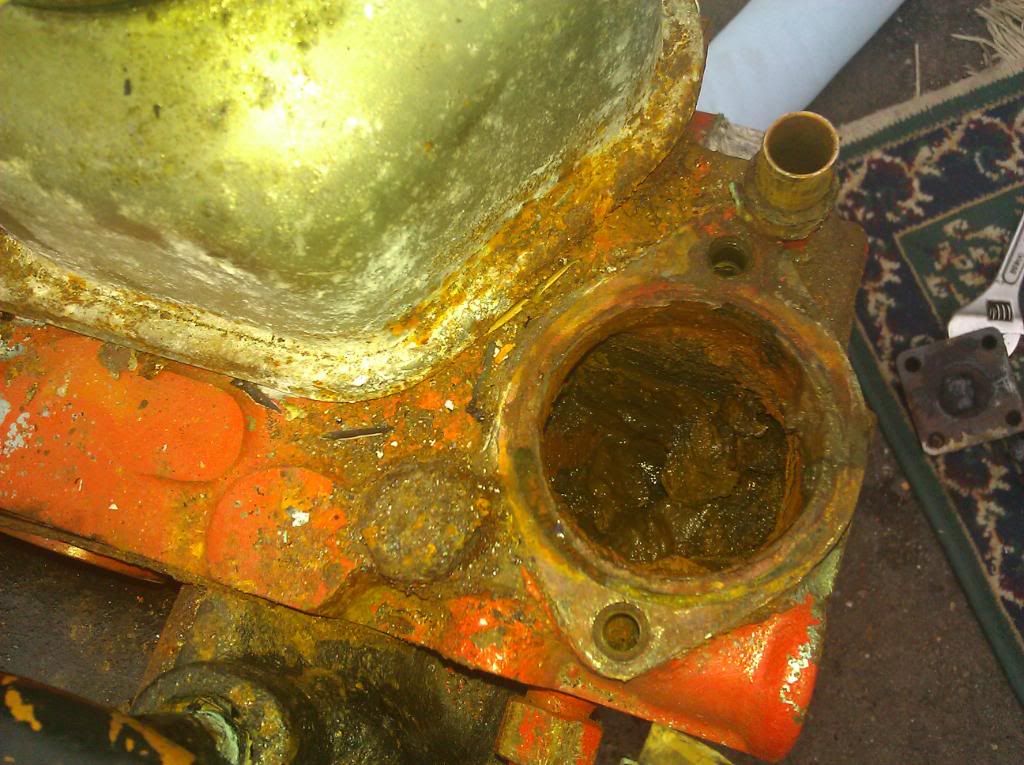
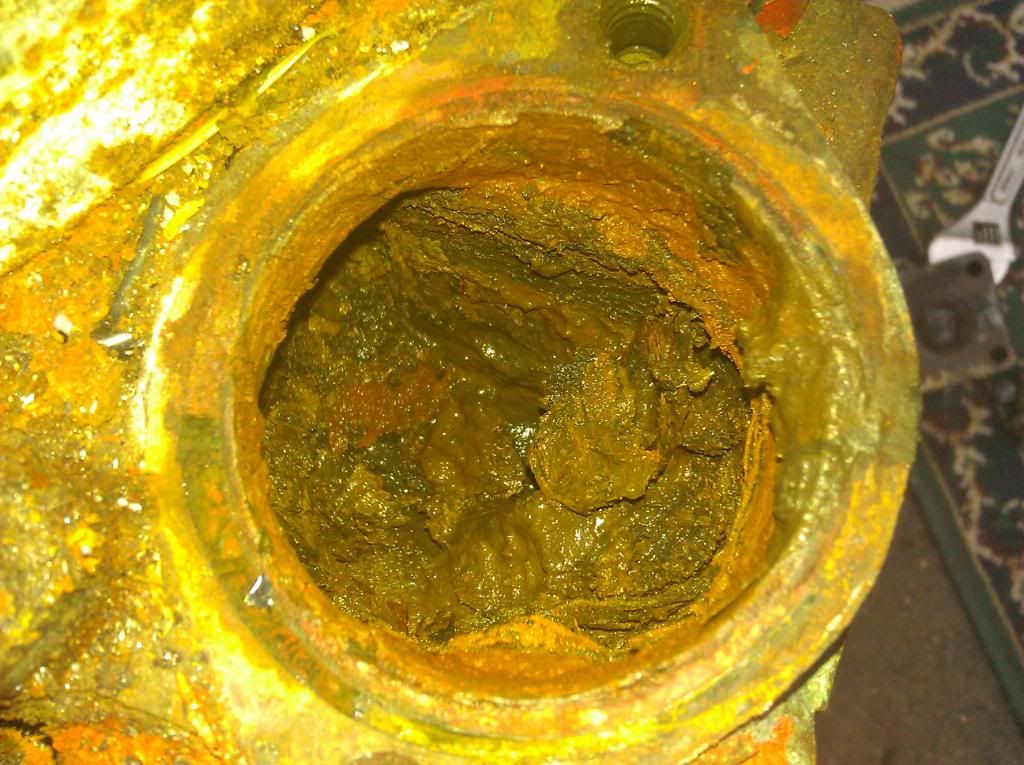
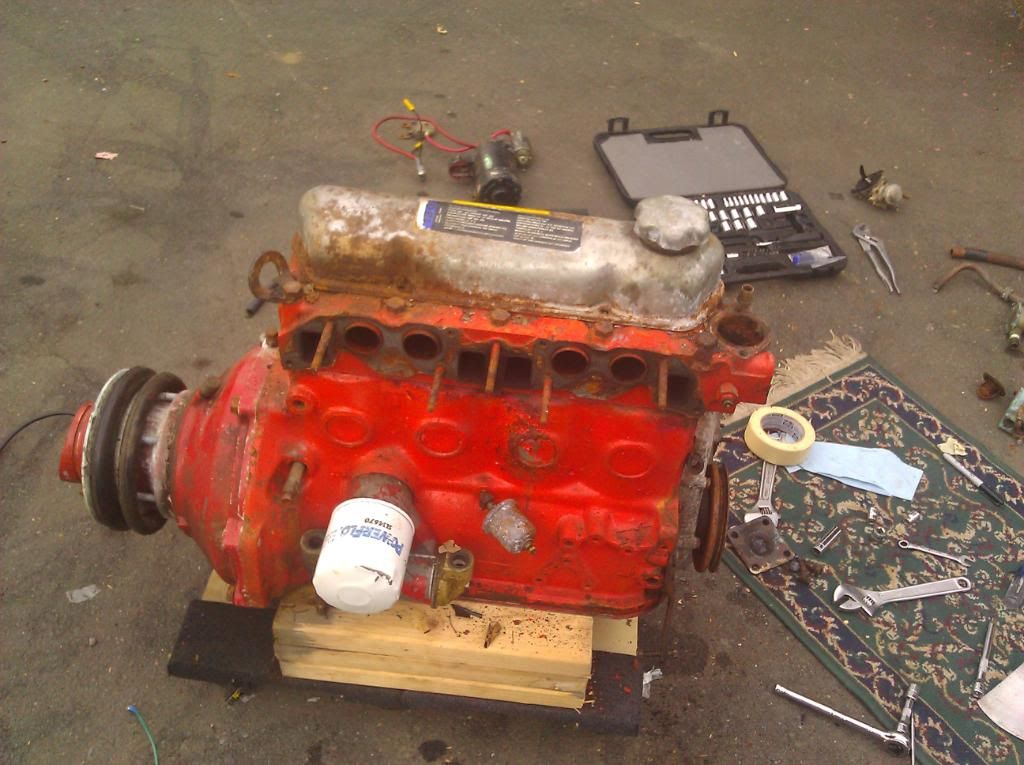
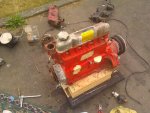
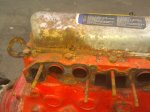
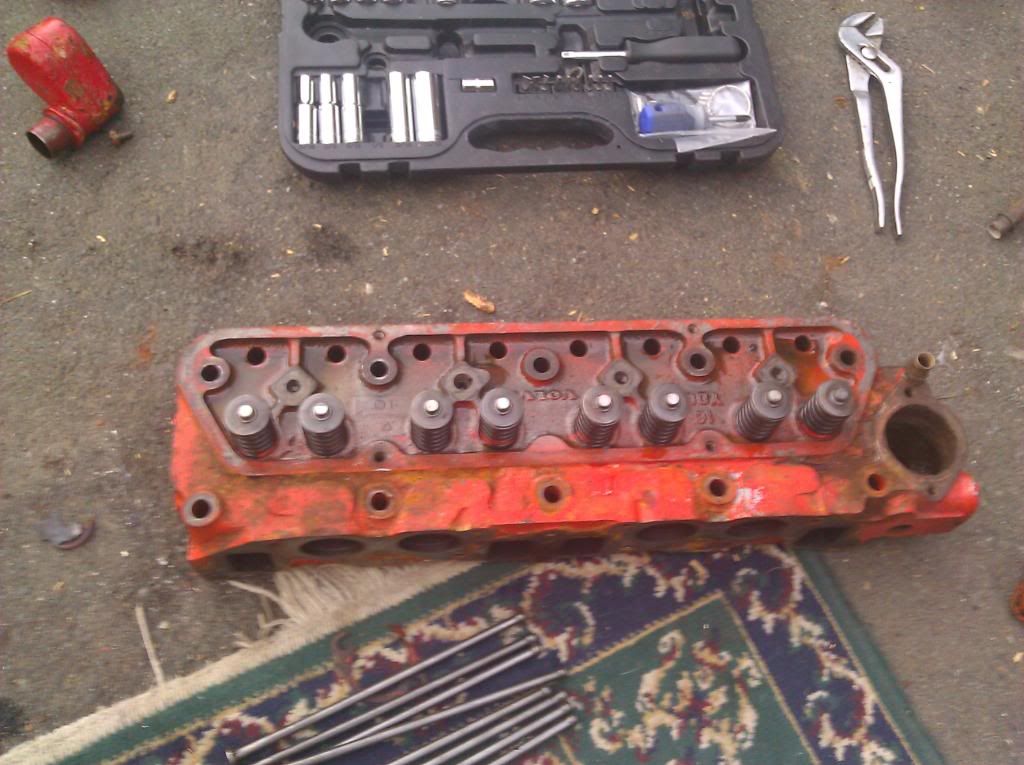
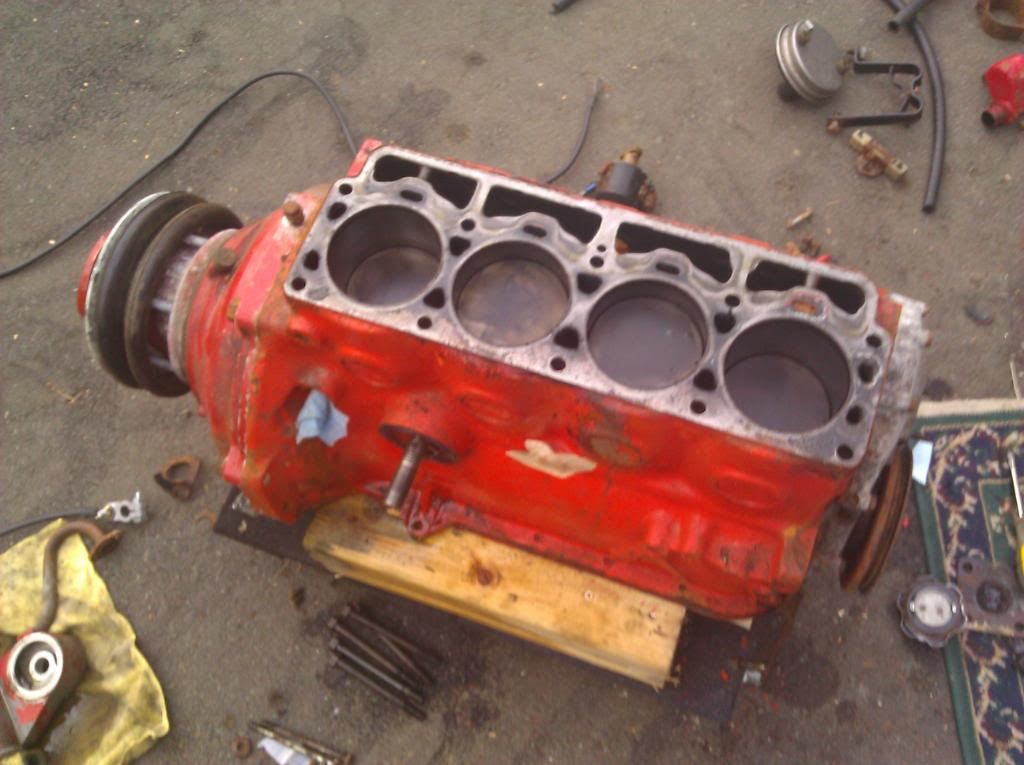
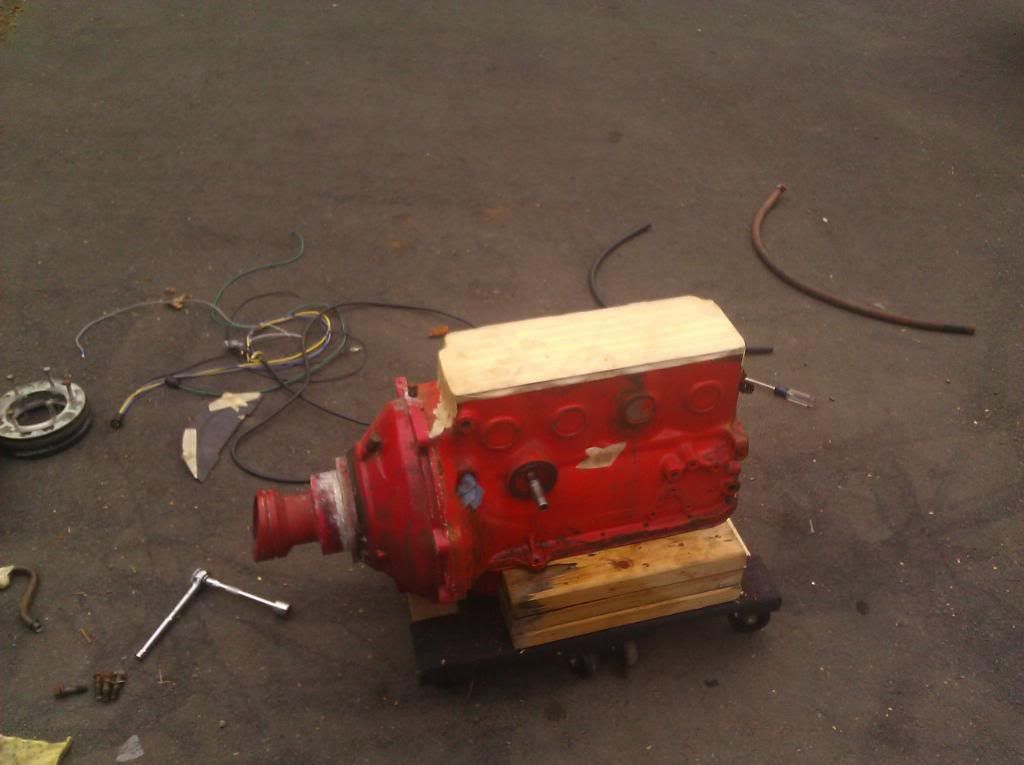
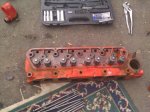
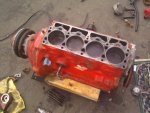
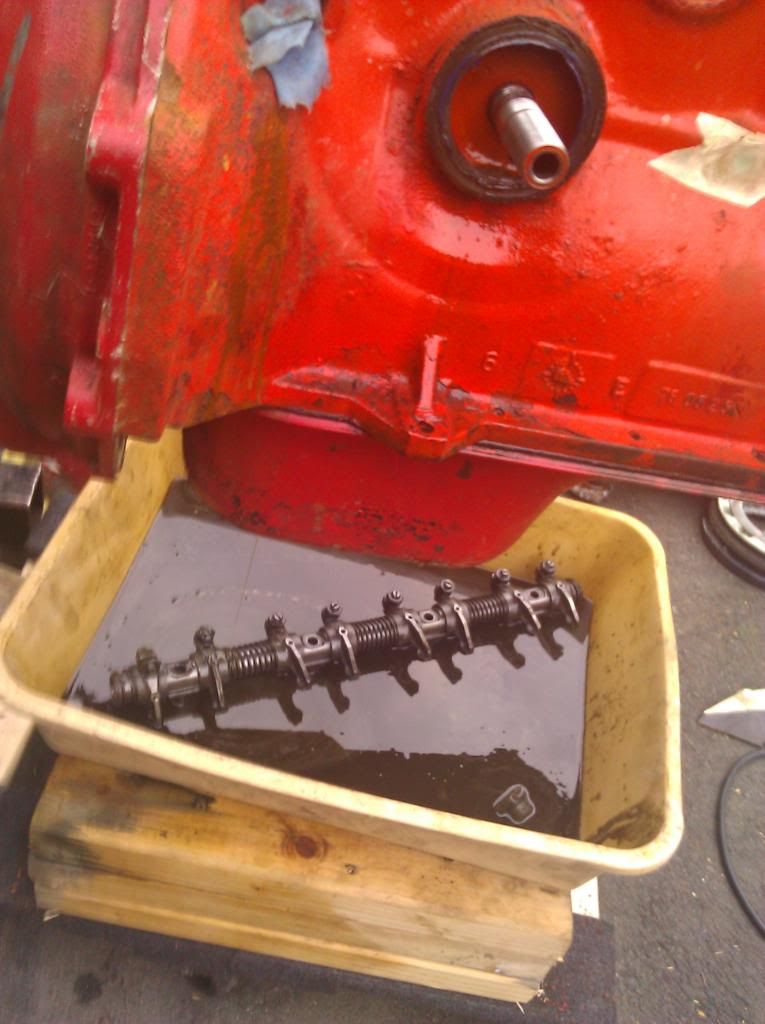
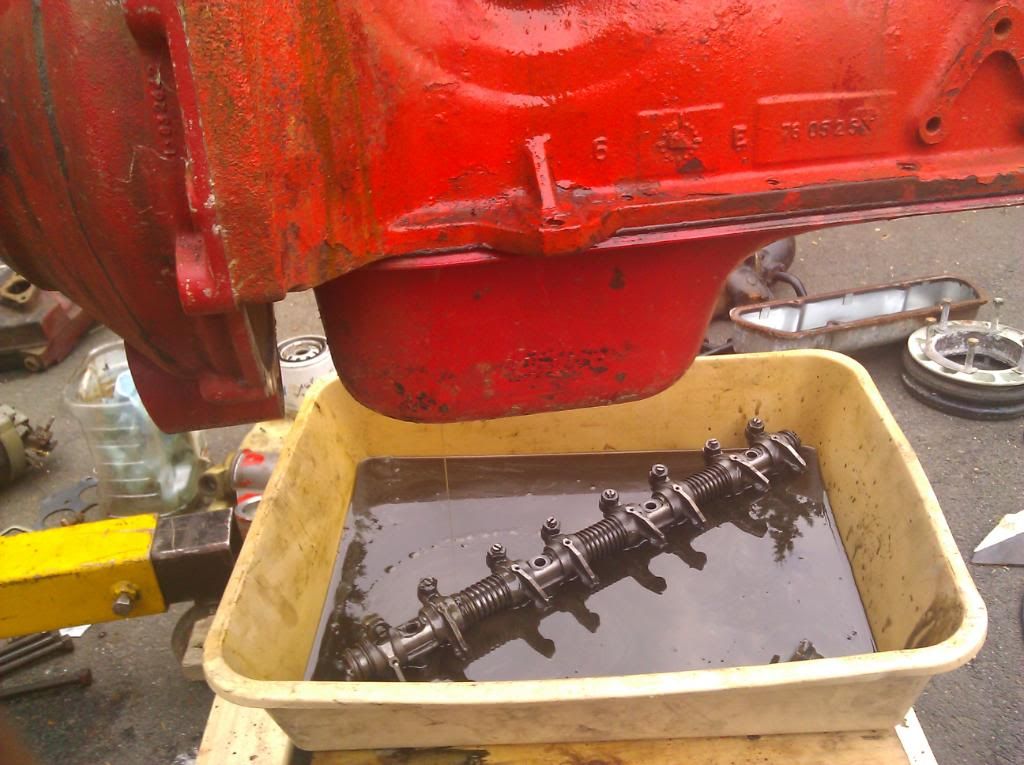
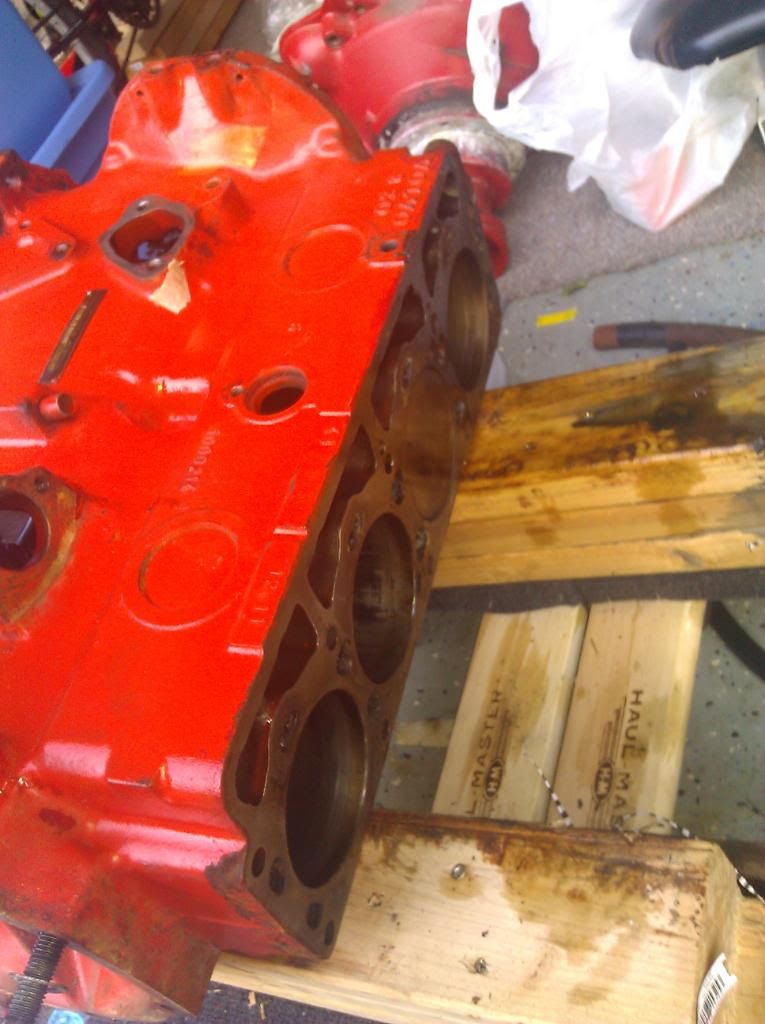
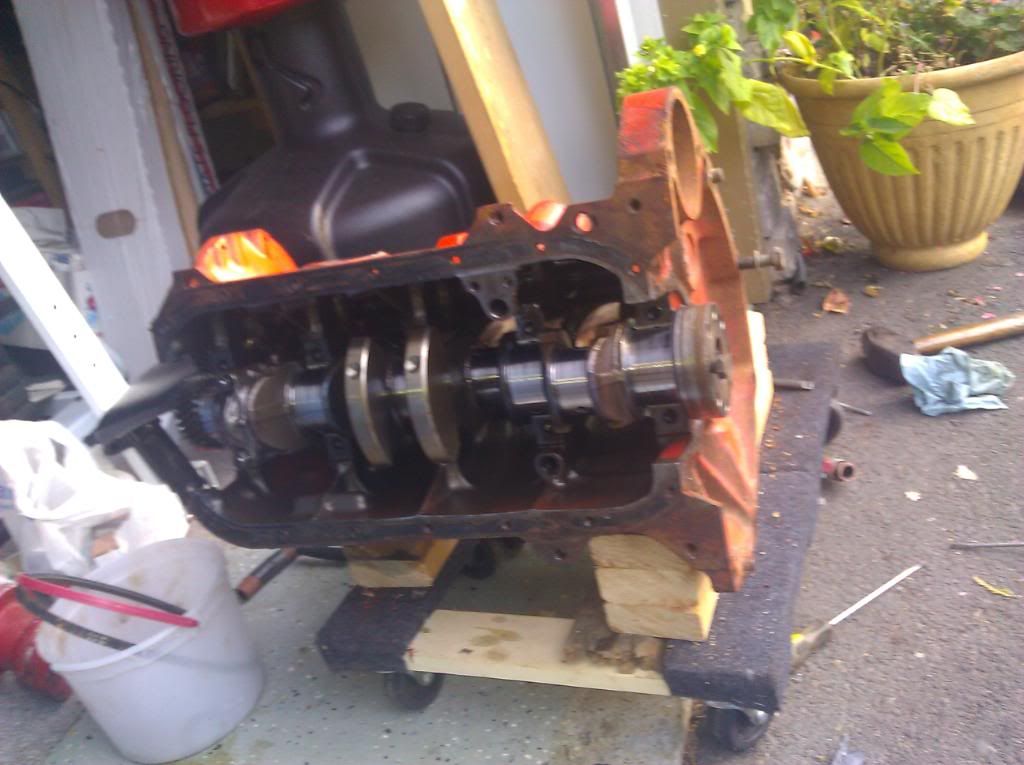
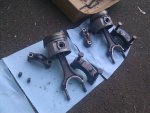
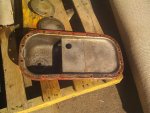
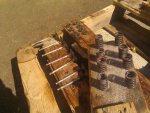
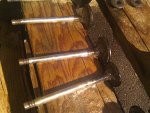
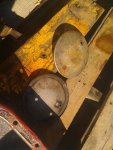
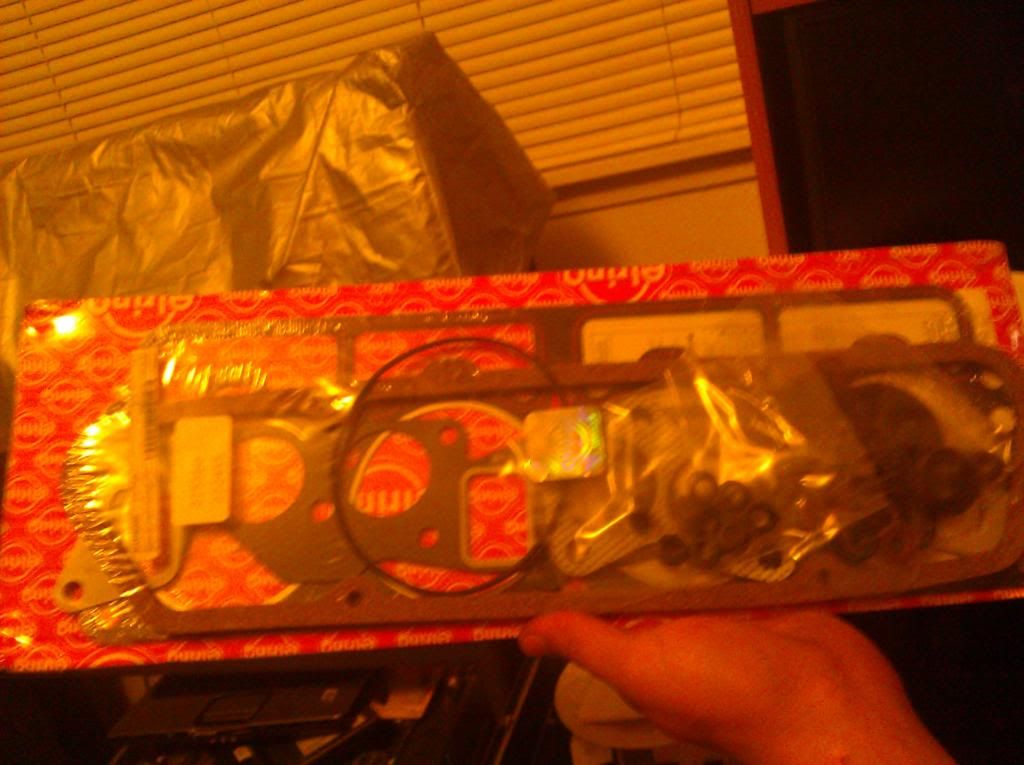
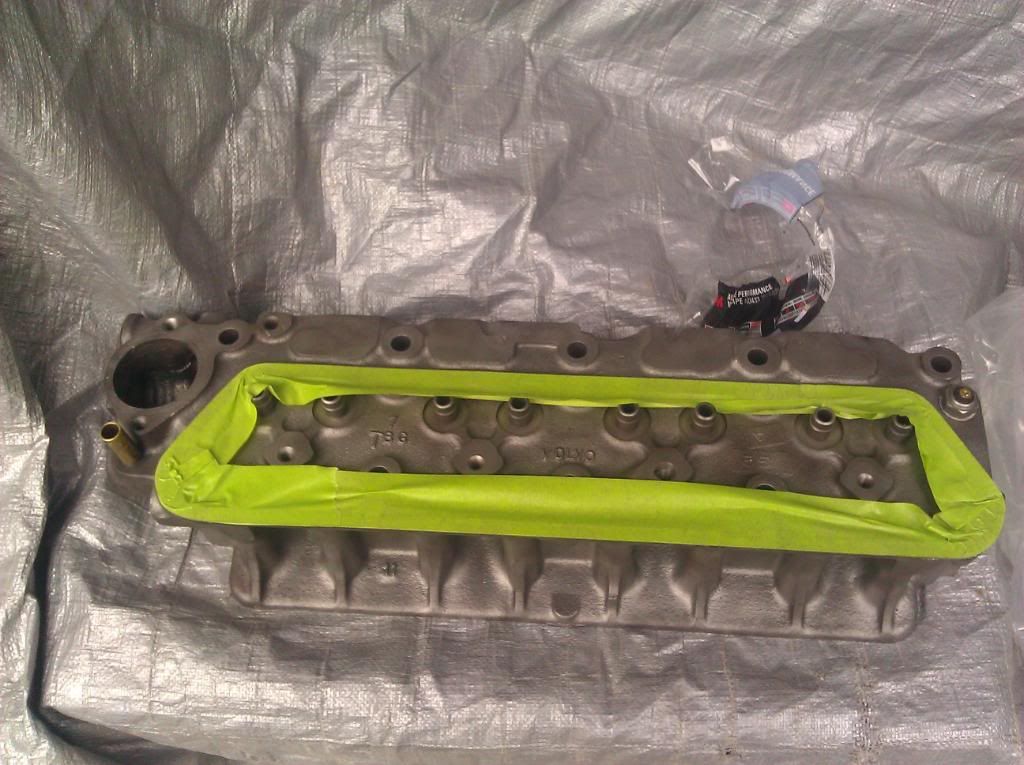
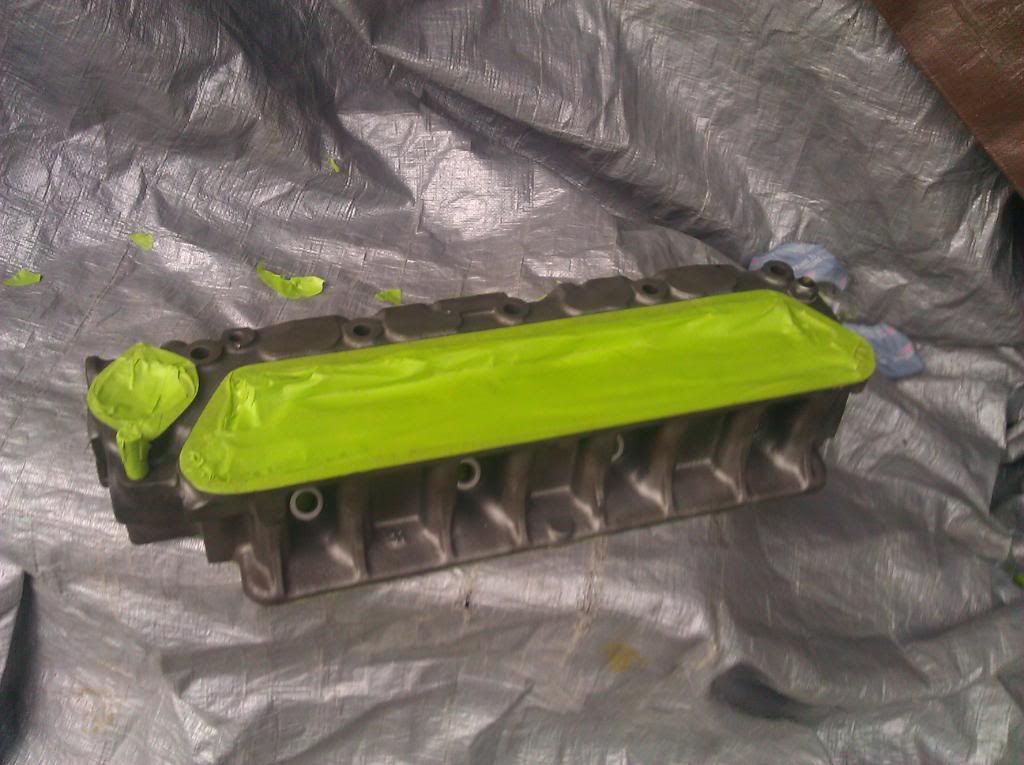
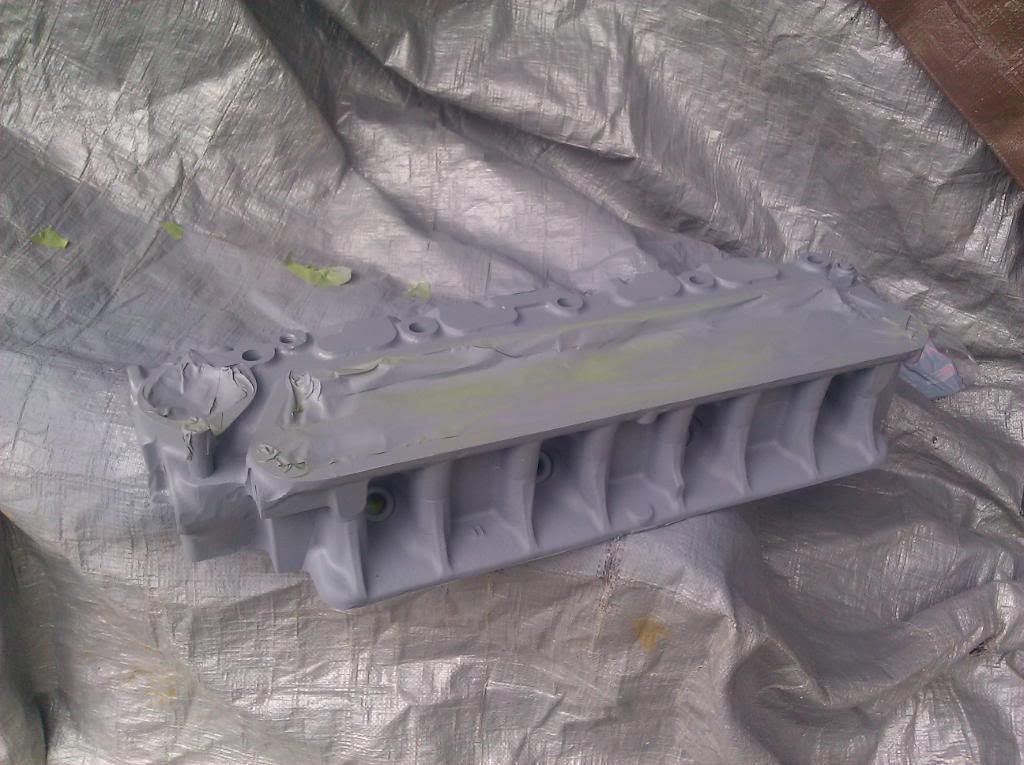
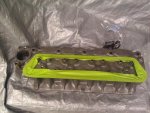
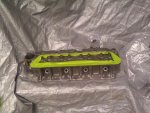
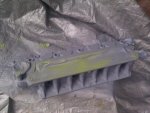
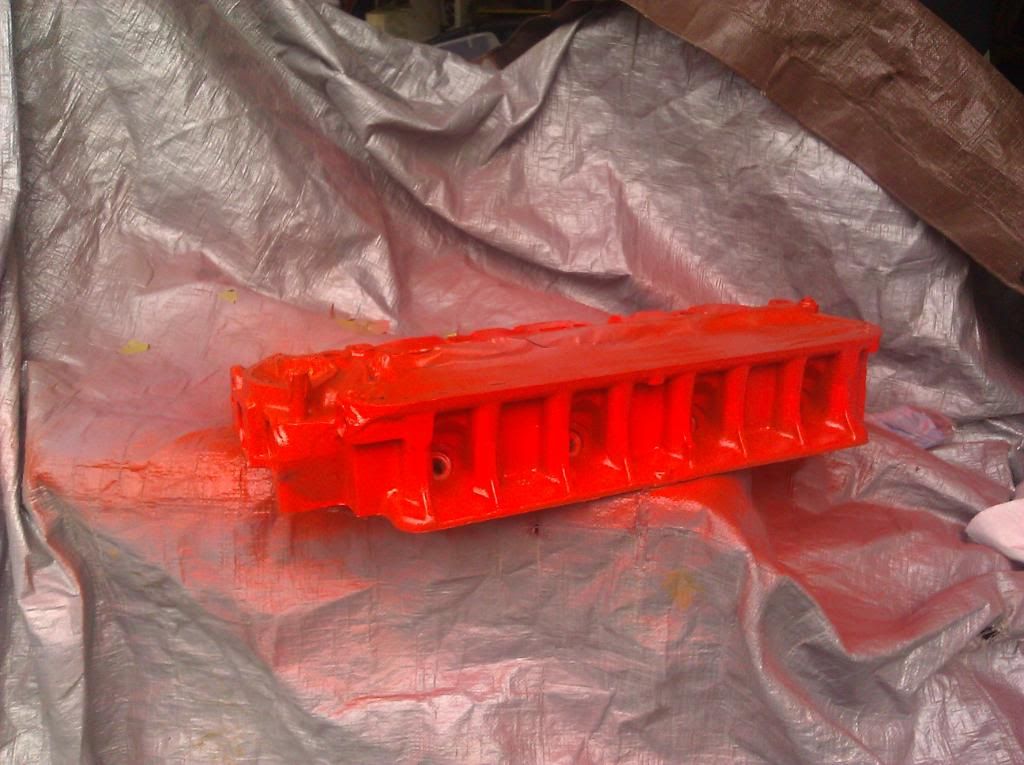
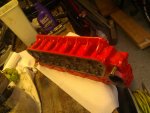
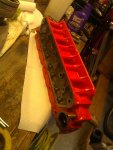
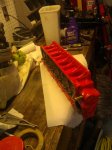
Engine (rebuild completely prep&paint, new accesories)
Outdrive (rebuild completely prep&paint)
Titles (take trailer in to State Patrol for inspection when complete.)

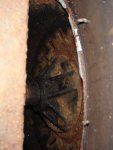
So alot of this may sound like TONS of work, which it is. But i am prepared to put a fair amount of money into it and achieve a very much wanted result. I will not be doing any transom or deck rebuilds this summer. I think it has been taken care of very well, after drilling a few holes the foam is solid and in tact in 5 different places around the boat. (knock on wood :D )
I have taken a while to get the pictures organized but it has been a few months since i bought the boat and i am going to post these pictures in dated order and explain what is going on. I did video record some of the process, but that is mostly for me to remember how to put it all back. I will be posting pictures every week or so when i do something to the boat worth posting pictures. I hope you will all stay tuned...

My goal to splash the boat is listed in my Signature. That is not a goal i hope to reach... that is a goal i WILL achieve!!

By the way the engine is a Aq130D and the outdrive is a AQ270... I know normally these two are not matched up, the AQ130D goes with 280, but i was told by a marine mechanic that it should not really make a difference. If anyone else has done this and knows otherwise, please let me know, thank you!

-vlad
 
Last edited:

74bayliner

Chief Petty Officer
Joined
Aug 23, 2011
Messages
607
Re: 1974 Bayliner Discovery 1850 Restore

The boat is brought Home!!! 50 dollars as i saw it on craigslist...
The guy actually wanted 175 but i brought it down to 50... so good deal

001_boatoncraigslist-1.jpg


002_boatatparentshouse-1.jpg


003_boatatuncleshousestorage-1.jpg


004_boatatuncleshousestorage2.jpg


006_boatinrearview-1.jpg
 

74bayliner

Chief Petty Officer
Joined
Aug 23, 2011
Messages
607
Re: 1974 Bayliner Discovery 1850 Restore

The Old engine that came with the boat was AQ140A, and AQ270 Outdrive, The engine was partially taken apart and it was removed from the boat with a Engine hoist i bought for 80 dollars with an Engine stand and an Engine strap! GOOD DEAL! Thank you craigslist.

008_pullingjunkengineout-1.jpg

These next pictures are of the New engine i bought. AQ130D i bought it for 600... the guy wanted 1200 but i knocked it down to 600... not knowing what i would find out soon enough!!! (but isnt that how it always goes?)

011_beforefrontview-1.jpg


012_beforerearview-1.jpg


013_beforesideview1-1.jpg


014_beforesideview2.jpg


These pictures will also be the Before and After Photos... please excuse my aunt in the picture... she was captured on camera!
 

Attachments

  • 008_pulling junk engine out .jpg
    008_pulling junk engine out .jpg
    137.7 KB · Views: 0
  • 011_before front view.jpg
    011_before front view.jpg
    148.1 KB · Views: 0
  • 012_before rear view.jpg
    012_before rear view.jpg
    146.4 KB · Views: 0
  • 013_before side view 1.jpg
    013_before side view 1.jpg
    143.8 KB · Views: 0
  • 014_before sideview2.jpg
    014_before sideview2.jpg
    146.4 KB · Views: 0

74bayliner

Chief Petty Officer
Joined
Aug 23, 2011
Messages
607
Re: 1974 Bayliner Discovery 1850 Restore

After removing the Thermostat Housing i was shocked to see this "toilet" of a mess!!! oh was i mad

015_removedthermostatcap.jpg


016_troubleinthethermohousing.jpg


017_troubleinthethermohousing2.jpg
 

Attachments

  • 015_removed thermostat cap.jpg
    015_removed thermostat cap.jpg
    149.1 KB · Views: 0
  • 016_trouble in the thermo housing.jpg
    016_trouble in the thermo housing.jpg
    151 KB · Views: 0
  • 017_trouble in the thermo housing2.jpg
    017_trouble in the thermo housing2.jpg
    146.7 KB · Views: 0

74bayliner

Chief Petty Officer
Joined
Aug 23, 2011
Messages
607
Re: 1974 Bayliner Discovery 1850 Restore

The reason I took the housing off was because I figured i would take off all the electrical and mechanical things on the outside, tape off all of the other things, and have it sandblasted and primed and painted to look nice....
After i found the gunk, i couldnt just close it up and paint it over. I had to disassemble the rest... This is the engine being disassembled, and you can see little parts of tape where i had previously taped it up.. not knowing it would be useless..

018_exhaustmanifoldandcarbsremoved.jpg


019_accessoriesremoved.jpg


020_rustyvalvecover.jpg


021_componentsremoved.jpg
 

Attachments

  • 018_exhaust manifold and carbs removed.jpg
    018_exhaust manifold and carbs removed.jpg
    146.5 KB · Views: 0
  • 019_accessories removed.jpg
    019_accessories removed.jpg
    146.6 KB · Views: 0
  • 020_rusty valve cover.jpg
    020_rusty valve cover.jpg
    144.9 KB · Views: 0
  • 021_components removed.jpg
    021_components removed.jpg
    145.1 KB · Views: 0

74bayliner

Chief Petty Officer
Joined
Aug 23, 2011
Messages
607
Re: 1974 Bayliner Discovery 1850 Restore

I got the cylinder head off, and the rocker arm and the rods off. For the cylinder head i plan to take it to machinest to machine the sealing surface and clean it so i can paint it. heres the pictures.

022_cylinderheadremoved.jpg


Dont mind the axe... i just used the but end of it to knock a few things lose.

023_internalcomponentsremoved.jpg


024_headlessengine.jpg


025_enginetapedup.jpg
 

Attachments

  • 022_cylinder head removed.jpg
    022_cylinder head removed.jpg
    144.5 KB · Views: 0
  • 023_internal components removed.jpg
    023_internal components removed.jpg
    137.8 KB · Views: 0
  • 024_headless engine.jpg
    024_headless engine.jpg
    135.2 KB · Views: 0
  • 025_engine taped up.jpg
    025_engine taped up.jpg
    139.8 KB · Views: 0

74bayliner

Chief Petty Officer
Joined
Aug 23, 2011
Messages
607
Re: 1974 Bayliner Discovery 1850 Restore

Than i drained the oil. And what did i find.. Milk!! kinda hard to see in these pictures but it is what it is... that means i have to rebuild everything new seals and i found the issue... head gasket had a crack... later to be posted about the cylinder head!! made me pissed

027_oildrained.jpg


028_oildrained2.jpg
 

Attachments

  • 027_oil drained.jpg
    027_oil drained.jpg
    134.5 KB · Views: 0
  • 028_oil drained2.jpg
    028_oil drained2.jpg
    144.3 KB · Views: 0

74bayliner

Chief Petty Officer
Joined
Aug 23, 2011
Messages
607
Re: 1974 Bayliner Discovery 1850 Restore

So next i decided to pull all of the Wiring out of the boat!! here goes...
This is the wiring harness before i started.
099_wire harness before.jpg
After 90 dollars of supplies and marine wire, 4 days of headaches and a Volvo Penta wiring diagram, i completed the wiring harness for my boat. What do you think?
100_wire harness after.jpg
After i completed this task i convinced the wife to let me dig a little deeper into our "purse" so to speak and i bought these :)
when they came i was jumping for joy

029_newgaugescameinmail.jpg
 

Attachments

  • 029_new gauges came in mail.jpg
    029_new gauges came in mail.jpg
    134.5 KB · Views: 0

74bayliner

Chief Petty Officer
Joined
Aug 23, 2011
Messages
607
Re: 1974 Bayliner Discovery 1850 Restore

Anyways sorry to track you away from there, now the following day i went back to the engine to pull out the pistons. Here is more of the process, removing the pistons, which came out very easily as they were pretty well lubed and not frozen in.

036_pistonsoutofblock.jpg


038_pistonremoval.jpg


The Pistons themselves seem to be in ok Condition they just need to be cleaned. Something to pay attention to when removing pistons, is to make sure you know where the pistons go. and the crank shaft and all of the bolts and nuts. its necessary to keep them all together... take lots of pictures.

Next i pulled the crank shaft, be very careful as you can scratch the crankshaft bearing surfaces. Be sure to check the bearing surfaces for scratches also check the bearings. Mine (not pictured had some bad scratches) so i will need to replace them..

037_blockwithcrankshaft.jpg


Be careful taking out any plugs as they may be in there stiff but they are very fragile. so dont go drilling into the camshaft plug just because its hard in the beginning it will turn soft real fast. I learned the hard way, fortunately not much was damaged.

Another thing to look for is to check the Piston sealing surface in the block.. make sure there are no deep scratches that if you run your fingernail past it, the nail goes into the scratch... If so you will need it Bored and you will most likely need new pistons and rings...

My block will be going to the machinest for cleaning and hot tanking in a few weeks as i do not have enough money for it right now. He will than machine the surface for me where the head sits so the head gasket has a flat surface.
I hope that there is no more work needed for the block.
 

Attachments

  • 036_pistons out of block.jpg
    036_pistons out of block.jpg
    148.2 KB · Views: 0
  • 037_block with crankshaft.jpg
    037_block with crankshaft.jpg
    136.3 KB · Views: 0
  • 038_piston removal.jpg
    038_piston removal.jpg
    138.2 KB · Views: 0

74bayliner

Chief Petty Officer
Joined
Aug 23, 2011
Messages
607
Re: 1974 Bayliner Discovery 1850 Restore

Next came the Cleaning. I decided i would try cleaning a few things such as the Valves, the springs and such.
I have been recommended to use Oven Cleaner as it will remove any paint as well as clean grease.. I didnt have such good luck. So i will be getting some kerosene and diesel fuel mix to use as a cleaning solvent. Thanks to a few people on here for suggesting it... Hopefully it will work better than the oven cleaner... or maybe i wasnt doing it right..

041_cleaningoilpan.jpg


042_cleaningvalvesandspringsandretainers.jpg


043_cleaningvalves.jpg


044_cleaningflamearrestors.jpg
 

Attachments

  • 041_cleaning oil pan.jpg
    041_cleaning oil pan.jpg
    147.5 KB · Views: 0
  • 042_cleaning valves and springs and retainers.jpg
    042_cleaning valves and springs and retainers.jpg
    149.4 KB · Views: 0
  • 043_cleaning valves.jpg
    043_cleaning valves.jpg
    148.1 KB · Views: 0
  • 044_cleaning flame arrestors.jpg
    044_cleaning flame arrestors.jpg
    148.2 KB · Views: 0

74bayliner

Chief Petty Officer
Joined
Aug 23, 2011
Messages
607
Re: 1974 Bayliner Discovery 1850 Restore

I than went and purchased a Head gasket kit for the Automotive equivalent of my engine... Shame on me as i kept reading on and on... that the head gasket and other things have to be marine.. So i am sending this head gasket kit back and buying the kit piece by piece.

047_automotiveheadgasketset.jpg
 

Attachments

  • 047_automotive head gasket set.jpg
    047_automotive head gasket set.jpg
    138.3 KB · Views: 0

74bayliner

Chief Petty Officer
Joined
Aug 23, 2011
Messages
607
Re: 1974 Bayliner Discovery 1850 Restore

The next day, I decided i would remove all of the teak, windows, accesories from the boat. Here are some pictures with the boat missing the windows... stylin

039_windowsremovedfromboat.jpg


040_tarponboatafterwindowremoval.jpg
 

Attachments

  • 039_windows removed from boat.jpg
    039_windows removed from boat.jpg
    139.2 KB · Views: 0
  • 040_tarp on boat after window removal.jpg
    040_tarp on boat after window removal.jpg
    143.4 KB · Views: 0

74bayliner

Chief Petty Officer
Joined
Aug 23, 2011
Messages
607
Re: 1974 Bayliner Discovery 1850 Restore

My next step was really hard because all of my friends were always to busy to help me, so it was just me and my little bro moving the trailer out from under the boat...

057_trailerremoved.jpg


058_boatontires.jpg


But with a little muscle and persperation we got it!

059_boatraisedwithenginehoist.jpg


060_trailerremovedfromunderboat.jpg
 

Attachments

  • 057_trailer removed copy.jpg
    057_trailer removed copy.jpg
    151.6 KB · Views: 0
  • 058_boat on tires copy.jpg
    058_boat on tires copy.jpg
    145.6 KB · Views: 0
  • 059_boat raised with engine hoist copy.jpg
    059_boat raised with engine hoist copy.jpg
    154 KB · Views: 0
  • 060_trailer removed from under boat copy.jpg
    060_trailer removed from under boat copy.jpg
    153.2 KB · Views: 0

74bayliner

Chief Petty Officer
Joined
Aug 23, 2011
Messages
607
Re: 1974 Bayliner Discovery 1850 Restore

Next the trailer was hauled over to its quiet little corner in the side of my dads house, and all of the rollers and nuts and bolts were removed until it was down to its bare bones.

062_bromovingtrailer.jpg


063_hardworkingbrother.jpg


064_trailerparkedinitsspot.jpg


We worked well into the night, as you can imagine the bolts were very rusty and i think i got carpet tunnel from it.

065_trailerpartiallydisassembleddowntobasics1.jpg


066_trailerpartiallydisassembleddowntobasics2.jpg
 

Attachments

  • 062_bro moving trailer copy.jpg
    062_bro moving trailer copy.jpg
    153.7 KB · Views: 0
  • 063_hard working brother copy.jpg
    063_hard working brother copy.jpg
    146 KB · Views: 0
  • 064_trailer parked in its spot copy.jpg
    064_trailer parked in its spot copy.jpg
    151.6 KB · Views: 0
  • 065_trailer partially disassembled down to basics1 copy.jpg
    065_trailer partially disassembled down to basics1 copy.jpg
    95.9 KB · Views: 0
  • 066_trailer partially disassembled down to basics2 copy.jpg
    066_trailer partially disassembled down to basics2 copy.jpg
    63 KB · Views: 0

74bayliner

Chief Petty Officer
Joined
Aug 23, 2011
Messages
607
Re: 1974 Bayliner Discovery 1850 Restore

Lots of nuts and bolts and other various things that came off the trailer.

067_trailerparts1.jpg


068_trailerparts2.jpg


069_trailerparts3.jpg


070_trailerparts4.jpg


071_trailerparts5.jpg


All of the rusty parts are going to get replaced. including the axle, the leaf springs, and ubolts and such. as you can see the wench is fine. it will stay.
 

Attachments

  • 067_trailer parts1 copy.jpg
    067_trailer parts1 copy.jpg
    149.2 KB · Views: 0
  • 068_trailer parts2 copy.jpg
    068_trailer parts2 copy.jpg
    150 KB · Views: 0
  • 069_trailer parts3 copy.jpg
    069_trailer parts3 copy.jpg
    148.3 KB · Views: 0
  • 070_trailer parts4 copy.jpg
    070_trailer parts4 copy.jpg
    99.1 KB · Views: 0
  • 071_trailer parts5 copy.jpg
    071_trailer parts5 copy.jpg
    93.5 KB · Views: 0

74bayliner

Chief Petty Officer
Joined
Aug 23, 2011
Messages
607
Re: 1974 Bayliner Discovery 1850 Restore

The frame is rusty and it will be sanded down with a DA sander just as soon as i purchase a 2 stage compressor that can handle the capacity.

072_trailerparts6.jpg


073_trailerbare.jpg


The wheel has been rusted and is now flaky it will need to be removed.

074_trailertire.jpg


As far as the tires are concerned they are good and can be reused.

075_trailerhub.jpg
 

Attachments

  • 072_trailer parts6 copy.jpg
    072_trailer parts6 copy.jpg
    82.2 KB · Views: 0
  • 073_trailer bare copy.jpg
    073_trailer bare copy.jpg
    121.2 KB · Views: 0
  • 074_trailer tire copy.jpg
    074_trailer tire copy.jpg
    147.2 KB · Views: 0
  • 075_trailer hub copy.jpg
    075_trailer hub copy.jpg
    97.3 KB · Views: 0

74bayliner

Chief Petty Officer
Joined
Aug 23, 2011
Messages
607
Re: 1974 Bayliner Discovery 1850 Restore

So I send the cylinder head out for machining... i get a premature call saying... "your head is cracked..." i paniced and went straight to iboats.com, and once again you saved me. i drove up to canada that weekend and picked up an automotive head, it was almost perfect except for a few holes didnt match up. I sent the new head out to the machinest and he finished it last week.
So here is what i did... yup. i taped it right up and primered it with High Temp Primer...

077_headbackfrommachineshop.jpg


078_headtapedup.jpg


079_headcompletelytapedoff.jpg


082_headprimercoat1.jpg


083_headprimercoat2.jpg
 

Attachments

  • 077_head back from machine shop.jpg
    077_head back from machine shop.jpg
    146 KB · Views: 0
  • 078_head taped up.jpg
    078_head taped up.jpg
    147.2 KB · Views: 0
  • 079_head completely taped off.jpg
    079_head completely taped off.jpg
    142.9 KB · Views: 0
  • 082_head primer coat 1.jpg
    082_head primer coat 1.jpg
    145.1 KB · Views: 0
  • 083_head primer coat 2.jpg
    083_head primer coat 2.jpg
    144.8 KB · Views: 0

74bayliner

Chief Petty Officer
Joined
Aug 23, 2011
Messages
607
Re: 1974 Bayliner Discovery 1850 Restore

After 2 coats of high temp primer i coated it with high temp engine enamel (Chevy Orange)

084_headpainted.jpg


After 3 coats here is the result. I am happy with it, what do you folks think?

086_headfinishedpaint.jpg


087_headfinishedpaint2.jpg


088_headfinishedpaint3.jpg
 

Attachments

  • 084_head painted.jpg
    084_head painted.jpg
    143.9 KB · Views: 0
  • 086_head finished paint.jpg
    086_head finished paint.jpg
    134.7 KB · Views: 0
  • 087_head finished paint 2.jpg
    087_head finished paint 2.jpg
    133.6 KB · Views: 0
  • 088_head finished paint 3.jpg
    088_head finished paint 3.jpg
    140.2 KB · Views: 0

74bayliner

Chief Petty Officer
Joined
Aug 23, 2011
Messages
607
Re: 1974 Bayliner Discovery 1850 Restore

The latest thing i did which was two days ago. I decided that in order for me to be able to do the restoration i needed to keep the boat out from the elements.
So i went to Costco they have 10x20 car ports for sale. so 200 dollars later I am building the carport with my brother :D

090_carportgoingup.jpg


After adjusting the car port to its proper location.. the boat was not in the middle. so painfully we moved the boat (since its not on a trailer anymore...) but with both of us we got it done.

091_carportassembly.jpg


093_boatbeingmovedover.jpg
 

Attachments

  • 090_carport going up.jpg
    090_carport going up.jpg
    140.2 KB · Views: 0
  • 091_carport assembly.jpg
    091_carport assembly.jpg
    140.5 KB · Views: 0
  • 093_boat being moved over.jpg
    093_boat being moved over.jpg
    143.3 KB · Views: 0

74bayliner

Chief Petty Officer
Joined
Aug 23, 2011
Messages
607
Re: 1974 Bayliner Discovery 1850 Restore

The canopy has been finished and so was I. So tired i was glad i had it done.
This canopy was completed on Friday night last week.
So far i haven't had the time to go back to the boat. But i will make some thing this week to clean up in the deck of the boat and start sawing a few old boards away :)

095_finishedcarport1.jpg


096_finishedcarport2.jpg


097_finishedcarport3.jpg
 

Attachments

  • 095_finished carport1.jpg
    095_finished carport1.jpg
    151.5 KB · Views: 0
  • 096_finished carport2.jpg
    096_finished carport2.jpg
    152.1 KB · Views: 0
  • 097_finished carport 3.jpg
    097_finished carport 3.jpg
    156.9 KB · Views: 0
Top