1974 Vanguard TRII Restoration Thread - Beginning

Raist11

Seaman Apprentice
Joined
Sep 7, 2012
Messages
30
Greetings everyone!

So, down to the details. Last year we took ownership of a 1974 Vanguard TRII 14foot. The year may not be exact. The boat has been in the family since I don’t know when.. long time anyways. It wasn’t used a whole lot in the later 1980’s and not at all after that. It had a tarp thrown over it and parked at the farm. So, this means the engine has very low hours on it. But it also is suffering from neglect. I’ll share the pics, you can see the transom will definitely be on the project list and the floor is very soft and as you can see at the bilge area the floor is a definite (yes, stringers and such most likely)


It’s in rough shape. The bow eye is pulling out, hence the blue strap across the bow. I was a bit nervous with that bow eye so decided to take extra precautions on the highway, rather than looking out my side mirror to see the bow skipping along the highway.


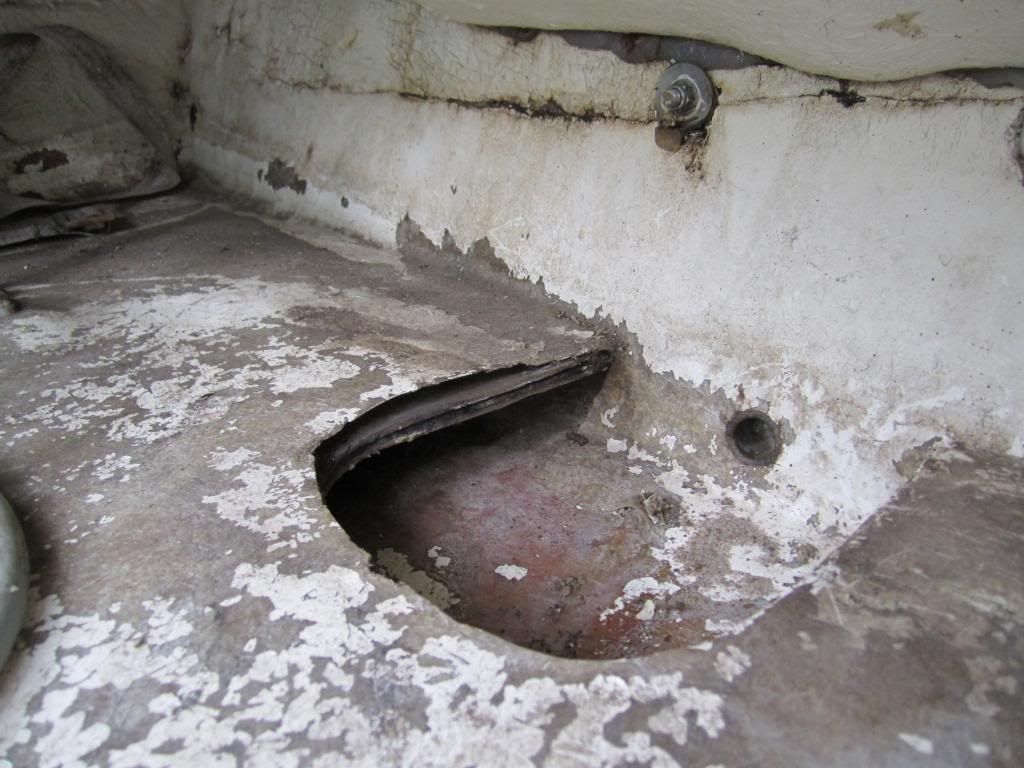
The transom and a good view of the floor.


A more direct view of the transom.


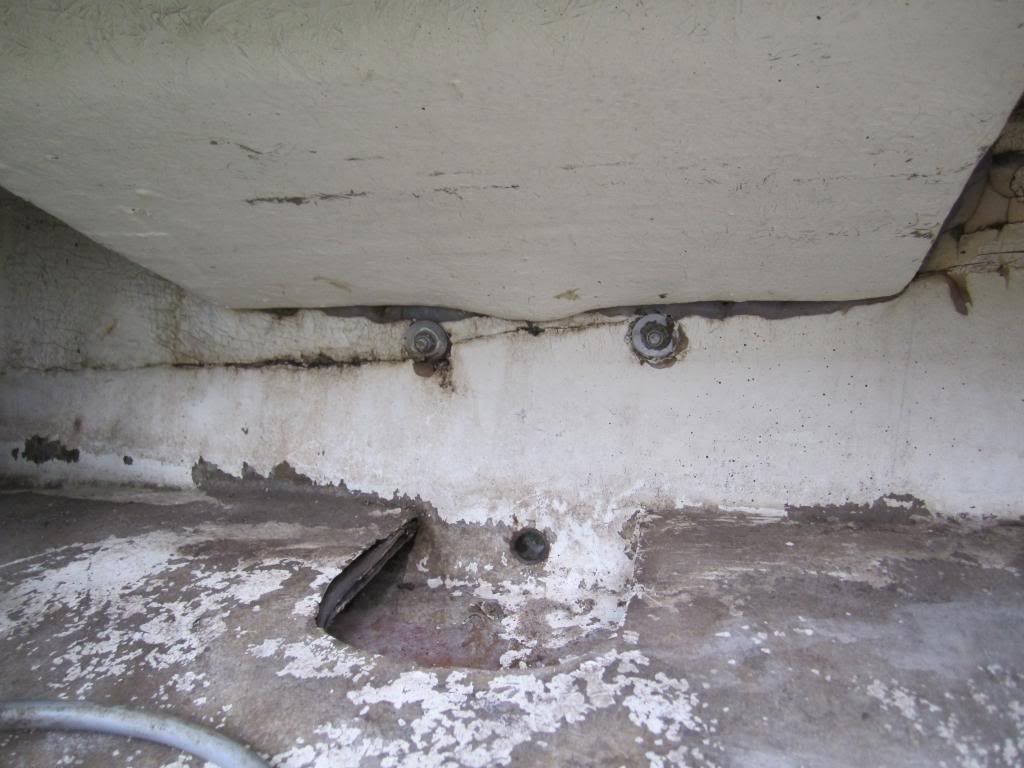
Outside view of the transom.


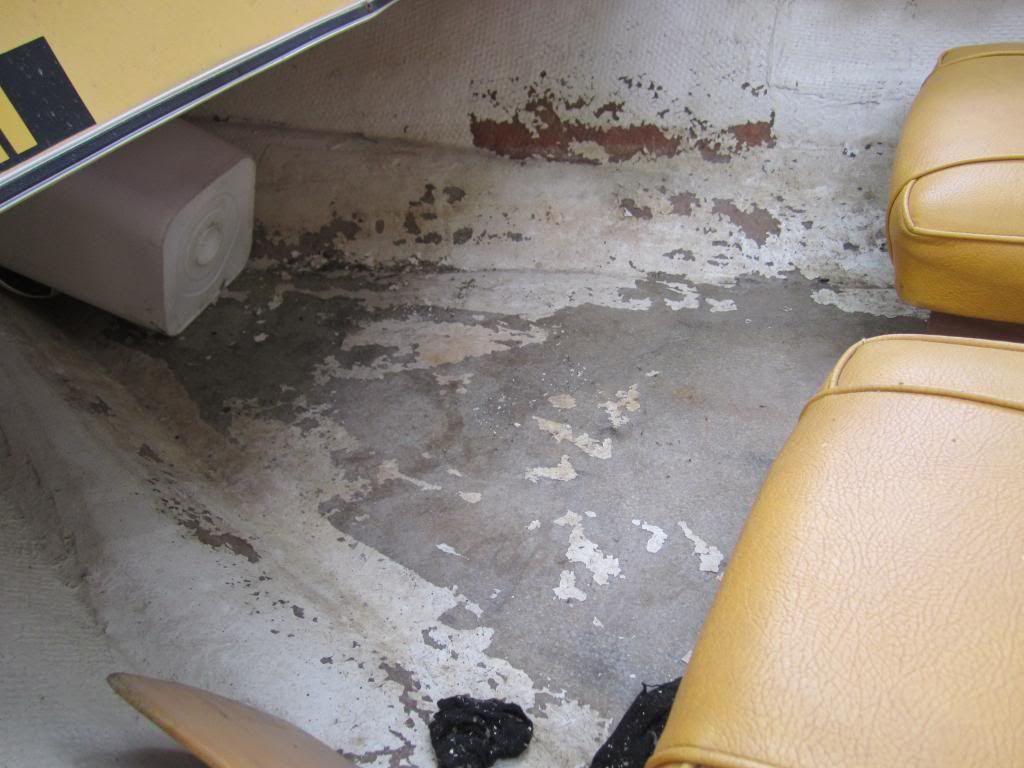
A view of the floor in front of the seats.


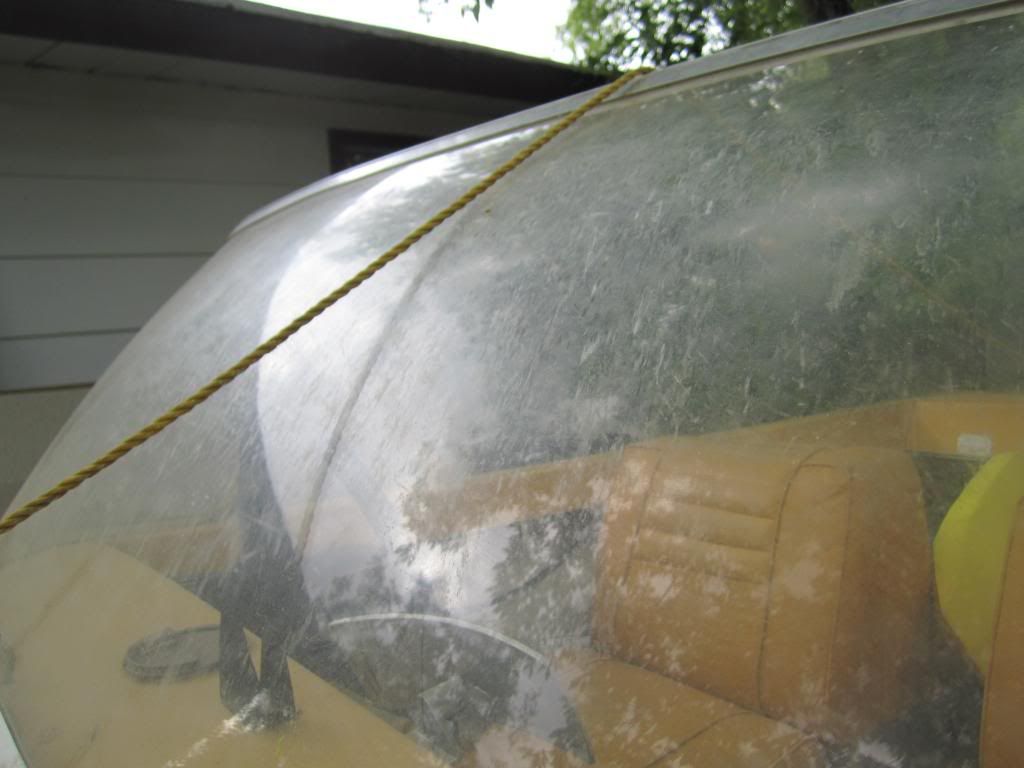
And finally the windshield.


I have some more views of different areas and some exterior shots. There isn’t too much damage on the exterior of the hull but some nicks and scratches as you could imagine a boat of this age would have. I’m told that crack in the transom has “always been there”. That’s a scary thought.

Other problems: The steering is real sloppy. The FIL took it out last year and the steering was seized, not sure what he did to make it work. And the wiring connection to the motor is bad, to start it you have to have someone push down on it. So I'll have to take that apart and figure it out. And of course the prop looks like Jaws was nipping at it.

Now, you’re probably wondering.. Is he going to ask if it’s worth fixing? Nope, I’m not going to ask that. This boat is important to the Admiral. So this boat will be repaired over a period of time. Although it will take a back seat to any work I have to do to the 1990 motorhome, but will be ahead of the renovation of the 1968 Ford Torino GT. (I think I need more projects)

So my first couple tasks other than tearing things out is going to be building a motor stand (I’ve got the perfect wheels kickin’ around) and some form of cradle. I really don’t want to have to take it off the trailer though. So I’m going to look at how I can do a cradle incorporating the trailer. Thoughts, ideas.. friendly insults are welcome.

Admittedly this will be slow going but I will update as I go. I’m still doing a crap load of reading here on the forums. But with everything else going on it's hard to find a lot of time to just sit and read. I finally found where someone said exactly what peanut butter was! Sheesh.. :p

As always, thanks you for your time and attention.

Raist - Collector of Projects
 

Raist11

Seaman Apprentice
Joined
Sep 7, 2012
Messages
30
Re: 1974 Vanguard TRII Restoration Thread - Beginning

Although this picture doesn't give the best angle here is the bow eye.


It doesn't show how much it will pull out because I don't have it winched that tight. Seemed pointless to yank it out through the hull. :facepalm:

Edit: Wow, that pic doesn't really show any problem.. other than that rope there sucks. This is what I get when taking pics in a hurry and posting fast. I know it pulls out and just assumed it looked that way I guess.
 

Raist11

Seaman Apprentice
Joined
Sep 7, 2012
Messages
30
Re: 1974 Vanguard TRII Restoration Thread - Beginning

My apologies for no drink containers laying in the boat. I will do my best to provide some in the next pictures I take as work begins. :joyous:

Perhaps I get some points for having a pair of socks in there?
 

Raist11

Seaman Apprentice
Joined
Sep 7, 2012
Messages
30
Re: 1974 Vanguard TRII Restoration Thread - Beginning

Well so far, I haven't gotten very far. I had fully intended on making some first cuts after starting this thread. But now we've had a few days of rain. :rain: Things go fast in this forum I see, this thread had already made it to the third page. Hopefully next week the weather will be better and I can get under the floor to see what's all happening down there.
 

sheboyganjohn

Senior Chief Petty Officer
Joined
Aug 2, 2005
Messages
753
Re: 1974 Vanguard TRII Restoration Thread - Beginning

That boat must have been covered real well. The first thing I noticed was the rub rail, it looks new. The gel coat appears to only need a good buffing to bring it back. I think that is going to be a sharp looking boat when it is done. I think the biggest issue you are going to have is that windshield
 

Raist11

Seaman Apprentice
Joined
Sep 7, 2012
Messages
30
Re: 1974 Vanguard TRII Restoration Thread - Beginning

Thanks, well it is in decent shape for the years it sat outside on a farm in the prairies. If it ever stops freakin' raining here I may actually get to start on it. It's been rain every day since my last post in this thread. ugh.
 

GT1000000

Rear Admiral
Joined
Jul 13, 2011
Messages
4,916
Re: 1974 Vanguard TRII Restoration Thread - Beginning

Welcome to the Iboats Dry Dock, Raist11...man of many projects...;)
Glad to have you aboard and I would like to tag along to see this family heirloom brought back to better than new condition...
As far as things moving fast on this forum...well sometimes the postings far exceed the actual forward progress...although there are some folks on here that are able to fly through their restorations, most of us slow pokes take quite a while longer...:rolleyes:
As far as the windshield goes, some of the fancy schmancy new chemicals and methods available today may just be able to help revive it...
One of the first priorities is to take lots of pictures and measurements for future reference in the reassembly...
If your trailer is a bunk type, you can probably add some extra support to it and be good to go...
PB, or peanut butter is just a name we have for a mixture of thickened resin...it is usually made up with a combination of resin and different thickening agents...the resin can be either polyester or epoxy, the thickening agents can be any number of things, like micro-ballons, milled fibers, cabosil/aerosil, talcum powder, sawdust...
Most of our fiberglass boats just use a combination of polyester resin and one or more of the first three above to make PB...it is also mixed up to different consistencies depending on its intended use, so you might hear PB [peanut butter], referred to as mayonaisse-like or creamy or hairy, etc...
The more you get into this restoration stuff, the more you'll begin to understand what is involved and how to go about making the necessary repairs...
Here is a good primer on how to build your new structure by Iboats member, "Woodonglass"...http://forums.iboats.com/boat-resto...lly-started-w-pics-384982-25.html#post3586813
Also, a lot of good info is available here...http://forums.iboats.com/boat-resto...r/how-tos-other-great-information-288451.html
Best of Luck and most of all Have Fun!
GT1M:)
 

Raist11

Seaman Apprentice
Joined
Sep 7, 2012
Messages
30
Re: 1974 Vanguard TRII Restoration Thread - Beginning

Thanks for the Welcome, GT1M. :) And thanks for the info.

This is my biggest problem right now. Rain.. :rain: Last night was the first really decent night after work. Sunny, calm.. I opted to take the dog for a run with the bike and then spent some time with my daughter. I sat there thinking, I should get to work on the boat.. nah, tomorrow. Oops. I just hope I get to start actual work on the boat before I forget all the information I've been gaining on this forum :p It doesn't look too wet because it's parked underneath the trees in our yard so somewhat protected.. but still wet.
http://
 

Raist11

Seaman Apprentice
Joined
Sep 7, 2012
Messages
30
Re: 1974 Vanguard TRII Restoration Thread - Beginning

Has anyone sat in their boat, saw in hand and thought: "I am going to cut a hole in the floor of my boat?" I thought, I shouldn't be doing this. :faint2: The weather finally broke and we had some sun today so I decided to cut a hole and get a look at what I have going on. Just to confirm what I already know.

So.. I did it.


As I dug away some of the foam you can see the water sitting there. I'm not sure if you can see it in this picture. You can see how dark the wood is though. The original test hole I cut was smaller, most of this I broke out just by hand, the wood was completely soaked. It is only 3/8" plywood though from what I can tell.

This view is where I stuck the camera in the hole looking to the stern with the center stringer on the left side of the image and the foam on the right. It's some really coarse looking fiberglass there. It seems quite solid though, but I know what the truth will be on the inside of that fiberglass. :tongue-new:
I was surprised to see such gaps in there. I figured the foam would be filled right up to the floor, but it's just a rounded slug looking mass.


Here I am squeezing water out of the foam. Just in case anyone is thinking they need to redo their boat.. but how bad could it be? Trust me, it's probably bad.


And that's just a small piece of foam.

So, the point? I now see exactly where I'm at. If I had any doubts about how badly this work needed to be done.. they're gone now. Part of me worried, what if I cut out the floor and it's not as bad as I think? So, now I just need this dang weather to cooperate so that I can spend some time working. As it is it's started raining again now.. pouring really.

I'm excited to get at this now. This was really the confirmation I needed that it's necessary to gut my boat and and tear it apart.
 

Raist11

Seaman Apprentice
Joined
Sep 7, 2012
Messages
30
Re: 1974 Vanguard TRII Restoration Thread - Beginning

For those wondering about the foam holding water, here's a good shot. Now remember this boat hasn't been in the water this year, was in the water twice last year and not at all for 20some years prior to that.
 

Raist11

Seaman Apprentice
Joined
Sep 7, 2012
Messages
30
Re: 1974 Vanguard TRII Restoration Thread - Beginning

I'm going to try posting this here. Otherwise I'll start a thread in the appropriate OB section.

Simply put, how the heck do I remove the throttle cables on my outboard? I thought I figured where to start, but quickly realized I was wrong. I swear I am mechanically inclined but I can't figure it out. And the way things are working for me today (they aren't) I'll end up breaking it before I figured out the proper way.

Thanks for your time and attention.


GT1000000

Rear Admiral
Joined
Jul 13, 2011
Messages
4,916
Re: 1974 Vanguard TRII Restoration Thread - Beginning

Not 100% sure but check this out...


Raist11

Seaman Apprentice
Joined
Sep 7, 2012
Messages
30
Re: 1974 Vanguard TRII Restoration Thread - Beginning

Well, I figured on the "Release this Clamp".. I'll have to take another look at the clips/rings whatever they are. I assumed the screw just up and to the right of the right-hand red circle was the key. :facepalm: unfortunately the only thing that happened was a nut went flying. Luckily it landed on a ledge and I was able to rescue it. I'll go out and take another look. Thanks, GT1M.
 

Raist11

Seaman Apprentice
Joined
Sep 7, 2012
Messages
30
Re: 1974 Vanguard TRII Restoration Thread - Beginning

Alright, not sure what they are. Just seem to be a square "pin" going through.


It doesn't seem to come apart there.. but further to the right it definitely doesn't seem to easily come apart there either. The bottom one has an adjustment screw to the right of it's square pin there.
 

GT1000000

Rear Admiral
Joined
Jul 13, 2011
Messages
4,916
Re: 1974 Vanguard TRII Restoration Thread - Beginning

Been looking on the net for more info and read something about there being a spring/clip on the back side of the pin...get a mirror and some good light and see what's on the backside...
Other option is to try to turn them, gently, with an open end wrench...might be some kind of square headed bolt...or you might feel a springy-ness to them...
The other possibility is that somewhere there is a drift pin holding them in...
If not, and nobody else chimes in here, you might have to post up in the Merc engine forum...some really smart guys over there...
 

Raist11

Seaman Apprentice
Joined
Sep 7, 2012
Messages
30
Re: 1974 Vanguard TRII Restoration Thread - Beginning

It seems to be the exact same thing on the other side of them.

The only thing I have found in my searches is somebody saying to take it apart at the controls.. but that seems whack. Why have like 10ft of cables dangling off the motor as you try to move it around. Well thanks for trying GT1M, I'll let it sit for a bit to see if anyone else knows, then I'll try the OB forum. Thanks again.
 

sphelps

Supreme Mariner
Joined
Nov 16, 2011
Messages
11,475
Re: 1974 Vanguard TRII Restoration Thread - Beginning

Perhaps I get some points for having a pair of socks in there?

Nope no points for the socks ... But if ya had a few pics of you wearing the Admirals slippers that just might add a few .. :lol:
Just kidding ! Very cool looking runabout ya got there ! I,d like to tag along and see her take shape again R11 ..
Good luck ! SP...
 

Raist11

Seaman Apprentice
Joined
Sep 7, 2012
Messages
30
Re: 1974 Vanguard TRII Restoration Thread - Beginning

Thanks SP, well I'm not sure about wearing her slippers.. but in the interest of points.. nah, they wouldn't fit anyways.

Nice to see your friend there. Here's a shot of mine the other night showing how his tongue stretches. lol. It's a crappy pic (black dogs are terrible to photograph) and this angle doesn't show but he's at 92lbs.. big dumb and happy.. that's my boy. :witless:
And there is water in the background so still sort of maybe on topic.

That said, I still have yet to figure out these throttle cables. Probably have to leave it till Tuesday when the brother-in-law is back in town. He's restored a couple old wooden boats and a glass one recently so he may have an idea.
 

rickryder

Commander
Joined
Jun 24, 2010
Messages
2,722
Re: 1974 Vanguard TRII Restoration Thread - Beginning

Alright, not sure what they are. Just seem to be a square "pin" going through.


It doesn't seem to come apart there.. but further to the right it definitely doesn't seem to easily come apart there either. The bottom one has an adjustment screw to the right of it's square pin there.

It's a square head bolt not a pin......loosen it and slide the cable out....
 
Top