1984 BlueFin 16' Stem to Stern re-do

Status
Not open for further replies.

pascoea

Seaman Apprentice
Joined
May 8, 2017
Messages
44
Hey guys and gals. This one has been a long time in the making, so hopefully you like it! I'd love to hear your feedback, suggestions for improvements, things I screwed up.

The basics:
I got permission last spring to go buy a "new" fishing boat, and we wanted to spend about $4,000. The only real guidelines I had were: It needed to fit in the garage, and it needed to have a full windscreen. Beyond that, it just needed to float and move.

Long story short, I figured out that there wasn't a lot out there that met those criteria. Lots of $2000 projects and $6000 well-kept boats. Me, being as cheap as I am went the $2000 route, thinking I could put a bit of money into it that spring, fish in it through the summer, then spend some time in the winter doing it right. As you'll see below, that plan didn't work out. Over the course of last spring/early summer, I completely re-did the interior. Then this spring/summer I re-did the outside and the trailer.

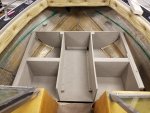
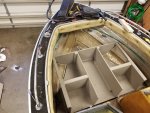
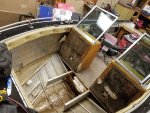
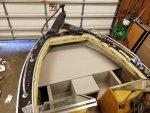
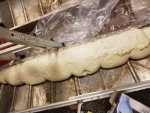
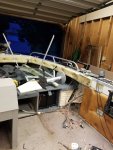
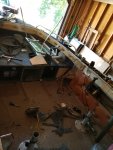
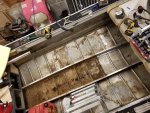
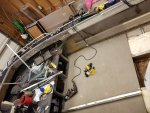
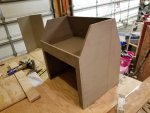
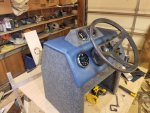
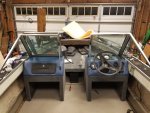
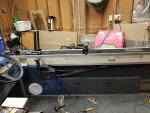
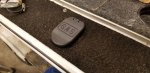
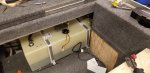
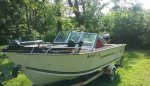
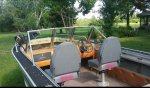
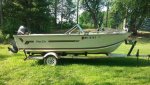
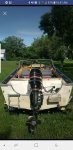
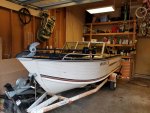
"Before" pics are attached here.

Enjoy the read!

(I'm going to break this up into a couple of different posts, hope that's cool with everyone!)
 

Attachments

  • photo316940.jpg
    photo316940.jpg
    219.7 KB · Views: 3
  • photo316941.jpg
    photo316941.jpg
    202 KB · Views: 3
  • photo316942.jpg
    photo316942.jpg
    237.3 KB · Views: 3
  • photo316943.jpg
    photo316943.jpg
    281.4 KB · Views: 4
  • photo316944.jpg
    photo316944.jpg
    594.4 KB · Views: 3
Last edited by a moderator:

pascoea

Seaman Apprentice
Joined
May 8, 2017
Messages
44
This is where the project went "sideways" in a big hurry.

You can't see it well from the pics, but up front were a couple of built-in seats that were part of the consoles. I knew when I bought the boat that the front benches and floor were gone, so my plan was to just replace those and deal with the rest of the restoration over the winter, so I grabbed a Sawzall and went to work.

fetch

This part actually came out pretty easy. It was a little tricky, but managed to get a pretty straight cut in front of the consoles, and didn't scuff up the aluminum. There were the two seats attached to the consoles, the floor, and a small fishing platform that came out. (Writing this, I forgot how ugly the interior of this boat was)

Next step, I wanted a fishing platform. This next pic is the test fit of the underlying structure of the platform. All built out of 3/4 marine plywood and standard building lumber. Everything held together with liquid nails and stainless steel drywall screws. Mounting to the boat I used marine adhesive and #12 stainless sheet metal screws. I used some spray paint (the green lines) to help me line everything up with where I wanted the floor later. You'll see the two battery compartments on either side, with some additional storage directly in front of those. The large center space and in front of the structure is wasted space. (Hindsight point number one, doing this again I would have kept access available for that center spot.) Not shown here, I added more reinforcement underneath where the seat mount was going to go. (More 2x2s and another layer of 3/4 marine plywood) After everything was together and fitted, coated it with 2 coats of exterior sealing paint/stain. It was just whatever crap I had left over after painting my house.

fetch


Next up, the platform. The pic is my just a test fit after I got everything the shape I wanted it. You can see a little bit of the reinforcing in the center I talked about above. There was a little more reinforcing added on the sides, next to the battery compartments to support the "wings" on either side of them. Once I got things how I wanted them I took it out and cut it up to form the lids for the storage. (Hindsight point #2, instead of starting off with one piece, fitting it, then cutting it up it would have been easier to contour to the sides of the boat if I had just pieced it together)

fetch


Here is the finished product. A couple of details, on the front right you can see a notch cut out of the panel lid for the charger plug-in and trolling motor plug-in. First time out, I didn't like that cable hanging out so I moved it up front, under the bow deck. I mounted a resettable breaker in with the right battery. The other doodad you can see in the right battery is a current shunt for a battery monitoring computer. All of the heavy gauge wiring is #8 high-strand count car audio cable.

fetch


Here it is with everything closed up. Eventually I went through and got rid of the ugly *** yellow padding. All of the carpet is standard automotive/exterior carpet from Menards. I used 3M 90+ spray glue and stainless staples to hold everything together. The piano hinges are 1-1/2" open width aluminum continuous hinges I picked up from Amazon. (Hindsight #3, holy **** did I go through a lot of spray glue and carpet! In all, I about close to 30 linear feet (180 sq feet) of carpet and at least a dozen cans of spray glue on the whole project.
fetch


This is here I had originally planned to stop for the year. Just add the seat pedestal and do some fishing! But after walking around on the deck in the back it became readily apparent that there were a lot more issues that needed to be addressed. The passenger console, and all of the floor on that side was completely rotten. So, next post...Floors and consoles! Stay tuned.
 

Attachments

  • photo316945.jpg
    photo316945.jpg
    918.2 KB · Views: 2
  • photo316946.jpg
    photo316946.jpg
    1.2 MB · Views: 2
  • photo316947.jpg
    photo316947.jpg
    1.7 MB · Views: 2
  • photo316948.jpg
    photo316948.jpg
    834.3 KB · Views: 2
  • photo316949.jpg
    photo316949.jpg
    1.5 MB · Views: 2
  • photo316950.jpg
    photo316950.jpg
    1.7 MB · Views: 2
  • photo316951.jpg
    photo316951.jpg
    1.4 MB · Views: 2
Last edited:

pascoea

Seaman Apprentice
Joined
May 8, 2017
Messages
44
Installment number 3,gutting the rest of the interior.

As I mentioned in the second post, pretty much everything on the port side was rotten, console, floor, all gone. It all had to come out. Once I got the floor out I realized that all the foam was waterlogged. So that had to some out too.

In this pic you can see the extra reinforcing I added to the sides/wings of the upper platform. There really wasn't anything else to attach them to.

The first thing I did was take the drivers console out, and used it as a template to build the new one.

fetch


Next, out with the floor boards, flotation foam, nasty-ass carpet along the keel. Peeled all the wiring and control cables back.
fetch


In with some new foam. Picket up some 2-part epoxy foam from Jamestown Distributors. I laid some plastic down to create a sealed "bowl" for the foam, held it in place with blue painters tape. Made sure to go all the way to the transom. My application method was to mix up small batches, 2-3 cups of each part, in gallon sized ziploc baggies. Dump the parts in, kneed them together, then cut a small bit of the corner off to pour the foam where I needed it. Repeated for both sides. I ended up using the entire 2 galons of foam. When I was done, the foam ended up too high, so I used a hack-saw to shave the foam down until I could get the floor boards down. (Hindsight #4. I probably should have used more foam. What went in wasn't quite as much as what was taken out. Hindsight 4.5, my application method sucked. I don't know what I'd do differently next time, but this method was awful.
fetch


Next step, cut, paint, and fit the floor. Same stuff as up as up front. Drill a small pilot hole in the ribs, counter-sunk #12 stainless sheet metal screws. I didn't use any adhesive on these panels.

fetch


Pug included for reference. He was inspecting the finished floor.
fetch


Next up. Consoles!
 

Attachments

  • photo316957.jpg
    photo316957.jpg
    817.9 KB · Views: 1
  • photo316958.jpg
    photo316958.jpg
    871.6 KB · Views: 1
  • photo316959.jpg
    photo316959.jpg
    1.5 MB · Views: 1
  • photo316960.jpg
    photo316960.jpg
    1.5 MB · Views: 1
  • photo316967.jpg
    photo316967.jpg
    928.9 KB · Views: 1
  • photo316968.jpg
    photo316968.jpg
    466.6 KB · Views: 1

pascoea

Seaman Apprentice
Joined
May 8, 2017
Messages
44
Alrighty. Now that the floor is in, time to start putting the interior back together.

Using the original consoles for reference, I built new ones. Again, using marine plywood, liquid nails, and staples. (This time, standard 1/4" wood staples. I couldn't find staples for my air nailer in stainless. Here's to hoping these don't rust)

fetch


Once I had them built, they were painted with exterior paint. This one is the passenger side, The entire top part is the glove box compartment, so there is a full "floor". The drivers side has an open bottom to leave access to the steering mechanism and wiring.
fetch


Then covered in more automotive carpet. The tops are covered with a 1" foam pad and wrapped in vinyl. Thank the Internet gods for youtube tutorials! I ran out of room for gauges, so a cobbled together a gauge pod for the speedo and tach. When I got the boat, the only gauge on it was voltage. I added Speedo, Tach, Fuel, and Voltage, added a stereo, and added a proper switch panel with phone charging port. The lid of the console is held on with 3/4" aluminum angles. Two on each side and one in the back in the middle.

fetch


Mocked-up to check the mounting of the windshield. For the glove box I took the original compartment and cut off the compartment part of it, leaving just the door and frame. There's a LOT of room for crap in there!
fetch


Up next, detailing out the interior.
 

Attachments

  • photo316970.jpg
    photo316970.jpg
    403.9 KB · Views: 2
  • photo316971.jpg
    photo316971.jpg
    575.4 KB · Views: 2
  • photo316972.jpg
    photo316972.jpg
    967.6 KB · Views: 2
  • photo316973.jpg
    photo316973.jpg
    940.6 KB · Views: 2

pascoea

Seaman Apprentice
Joined
May 8, 2017
Messages
44
The interior panels are all 1/4" standard plywood. The blue vinyl pieces have 1/4 or 1/2" foam behind it. For the speakers and lights, I hole-sawed them in from the back after the vinyl was mounted, then "star-fished" the vinyl around the back of the board to keep it from moving. For these (and the consoles above) the foam is glued to the backer, and the vinyl is just stretched over the foam, no glue. Speaker/stereo is "boss" brand from, I don't recall the brand of the courtesy lights, but they are LED style from Amazon. The fasteners are chrome plated with integral washers, specifically designed for boat upholstery. I didn't want screws poking through the aluminum rail/storage on the side, so I took chunks of plain wood (remember, don't use treated!) that are screwed to the bottom of the rail, then the upholstery screws are attached to that.

fetch


First side completed. I re-used the factory aluminum strip on the bottom. For whatever reason it wasn't fastened to the floor from the factory. I chose to screw it down before I screwed the side boards to it. I did end up shimming the carpeted board out 1/4" to make it more flush with the vinyl. Controls are mounted in their stock location.

fetch


I apologize, I don't have any pictures of the rear bench under construction, but here is the semi-finished product. The idea here was I wanted storage, seats, and a fishing platform. The two side boxes are 1/2 plywood, fastened to the side rail and the floor. The seat is a large box made of 1/2" on the sides and front, 1/4" on the back and bottom, and 3/4 on the top. There is a reinforcing beam run through the center, front to back. The lid of the seats open to a large storage area, and the whole assembly folds forward to get to the battery and fuel tank.

fetch


Here you can see the two seats mounted, with a center arm rest. I went back later and added a 3rd cup holder in the center, because you can never have too many beer holders.

fetch


Here's the fishing platform. All made of 3/4 marine plywood. On the back half of the platform I laminated two 3-inch-ish wide strips of 3/4 plywood to create a beam that runs across the back. My first attempt at this, I neglected the fact that the motor had to tilt up, so I went back and added a second hinge so the back platform can fold up to allow the motor to be fully lifted. I went back later and added holes so you can use the cup holders when the platform is folded out. Used more aluminum piano hinge for the bench, bench lid, and platform. Hindsight #5, don't use piano hinges where people will be walking/laying down. They weren't as much of a problem up front because I didn't care of the storage lids would open all the way, but these needed to be able to lay flat in the open position, and I had to mount the hinges higher. At some point I'll replace the piano hinges on the deck with proper counter-sunk 180 degree hinges. Hindsight #6, pay attention to what you are doing. I wasted a lot of time having to tear this deck apart when I realized I couldn't lift the damn motor!

fetch


Last part of this thread... I trailer my boat, and I hated lugging the portable tank out of the boat to fill it, and having to carry another 5 gallon gas can out. So I added a 14-gallon tank and filler. Again, being a cheap-ass, I wasn't about to pay $30 for hold down straps, so I made my own. The foam around the tank is two strips of 3/4 foam weather stripping. #12 sheet metal screws holding it down. The fill tube was a pain in the ass, as those hosed aren't very flexible. I ended up getting two 45 degree pre-bent hoses, a coupling, and a pile of hose clamps.

Not a lot of room left back there!

fetch


Gas cap with integrated vent! Hindsight #6, I should have built a plate of some kind that this could sit on. It's not very sturdy, and if you spill it just sits on the carpet and runs into the boat. No bueno.

fetch


So there it is, about 6 weeks of part-time work, condensed into an hour of posts!

I'll come back tomorrow and throw out some pictures of the exterior work.
 

Attachments

  • photo316974.jpg
    photo316974.jpg
    803.7 KB · Views: 2
  • photo316975.jpg
    photo316975.jpg
    1.2 MB · Views: 2
  • photo316976.jpg
    photo316976.jpg
    1.4 MB · Views: 2
  • photo316977.jpg
    photo316977.jpg
    980.9 KB · Views: 3
  • photo316978.jpg
    photo316978.jpg
    1.6 MB · Views: 2
  • photo316979.jpg
    photo316979.jpg
    1.2 MB · Views: 2
  • photo316980.jpg
    photo316980.jpg
    1.3 MB · Views: 2
Status
Not open for further replies.
Top