1994 Bayliner Capri Rebuild

aggiebtw

Cadet
Joined
Mar 16, 2010
Messages
23
This is an interior rebuild of my 1994 Bayliner Capri Fish & Ski. It's an 18.5' V-hull with a 3.0L MerCruiser Alpha One I/O.

This rebuild started exactly 1 week after deer season ended in January 2012. I knew I had some soft spots in the deck from the previous fishing season, and I knew the time was coming for some major work on the boat.

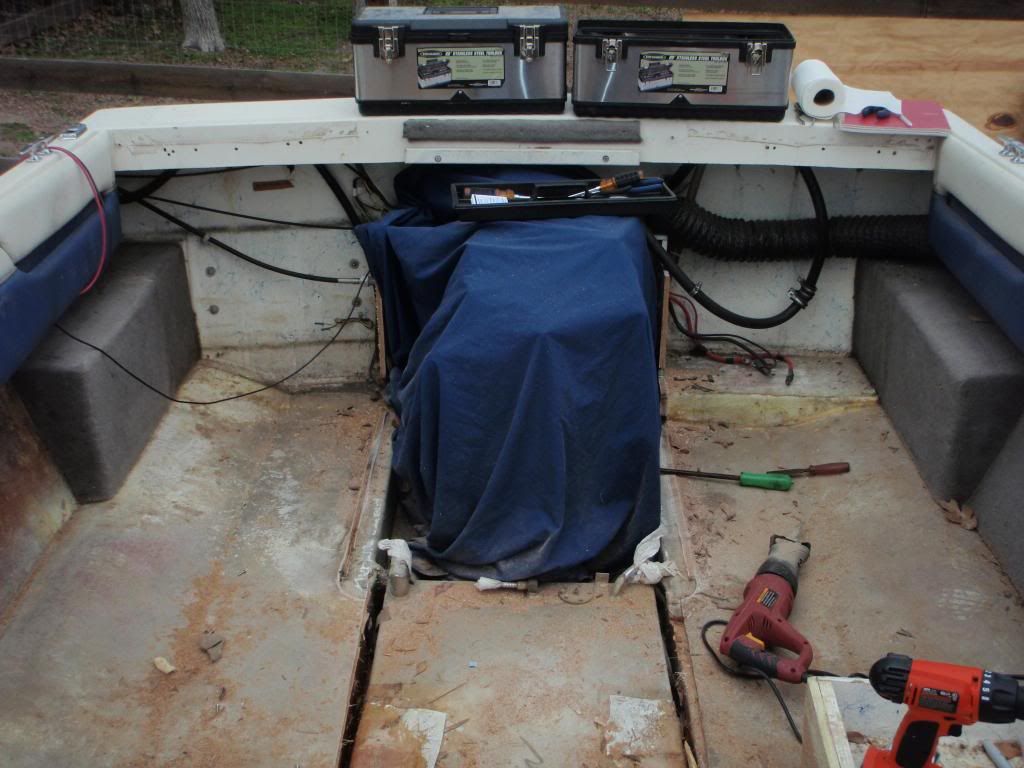
Anyways, the weekend after deer season ended, I went and uncovered my boat and prepared to get her ready for the lake that same day. It had been just sitting all winter long. Well, about the time I set foot inside, my foot just about went through the deck. I immediately dropped the fishing plans and got my tools and went to work.

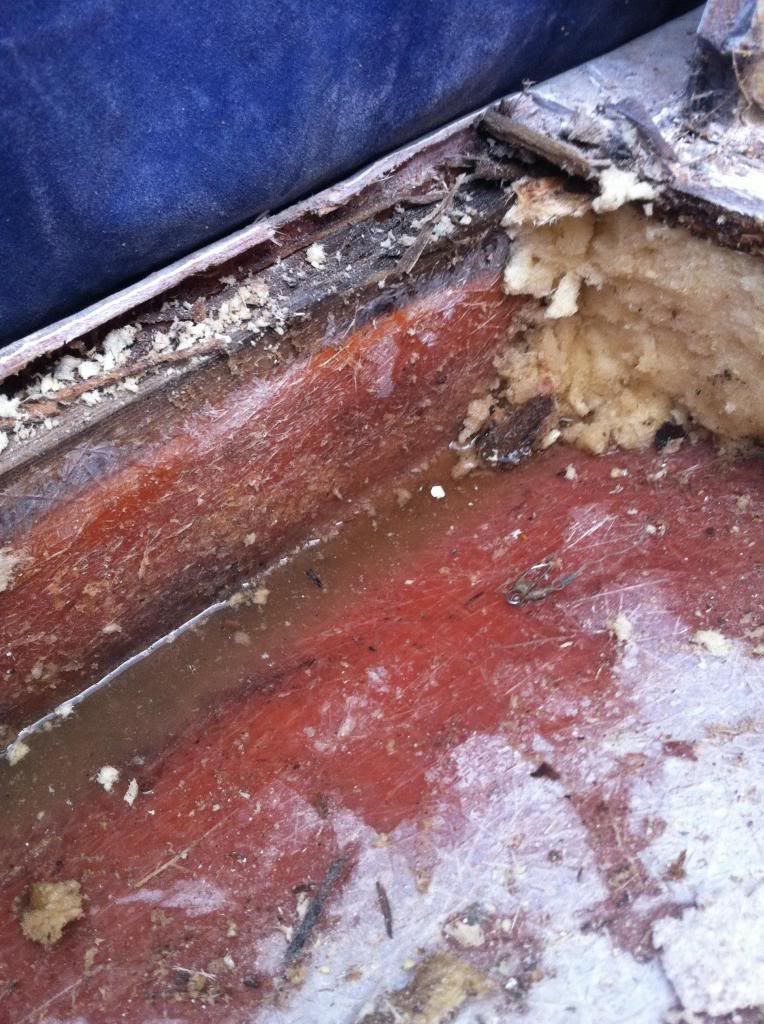
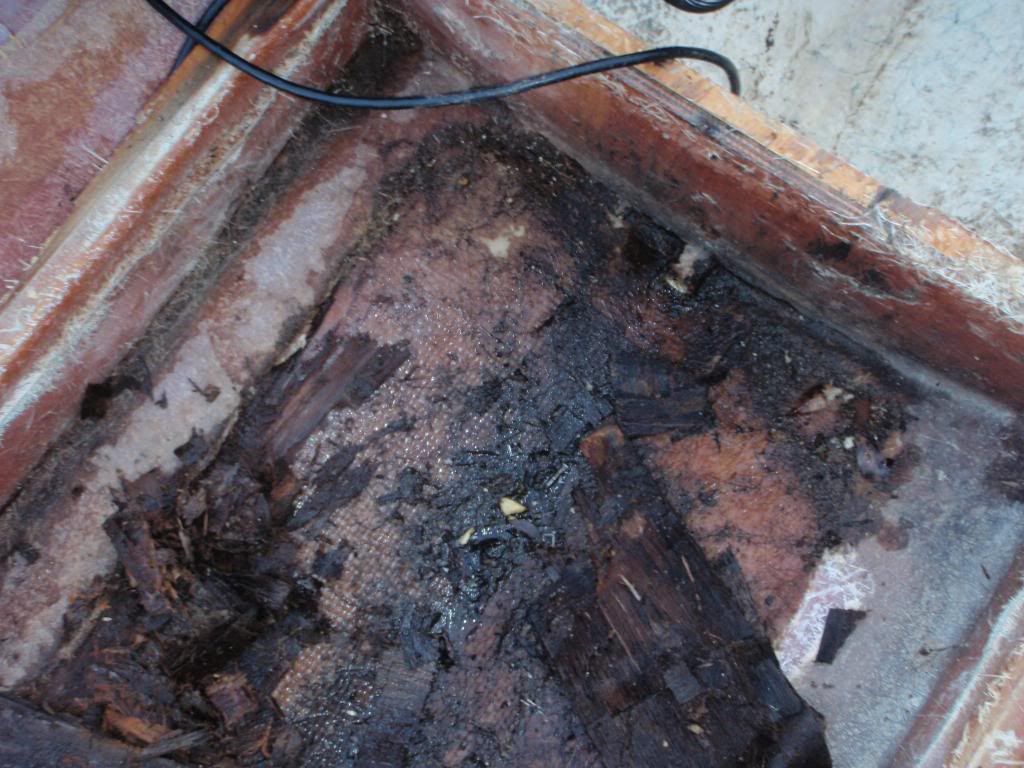
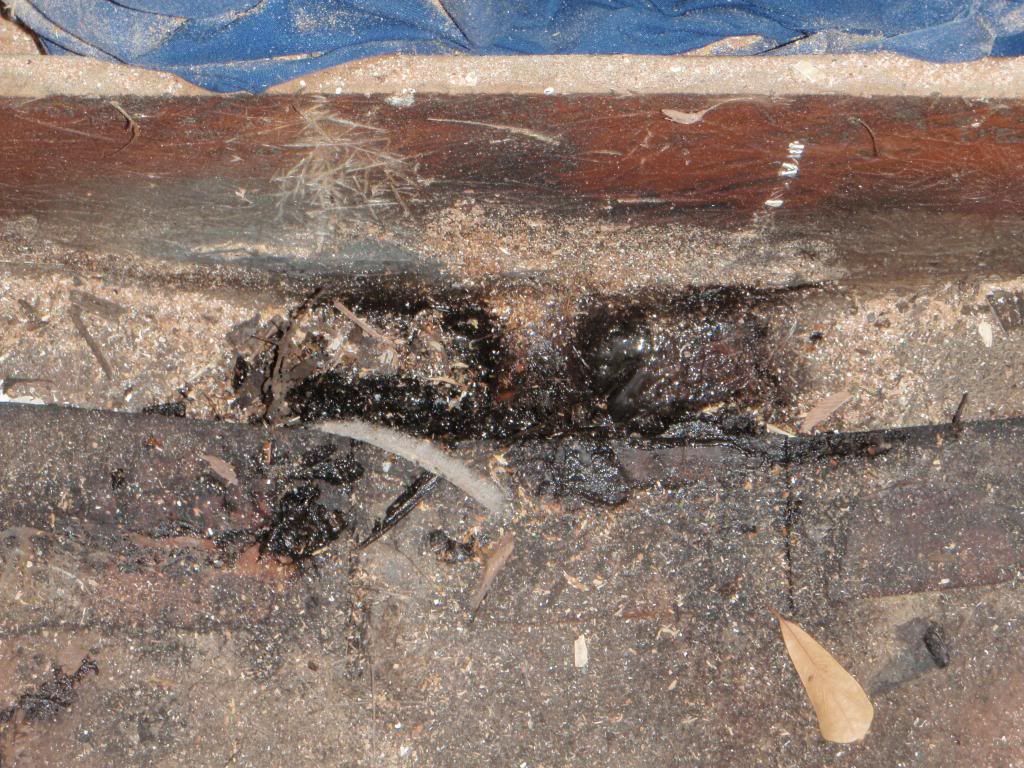
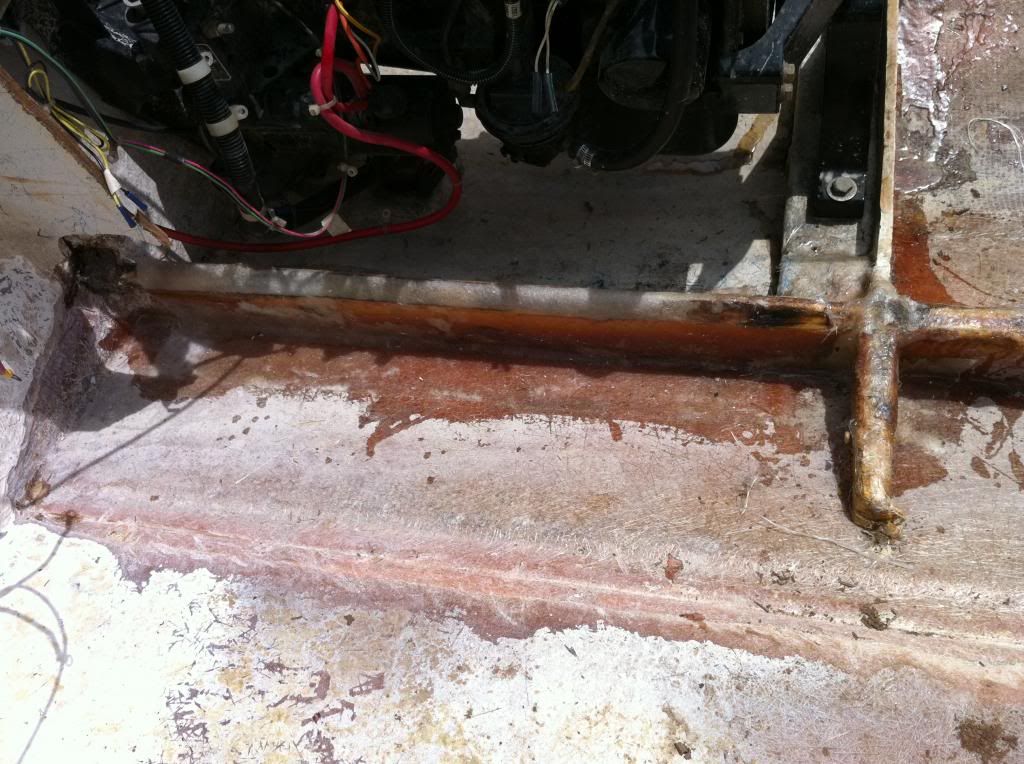
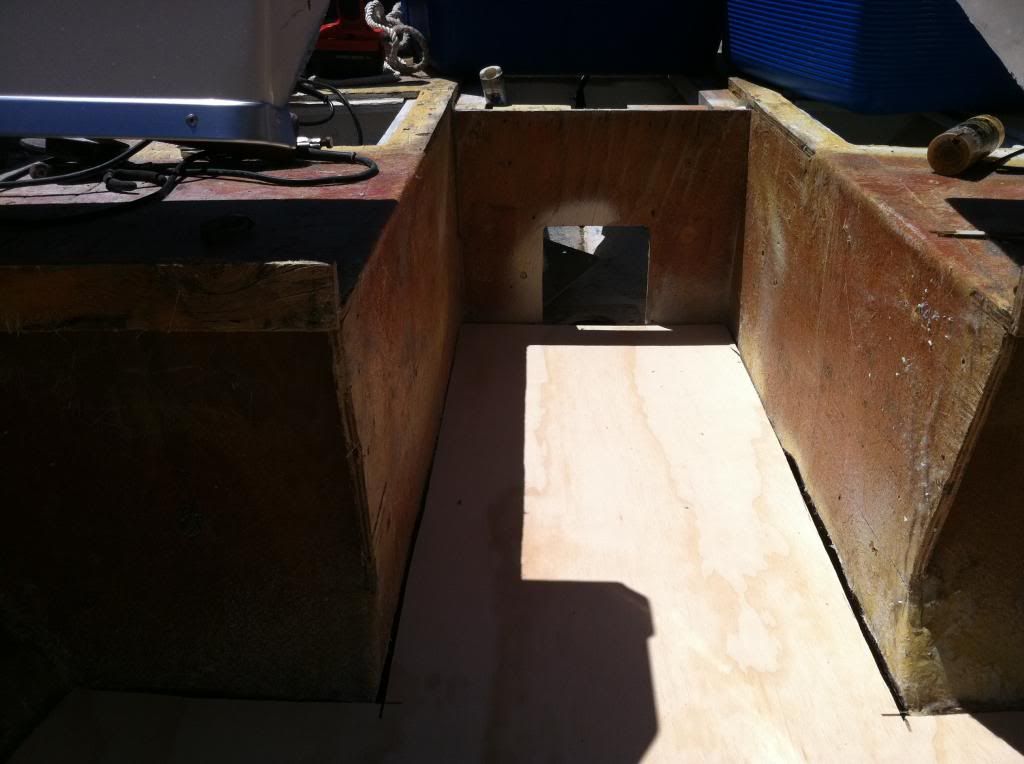
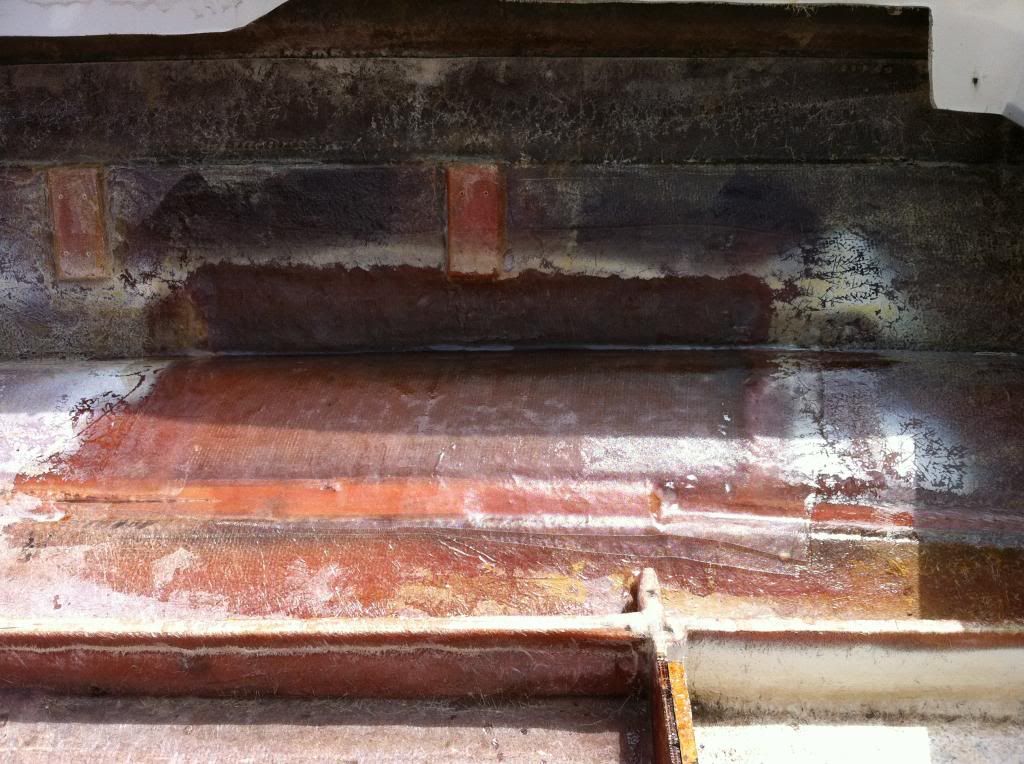
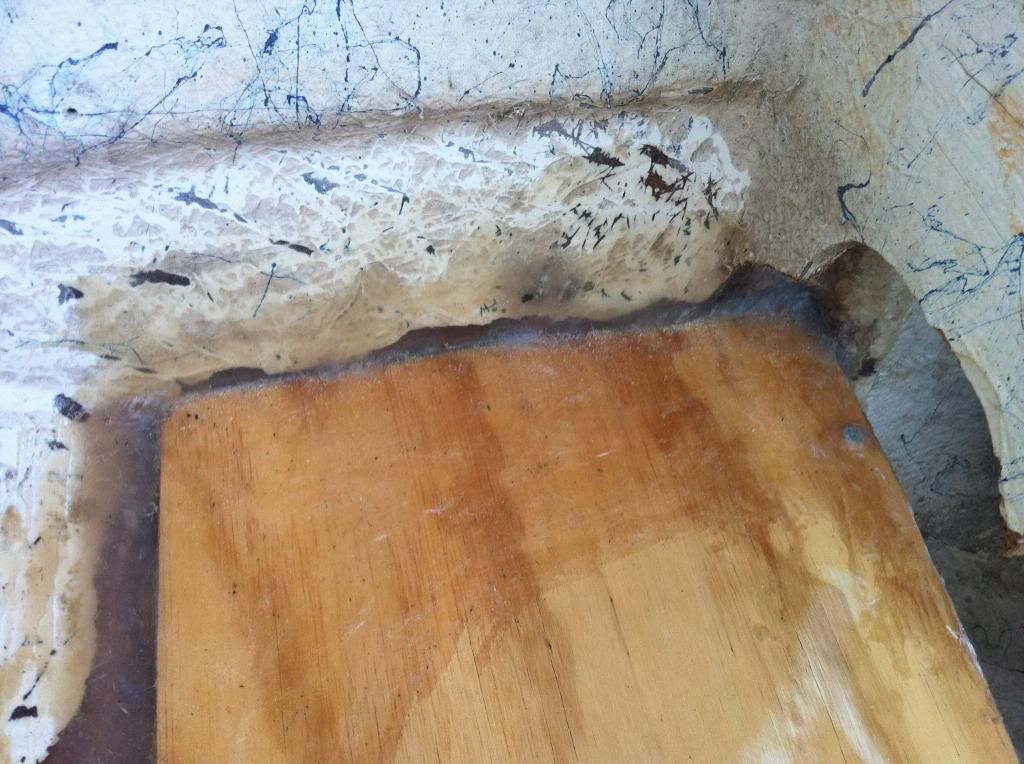
Once I ripped up the carpet, and this is what I was dealing with.

97854b14-76fe-49d6-b2b8-2f0a3463e5c6_zpse32f7426.jpg


7222D777-E36C-4FD6-8C9D-C913F9134617-370-0000006DA319C415_zpscd3bd4c4.jpg


IMG_0355_zpsbdc05605.jpg


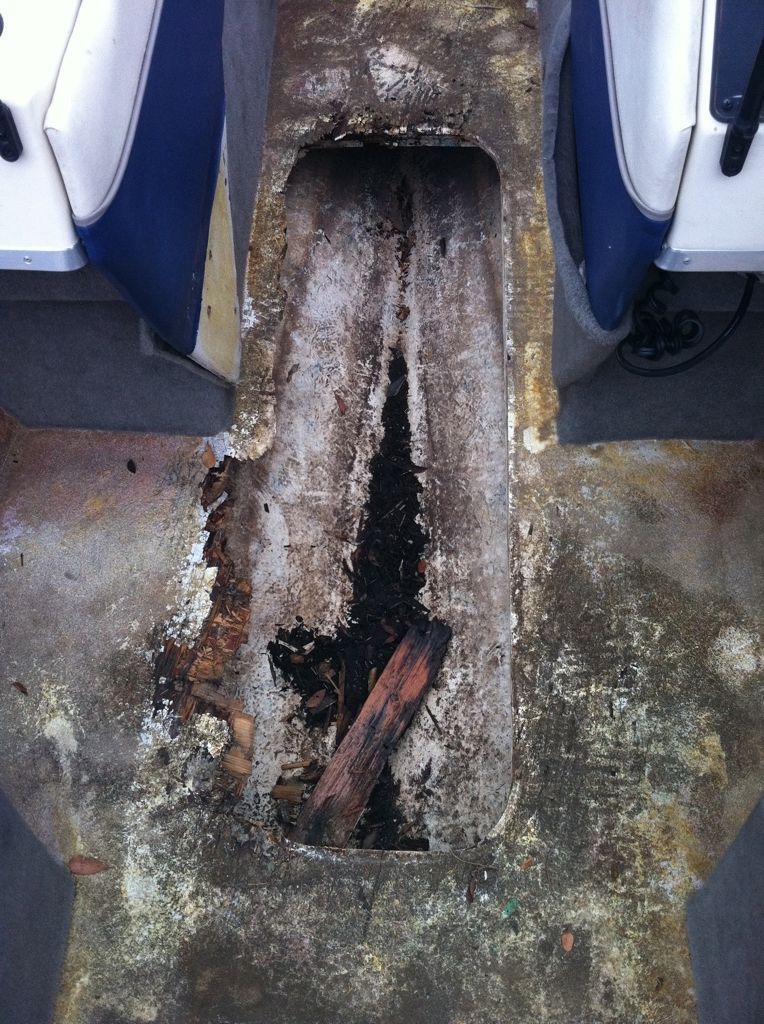
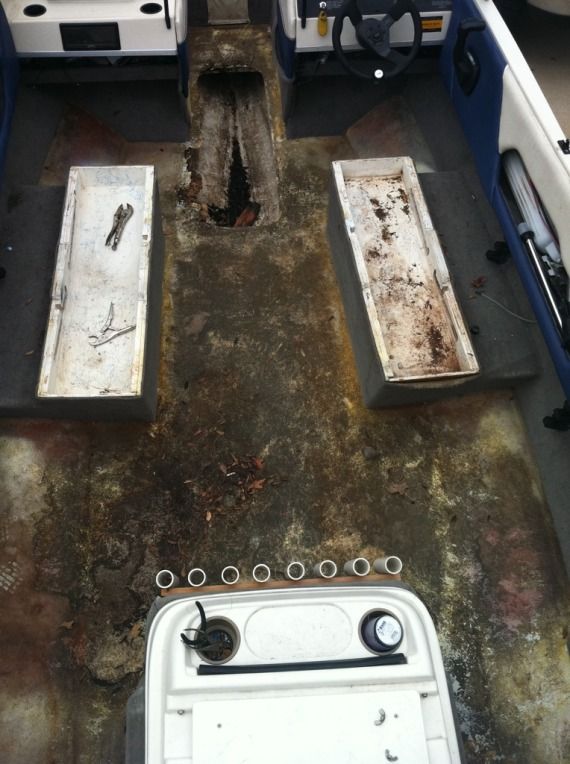
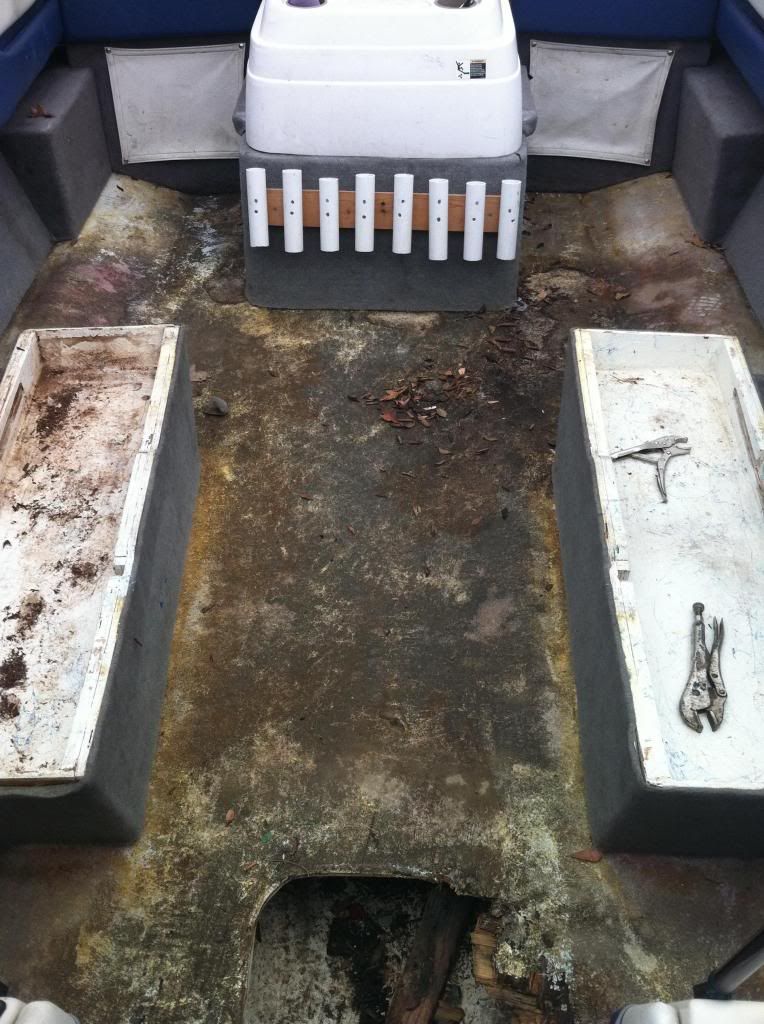
Quite the mess indeed. The carpet just holds all the moisture in. The area around the ski locker was the worst part, and that's where my foot went through. Notice my high tech rod holders.

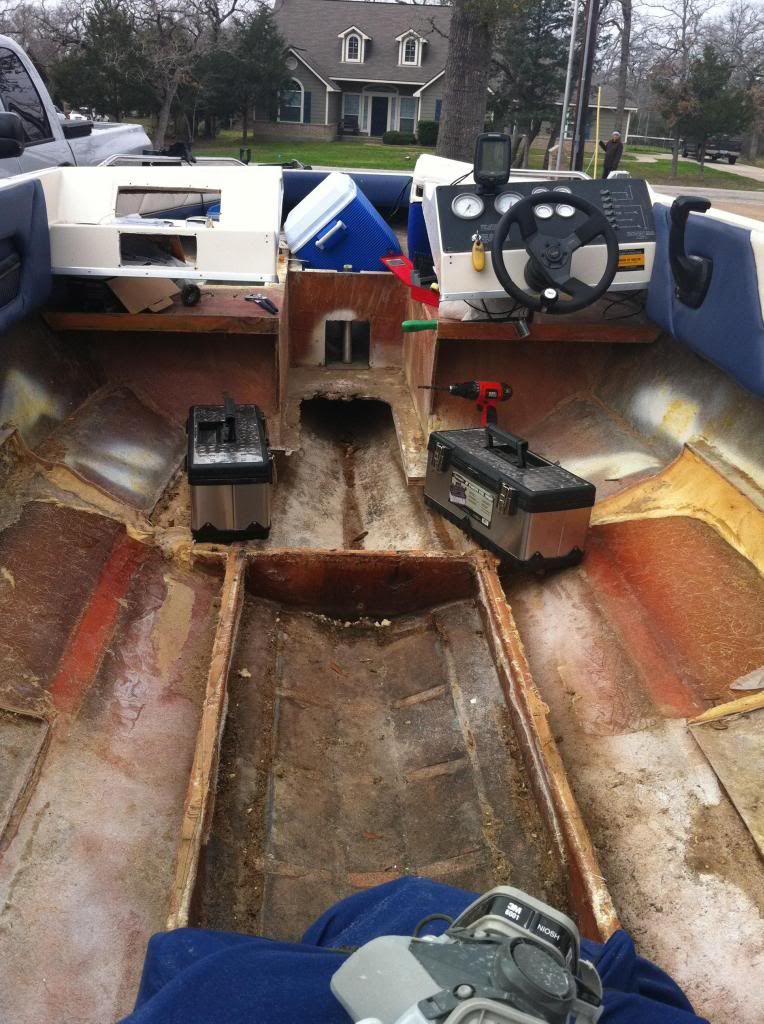
A few things to note here. As you can see in the pics above, the seats were originally the back to back seating on each side. My plan here is to remove this setup altogether and replace with a single bucket seat on each side. I do not plan to replace the carpet either, for obvious reasons. I will replace it with a roll-on bedliner instead.

Also, going into this project, I really had no idea what I was doing. I have never tackled a project of this sort. I am not a carpenter, and I knew nothing about fiberglassing. But I do like to think of myself as a handyman. There are a lot of things that I like to think I can do fairly well with my hands. Boat rebuild and fiberglass work was just not one of those things. But it was something I was eager to try. I learned as I went, and got LOTS of guidance from various internet postings (most of the them from Iboats) of folks doing exactly as I am doing here.

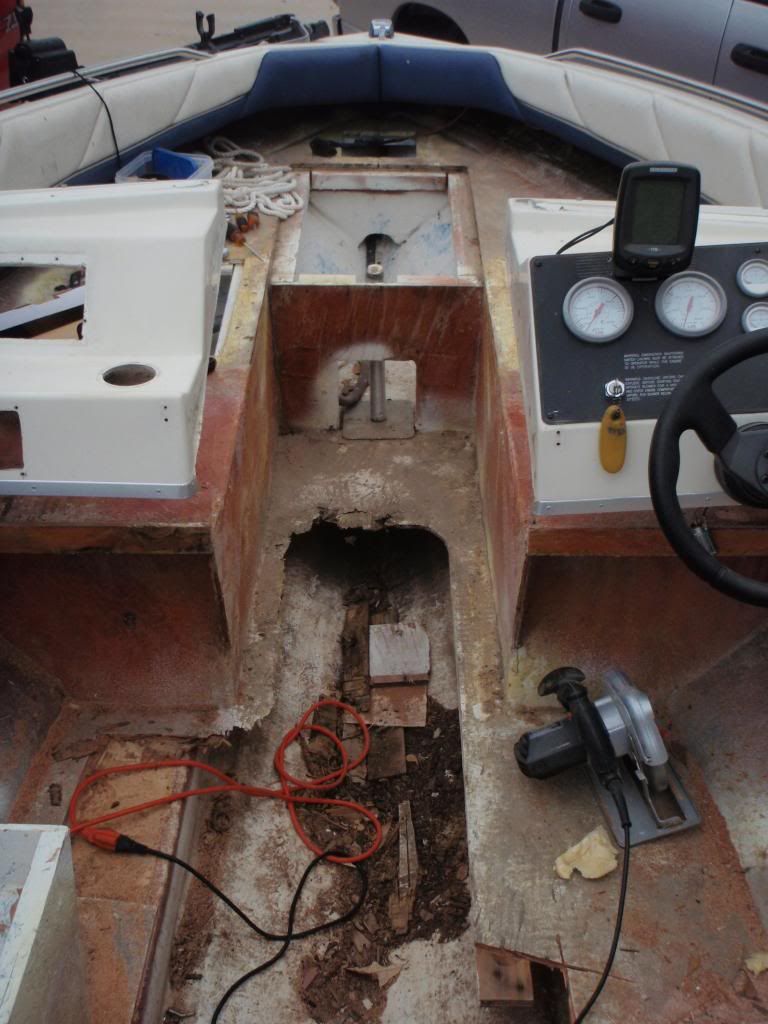
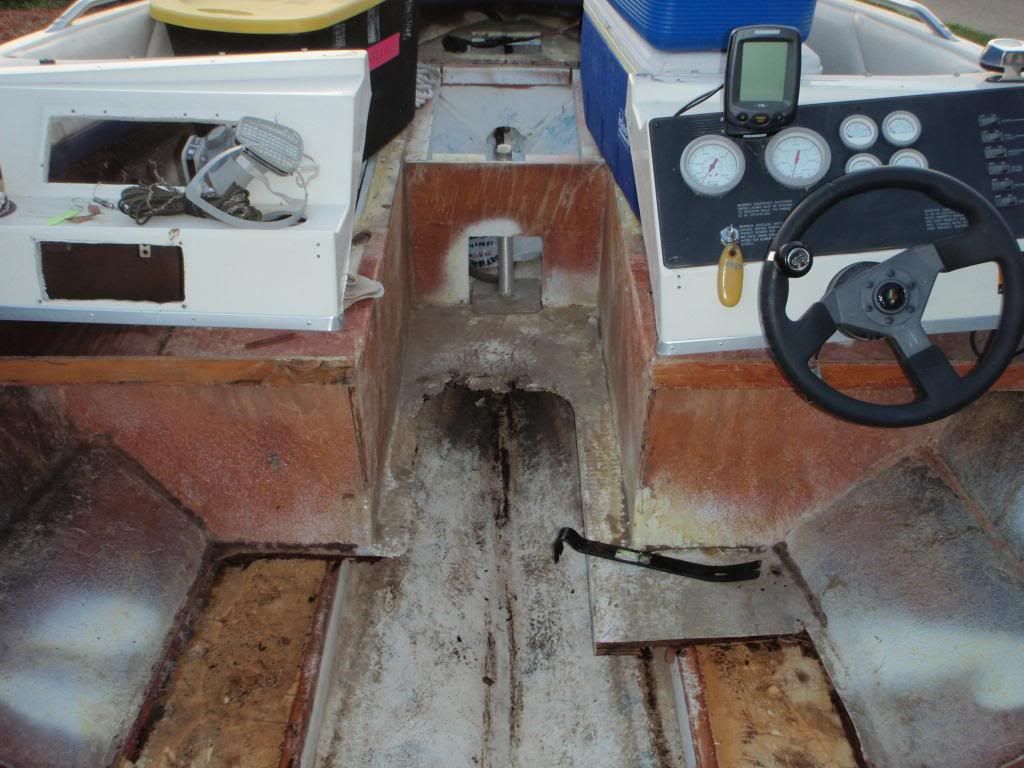
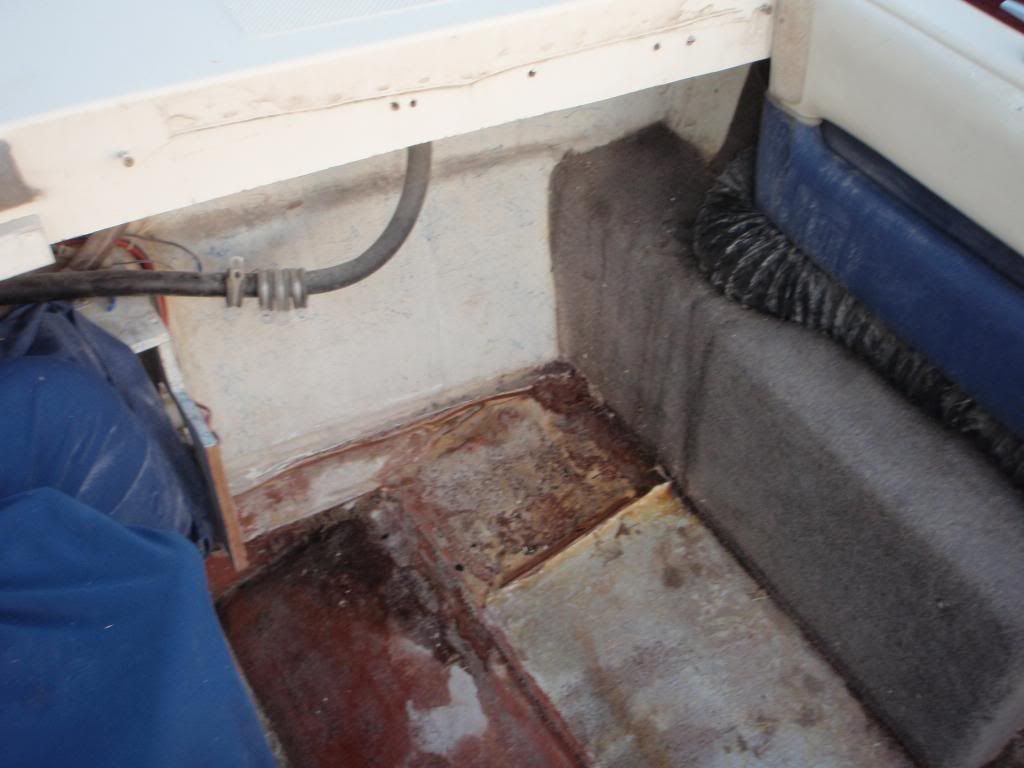
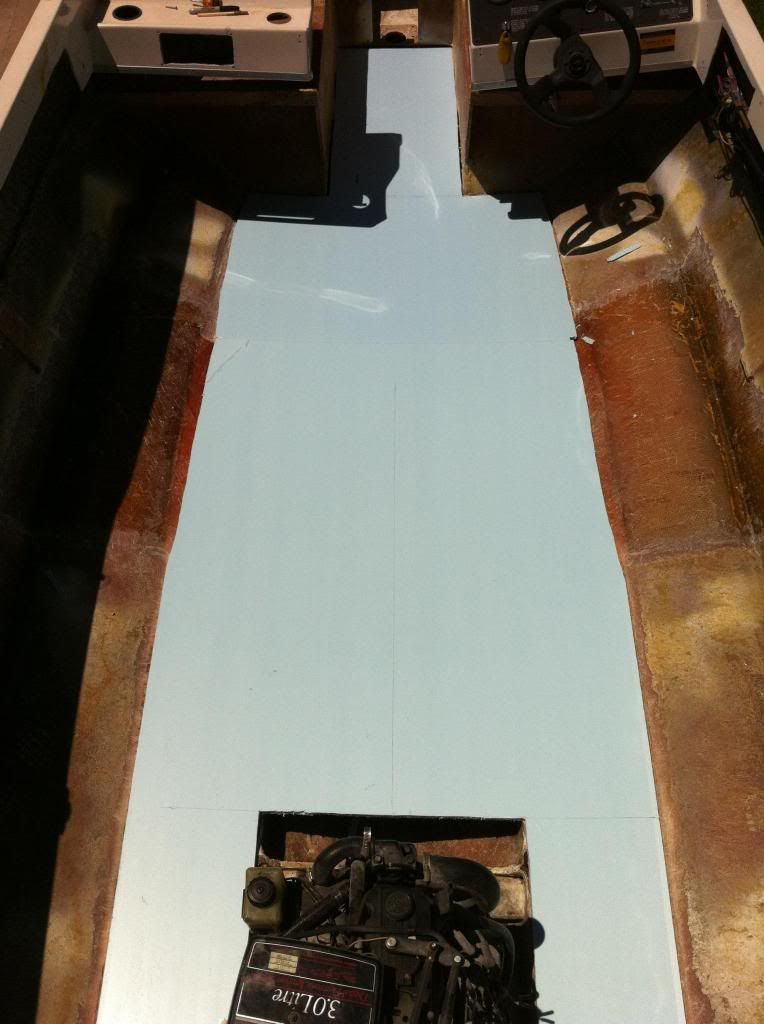
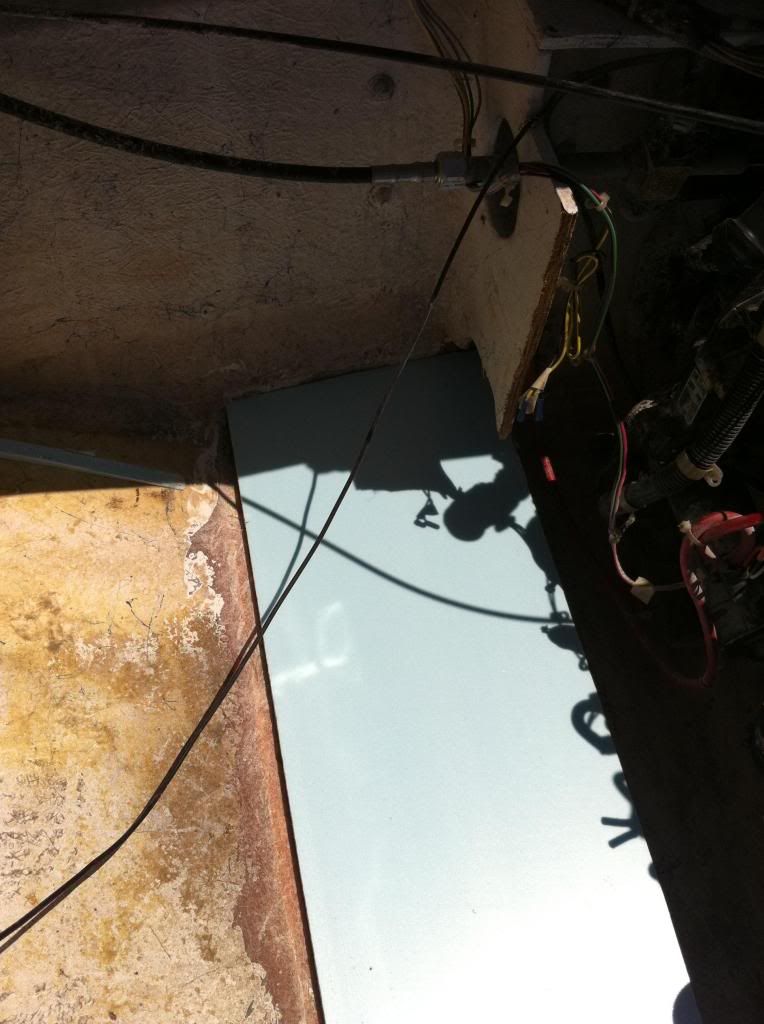
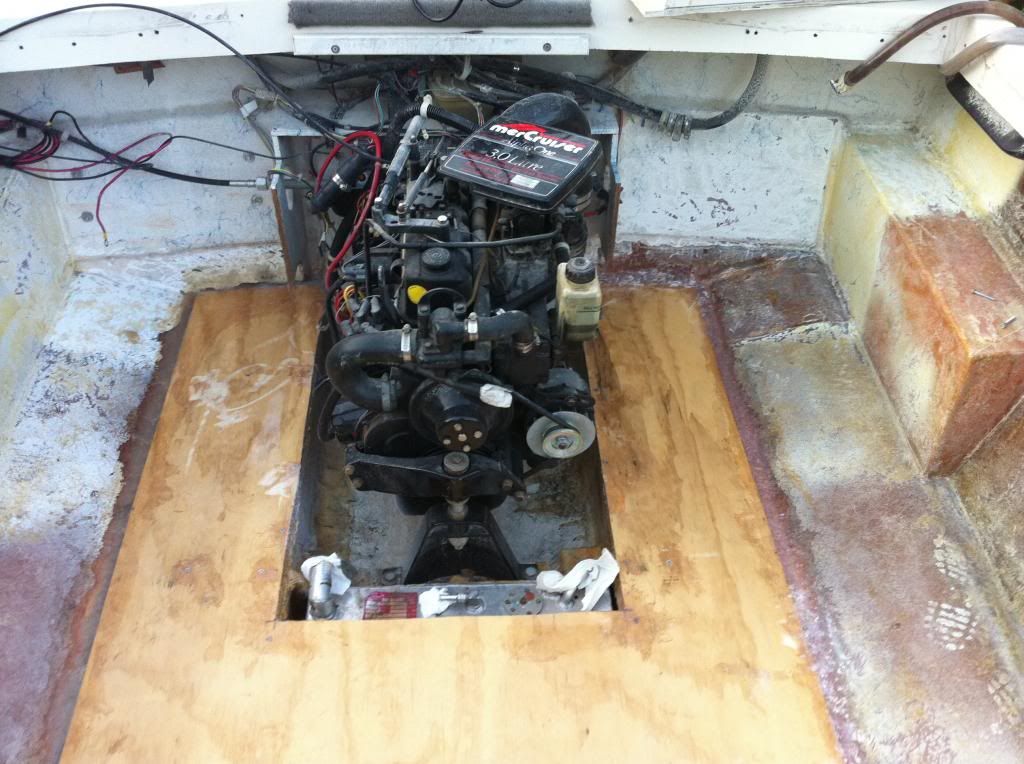
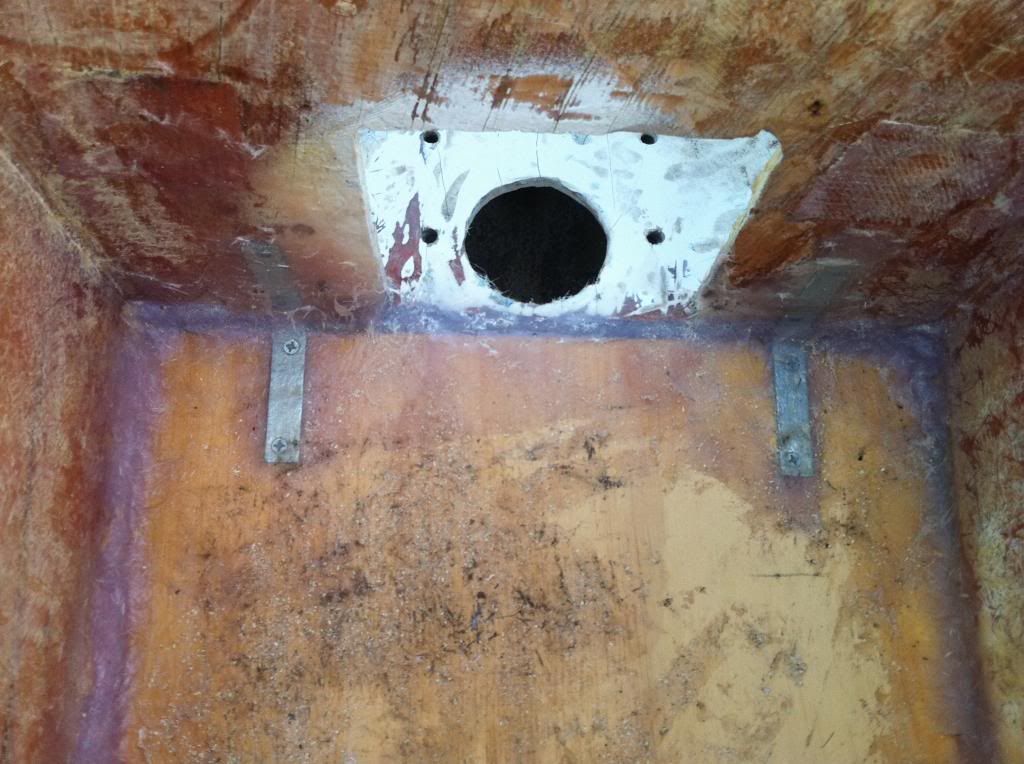
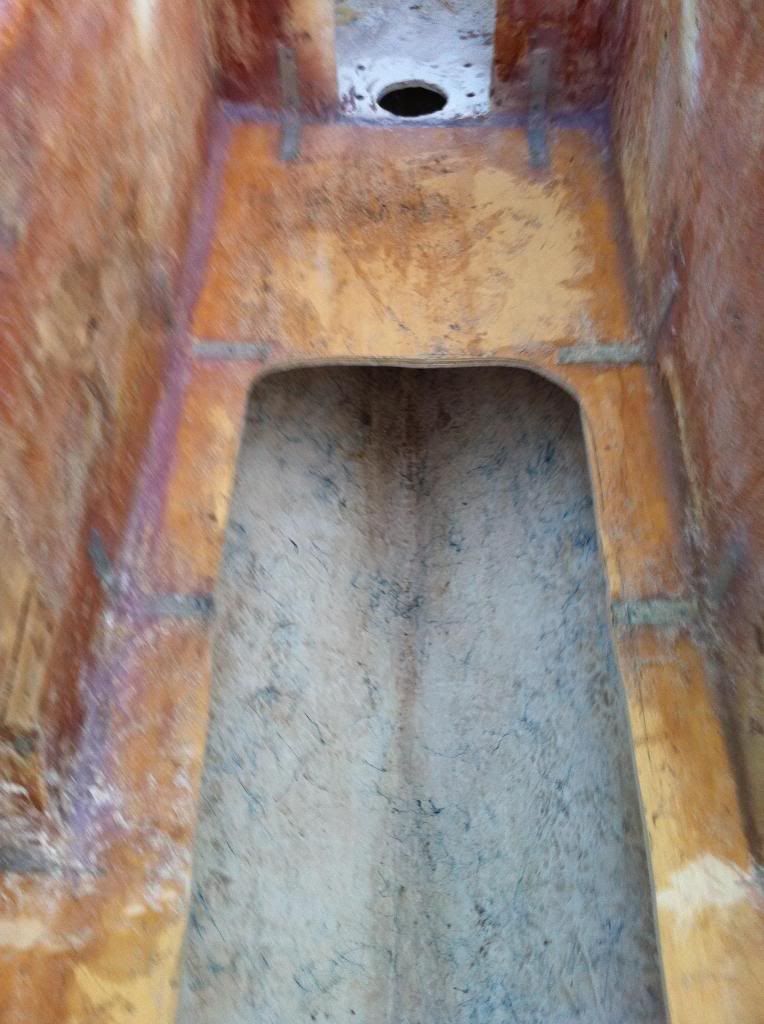
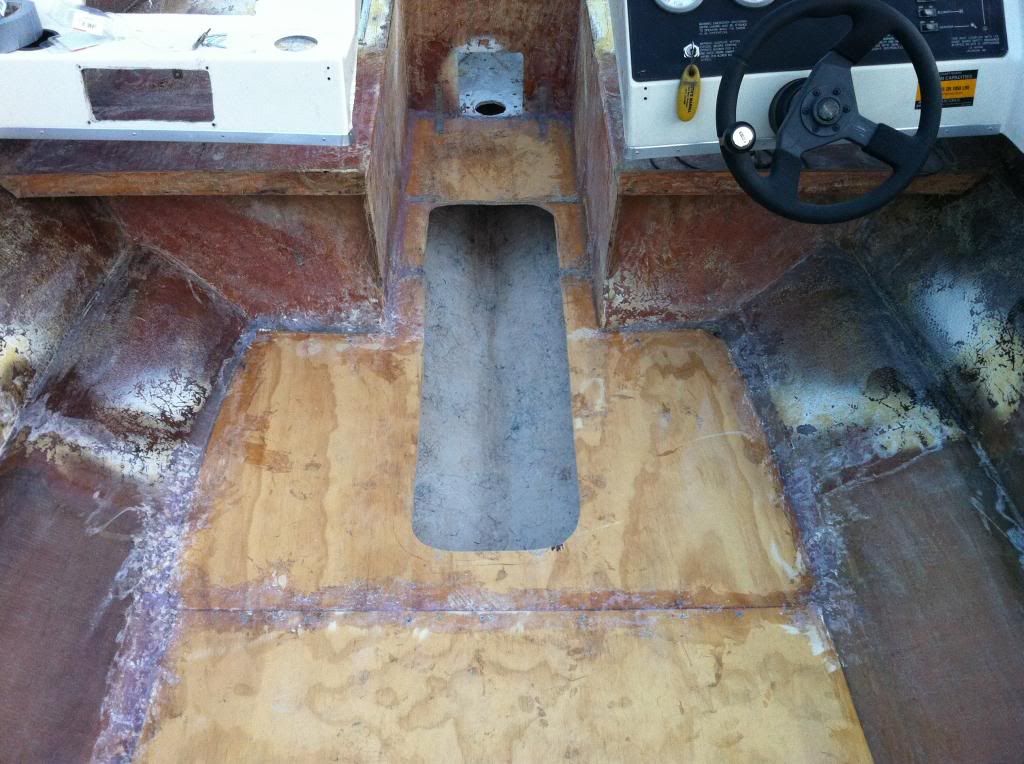
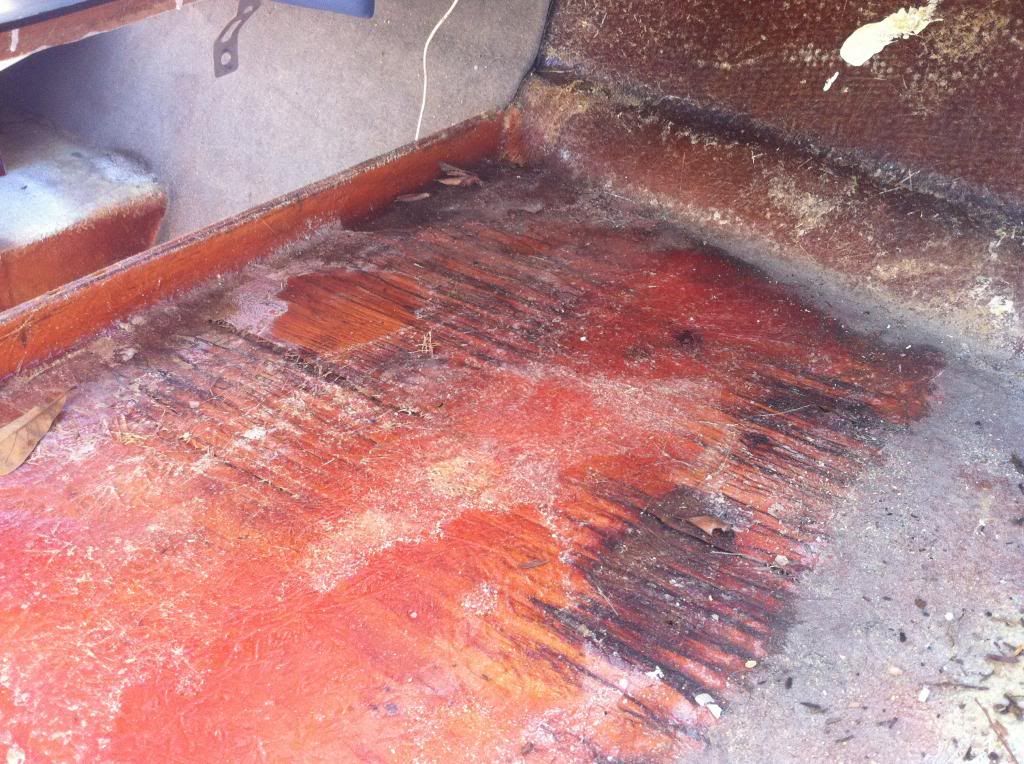
A pic of the area under the passenger side console.

IMG_0362_zpsce3e1221.jpg
 

aggiebtw

Cadet
Joined
Mar 16, 2010
Messages
23
Re: 1994 Bayliner Capri Rebuild

Here is when I actually started doing some cutting. I took a skilsaw and cut right on top the stringers to remove the middle section of the deck. I set the blade shallow such that the blade was just deep enough to cut through the deck, but not into the stringer.

The first middle section removed, exposing the fuel tank.

P1153328_zps7d795369.jpg


P1153329_zps59dcc8be.jpg


The outsides being removed by use of the prybar, sawzall and skilsaw.

The engine compartment has also been removed by cutting it off as close to the deck as possible with a sawzall. At this point, I had no idea how I was going to reinstall it when that time came.

P1153330_zps58b9f230.jpg


P3123398_zps529af4cb.jpg


That forward-most compartment is where the livewell was. It was very poorly designed, and a real PITA to deal with. My plan is to remove it completely and utilize that space as storage. Storage space is very limited on this boat. Also, I will use the livewell pump for something else other than a livewell. More on that later on.

More pics to come. I should note here that I am not far from being finished with this project, much farther along that this opening post. I will post more in the coming days.
 

jmmacky

Petty Officer 2nd Class
Joined
Jun 20, 2011
Messages
177
Re: 1994 Bayliner Capri Rebuild

This boat is very similar to mine except mine is an outboard. The console, interior structure, rails etc is all exactly the same. Looks like you have a good project on your hands and are well on the way with the tear down. There are some great threads on this site containing loads of info from other peoples' rebuilds which I have found massively helpful.

A good place to start is: http://forums.iboats.com/boat-resto...eck-stringer-restoration-splashed-454460.html
 

aggiebtw

Cadet
Joined
Mar 16, 2010
Messages
23
Re: 1994 Bayliner Capri Rebuild

Moving on now. Once I made some more cuts, I was able to pretty much fully remove the deck (sole?), and expose the completely soaked foam underneath. And once I finally removed the fuel tank, the muck that was underneath it was some basically rotted wood that had turned into a mud-like substance. Pretty nasty stuff.

Here is the moisture that was inside the foam.

IMG_0364_zpsc4f7228d.jpg


And here is what was beneath the fuel tank. Those pieces of wood would literally turn to mush when I picked it up.

P3123395_zpsc6cea452.jpg


Here is the last drainage hole just fore of the bilge.

P1153331_zpse1dee570.jpg


And a few more pics showing the entire area once I got it cleaned up a little bit.

IMG_0366_zpsd7e2bcbe.jpg


P3123396_zps5211c25e.jpg
 

aggiebtw

Cadet
Joined
Mar 16, 2010
Messages
23
Re: 1994 Bayliner Capri Rebuild

Here is another issue that I encountered. This is the where the the platform for the double seating was cut off. On the left side is lots of fiberglass reinforcement, on the right side is pretty much just bare hull. Once I cut off this platform, the structural integrity in this area had been compromised. I could stand on it and the hull would flex easily. As where if I put my full weight on the left side, there is no give at all. My plan at this point is to just layer the hell out it with fiberglass.

P3123397_zpse14a29c2.jpg
 

aggiebtw

Cadet
Joined
Mar 16, 2010
Messages
23
Re: 1994 Bayliner Capri Rebuild

Here is a pic showing how I cut out the battery platform. I intend to rebuild this the same way it was originally.

P3123402_zps0f66ce76.jpg
 

aggiebtw

Cadet
Joined
Mar 16, 2010
Messages
23
Re: 1994 Bayliner Capri Rebuild

As bad as everything else looks, the stringers were actually in pretty decent shape, thankfully. I drilled a few test holes in various spots, and they were still solid. This part of the stringers did have a little rot on the top, but I removed it and added a layer of resin and glass.

IMG_0810_zpsd2498d82.jpg


One thing I wish I would have done is taken more pictures. I have about 100 so far, but I dont feel like it even comes close to capturing all the work that I have put in. Between grinding, cutting, grinding, cutting....this is a very tedious process. Not to mention that its about at this time that the Texas summertime heat is setting in. And due to the nature of the work, I am wearing long sleeves and a respirator the entire time. Nevertheless, the next pics will show the very beginning of the actual rebuilding process.
 

aggiebtw

Cadet
Joined
Mar 16, 2010
Messages
23
Re: 1994 Bayliner Capri Rebuild

Next up is cutting the new deck. I ended up using 1/2" Arauco plywood from Lowes as the new deck, which is basically their AC grade. To get the shape of the new deck correct, I first used two 4x8 sheets of 1/2" styrofoam. I took some rough measurements, then started cutting with a utility knife. It worked VERY well. I'd cut just a little bit at a time until I got the shape perfect. I will then use these as a template to cut the plywood.

IMG_0721_zpse6fec406.jpg


IMG_0725_zpsf7736439.jpg


IMG_0722_zps04552dc6.jpg


IMG_0723_zps04935121.jpg
 

aggiebtw

Cadet
Joined
Mar 16, 2010
Messages
23
Re: 1994 Bayliner Capri Rebuild

Alright, now that I got the styrofoam boards shaped right for my new deck, its now time to start the fun part and start chopping on some wood!

The hardest part of this entire project is now done, which was all the sanding and grinding down of everything. None of it was overly difficult to do, but it is VERY time consuming. Getting ground up fiberglass in your skin really sucks too. No matter how much protection I wore, my arms always ended up very itchy at the end of the day.

Here are the pics of the next step completed. They didn't turn out perfect, but I thought it was pretty damn good for an amateur first-timer.

IMG_0727_zpsb183748d.jpg


IMG_0726_zpsf5654e00.jpg


IMG_0728_zps6141e34a.jpg


IMG_0729_zps528201ba.jpg


On the picture below, notice the big gap between the new board and the existing sides. That gap is about 3/4" almost to 1" at the most. That front part also just hangs freely. So if you step on it, there is nothing there to support it. I had an idea in mind on how to tie it all together to give it plenty of strength, although this idea is probably not what a professional would have done. But in the end, it worked pretty well. More on that later.

IMG_0730_zpsbc97b04b.jpg
 

aggiebtw

Cadet
Joined
Mar 16, 2010
Messages
23
Re: 1994 Bayliner Capri Rebuild

Before I placed the new boards in permanently, I went back to the areas where I took out the double seat platform. I had the bright idea that I could apply a couple layers of the Bondo fiberglass sheets from Wally World on the weak area and give it some strenth. Im not real sure why I thought this would help it, but it definitely didnt help it all. You can see the edges of the Bondo sheets I applied. It literally did nothing for it. So I let that be for now, and went back to working on the new deck. I will revisit this area after I get the new deck in.

IMG_0808_zps2fb795b7.jpg
 

aggiebtw

Cadet
Joined
Mar 16, 2010
Messages
23
Re: 1994 Bayliner Capri Rebuild

Back to the deck.

The next step is to screw it down, and then use PB to fillet the edges around the entire perimeter. Here the captains side at the transom. I could not have cut the new deck any more perfectly to fit here at the transom area. I please with how it all fit here. Also here you can now see the PB and the fillets I made with it. This picture was taken before any sanding, shortly after it dried.

IMG_0828_zps2c6e31b1.jpg


Here is the rest of the deck laid. I put the PB on every seam, and also coated every screw I laid with it. It appears I took the pics while I was sanding down the fillets at the seams.

IMG_0831_zps690029bb.jpg


IMG_0829_zpsbad06be8.jpg
 

aggiebtw

Cadet
Joined
Mar 16, 2010
Messages
23
Re: 1994 Bayliner Capri Rebuild

Remember the issue of the fore-most part of the new deck not having any support or anything to tie to? Well, here was my solution.

IMG_0826_zps483aaaf3.jpg


I got some 3" steel brackets and just screwed them right into the sides and new deck. I used 6 brackets total. I then applied the PB over the top of them to smooth them out. It took A LOT of PB to make the fillets at the seams in this area. The big hole you see there is where my seat pedestal mounts to the deck. I will have to drill 2 more holes into this board before all is said and done to mount the pedestal.

IMG_0824_zps0171f09e.jpg


IMG_0827_zps9f8e691e.jpg


IMG_0830_zpseece842c.jpg
 

aggiebtw

Cadet
Joined
Mar 16, 2010
Messages
23
Re: 1994 Bayliner Capri Rebuild

I also would like to note here that before I permanently put down the new deck, I first applied one layer of fiberglass to the bottom side. That's one of the things I really wish I wouldve got more pics of, was the actual fiberglassing process.

The fiberglass I ended up using was 2.5oz chopped strand mat. For application, I would first wet out the board with the poly resin using a 1/4" nap paint roller. As soon as the board was wetted down completely, I would lay the fiberglass mat down (which I had already cut to fit), then immediately coat the top of the mat with more resin until the white mat turns completely clear. Once you apply the hardener to the resin, it cures quickly, so you only have a short time frame to work. Its best to have help to do this. One person to mix, and one person apply it. I had my dad helping me out here. Due to the intense Texas summertime heat, I only had about a 15 minute window to apply the stuff, even if I only applied very little hardener to it. I was doing this while we were having some of those 105+ degree days last summer.
 
Top