74 Chrysler Conqueror SIII SuperBee 340 Jet rebuild and restoration

73Chrysler105

Chief Petty Officer
Joined
Sep 10, 2009
Messages
407
Okay so I have been lurking here a long time and just after 4 days of lost time at work finished reading through oops extenda boat thread and thats cause i skipped over some sections and skimmed over others. If I read the entire thing man I dont think I would be half way through it and would be looking for work cause nothign would get done.

Anywho that inspired me to post my own restoration project for others to learn from my mistakes and others to tell me what mistakes I am making along the way.

This is my first full restoration and seems to take on a life of its own. I want to first preface this by saying that I in no way am any sort of know it all and in fact I have done a lot of reading of the last two years about boats and repairs and a lot more over the last year preparing fo this restoration.

Now down to the project. This will due to the nature of the beast be very similar to the rebuild of oops boat (named not yet public) except that I wont be doing a hull extension, but he has made me think about it.
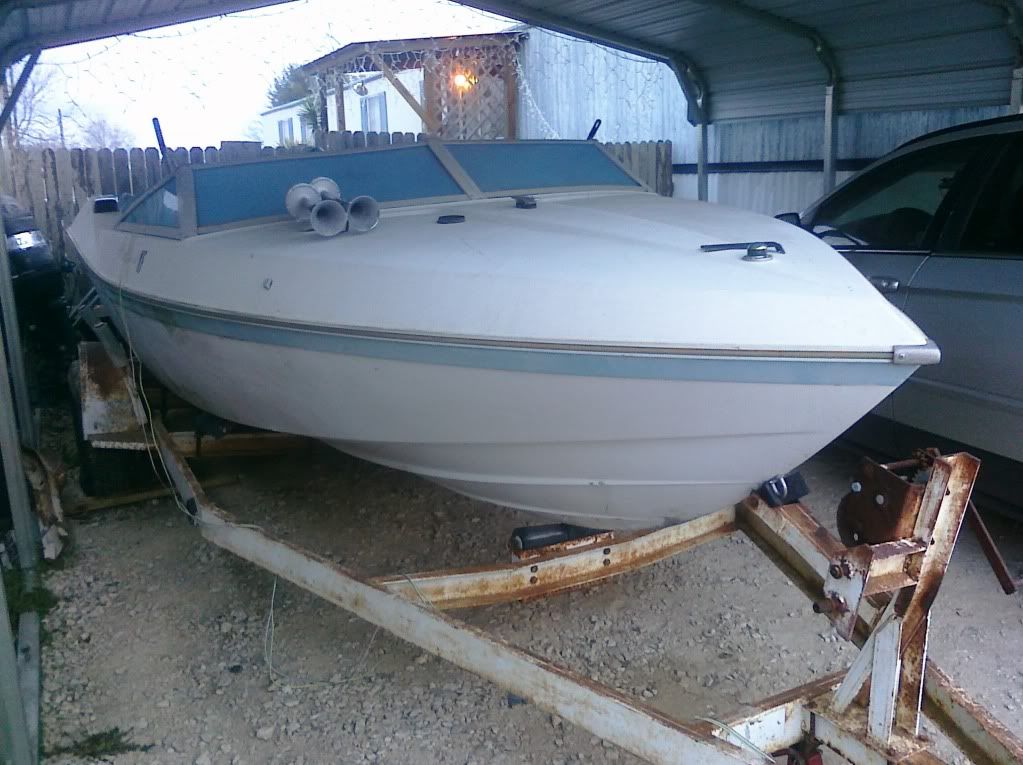
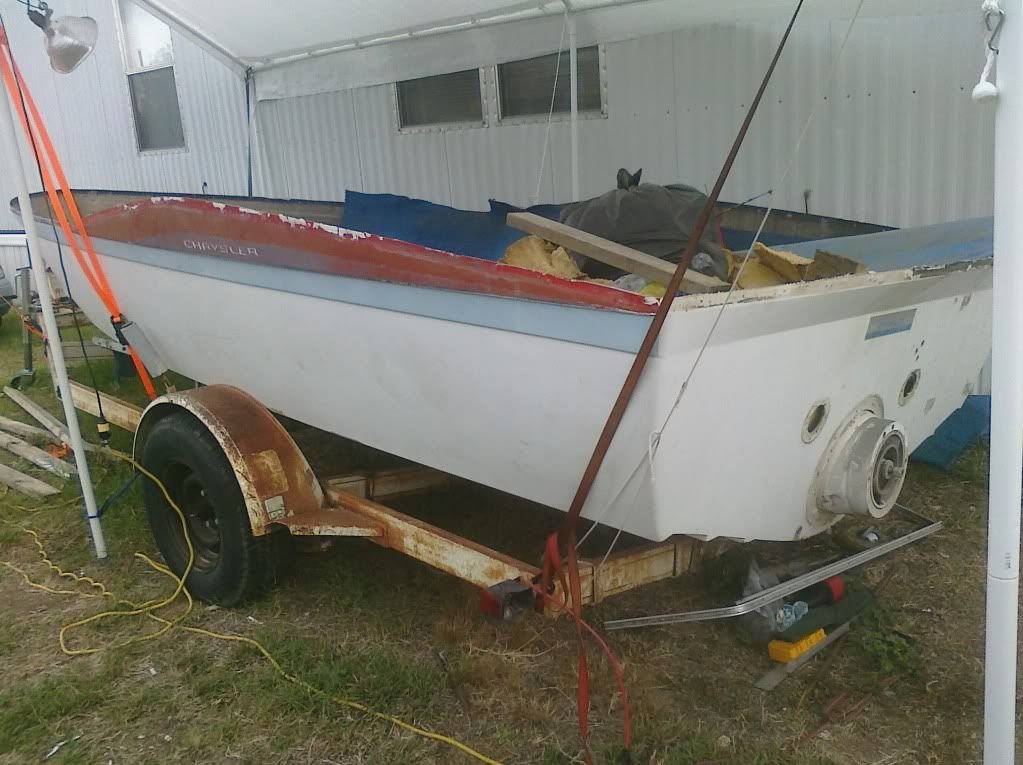
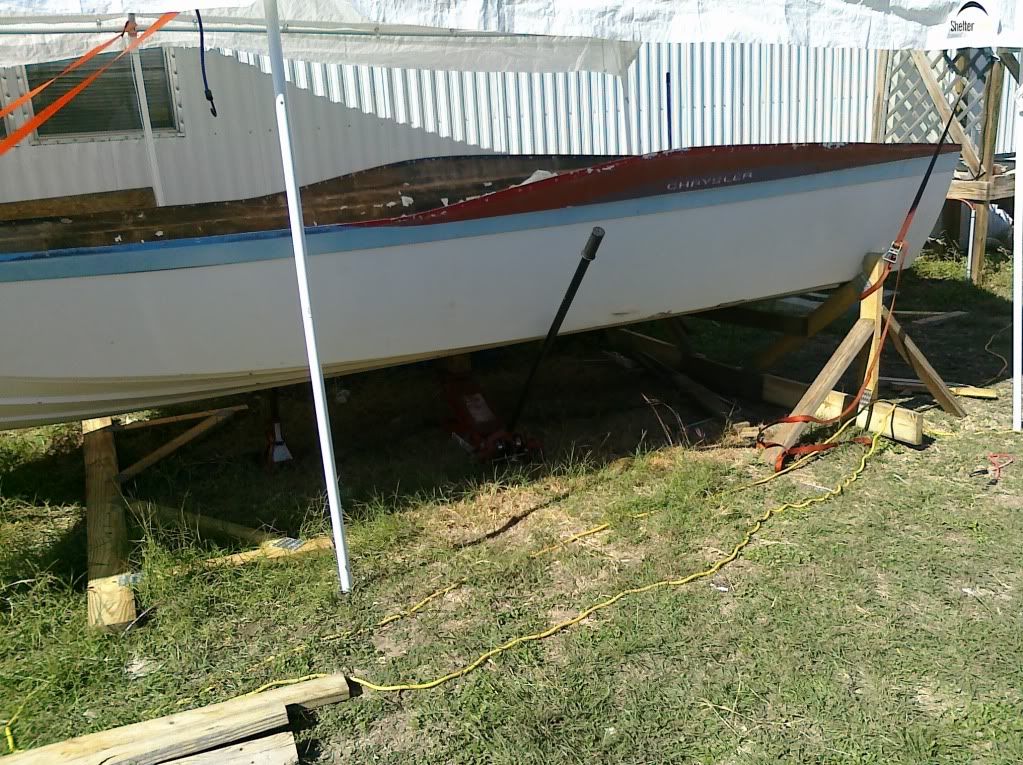
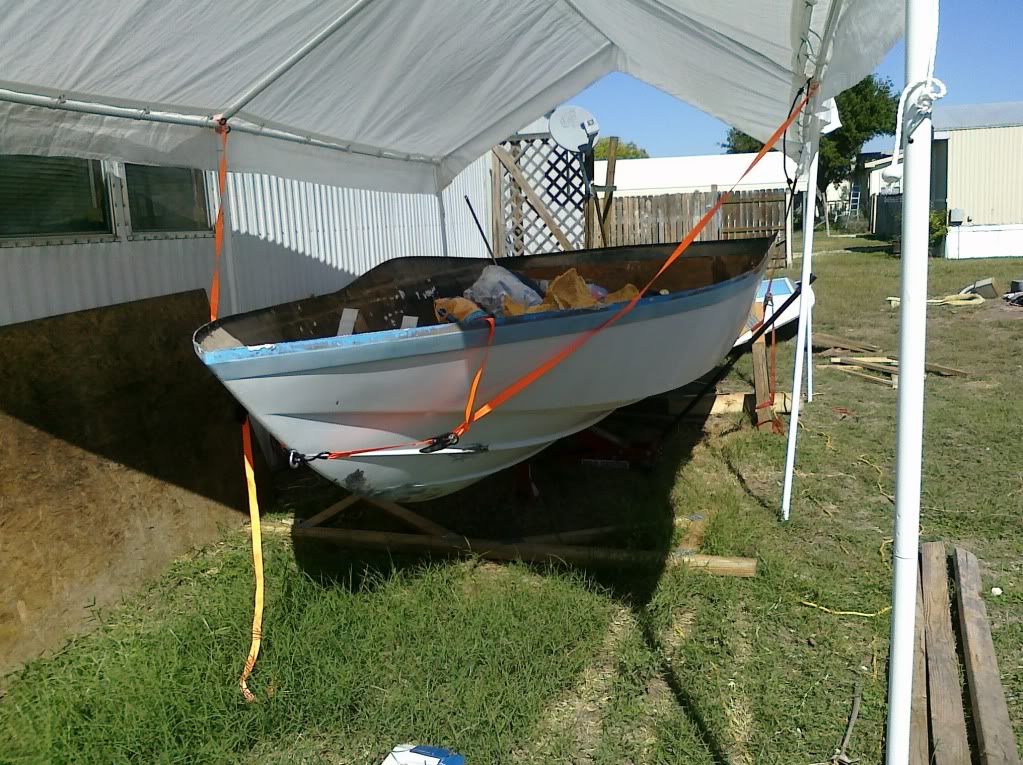
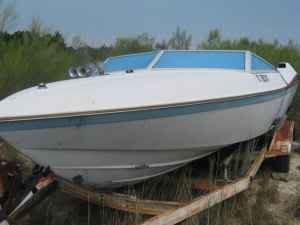
This is a badly abused and abandoned boat I found on Craigslist for $400 listed as a mopar being sold by a mopar enthusiast like me. There wasnt ever going to be another buyer out there for this boat. He had rescued it from goign to the junk yard from the previous owner thinking he would fix it up but was never a boat person and never got around to it. so basically since 1985 this boat has been sitting in one field or another in the Texas heat.
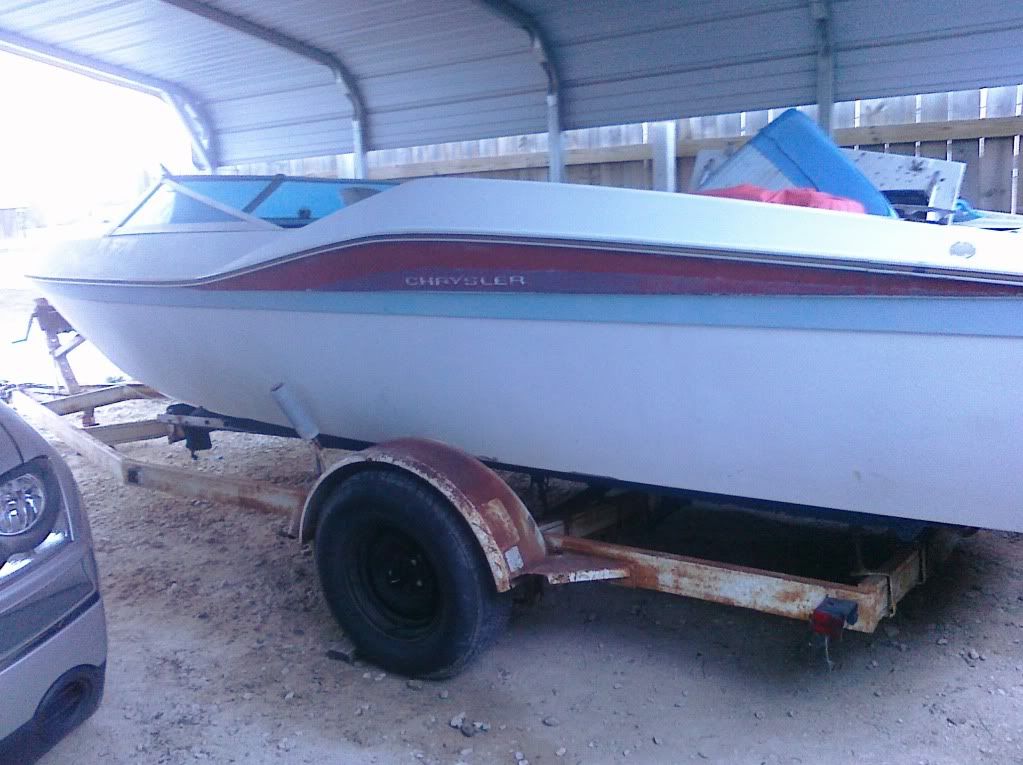
Now for a little history lesson most people don't know that Chrysler made boats but they bought out Lonestar boat in Plano Texas and started making thier own line of boats which lasted until early 80's when Chrysler go into touble and the govt made them drop all lines that were not dealing with the automotive industry. The boats made from the 60's through the 80's were manufactured under Chrysler Boat Corporation.
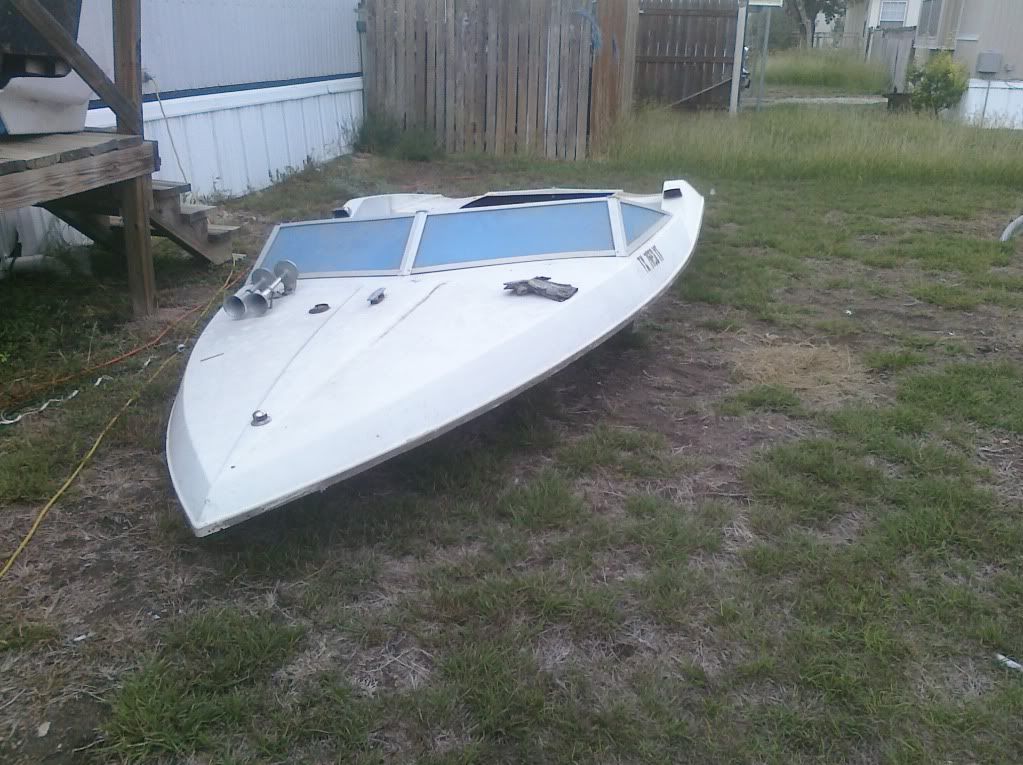
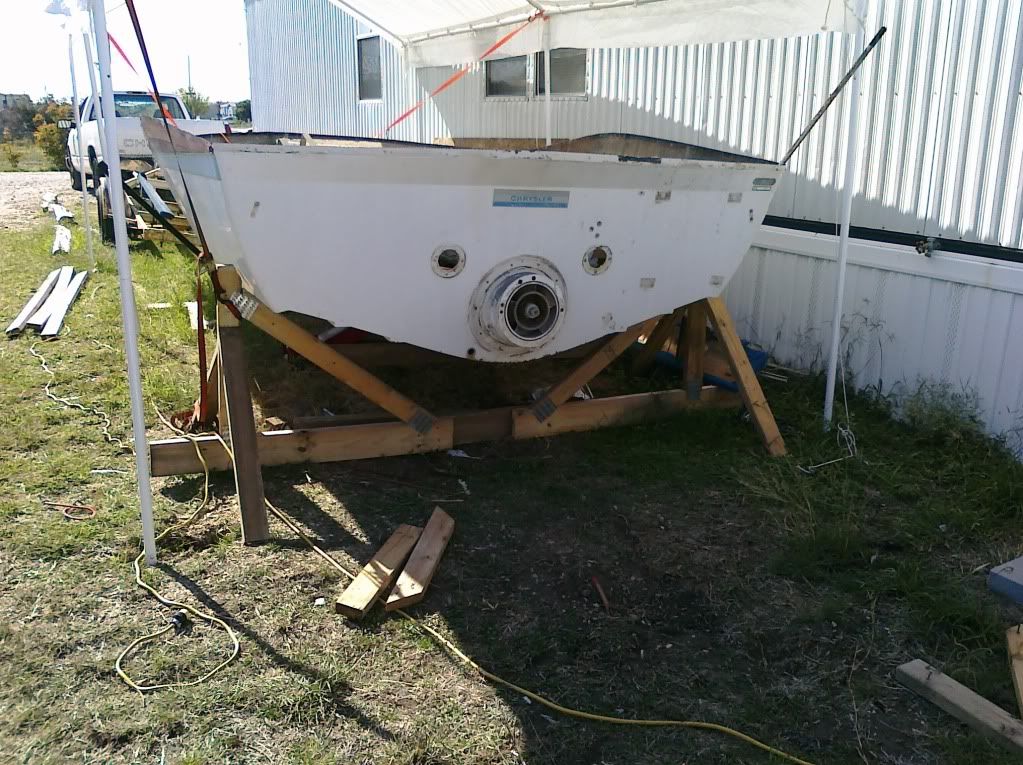
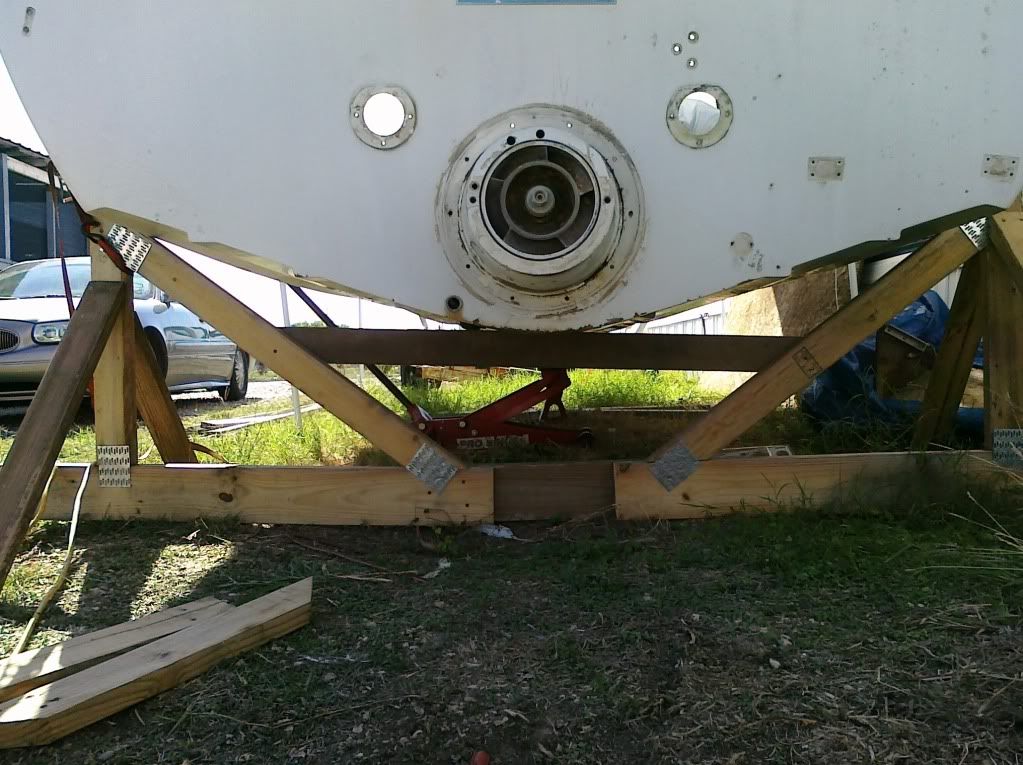
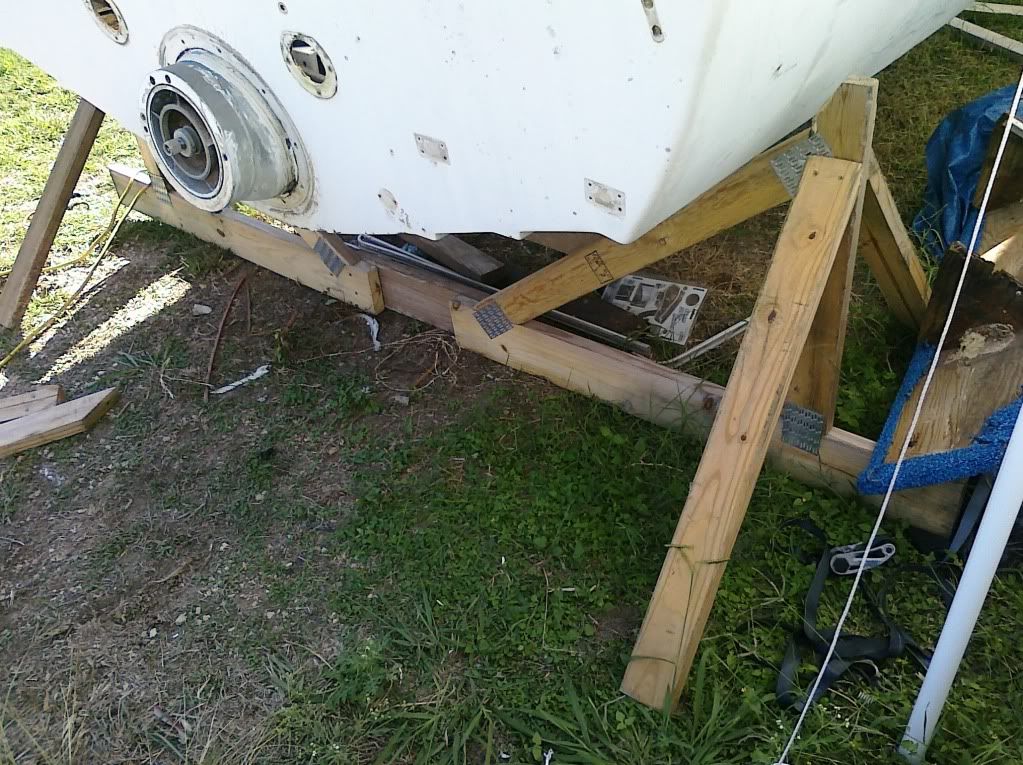
This boat is unique in that it not only is a boat made by Chrysler with a Chrysler Inboard motor it also has a drive designed and manufactured by Chrysler an all new Jet Drive.

Full.jpg
Jet.jpg


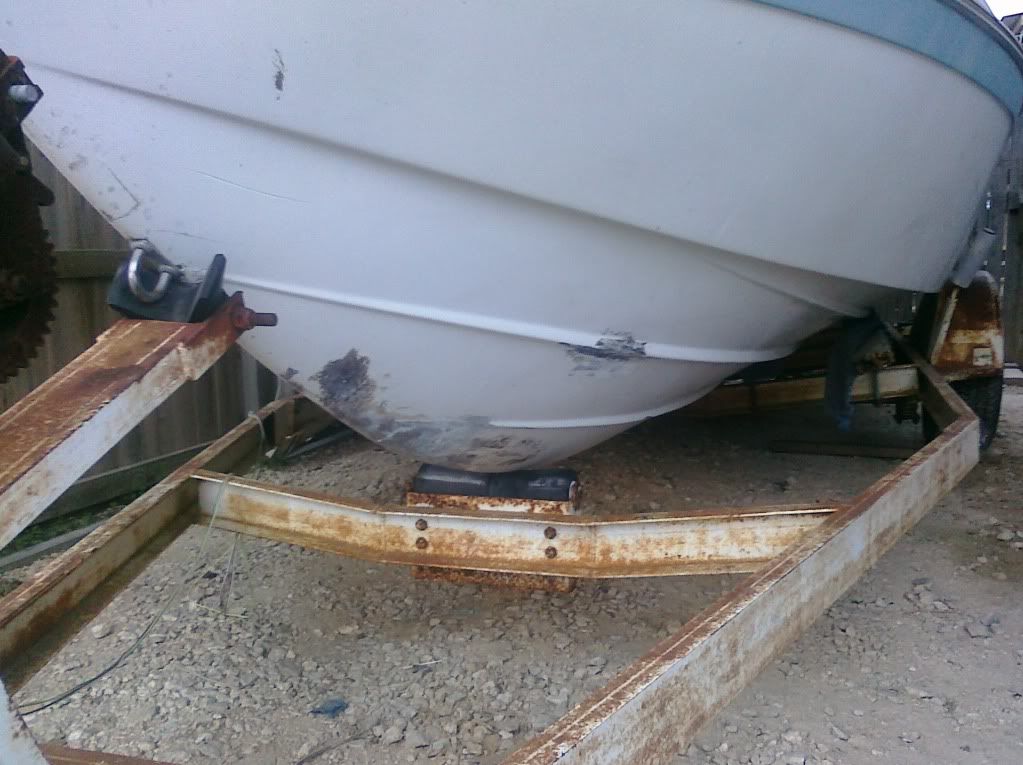
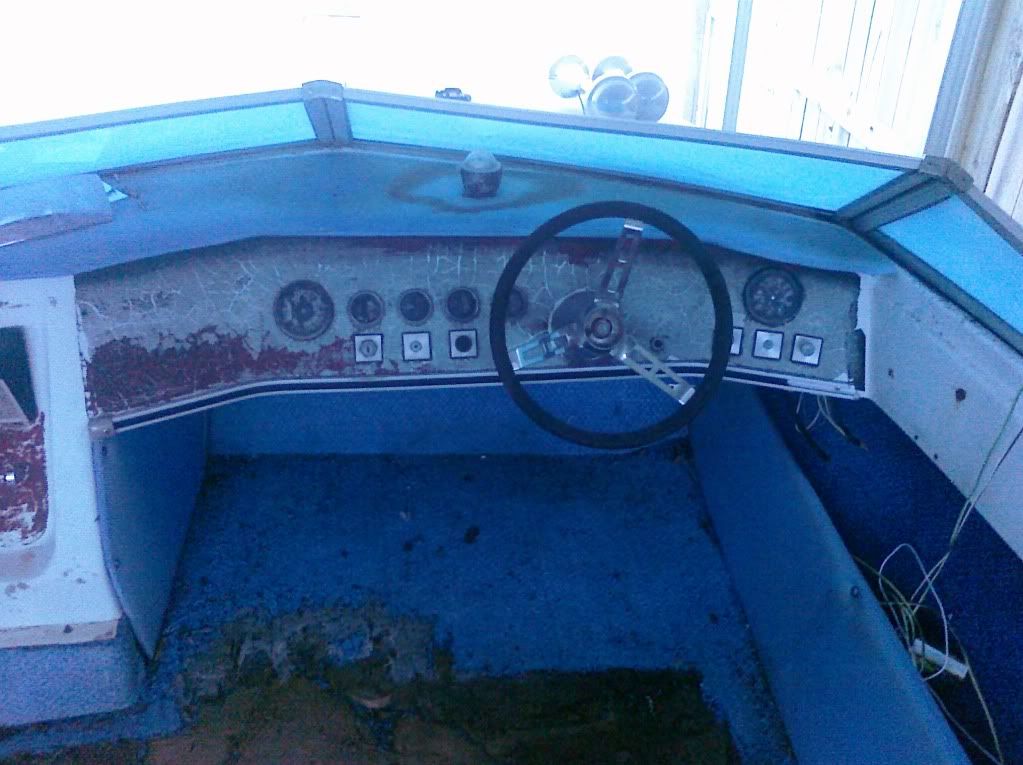
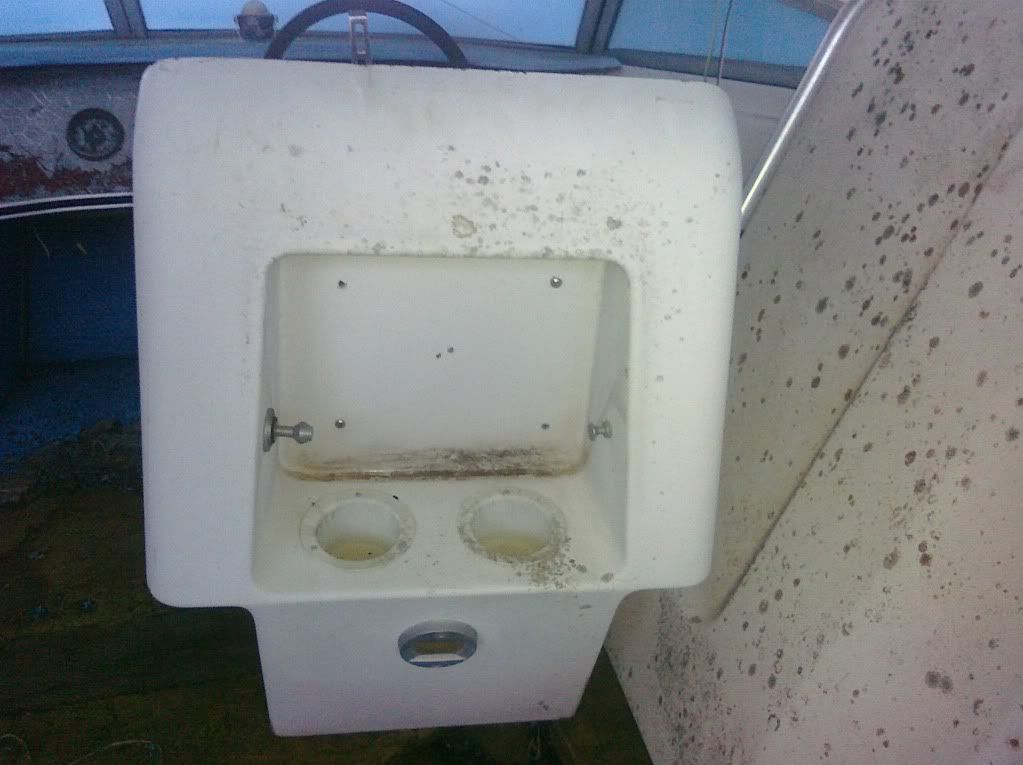
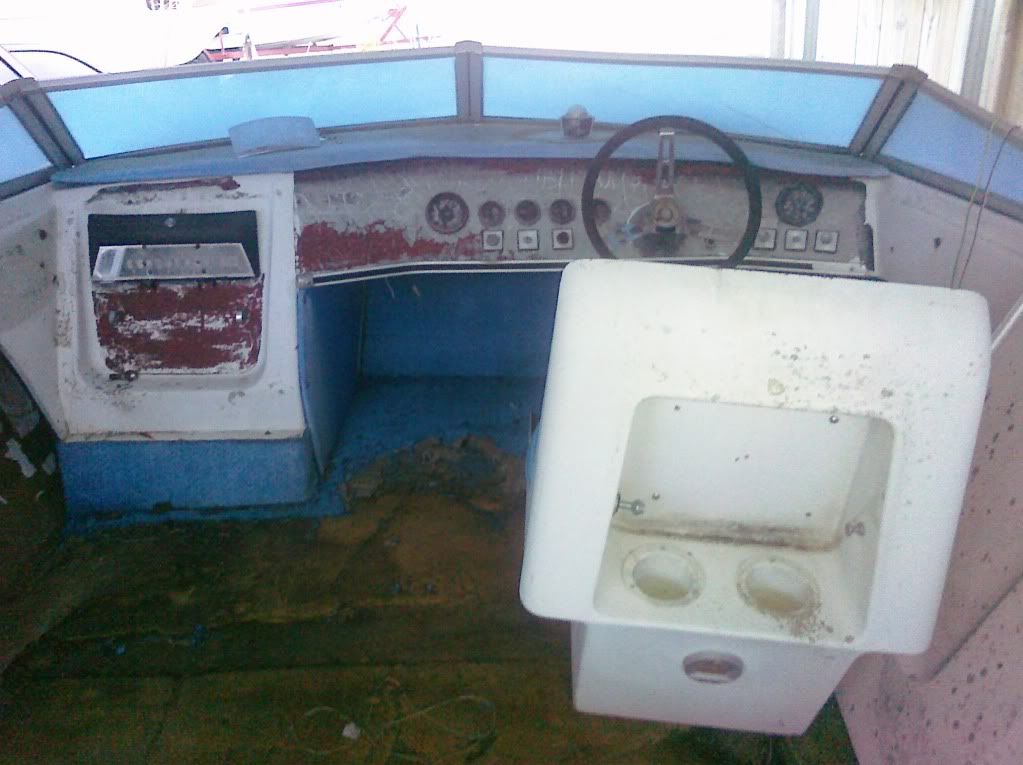
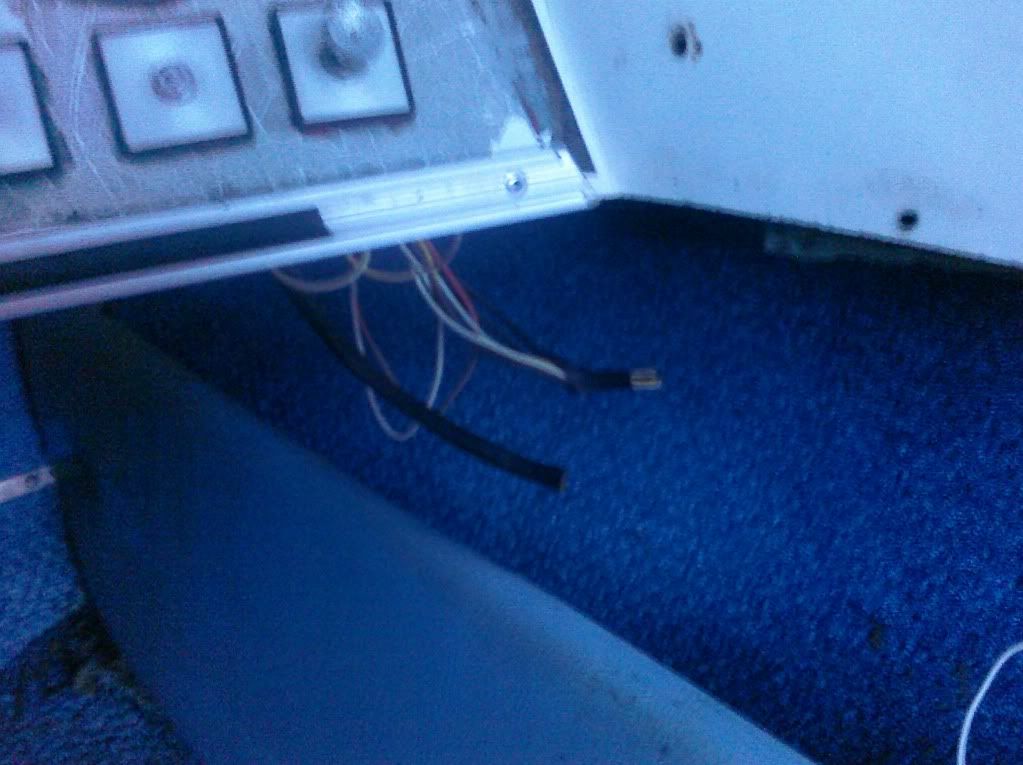
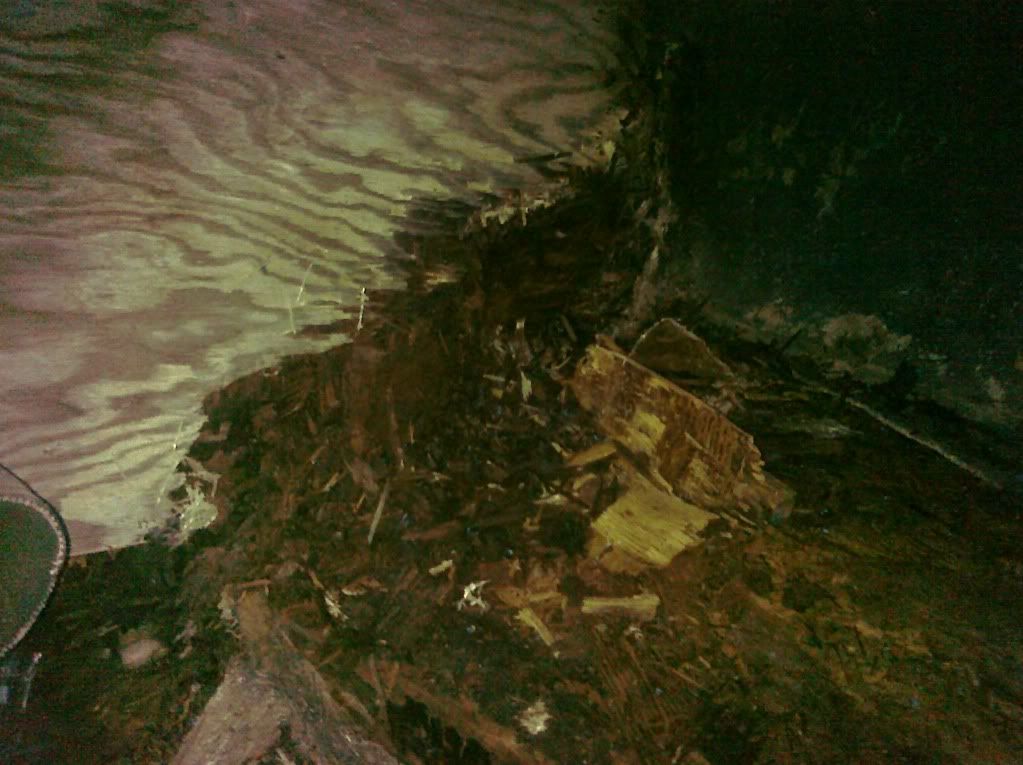
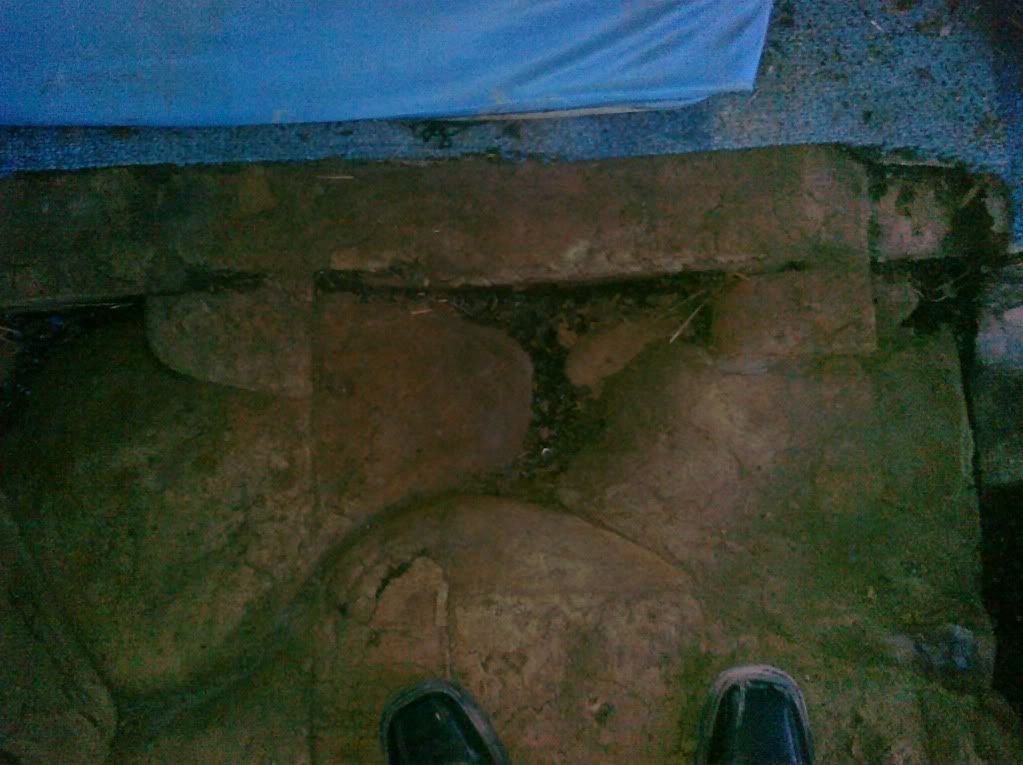
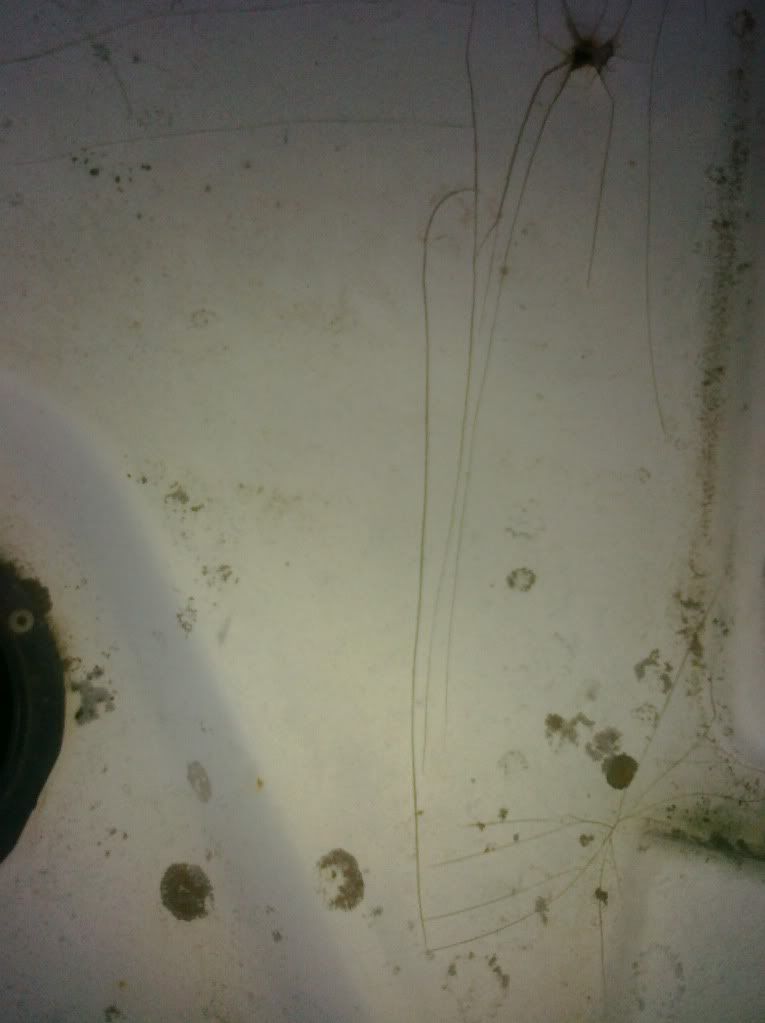
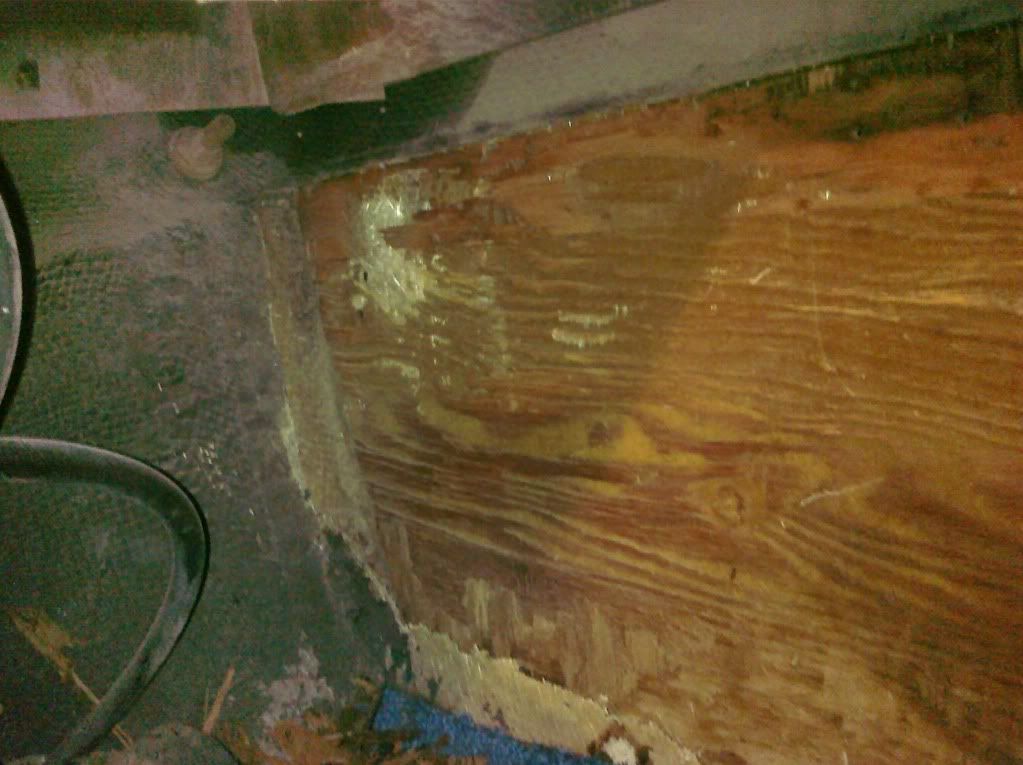
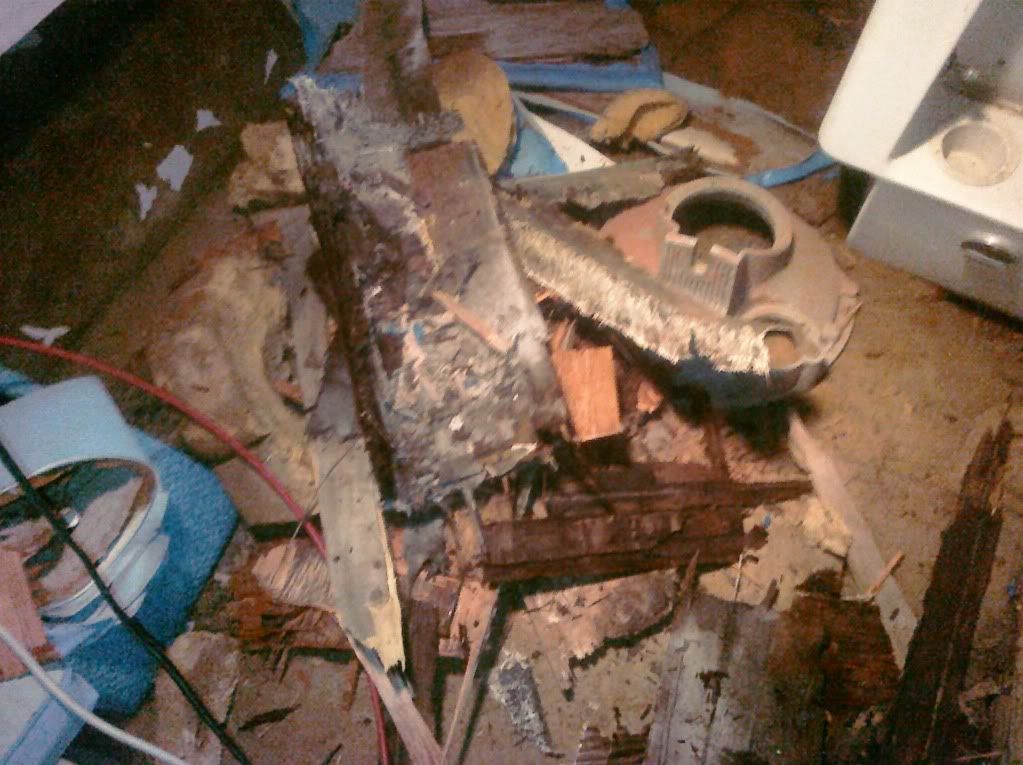
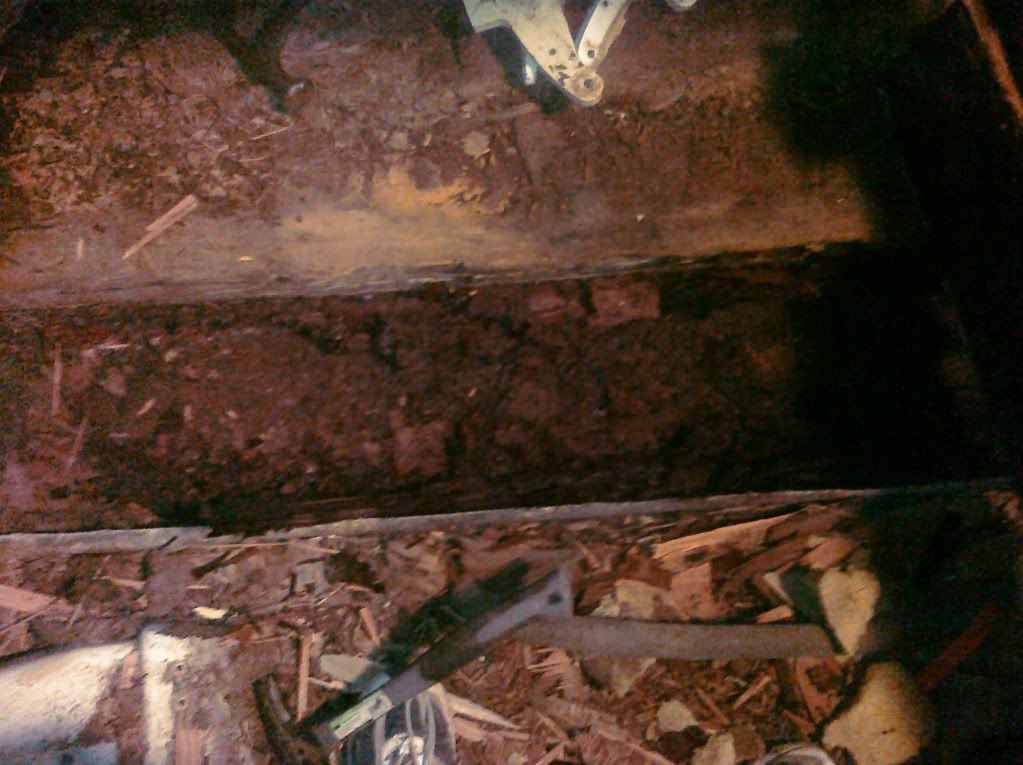
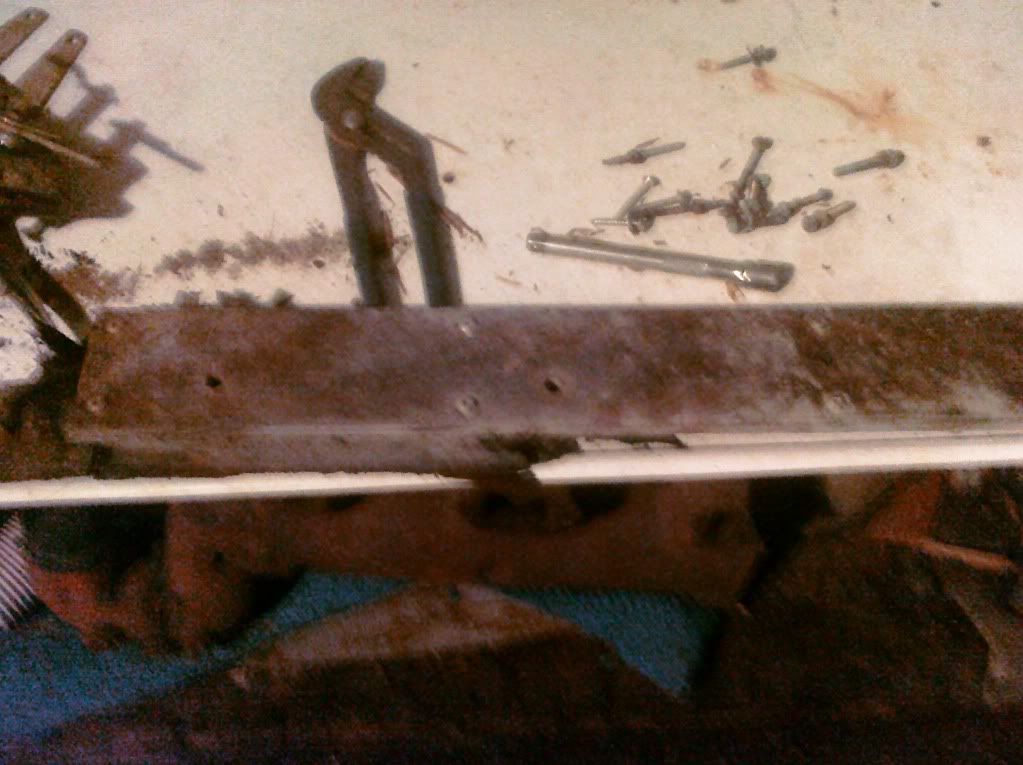
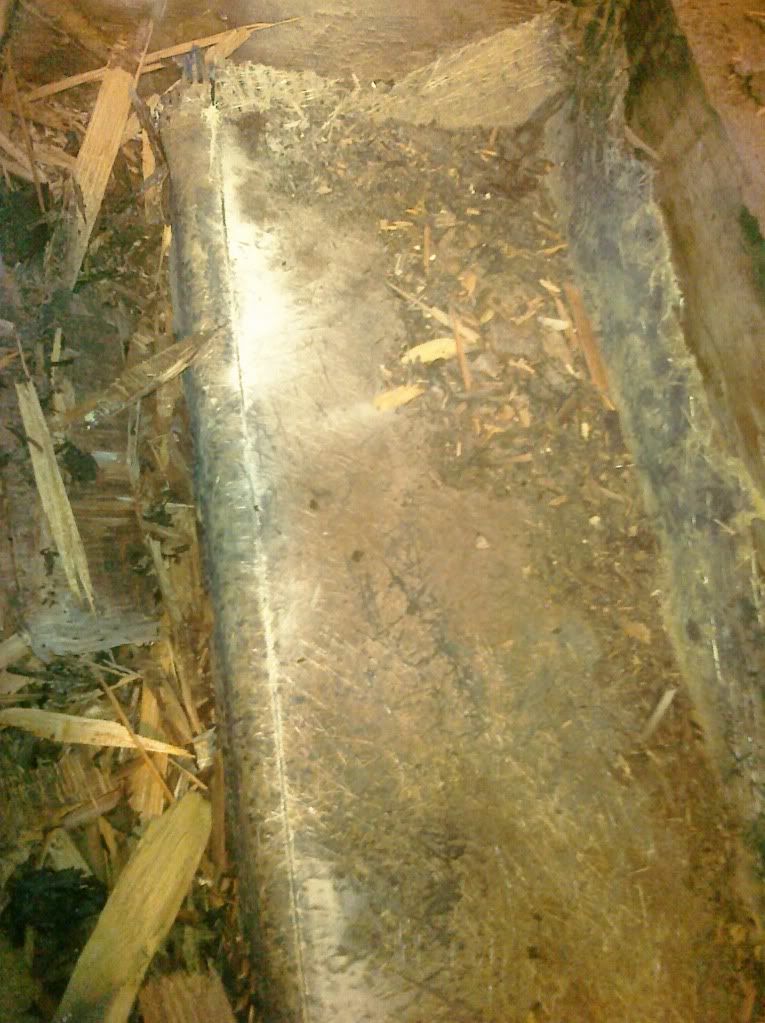
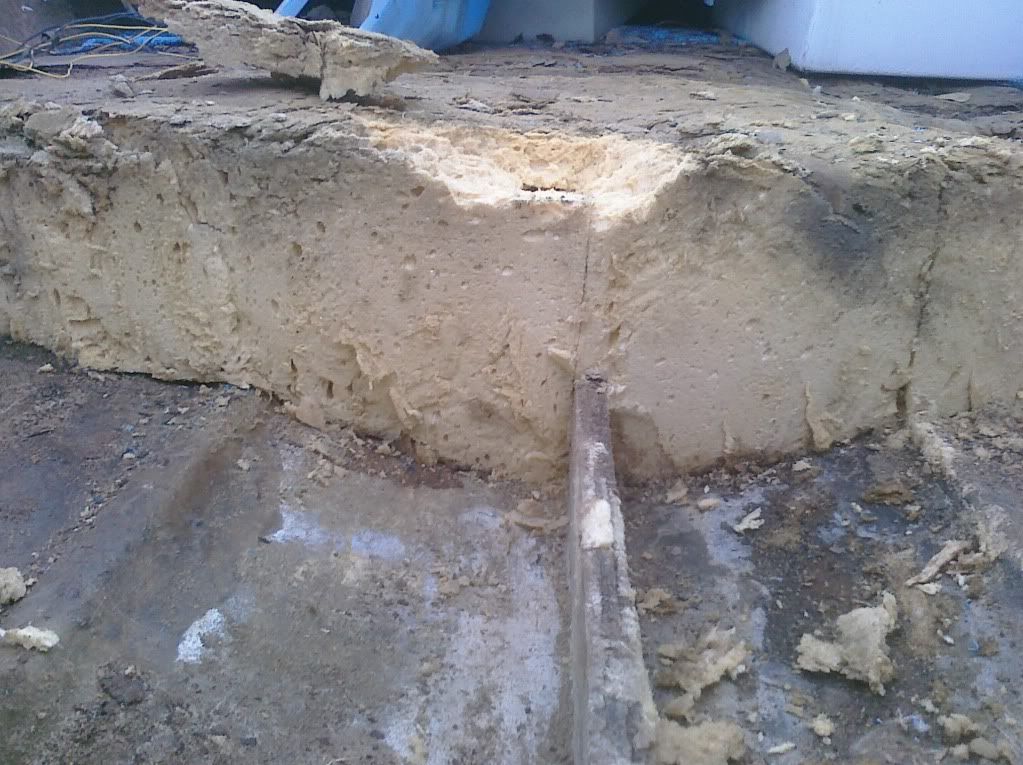
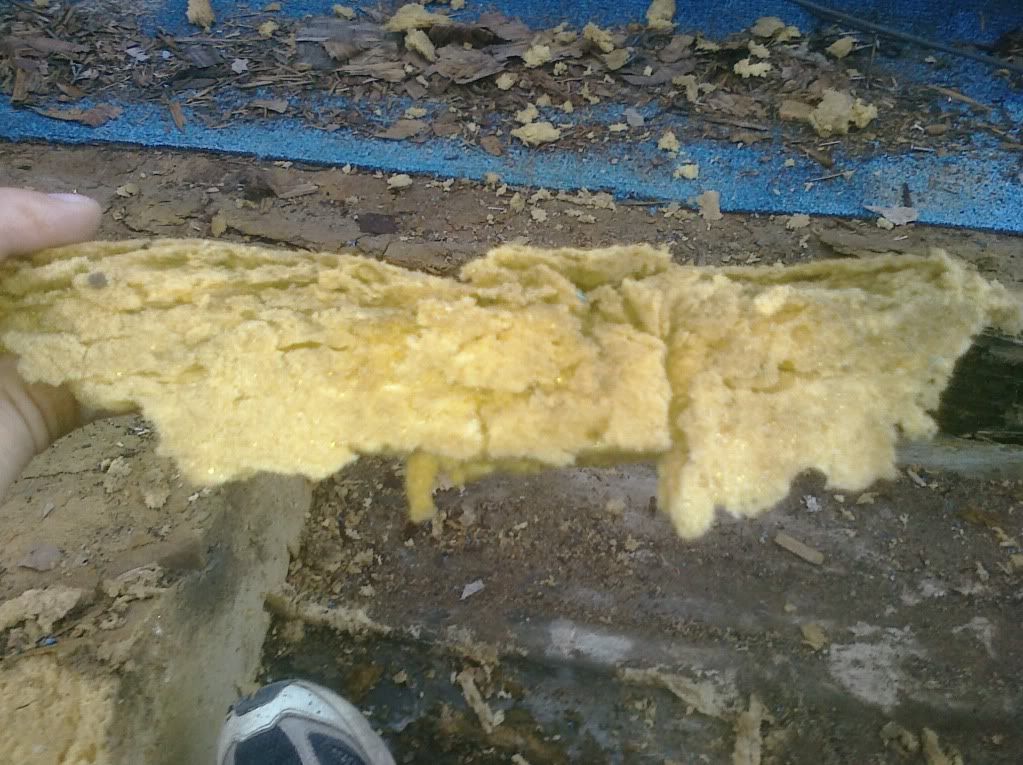
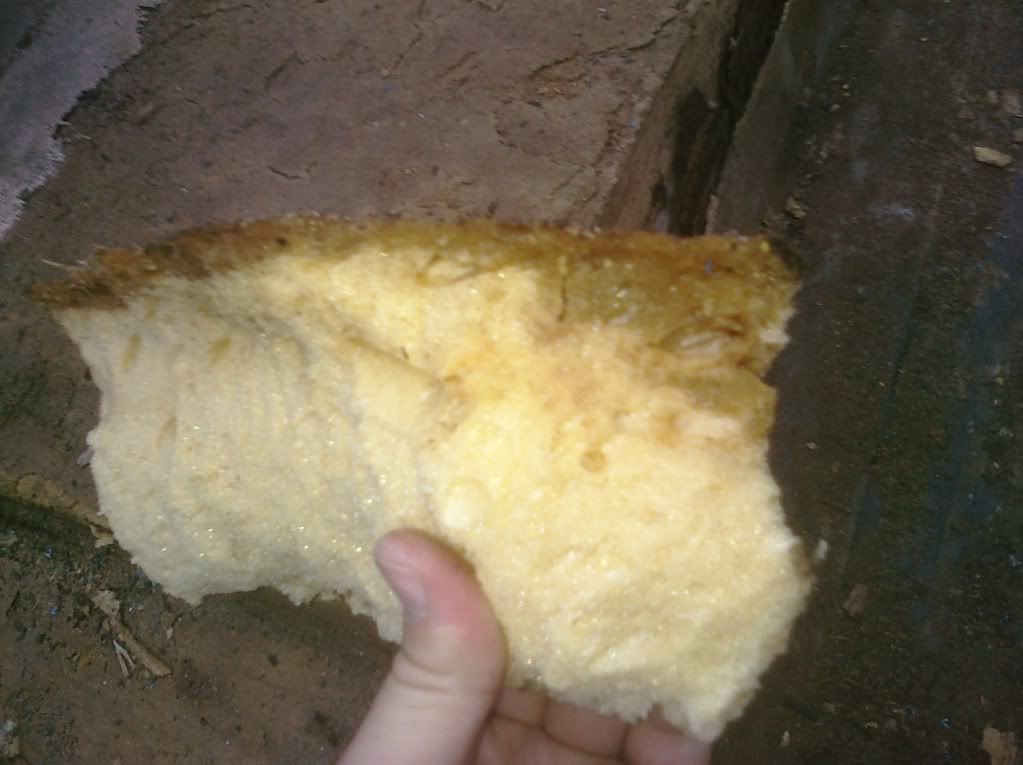
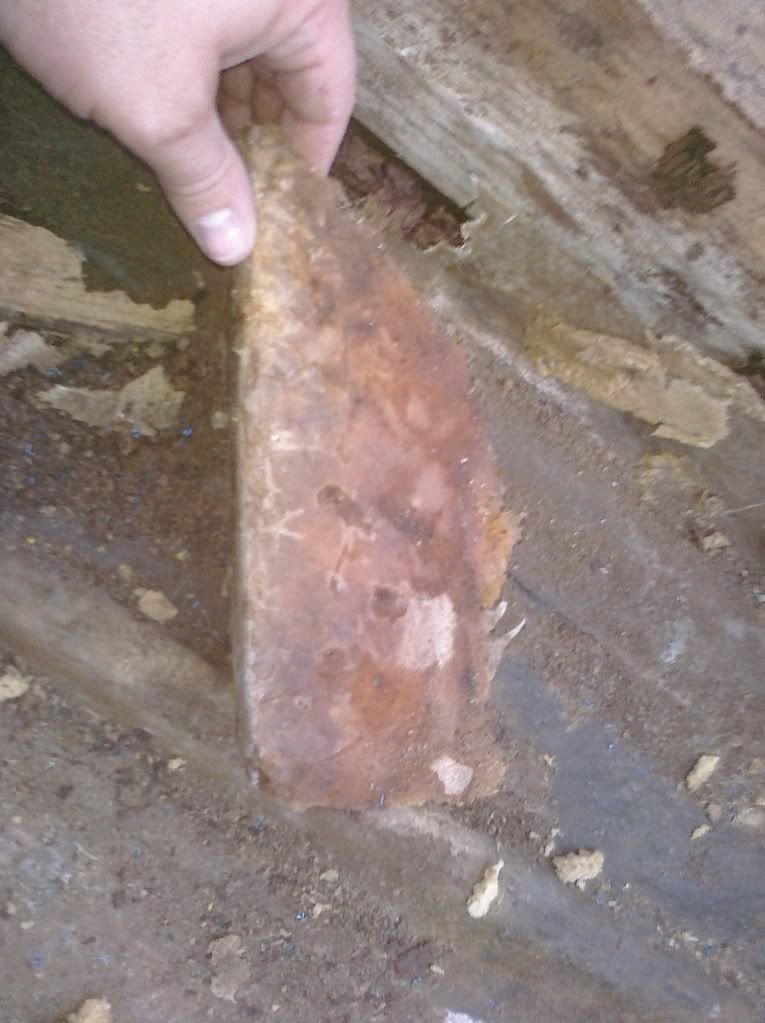
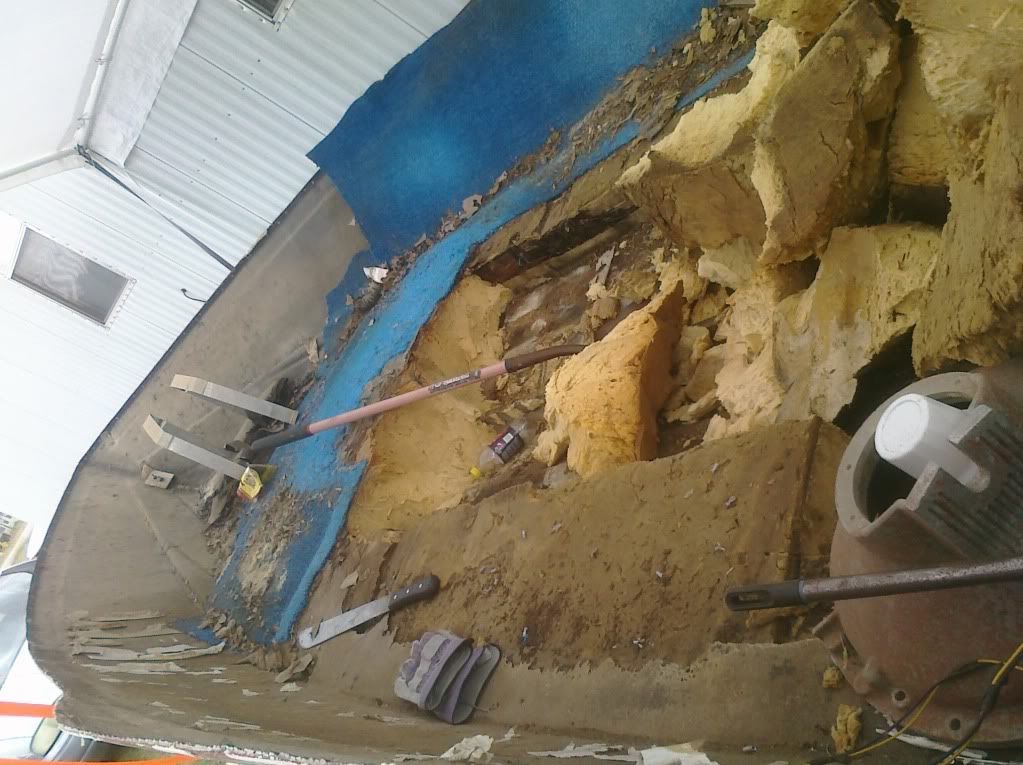
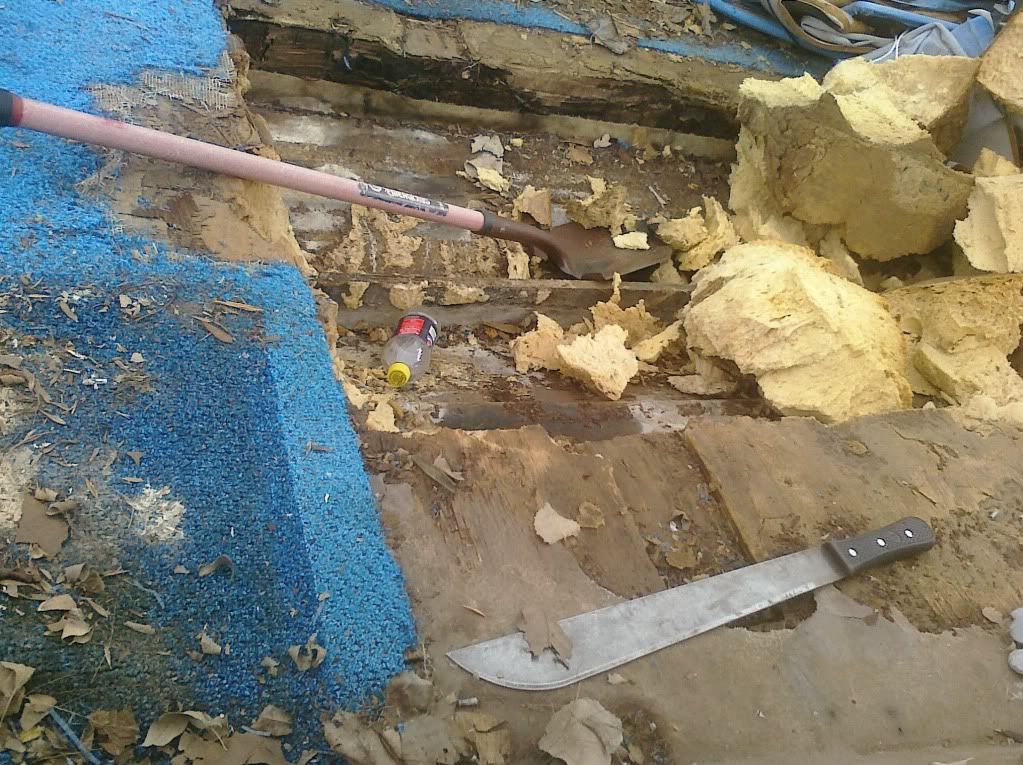
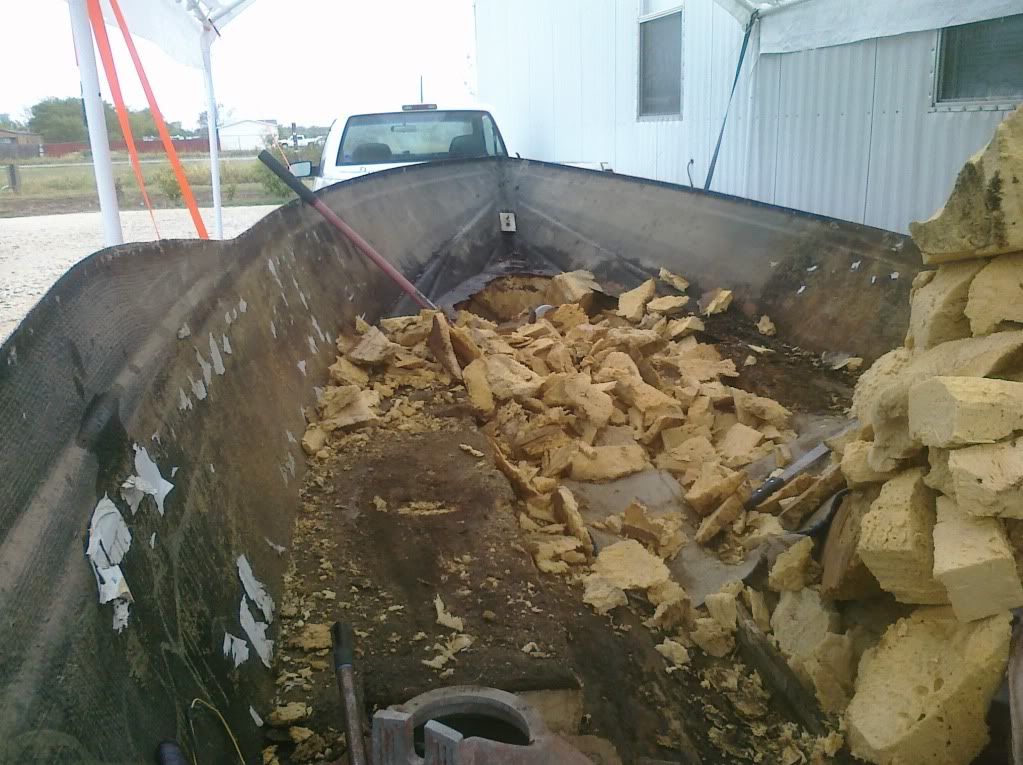
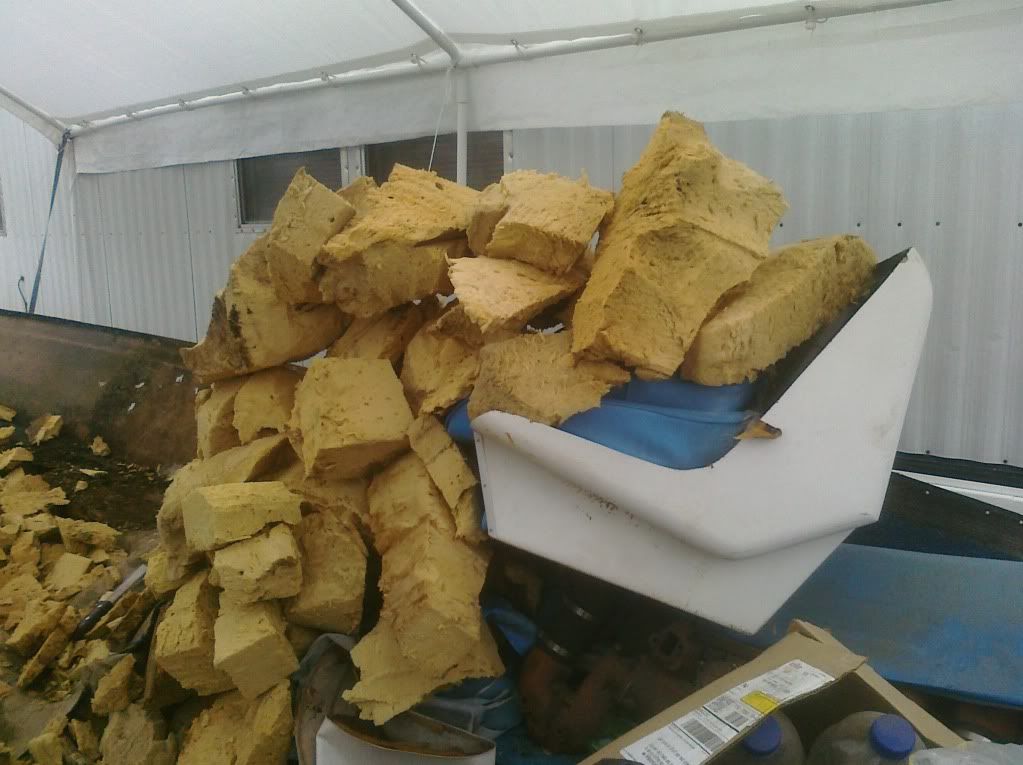
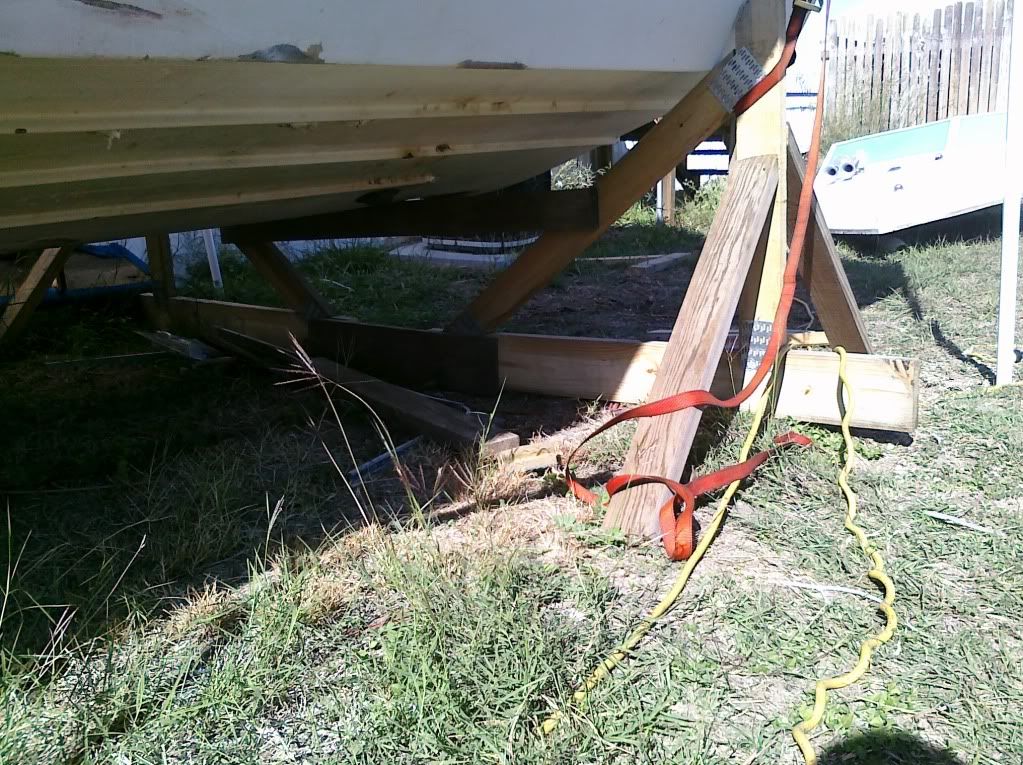
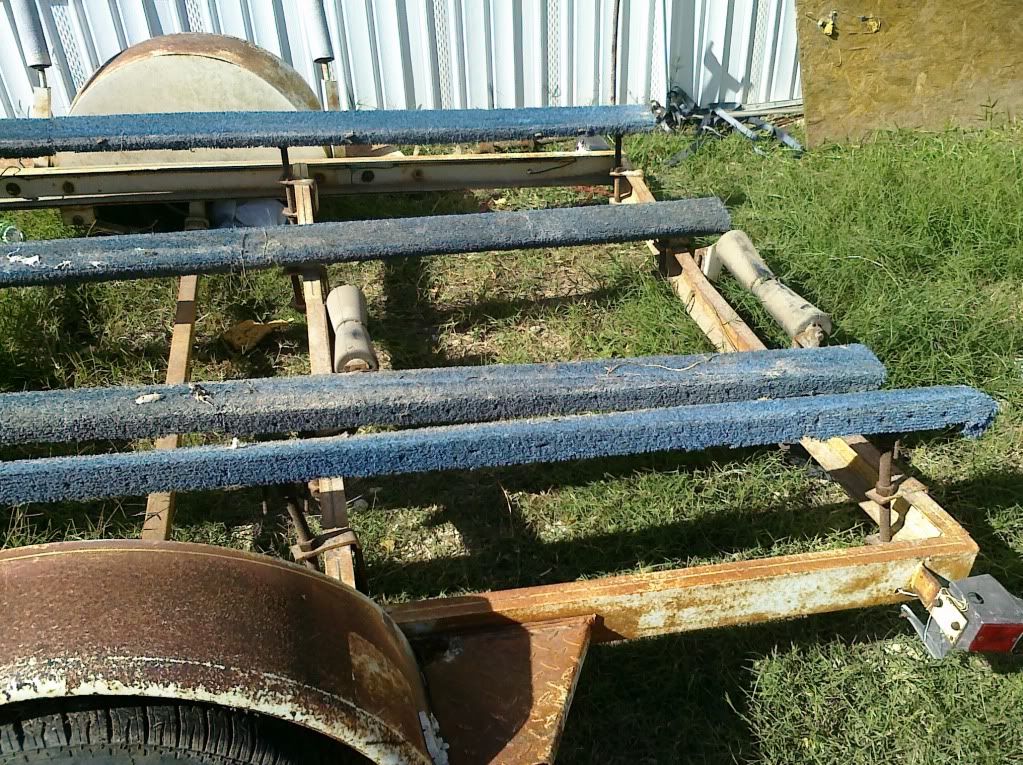
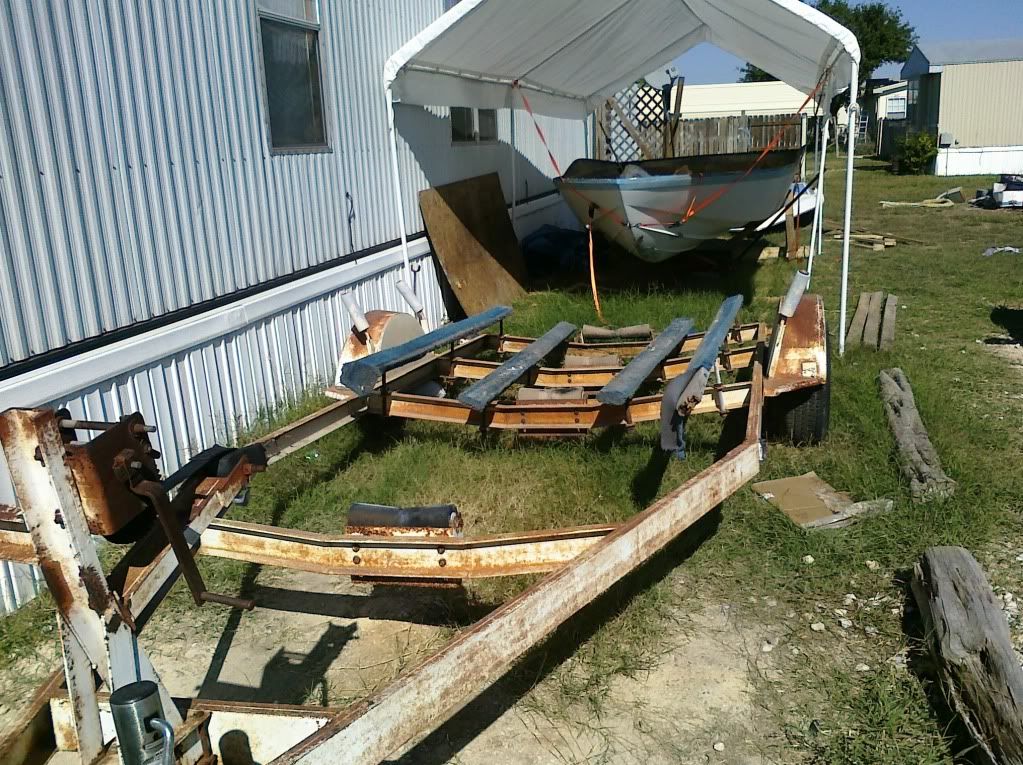
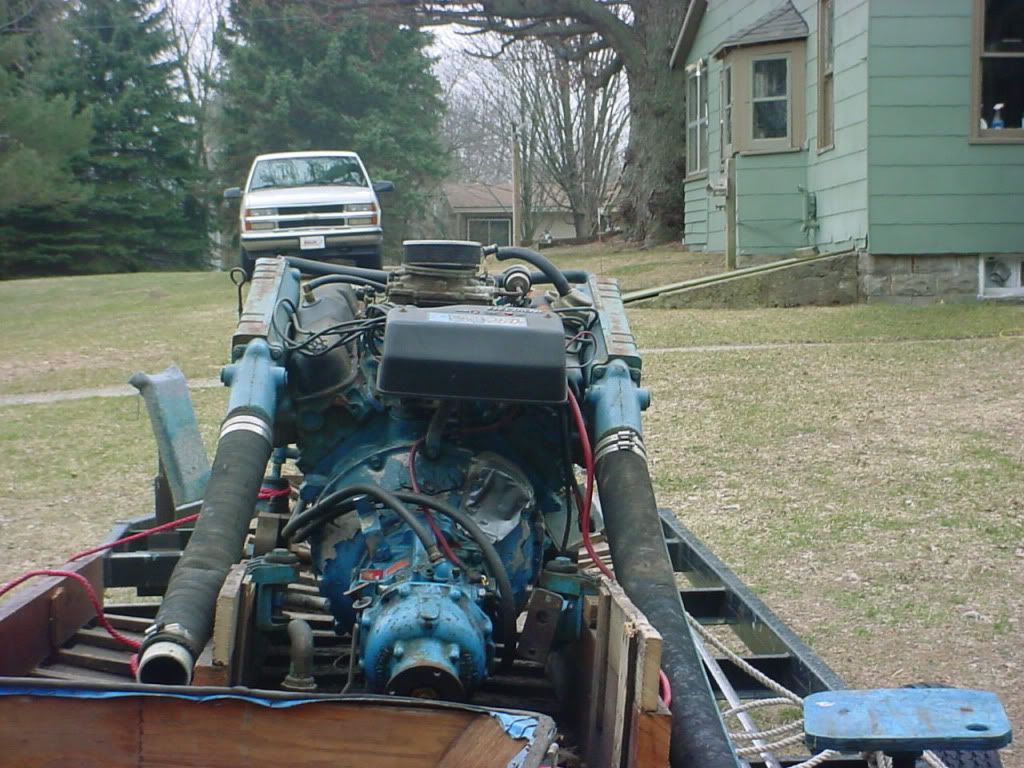
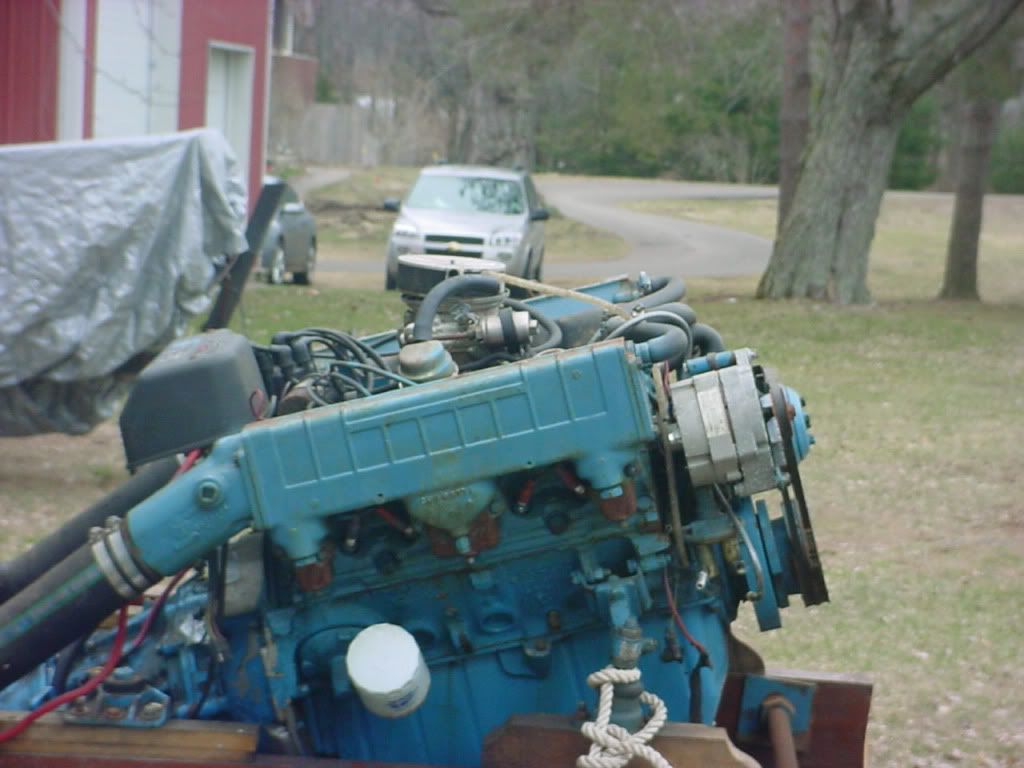
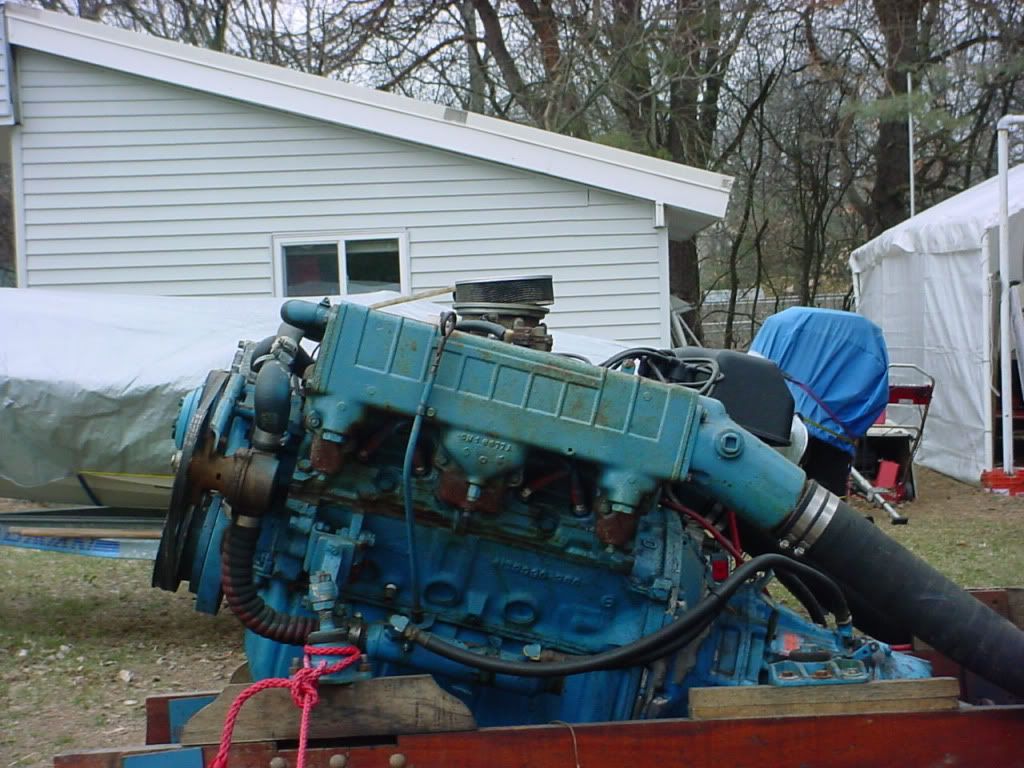
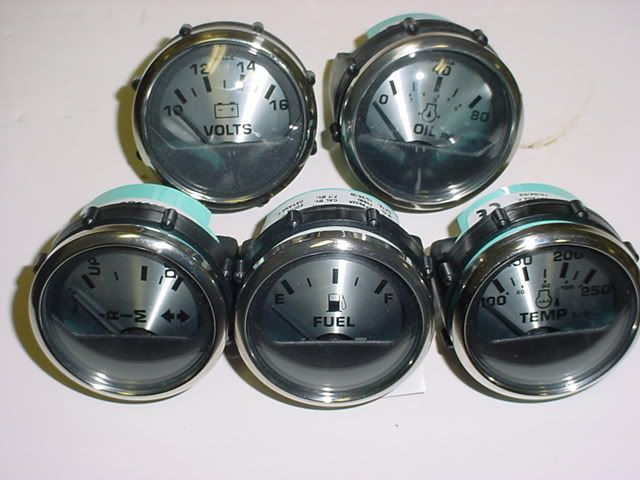
Well when I went to see the boat it was up on a hill. I got in carefully fully expecting to fall through the rotted wood. The floor was soft but not going to falter. The motor was long gone so no 340 it will be gettign a 360 pics on that later. BTW I know how everyone loves pics I have lots of them and will post them all. The captains chair was there but that was it. The jet appeared to be complete and the direct drive to it was there along with the flywheel, bellhousing, and exhaust manifolds. There was also a raw water pump that was in bad shape but rebuildable. All the other accessories were missing (alternator, spark arrestor, starter, carb, brackets, motor mounts, etc.).

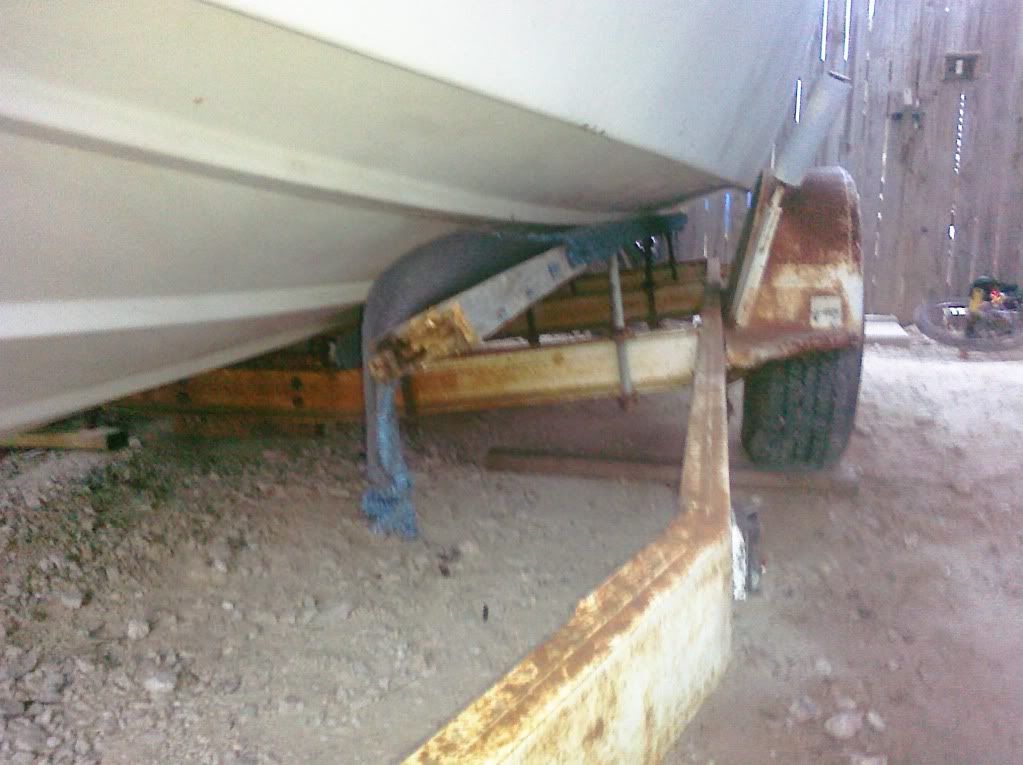
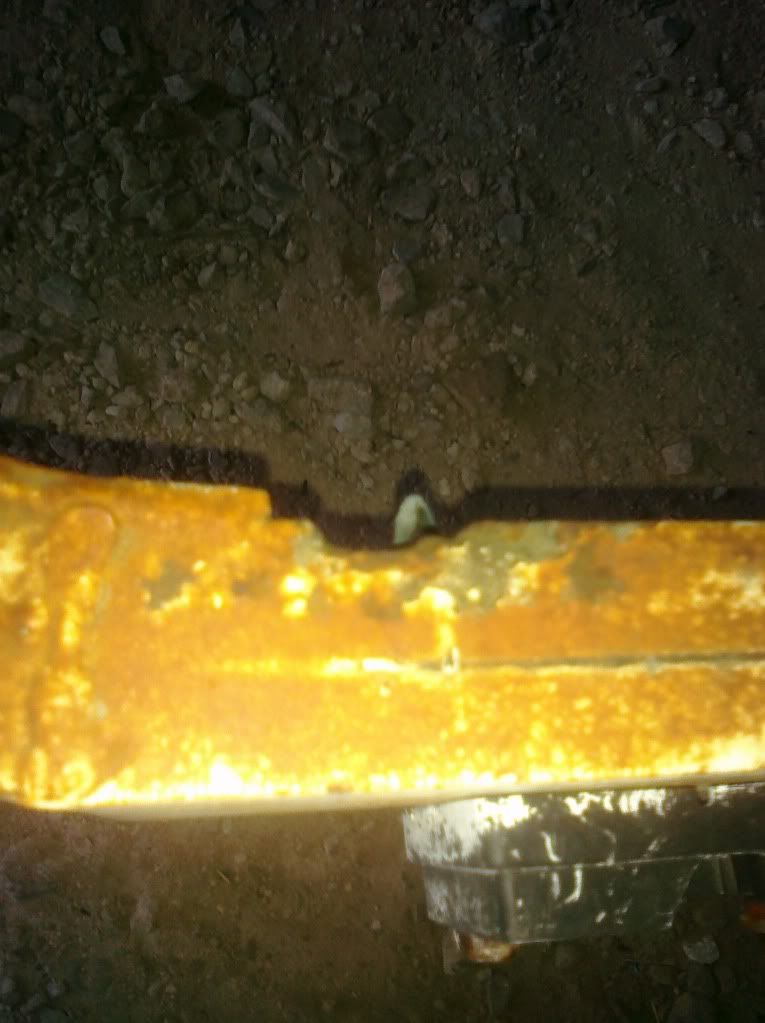
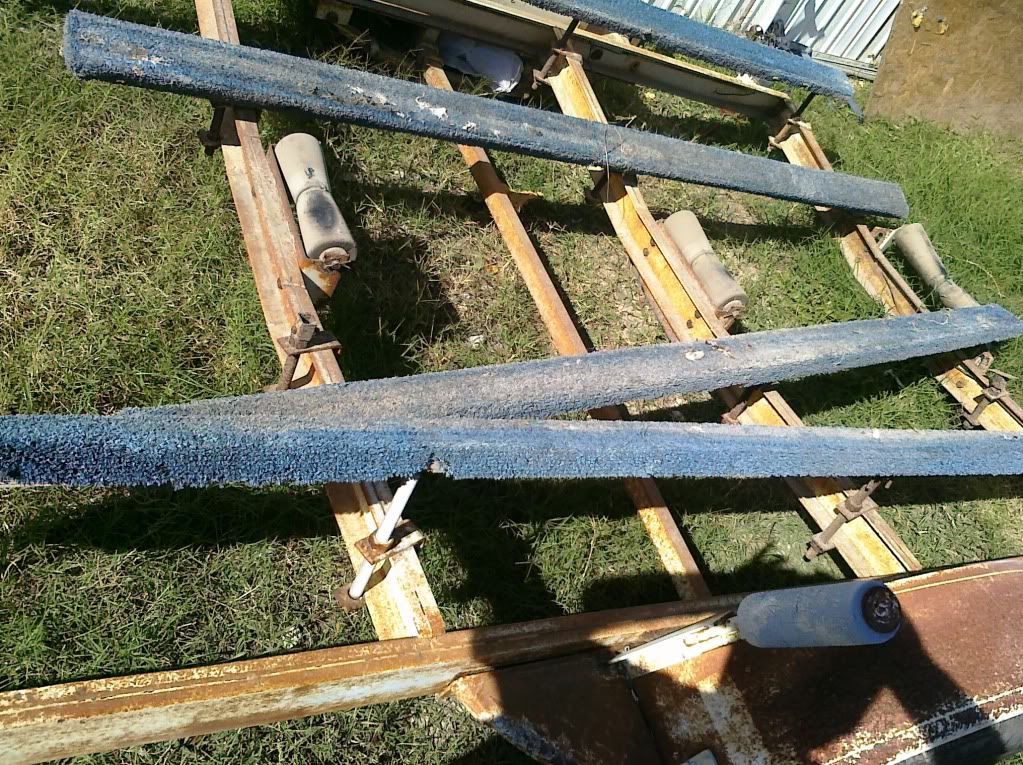
Well I told the guy I would get back with him a month later the boat was still there (like I said it wasnt going to anyone else) I offered him $250 for it and I overpaid. The Tires were held on by bolts and nuts not lugs and studs. the hitch was also not positively locking wrapped some bailing wire around it. And to top it all off I had a 30 mile drive home half way home one of crossmembers the second one back from the front the welds broke and it dropped and was dragging underneath the trailer being held on by one rusty bolt to the end of a piece of rotted 2x4 holding up the boat. My luck was with me and whoever was driving behind me cause I could just see that thing bouncing down the road behind me into someones windshield. Of all the things that could happen that was the last thing I would have thought that would have happened. It made the rest of the trip home safely though.

Next post though will post some more pics of the boat and then some of the initial issues found.

BTW this all Happened Jan 2011, my goal was to have it water ready by April 25th 2011 my birthday. It may not have been pretty but would have been on the water for the first time in 26 years.

Thanks for reading
 

73Chrysler105

Chief Petty Officer
Joined
Sep 10, 2009
Messages
407
First Shots at the new home

First Shots at the new home

Well getting her home was fun and here are a few shots of it once it was home. Sitting under the carport kicked out the Jag.
Bow-1.jpg


side pic from the stern
PortSide.jpg


Keel Damage
Keeldamage.jpg


Dash
Dash1.jpg


Back of the Captains Chair
BackofDriversSeat.jpg


Dash with Captains chair these are after ripping up the carpet and not finding any floor wood.
EntireDash.jpg


The link to the photobucket is here
http://s1236.photobucket.com/albums/ff447/74ChryslerConqueror/
 

73Chrysler105

Chief Petty Officer
Joined
Sep 10, 2009
Messages
407
The Rogue Crossmember

The Rogue Crossmember

Here is on the fallen crossmember

This is where its supposed to be just tot he stern of the angle in the frame.
TrailerLeftside.jpg


The fallen crossmember beside the fence
FallenCrossmember.jpg


A closer shot of the broken weld area
TrailerCrossmemberBreakingpoint2.jpg


A little closer still
TrailerCrossmemberBreakingpoint.jpg


Ugg cant believe i was so lucky it didnt cause any major damage
 

73Chrysler105

Chief Petty Officer
Joined
Sep 10, 2009
Messages
407
A few Initial Issues

A few Initial Issues

Here is the motor cover (Bonnett if your British) needs a complete refinish
MotorCover.jpg


The extent of the wiring in the boat
WiringCut.jpg


Under the carpet rot
UnderCarpetRot2.jpg


Transom Rot
TransomRot.jpg


Missing (deteriorated) crossbeams under the floor which is also deteriorated
SupportBeamindentinfoam.jpg


Voids in the foam under the floor. THis along with the fact that the floor was not glassed in i would bet contributed to the rot.
MajorVoid2.jpg


More to come
 

73Chrysler105

Chief Petty Officer
Joined
Sep 10, 2009
Messages
407
Crazing (lots of it)

Crazing (lots of it)

Here are several areas of crazing almost the entire deck and top half of the hull are covered in these crazing cracks. Still trying to determine if I should take the time to grind each one out or just grind off a;; the gellcoat and recoat the entire serface. The bottom hull is pretty banged up to so might end up doing it as well. Just not sure I have in my budget to regelcoat the entire boat. Was just going to sand and paint with a build primer layers to fill the cracks. Let me know your thoughts.

To start it off
LeftBlowerExhaust.jpg


Some More
GelcoatCracks3.jpg


Okay thought I had more pics of this but the rest are these same ones. WIll have to get more.
 

oops!

Supreme Mariner
Joined
Oct 18, 2007
Messages
12,932
Re: Crazing (lots of it)

Re: Crazing (lots of it)

hi 73.

i really like the hull.....nice shape.

i think its time for a new trailer....lol

so where are you now on the boat?....have you started the rip and strip?

i dont think the keel damage is much to worry about.
the top crazing i cant really tell if its easier to do a full gell or not because of the dirt.

but beef up the inder side before you re gell it.......standard cross frames laterally under the bow will work fine....even strips as thin as 1/4 inch ply will be great...
 

ezmobee

Supreme Mariner
Joined
Mar 26, 2007
Messages
23,767
Re: Crazing (lots of it)

Re: Crazing (lots of it)

Very cool hull. Should be a neat project.
 

73Chrysler105

Chief Petty Officer
Joined
Sep 10, 2009
Messages
407
Re: Crazing (lots of it)

Re: Crazing (lots of it)

oops i was thinking the same thing. Yeah there is a lot of dirt but believe me there is more cracked gelcoat than there is good gelcoat. I was thinking the same thing across the bow just was planning on using 3/8 ply. I will try to get more pics this weekend of more of the damage. This hull was not treated very well from its begining in life. I have seen a few others of these and they were fully glassed transoms and floors mine was only about 4-5 inches from the sides and about the same up the transom from the bottom. I wonder was mine a test boat to see how little they could get away with?? It is an early build of this model.

I have been working on grinding down the remainder of the plywood stuck to the glass on the transom. Going to have to get some milled fibers so I can make some peanut butter cause there is quite a few voids in the transom glass I need to fill. I get stalled out on this project a lot as two jobs and other projects take a lot of precidence. Right now in the search for a new truck since I just sold the old one. Need to get the Jag and/or chopper running and on the road or get another truck so the wife can have her car back. If I get another ruck with my budget it will be one that needs work so again another project. Plus we have been actually getting rain.

I did find a good source on 3/4" Exterior grade plywood at $10 a sheet its all been cut down to 8'x42" but thats a huge discount for missing only a 8'x6" strip. Now to bribe my dad to let me store it in his garage.

The transom glass on this thing is very thick the sides not so much.nice thing about the jet is that I can make the transom thicker if I need to but I think if I go back with what was there 2 of 3/4" and 1 of 1/2" ply it will be fine especially since I am going to glass it all in. I am still having trouble getting the jet out looks like they put that in then gelcoated that area of the hull or that was in part of the mold cause there is no seam line from the gel to the aluminum jet intake. The rakes for it I have all the bolts out and it doesnt want to budge either. With the rarity of this Jet I am relucant to hit anything with a hammer.

Regarding the trailer I think with the rewelding and will be blasting it it will be fine. I wish it was a bit longer and have some plans to extend it at the hitch since it needs to be replaced anyways. I scored a fairly new set of roller bunks from craigslist 4 of them for $40. They are about 4-5' long each so not enough to do the entire trailer but a good start now to find some more. I think the patience thing has me finding decent deals and will allow me to do more and still within my budget now if only I can meet a decent timeline to be ont he water this year. Although they are planning another major drought season for us here so we may not have any water to float in may have to setup the 18' pool and put the boat in it. Maybe will be able to get the wife to allow me to take it up to michigan and run it in a real lake. Texas only has one real natural lake all the rest are dammed lakes (literally each one is created by a dam).

Regarding the dirt I have had the top out in the rain lately and used nature and a sponge to wash it will get some more pics of that as it looks now. Need to still build stands to set the top on so its not sitting on the ground. Also will need to flip the top when I am ready to do the bracing.

There is a ton of work left but your thread has inspired me with more ideas the more I think on it the more there is now to do. The seat frames though I am going to make out of Fiberglass now instead of using 3/4" plywood to save some weight without sacrificing strength.

Since I am not working my second job this weekend might get some work done inbetween other family obligations. Son has a cubscout outing sat and wife wants to take the kids to seaworld sunday.

Anyways this post is probably too long already.

exmobee thanks for the compliment yeah I agree it will be a very neat project cant wait to get to do some sliding figure 8's out there on the water with that jet.
 

73Chrysler105

Chief Petty Officer
Joined
Sep 10, 2009
Messages
407
Updates

Updates

I just realized I havent gotten any of the tear down pictures or separation pictures up here. Man am I sorely lacking. So heres a few of the tear down.

Full Transom
Cleantransom.jpg


Transom corner
TransomRight.jpg


Trash Pile
PileofTrashrottedwoodandfiberglass.jpg


motor mount stringers cut open
MotorMountcavityrot.jpg


metal brace for motor mount it was screwed to the plywood and then glassed over both
MotorMountPlate.jpg


before shot of the motor mount stringer
MotorMountFiberGlass5.jpg

those were completely hollow underneath. I will be putting in mahagony stringers there and filling the voids with my foam & plastic bottle mix.
 

73Chrysler105

Chief Petty Officer
Joined
Sep 10, 2009
Messages
407
More Updates

More Updates

Here are some shots of the foam removal

A section of the foam up until this point I was using a Machete and carefully cutting out the sections since it appears to mostly be in good shape. you can see at the bottom its a little darked in the center this is water logged foam there are some more shots of it further down in this post
Cutaway.jpg


And with a piece of the top degraded part removed
Cutawaysection.jpg


Another one
RemvalofDeterioratedsection.jpg


The degraded piece
Deterioratedsectionontop.jpg


A piece of foam with the edge water logged
Waterloggedbottomsection6.jpg


the bottom of water logged foam piece
Waterloggedbottom.jpg


more to come
 

73Chrysler105

Chief Petty Officer
Joined
Sep 10, 2009
Messages
407
Update on the top removal

Update on the top removal

Well I didnt take any pictures of the rub rail removal but it was drilling out about 200 rivets and punchign them through to remove the rail. The rubber rub piece was old and hard and brown even though it was supposed to be a bright red. I did find a source for my red rub rail though but its expensive.
Also didnt get pics of the actual removal took just four of us to take it off and really could have done it will three. The Fiberglass at the mating edges is real thin could not put a 2x4 under the top or over the hull without it messing up the fiberglass so had to lift it all by hand with leather gloves.

Here is the hull
HullNotop.jpg


Here is the top
Topremoved.jpg


The reason I decided to remove the top is because I realized to replace the floor and foam in the bow would be a lot easier with the top removed and it wasn't that hard to do.

Here is the foam removal progress after the top was removed.
HullInsideNoTop.jpg


The tools used to remove the foam. The machete was used initially but once I realized I couldn't reuse all the foam I started using the shovel and it went a lot faster.
Centerfoamremoved.jpg


Foam Demo at the bow
Bowfoam.jpg


An overall Viwe of the foam demo
UnusablefoamPile.jpg
 

73Chrysler105

Chief Petty Officer
Joined
Sep 10, 2009
Messages
407
Re: Update on the top removal

Re: Update on the top removal

In the last post showing the open hull it looks so huge now. I have seriously thought about cutting the bow of the cap and moving the dash forward or turning it into an open bow but then where would I put the gas tank?
 

73Chrysler105

Chief Petty Officer
Joined
Sep 10, 2009
Messages
407
More Foam

More Foam

Well I decided I was going to try to salvage as much of the good foam as I could since I only got 2 gallons of the foam I wanted to make sure it lasted didn't want to have to place another $300 order for more foam and resin although I think I will need to order more resin and some mat and possibly more cloth before its all said and done. I am also going to be strategically placing plastic soda bottles of different sizes in the poured foam in order to create larger sealed air pockets in the foam thereby making more bouyant.

So here is a pile of the good foam I am keeping.
GoodFoamPile.jpg


and the bad foam pile that got put in the dumpster. Most of this was more deteriorated than wet surprising enough the foam has held up pretty well for the last almost 40 years.
UnusableFoam2.jpg
 

73Chrysler105

Chief Petty Officer
Joined
Sep 10, 2009
Messages
407
Taking it off the trailer

Taking it off the trailer

Well I had a need to use the trailer for delivery of another scrap boat I had lying in the field after selling off the trailer it was on. So I had som trusses a buddy of mine had given me that I thought would make perfect boat stands. Once I got them over to it they were too narrow for the stern of the boat so I had a decision to make fab something else or cut and splice these to make them wider. So wht do you think I did??

Yup thats right I cut these and spliced them to fit. I put angled down legs on them and lifter the stern of the boat with my 3 ton automotive jack off the trailer with a 4x4 block of wood between the jack and the boat. slid each side of the stand in realized I needed to slice the top at an angle so it wouldnt rub into the gelcoat and then screwed them together at the bottom with a 2x6. i then realised that was too much stress on the sides and added a 2x4 crossbrace to hold the keel. All this cost me not a single cent as I had a bunch of scrap wood and the trusses were given to me. The screws had lying around too.

CIMG0582.jpg


Close up
CIMG0583.jpg


CIMG0584.jpg


CIMG0581.jpg


CIMG0580.jpg


CIMG0579.jpg


Like my boat shelter $80 on sale at northern tools
 

73Chrysler105

Chief Petty Officer
Joined
Sep 10, 2009
Messages
407
Re: Taking it off the trailer

Re: Taking it off the trailer

Okay so here are pics of the trailer still needs a little work done to it.

I just got the new bunk board rollers wish I had them before delivering that other boat would have made things easier.

CIMG0586.jpg


CIMG0585.jpg


CIMG0577.jpg
 

73Chrysler105

Chief Petty Officer
Joined
Sep 10, 2009
Messages
407
The New Motor

The New Motor

Thought I would post a few pics of the motor I scored just need to get it from Michigan to Texas. Anyone already making a drive that wants to haul a motor for me will pay for gas.

Front.jpg


Rear.jpg


Right.jpg


Left.jpg


It is a complete running pull out includes starter, alternator, water pump, raw water pump, carb, brackets, and motor mounts, all of which I needed. The exhaust manifolds I didnt need but are a plus and the same witht he bell housing it had a velvet drive but mines a direct drive. I had a buddy of mine in Michigan go pick it up so its been sitting in his garage since May. Wife wont let me ship it down here to the tune of $260 cause thats more than she thought was budgeted for the motor. What she doesnt realize is the budget she saw for the motor was for the motor only not for all the accessories even paying shipping I am still coming out ahead with what I paid for it.
 

73Chrysler105

Chief Petty Officer
Joined
Sep 10, 2009
Messages
407
Dash Gauges

Dash Gauges

Okay so my dash gauges may or may not be shot but from the Texas sun all the needles on all the gauges are bent. I am planning on repainting the dash black (a semi flat black). So here are the old gauges and some new ones that are on my wish list or somet hat resemble the originals as best as I can find. Bad thing about the new gauges is the cost the new gauges will cost almost as much as what I paid for the boat to start with.

Old Gauges
LeftSideOfDash.jpg


New Titanium wish list gauges
NewGuages.jpg


Speedo and Tach
SPeedoTach.jpg


Other Gauges
OtherGuages.jpg


BTW talking about the rub rail earlier here is the rub rail I found
rubrail.jpg
 

73Chrysler105

Chief Petty Officer
Joined
Sep 10, 2009
Messages
407
Re: Opps Updates

Re: Opps Updates

Well oops you asked for updates that should hold ya over for a while.

Chris
 

oops!

Supreme Mariner
Joined
Oct 18, 2007
Messages
12,932
Re: Opps Updates

Re: Opps Updates

Well oops you asked for updates that should hold ya over for a while.

Chris

lol......i have several comments to make that may help you....but i think i going to have to read the whole set of up dates a few times to answer all your questions....lol.

geez i really like that boat....i wouldnt touch it as far as the hull or making it an open bow....it is real sweet. ....but this is your boat bud......you can do what ever you want to it.

one thing i have to warn you about right up front.........the cradles must have supports running under the hull from bow to stern....just like a bunk trailer.
it is possible that you hook the hull, if you start adding stuff...then re stringing the boat on the current set up.

as far as the foam.....it really does not look bad at all.....
the reason that your hull is crammed with the stuff....(far more than any other boat) is for the anti crush stregnth of the foam......jets are traditionally put thru much more carp than a traditional glass boat....like a standard fishing rig.
adding soda bottles will not increase the buoyancy. it will just let you use less foam....

buoyancy is created in a hull when the hull "pushes away" water. (displaces) the shape of the hull does this. the lighter the hull, and larger the surface area of the hull, the higher the boat will sit in the water. you could put your empty hull in the water.....float it.....mark the water line.......then fill the entire hull totally full of air filled soda bottles...and the hull would actually sink lower in the water due to the weight of the plastic in the soda bottles ! (it would be minuscule....but it would be measurable)

the reason they foam the hull with that much foam...(besides the obvious emergency flotation) .is because if the boat takes a whack....the foam acts as a backing plate for the glass,,,,,,the glass flexes and the foam can flex with it while still keeping its rigidity. (it spreads and absorbs the force of impact) the foam wont bounce back (if its a major whack) but it will stop the glass from a major crack.

i would not place any soda bottles in the new foam near the hull.
if you place soda bottles in the foam too close to the hull it will create a void in the foam allowing a weak spot in the structure fo the foam.

what i would do.......is to re use some of the foam. .....keep the dry stuff.......when you are pouring the new foam.....throw a big chunk in the area.....let the new foam expand around and encapsulate the old foam.
you will keep the costs down on the new foam, and not loose any anti crush.

as far as the transom......im not sure what the thickness is that the jet needs.........the jet forum will have that information but if you need say 2 inches of transom for example.....you must add in the thickness of the glass after cure......so if you go 2x3/4 and a 1/2 inch laminated ply.....that will be 2 inches.... no room for the glass !
find out what the thickness that your particular drive needs and i can come up with a proper lay up schedule for you.

ok,,,,,,,that is just a few things off the top of my head bud.......good work so far....keep it up !

ill re read the thread a few times.....and answer the rest of the questions you had...

cheers
oops
 

zopperman

Lieutenant Commander
Joined
Jun 22, 2011
Messages
1,551
Re: Opps Updates

Re: Opps Updates

Looking good buddy. You could use a belly tank if you wanted to make it an open bow.
Make sure you brace the cap too so that it doesn't warp.
Is that an OMC motor...?
 
Top