Re: Aluminum boat transom replacement
I have a Starcraft also, and am also replacing the transom. I used 3/4" PT plywood.
Some lessons learned (so far):
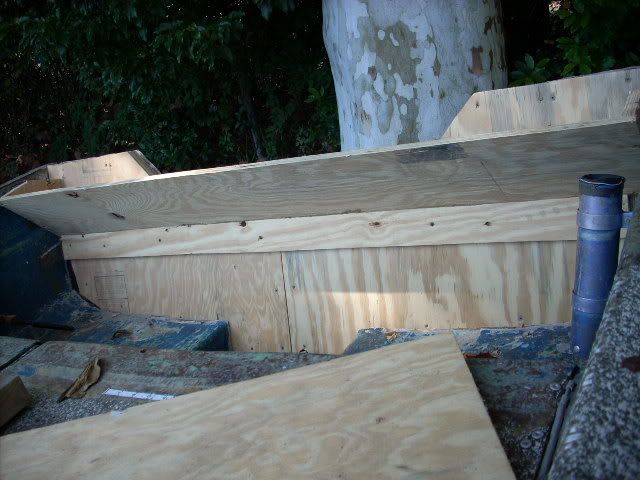
-A little aluminum cutting & bending under the rear corner covers let the transom slide up and out, as a whole. The splashwell doesn't need to be removed, nor does the transom have to be more than one piece.
-I used 1 sheet of 4'X8' - it was more than enough for both "layers".
-I used PL Premium Construction Adhesive and a 1/4" notched trowel to glue the 2 rough-cut layers together. A full 10 oz tube barely covered the whole thing.
-If I had it to do over again, instead of clamps, I would've used 1" drywall screws - this would've made for a much tighter bond.
-Use the old transom as a template, but just for the sides and bottom. Once sides and bottom are cut to match your template, slide it in the boat with the top uncut Then trace a line to match the splashwell/outer transom skin. Mark all holes whiles it's in, too.
-I used a belt sander w/ 24 grit and a plane to take off some thick areas so it would slide in and out easily.
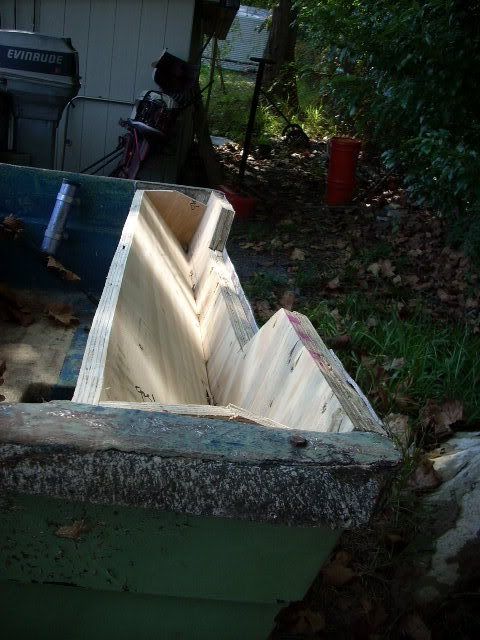
-I used epoxy to seal the whole thing, paying special attention to sides and the predrilled holes.
-I mixed the epoxy w/ sawdust (from the floor) to make a paste, and filled in the voids on the sides and faces.
-I thinned the first coat of epoxy w/ 25% Xylene (following others suggestions). It REALLY soaked in, almost like water. The outer surface wasn't even glossy.
-Plan on about 3-4 coats on the sides, and 2 on the front/back. The sides, being very porous, really soak up the resin.
I can post some pictures if you find any of this helpful.


") Thanks again guys. Wish me luck. As for tomorrow....I'm taking her out for the first time this season to get a little use out of her before tearing her apart again and maybe do a little fishing.
Thanks again guys. Wish me luck. As for tomorrow....I'm taking her out for the first time this season to get a little use out of her before tearing her apart again and maybe do a little fishing.

