Okay, I did manage to work in a setup for this Dust Deputy cyclone vacuum accessory. And before I go any further, I want to state, I am not being paid by Dust Deputy to promote any of their products. But I did say I would provide an honest assessment after using it. So here goes.
I opened up the box and it was well packaged with some warning issues about vacuuming up embers and items that could be extremely combustible. DUH! If anybody serious does that now, just forget buying one of these and stay away from me.
So I proceed to make my setup. Here are some pictures;
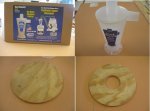
The outside of the box with a picture of a typical setup. And the Dust Deputy itself right out of the box.
I then took a piece of plywood and started cutting it to the proper shape. The diameter is 9" because on my bucket lid, the max diameter I could make and have it fit flat against the top was 9". So your plywood could be larger or smaller depending on what your lid will allow. This plywood goes underneath the lid to keep the top from sucking in when using it. I did read a few folks that forgo this reinforcement and have problems. So I decided to head that possible problem off from the get go.
The center hole is 3" and that is specified in the instructions as well. The is the exact opening of the Dust Deputy on the bottom. I used my Porter Cable Plunge Router to make these cuts. Bu honestly, a simple jig saw will certainly work.
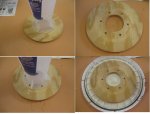
Next I drilled the six holes in the plate. They state to drill the holes 1/4". But the actual holes in the Dust Deputy are 5/16". And I almost made them 5/16" and decided to just go with the 1/4" size. And there is a good reason for that. If any of the spacing is even a little off, it is easier to move the Dust Deputy around to line up six 1/4" holes then six 5/16" holes without waddling and filing the holes for everything to fit. So go with the 1/4" size. It works.
Next, it is time to cut the plastic lid for this to mount on. As you can now see the 9" plywood just fits perfectly in the plastic lid because of all those ribs around the edge. So centering this was not hard at all. I marked it with a sharpie. But keep in mind that a sharpie really doesn't stay on this type plastic too well. So watch for that. I thought about what to use to cut this 3" hole out of the top. And even though a perfect cutting idea would be a 3" Forstner bit, I just didn't have one that large. I think my biggest is 2 1/2". So out comes a really good and sharp #11 bladed Exacto knife and an extremely sharp carpet knife. Between the two I managed to get it cut out. But here again, if you go the knife route, be careful with it and go slow. It is really easy to make a bad cut with a shape knife and applied pressure to cut the plastic. I took many little cuts in the plastic before cutting all the way through. But whatever work for you.
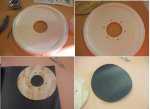
The 3" center came out really nice. Then you have to drill the six 1/4" holes as well. Again marking these was not as easy as it would seem. And that is because while you can get to all the six holes, if your marker is of a normal length, you can't mark the front side of any of the holes. The taper of the Dust Deputy won't allow it. So make do and it really isn't to critical as long as the holes are useable. Remember the holes are 5/16" and you are drilling 1/4". So there is a little lead way.
Now comes the interesting part. There are a lot of ways to install the Dust Deputy on the plastic lid. You want an air tight fit so the system will work perfectly. If there are air holes then the vacuum doesn't work as good. So I thought about silicones and different type sealers to assemble this. I even thought about 5200 sealer. I thought if I only had some rubber sheet, that would be prefect. Well I didn't have any rubber sheet and started wondering what else I could use. I even tough about tire tubing. Well I went to Lowe's (I think I own half of them now around where I live). And between my wife and I we searched the store over pretty well. And then we get to the housing section and they had this drawer liner sheeting. It was about 3/32" thick, black, and rubbery. WALA, there was my rubber sheet. It came in 12" by 7'. And cost $7. So that is what I used for the gaskets instead of glues, sealers or silicones. So use whatever you have and as long as it seals, it will work.
I cut the circle out with the sharp carpet knife pretty easy.
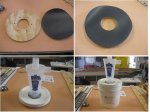
Cutting the outside of the gasket was easy, but not so much for the inside. It was a little more iffy. But I eventually got it cut. I needed to put the six holes for the bolts. That was another interesting question. I have a gasket cutter assortment that you use a hammer to cut them out. So I tried them. They worked okay, but honestly, a simple scratch awl works just as good to make an opening. You have to force the bolts through, but it does seal perfectly.
I used 1 1/4" bolts with flat washers on both sides with nylon lock nuts so vibration won't loosen them up down the road. Not bad getting everything made after all.
And for those of you that use Cabisol, take a real good look at the bucket I used for this. Yes a Cabisol bucket, and it has a great rubber gasket all around the lip to seal really tightly. How can you go wrong reusing such things?
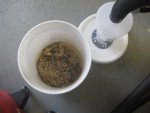
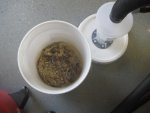
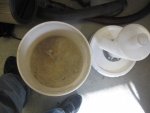
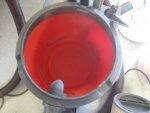
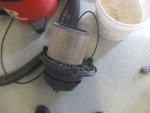
Here is the results of this setup. I have to say I am more the impressed with how well this thing works. If you are tired of plugged vacuum filters and having to clean out the vacuum and filter every time you use it, you have to make one of these. The time saved is worth it. But not having to clean the vacuum filter off is the best art. I give this 5 starts and I am really hard to impress.
So there it is folks. Hope it wasn't too boring. long and useless. But I thought it was worth the effort to report how well this things works knowing other iboaters grind fiberglass and hate cleaning dust filter in their vacuums. And it is neat to see the cyclone action as it runs too. :thumb:


