Fixing tired starter

bjhc100

Seaman Apprentice
Joined
Nov 17, 2006
Messages
40
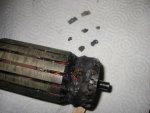
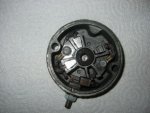
I am getting ready to install a brush and spring kit in the starter for the '86 Force 125. I got the kit here at I boats. Service was great. First what should I not mess with? Do I leave the magnets alone? I want to clean it real good so what cleaning solution works best. I have Clymers but they don't go into cleaning the parts, I am thinking of using electrical contact cleaner. Also what lube, if any, should I put on the bushings when I reassemble it. Any other tips for a good job. Harley
 
Last edited:

eurolarva

Rear Admiral
Joined
Jun 24, 2003
Messages
4,182
Re: Fixing tired starter

WD 40 and a bunch of Q tips works the best. I used mono fishing line to hold the brushes and springs in place when I reassembled it then cut the mono once the cover is over the magnets. WD 40 is the perfect cleaning solution because is will clean rust and not leave any lubrication. You dont want the inside of the starter lubed only the bendix with a light oil. Maybe put a mark on the cover of so you know which side is up and down. I worked on a merc starter that the cover could go on either way and I got it backwards. The magnets north and south poles got reversed so the motor spun the wrong way. It is pretty easy. When you take it apart do in a big box or in a clean area in case a spring or somthing comes flying out.
 

MikDee

Banned
Joined
Jun 6, 2007
Messages
4,745
Re: Fixing tired starter

Good advice by euro, also, I used to clean the copper on the armature where the brushes sit, lightly with emery cloth till it shines. (like shining shoes) I think a wash here with WD40 afterward would be good.
 

bjhc100

Seaman Apprentice
Joined
Nov 17, 2006
Messages
40
Re: Fixing tired starter

WD40 it is. Thanks for your help, its been a long time since I did a starter on a 50's Sea King.The brush leads had to be soldered in, ouch. harley
 

Frank Acampora

Supreme Mariner
Joined
Jan 19, 2007
Messages
12,004
Re: Fixing tired starter

Be careful not to lose the (usually) two washers on the commutator end of the shaft. They take up end thrust. The bushing in the lower cap is sintered bronze and you would LIGHTLY lubricate it with motor oil or equivalent. The bushing on the top of the shaft takes a lot of lateral thrust so you would also want to lubricate it. Since it has high thrust loads, I like to use lower unit oil. Again--Lightly-- too much will weep out and eventually work onto the commutator, fouling it and causing all sorts of problems. What you want to do is remove the top nut and the bendix, remove the shaft from the plate and clean and lubricate the bushing--only as much as it will absorb. (sintered is porous and will absorb a little oil) Before you remove the shaft, check for wear and play in the bushing. If excessive, replace the bushing. (no specs, use your judgement--as long as it does not let the armature contact and rub on the magnets you are OK) It is standard size--buy in bearing store. There is usually a sealing O ring in this end cap to keep water and goo out of the motor. Check its condition and replace if necessary.

Before you disassemble the motor, mark the ends and also note that both end caps are located by a notch in the magnet housing. You rotate them until the stake in the cap fits into the notch.
 

bjhc100

Seaman Apprentice
Joined
Nov 17, 2006
Messages
40
Re: Fixing tired starter

Thanks all, I did it this morning but its still laying on the work bench. This is an American Bosch starter, there is evidence of heat damage on the commutator just behind where the winding tap into the face. Some insulation was burned and cracked, with small chunks missing, some of these chunks were still in the housing! The loose pieces are just above the starter in the photo. Also there were no springs behind the brushes!!!! I will try and display a picture of it. This starter may not make it, but I will try it just to see.
 

Attachments

  • startet 014a.jpg
    startet 014a.jpg
    24.3 KB · Views: 0
  • startet 006.jpg
    startet 006.jpg
    50.1 KB · Views: 0
Last edited:

Frank Acampora

Supreme Mariner
Joined
Jan 19, 2007
Messages
12,004
Re: Fixing tired starter

It MUST have springs. Without them, the brushes will not properly contact the commutator. You will get little or no electrical transfer, brushes will spark excessively, and wear prematurely. That's where your problem is. Previous owner probably did not know how to reassemble it and left them out.

When you go to reassemble it with brush springs installed, the springs will push the brushes out of the holder. To fix this, you take a putty knife and grind a slot in the center of the blade to clear the shaft. Then you push down on all four brushes with the putty knife and install the end cap on the starter with the armature inside it. When the end cap is snug against the body, slip out the putty knife. ---Straight out of Clymers.

Bet with new springs and brushes, your tired starter will snap to.

Oh yeah! Don't clean the commutator with emery paper. Emery dust is electrically conductive--forget where I found out about that but it was a reliable source.
 

bjhc100

Seaman Apprentice
Joined
Nov 17, 2006
Messages
40
Re: Fixing tired starter

Frank, I asembled the starter with new brush kit yesterday, before I read your first response. Oops, I used 600 grit wet or dry paper, the black stuff, to lightly clean the commutator face. I think its carborundum, which will conduct. Then wiped the face with a cloth damp with wd40, then wiped dry with a clean shop towel. What do you think? I cut a slot in one of those plastic spreader knives to hold the spring and bush sets in place. It worked great and was cheap and easy to make. Also I used a thin coat of synthetic grease on the bushings, the sort of stuff normally used on brake caliper pads. I hope this works out, please let me know if you think this is a problem. Its easy to take apart and make right. Thanks for the help. Harley
 

eurolarva

Rear Admiral
Joined
Jun 24, 2003
Messages
4,182
Re: Fixing tired starter

If the insulation is burned and cracked as you mentioned I would plan on looking for a new one. Force motors have a tendency to be hard starting motors and because of that the starters fry pretty bad. I have seen a number of posts on people taking these starters apart only to find what you are seeing. I am suprised your brush kit did not come with new springs. If you find the springs and get it back together and it spins better then before cudos to you. I would still start looking for a new starter. Ebasic sells a good aftermarket one if you cant find one else where.
 

Frank Acampora

Supreme Mariner
Joined
Jan 19, 2007
Messages
12,004
Re: Fixing tired starter

Sounds good to me! There's no real absolutes. Synthetic grease is still oil in a carrier base. to solidify it. Should work. And sounds like you cleaned it well, so give it a try.

I truly--TRULY enjoy launching at a dock where some guy is futilely cranking his Evinrude or Merc, trying to start it. I turn the key and my old Chrysler or slightly newer Force (depending upon which boat I brought) fires up on the first or second turn of the crank. Then I smugly walk back to park the car while the engine warms up. Sometimes-just for the hell of it-I demonstrate how to rope start it. Mutter something like "Oh, crap! I left the battery at home." Vrooom! Running!
 

MikDee

Banned
Joined
Jun 6, 2007
Messages
4,745
Re: Fixing tired starter

Oh yeah! Don't clean the commutator with emery paper. Emery dust is electrically conductive--forget where I found out about that but it was a reliable source.

Frank, I've been taught this, and been doing it that way for 45yrs, never had a problem, but then again, I make sure to clean the arm when I'm done. Ok, I'm up for good ideas, is there something other then this you could recommend to clean the armature?
 

bjhc100

Seaman Apprentice
Joined
Nov 17, 2006
Messages
40
Re: Fixing tired starter

Eurolarva, Sorry for the confusion. The new kit came with springs A-OK, its my starter that didn't have any. Hard to believe it started with out them in place. If you look at the second picture you can see the brush cap exactly as it came off the starter. You may need to blow it up in your picture manager to see any details. Note the brushs are still in the holders. If the springs were in place they would have pushed the brushes out. I pulled one brush out just to make sure, no springs. I could not believe it!

Frank, I love your launch ramp story, thats so cool. I am gaining respect for these old Chrysler and Force engines. Anyway, its going back on tommorow and then I will know if I made a difference.

If I need a new starter which one should I get. I think there are maybe two listed here at I boats. But not sure what else. I'd rather buy here than Ebay. Wonder if they are available from Merc?

You guys are the greatest. Cheers, Harley
 

byacey

Chief Petty Officer
Joined
Jul 20, 2005
Messages
443
Re: Fixing tired starter

Wet & dry carborundum paper is fine for the commutator, although 320 grit is fine enough. Blow it off with compressed air after, and that's all that's needed. Make sure the mica insulators between the commutator bars is under cut slightly. It shouldn't be flush with the brush surface of the commutator bars. An old piece of a hacksaw blade can be used to remove a little of the mica. This helps the brushes last longer.

If you are interested in boat-launch stories, here's mine:
http://www.themarinedoctor.com/cgi-bin//YaBB.pl?num=1176129000

It's basically the story of my motor from the time I got it with an interesting launch ramp story towards the end.
 

Frank Acampora

Supreme Mariner
Joined
Jan 19, 2007
Messages
12,004
Re: Fixing tired starter

If the two listed are Prestolite and Bosch, there is no major difference. All three cylinder and 4 cylinder engines used the same starter--Bendix, mounting, and everything else is the same. Only difference between Bosch and prestolite is that the Bosch has the brushes on the bottom of the commutator and the Prestolite has them on the (more conventional) side of the commutator.

Just be careful that both are for 3 or 4 cylinders. The 2 cylinder engines used a different starter (shaft and bendix) and the late Chrysler 55, 60, 65 engine used a completely different starter--looked and mounted very much like an Evinrude starter.
 

bjhc100

Seaman Apprentice
Joined
Nov 17, 2006
Messages
40
Re: Fixing tired starter

This morning, after I mounted the starter to the engine It went like this. Prime the fuel bulb until hard, disengage interlock, move throttle forward until throttle plates open a little (I have an alignment mark on the shift console), key the ignition, choke closes, starter goes rrrrrrrrrmph 4 seconds, then rest 3 seconds, then key it again 3 seconds, rest 3 seconds, a little gas drips from the carbs, a good sign, I key it again with choke, immediate small backfire, key it again RRRRRMMMMPH then VROOOOM VROOOM were running. shut down. Rest a few seconds then keyed it again w/o choke and it started immediately. It easily started repeatedly there after with just a touch of the key. Thanks to all who helped and special thanks to Frank, who also cheered me up with the launch ramp story. Harley
 
Top