Gimbal bearing - no grease hole in CARRIER? pre alpha

CamaroMan

Petty Officer 1st Class
Joined
Mar 18, 2016
Messages
330
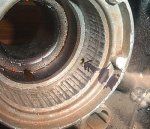
Hi all - hoping not to ask a dumb question here but i cant seem to find a grease hole in the carrier.

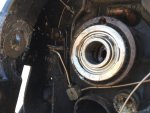
I aligned the bearing with the cutout in the ribbed ring, only place i could find a hole was at 12 oclock -
photo266195.jpg

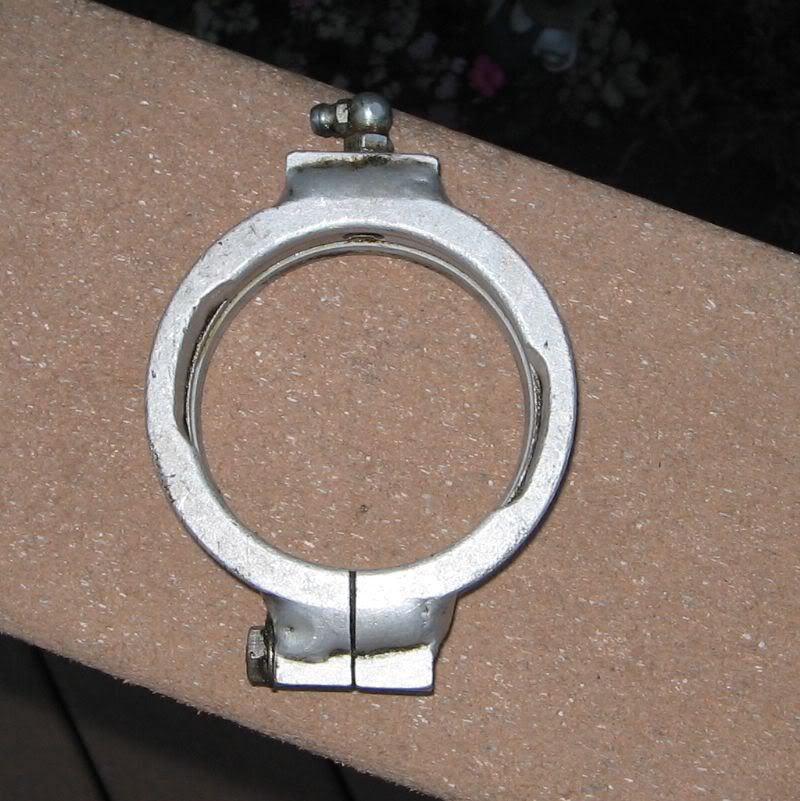
nothing like the hole in the pic from mercstuff - ?


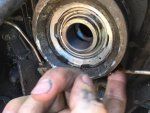
Last pic is the completed installed bearing -
image_266197.jpg
 

Attachments

  • photo266194.jpg
    photo266194.jpg
    60.6 KB · Views: 3
  • photo266196.jpg
    photo266196.jpg
    43.3 KB · Views: 3
  • IMG_5729.JPG
    IMG_5729.JPG
    67.2 KB · Views: 3

Bt Doctur

Supreme Mariner
Joined
Aug 29, 2004
Messages
19,346
Those very early housings did not have a grease channel .The oem bearing was in a plastic/teflon carrier and was retained with thin brass strips wrapped around the bearing carrier. and everything was held in place by a large snap ring.
Once all the old components were removed a late style bearing can be installed
Aft facing is ok. but if your bearing is greasable you need to make one of these
gimbalgreasetool.jpg
 

CamaroMan

Petty Officer 1st Class
Joined
Mar 18, 2016
Messages
330
BT you are the man! I did grease it a bit - wasnt sure exactly what to do. Guess ill pull it out again and do the palm grease method and really work it in there well. I always prefer teflon sealed bearings unless required to be open (like 2 stroke merc mariner crank bearings)..

What about drilling / tapping a grease nipple in the current housing thats reachable form the outside (perhaps like the 4 oclock position as the later style? Even an initial pump of grease while rotating the bearing would provide quite good lubrication for a long time since theres no water there -
 

achris

More fish than mountain goat
Joined
May 19, 2004
Messages
27,468
The latest are a sealed bearing ("greased for life")... But I think only OEM, haven't seen any aftermarket ones sealed.

Ref: Youtube Q&A. Grounding clip it to 'connect' the stainless steel bellows clamp to the aluminium gimbal housing, so it's all protected with the same anodes. And the shift cable thread is most definitely 1/4"-18...

Chris.........
BTW, what is the 'joke' with that Ryan guy? If it's an 'inside' joke, then duh, of course I don't get it.... That's why it's an 'inside' joke...
 

CamaroMan

Petty Officer 1st Class
Joined
Mar 18, 2016
Messages
330
BTW, what is the 'joke' with that Ryan guy? If it's an 'inside' joke, then duh, of course I don't get it.... That's why it's an 'inside' joke...

yeah have no clue what thatw as about, stupid comment to make - i thought he was ten, then he made it sound like u knew him which judging by your comment u dont. Just another troll.

Anyway tx for the info - ive cancelled the tap i ordered after running a wire brush thru and cleaning the threads up. Planning to do a lower unit pressure and vacuum test today - hopefully all is holding up.

Im curious - can you install the new shift seal/bush with basic tools? like tap it in with some light duty sealer which will aid as lube getting it in? Now that the unit is off and doing ujoints/etc - might as well do the shift seal as well. This thing was so corroded, bearing carrier was eaten by corrosion about 3-4mm!
 

achris

More fish than mountain goat
Joined
May 19, 2004
Messages
27,468
Im curious - can you install the new shift seal/bush with basic tools? like tap it in with some light duty sealer which will aid as lube getting it in? Now that the unit is off and doing ujoints/etc - might as well do the shift seal as well. This thing was so corroded, bearing carrier was eaten by corrosion about 3-4mm!

Shift shaft bush? I thought we were talking about the shift cable.

If you're doing both, then I have a wierd little setup for 'pushing' the bush (with the seals instlled) into the housing. It's basically a long bolt and a bunch of washers and nuts. Just set it up and using a couple of spanners and as you tighten the bolt up, the bushing is pressed into place.

Chris.......
 

CamaroMan

Petty Officer 1st Class
Joined
Mar 18, 2016
Messages
330
thanks chris, yes was talking about cable first then the seal - since drive is apart. mityvac arriving fri - can so the pressure/vac test, what psi do you recommend (10?) and for how long, 10 minutes?

Also - i got all the bellows tied up today. The shift bellows on the rear side, theres that little clamp thing, i just put on a small stainless hose clamp, since there isnt a lip for the bellows to attach to (and judging by the amount of stretch required from up/down) i presume the clamp just goes over the black outer sheath at a location that serves the trim positions well? (nearest to hull seemed better allowing more travel / less strain in bellows).

this correct?

thanks! will be doing a water test wed prob - bellows went well, got it on quite easily despite so many having real issues, very relieved -
 

achris

More fish than mountain goat
Joined
May 19, 2004
Messages
27,468
thanks chris, yes was talking about cable first then the seal - since drive is apart. mityvac arriving fri - can so the pressure/vac test, what psi do you recommend (10?) and for how long, 10 minutes?

I like to do a couple of tests. One at a very low pressure, like 3 to 5 psi and test for about 20 minutes, then about 20 minutes at 12 to 15 psi.Some folk leave them overnight... No point. If it hasn't leaked in 20 minutes, it's not going to. But remember to turn the shafts with the pressure on....

CamaroMan said:
Also - i got all the bellows tied up today. The shift bellows on the rear side, theres that little clamp thing, i just put on a small stainless hose clamp, since there isnt a lip for the bellows to attach to (and judging by the amount of stretch required from up/down) i presume the clamp just goes over the black outer sheath at a location that serves the trim positions well? (nearest to hull seemed better allowing more travel / less strain in bellows).

this correct?

At the small end of the shift bellows, use (the special) Merc fuel line cable tie, or a normal cable tie wrapped twice. As for positioning, turn the wheel hard a port, pull the bellows out along the cable as far as you wish, clamp it off.

CamaroMan said:
thanks! will be doing a water test wed prob - bellows went well, got it on quite easily despite so many having real issues, very relieved -

:)

Chris.........
 

CamaroMan

Petty Officer 1st Class
Joined
Mar 18, 2016
Messages
330
fantastic chris thanks - will inspect shift clamp hard port - i positioned the bellows to have as much travel as possible at the lower position, otherwise when lifting it would really put strain on the bellows - hopefully that makes sense, so currently its about 2-3 inches from the gimbal ring / rear brass nut.
 
Top