Hi all,
I had a 48v Ray Electric Motor from 2004 that died on me. I Installed new brushes and couldn't revive it. So I started looking for alternatives. I'm posting this thread to help anyone else who is in the same boat") .
.
I was lucky to find a literal drop-in replacement motor for the motor that Ray had installed on ATO.com. The dimensions are exactly the same down to the millimeter. Heck of a find. They offer a 5KW and a 10KW brushless motor to boot. The controller will even fit inside the original case. ATO has everything you need except for a new coupler. All parts are listed and linked below. Its expensive but 1/2 the price of a new unit, so it could be considered a bargain depending on how you look at it. Best of all is it's a 48v system, which you can get big lithium batteries for on Amazon. I installed 3 120Ah 48v lithium batteries in the boat, giving me a total of 360Ah to play with. The motor will put out more watts of energy than the 72v Ray motor. Enjoy! Pictures to follow...
--
This build describes how to (roughly) double the power of the 48v Ray Electric Motor. This upgrade will work on any of the Ray Electric Motor outboards (36v, 48v, 60v, 72v).
The build will upgrade the electric motor, the controller and the throttle all using ATO parts from ATO.com from a ~5kw electric motor to a 10kw electric motor. This build keeps the rest of the electric outboard intact including the cover.
Some facts before we get started:
Parts that you will need
I had a 48v Ray Electric Motor from 2004 that died on me. I Installed new brushes and couldn't revive it. So I started looking for alternatives. I'm posting this thread to help anyone else who is in the same boat
. I was lucky to find a literal drop-in replacement motor for the motor that Ray had installed on ATO.com. The dimensions are exactly the same down to the millimeter. Heck of a find. They offer a 5KW and a 10KW brushless motor to boot. The controller will even fit inside the original case. ATO has everything you need except for a new coupler. All parts are listed and linked below. Its expensive but 1/2 the price of a new unit, so it could be considered a bargain depending on how you look at it. Best of all is it's a 48v system, which you can get big lithium batteries for on Amazon. I installed 3 120Ah 48v lithium batteries in the boat, giving me a total of 360Ah to play with. The motor will put out more watts of energy than the 72v Ray motor. Enjoy! Pictures to follow...
--
This build describes how to (roughly) double the power of the 48v Ray Electric Motor. This upgrade will work on any of the Ray Electric Motor outboards (36v, 48v, 60v, 72v).
The build will upgrade the electric motor, the controller and the throttle all using ATO parts from ATO.com from a ~5kw electric motor to a 10kw electric motor. This build keeps the rest of the electric outboard intact including the cover.
Some facts before we get started:
- The 48v motor is rated at 8hp to spin at 4000 RPM but really spins closer to about 3,200 RPM when installed.
- The 60v motor spins at 3,700 RPM when installed.
- The shaft of the 48v motor is 3/4in
- The support housing on the 48v motor is 114mm
- The 48v motor has brushes and is single-phase
- The lower unit has a gear reduction of ~2.5:1 where the motor spins 2.5 time for every rotation of the prop
Parts that you will need
- 10KW high torque brushless air-cooled motor
- Model: ATO-EVA-10000
- https://www.ato.com/10-kw-air-cooling-bldc-motor-for-electric-vehicle
- It’s a perfect drop-in replacement for the existing motor
- Get the controller with the electric motor
- This motor is 3-phase and will not work with the existing controller
- This motor has a 7/8” shaft. See coupler below
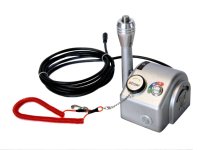
- Lever style throttle body from ATO (they call it a spare part. Just show this picture)
- This is compatible with the controller and also supports reverse
- 7/8” coupler
- Replacement woodruff key (you can get this from Ace Hardware)
- Disconnect battery power
- Remove the cover and top plate
- Unbolt the existing motor (4 bolts in the bottom)
- Remove controller (4 bolts)
- Install the 7/8” coupler on the new electric motor (make sure you tighten the set screw once you find the right depth)
- Drill holes in the plate where the old controller was installed to bolt in new controller (the holes don't align)
- Bolt in the new controller and check fit with the cover
- Bolt in the new motor – make sure the coupler is seated at the right depth - this takes some experimentation
- Move kill switch wires from old throttle to new throttle (take note of color)
- Move forward wires from old throttle to new throttle (take note of color)
- Move reverse wires from old throttle to new throttle (take note of color)
- Move potentiometer wires from old throttle to new throttle (take note of color)
- Hook up each throttle wire to controller
- Hook up battery leads to controller (keep the old relay in-tact - the kill switch wire activates the relay)
- Trim and hook up leads from the controller to the new electric motor
- Reinstall cover