Carlazzomark,
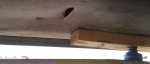
If patching is your only option, here's how I would try it. I'll start with a picture representing the hole, an inside patch and and outside patch. They will be used along with the sealant mentioned above to form a sandwich patch over the hole.
As shown, the patches should be oval shaped with the width (the narrowest dimension) of the patch only sligthly smaller than the length (the longest dimension) of the hole. That should allow you to slide the inside patch through the hole when the time comes and rotate it so it overlaps the entire hole. Here are the steps as I envision them.
- Cut two identical patches out of aluminum at least 4mm thick.
- Lay one patch over the hole and mark its outline to see when it is centered and how much overlap there is.
- Mark one patch for the location of holes to be drilled about 25mm apart around the circumference of the patch in the center of the overlap area.
- Locate enough aluminum rivet nuts and bolts to fill the holes in the inside plate. They should be sized for bolts about 5-7mm in diameter and about 25mm long. Get three extra bolts about 60mm long.
- Clamp both plates together and drill the holes marked in step 3 in a size just large enough for the bolts you will use with the rivet nuts.
- Enlarge the holes on the inside plate to the size needed to install the rivet nuts.
- Install the rivet nuts on the inside plate.
- Place the outside patch over the hole and mark the location of the holes on the skin of the pontoon. Drill holes as marked in the size for the bolts.
- Using strong duct tape, make a handle in the center of the outside facing side of the inside patch. You will use it to position the patch when it is inside the pontoon.
- Flatten the skin of the pontoon around the hole so the patches can fit snuggly.
- Prepare three pins (i.e., headless bolts) in the same size as the bolts you will use.
- Generously lather the outside facing side of the inside patch with sealant, slide the patch inside the hole and manuever it into place using the handle.
- Align the hole in the skin with the holes in the inside patch using the three pins spaced evenly around the hole.
- Relying on the sealant and the pins to hold the inside patch, carefully remove enough of the handle to clear installation of the outside patch.
- Carefully slide the outside patch over the three pins.
- Insert the three extra long bolts through the outside patch, skin and into the rivet nuts. Screw them until they securely hold the inside patch.
- Remove the pins and slide the outside patch away from the skin enough to apply sealant.
- Apply a generous amount of sealant to the overlap area between the skin and the outer patch.
- Slide the patch onto the sealant and skin.
- Insert the bolts through the outside patch, skin and inside patch.
- When all the bolts are started, remove the three extra long bolts and replace with regular bolts.
- Tighten the bolts evenly and in stages to avoid warping the metal.
- Let it cure.