Mercury Switchbox Wiring

dwyork@hotmail.com

Petty Officer 2nd Class
Joined
Jan 14, 2009
Messages
178
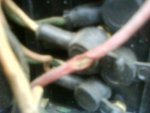
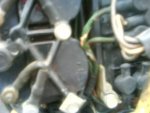
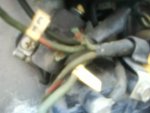
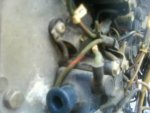
I've been trying to get my 1983 Mercury 115 running correctly so I have been going throught the routine motions...carb rebuild, fuel pump rebuild, new impeller, water pump, etc. But today when I was working on it I bent one of the wires running from the switch box and it crumbled in half. I started going through all the rest of the wires and about 50% of them are corroded badly and break easily. I would like to replace just the wires individually to save on money. Can anyone tell me the proper gauge of wiring or if any special wire is required here. I am trying to stay away from purchasing a new trigger and/or harnesses.
 

dwyork@hotmail.com

Petty Officer 2nd Class
Joined
Jan 14, 2009
Messages
178
Re: Mercury Switchbox Wiring

I replaced all of the wires from the switchboxes to the coils and all the other wiring from the trigger and stator look good. But, just my luck, even after fuel pump rebuild, new wiring, new plugs, new plug wires, and 2 carb rebuilds the boat still is acting the same as it was. I haven't been out on the water yet this year, but just by running the muffs and increasing the throttle it starts to cut out...so I don't think I even want to see what she is going to do once a load is on her. It seems like it is running fine and as I start to open up the throttle it sounds like it is throttling up and then makes a put, put , put, rrrrrr, put, put sound (kinda of corny, but...) and then it will break wide open, and then back to the put, put. What am I missing?
 

Karl_Childers

Petty Officer 2nd Class
Joined
Mar 2, 2009
Messages
118
Re: Mercury Switchbox Wiring

you could probably get away with 16ga, but I believe if I was doing a re-wire I would use heavy stuff like 12 ga. That being said, you are better off buying an OEM harness if you can. Troubleshooting down the road will be a lot easier with the correct color wires. On the other hand, a DIY re-wire can be just as good if do it right...solder, shrink tube, dielectric grease, etc. Just use good marine grade wire, and good technique and you'll be fine.
 
Joined
Feb 21, 2009
Messages
58
Re: Mercury Switchbox Wiring

How long have you had the boat? Have you ever had it running WOT before? There are several things that can cause iit to idle fine and then bog down when giving it full throttle. You really need to be on the water when testing it and making changes, muffs are really only good for flushing out the lake water. The trigger and the stator are the primary parts that have the bog down issue on the engine. Stator high speed winding could be bad, trigger could be bad, or trigger is not engaging due to dirt/grease build up. I've just been through this with my 1982 115 HP I-6. If you like you could also contact me on yahoo messenger tim_bfe_73@yahoo.com
 

dwyork@hotmail.com

Petty Officer 2nd Class
Joined
Jan 14, 2009
Messages
178
Re: Mercury Switchbox Wiring

I bought this boat late last summer and only took it out once so I have never seen it operate correctly @ WOT. When I did have it on the lake it would seem to be getting out of the whole pretty well, but then it would just stall out. The worst thing is that I have found lots of bad stuff like the switchbox wires broke in two and about a month ago I found that the coil end of one of the plugs wires was also corroded very badly and even after I have fixed both of these issues it still Muff running the same. I am going to get it out on the lake tomorrow to see just how bad or good it is and I am sure I will have a lot of questions tomorrow night, please stay tuned...
 

dwyork@hotmail.com

Petty Officer 2nd Class
Joined
Jan 14, 2009
Messages
178
Re: Mercury Switchbox Wiring

you could probably get away with 16ga, but I believe if I was doing a re-wire I would use heavy stuff like 12 ga. That being said, you are better off buying an OEM harness if you can. Troubleshooting down the road will be a lot easier with the correct color wires. On the other hand, a DIY re-wire can be just as good if do it right...solder, shrink tube, dielectric grease, etc. Just use good marine grade wire, and good technique and you'll be fine.

Yeah, I couldn't find an exact match to the original wiring so I came up with my own wiring schematic and I made the changes to the wiring diagram in my Seloc Manual for future use. I ended up going with 10 gauge wiring and connected just as the factory originally did.
 
Joined
Feb 21, 2009
Messages
58
Re: Mercury Switchbox Wiring

New York toss that Seloc manual, its garbage. Get the OEM Mercury/Mariner Manual, it is 1000 times better than the Seloc. I would suggest, only if you want it right with no problems, replace the trigger and stator, and any part that has corroded wires, and have the carbs rebuilt. Then after you have that done, take it to a repair shop and have them do the Link and Sync. If it is a good shop they will connect it to a dyno when timing it and they will adjust the carbs to make it run correctly. Its worth the cost of labor for them to do it. Locally I paid $92.00 for one hour, to complete my link and sync. So if your handy you can do all the labor of changing the parts yourself. Just have them do the Link and Sync.
 

dwyork@hotmail.com

Petty Officer 2nd Class
Joined
Jan 14, 2009
Messages
178
Re: Mercury Switchbox Wiring

Thanks for the info...I was really hoping to get by without having to fork out the cash for a Stator and trigger, but I really want to get this thing running so I guess I will do what I gotta do. What's the best way to test if I need a Stator or trigger? Also I looked everywhere for the Mercury manual for this model...where did you come up with one?
 
Joined
Feb 21, 2009
Messages
58
Re: Mercury Switchbox Wiring

Mine came with the boat when I bought it. First you have to disconnect the stator and trigger wires from the switch boxes. The wires should be marked with yellow tape to identify top switch box and bottom switch box. You will need an OHMS meter with 1x 10x 100x and 1000x settings on it. Get back to me if you have that.
 

dwyork@hotmail.com

Petty Officer 2nd Class
Joined
Jan 14, 2009
Messages
178
Re: Mercury Switchbox Wiring

I started this old Merc up yesterday in a small tank and she started right up and ran great in idle at about 850 RPM. As I increase the throttle she continues to run good until about 2500 RPM at which point the motor starts to surge and will jump from 2500 RPM to 3000 RPM and back down to 2500 RPM and so on. Like I stated, I have rebuilt the carbs and fuel pump and I rechecked the diaphragm for pinholes and checks good. I replaced all of the wiring on the switchboxes to the coils and to the idle stabilizer as they were badly corroded and in some cases broken in two (some poorly visible pics below). I checked the spark to each plug yesterday and all are getting sparks now. I have not checked the stator and trigger yet, but will do so soon. I plan on taking her to the lake tonight if I have time and running her under a load to see what happens. Do you all think that a simple link and sync could fix this surging issue or do you think I am facing a larger problem?
 

Attachments

  • corrodedwire4.jpg
    corrodedwire4.jpg
    26 KB · Views: 0
  • corrodedwire3.jpg
    corrodedwire3.jpg
    27.8 KB · Views: 0
  • corrodedwire1.jpg
    corrodedwire1.jpg
    24.4 KB · Views: 0
  • corrodedwire2.jpg
    corrodedwire2.jpg
    28.1 KB · Views: 0
Joined
Feb 21, 2009
Messages
58
Re: Mercury Switchbox Wiring

NewYork what is happening, since you did have the carbs cleaned, either the Trigger is not turning fully and engaging or is bad, or the Stator is bad. The Trigger sets inside the perimeter of the stator and the Stator sits under the fly wheel. They work together for your ignition. If you have easy start and good idle and run fine up to 2500 to 3000 RPM and it bogs down, it is the trigger/or stator.

Here is the test for the Stator. Make sure that the wire are disconnected that come from the stator going to the switch boxes and rectifier.

Using the Rx 1000 scale take a reading between the BLUE and RED stater wires = 5400 - 6200 Ohms

Using Rx1000 scale take a reading between the BLUE/WHITE and RED/WHITE stator wires = 5400 - 6200 Ohms

Using the Rx1 scale take meter reading between the RED stator wire and engine ground = 125 Ohms - 175 Ohms

Using Rx1 scale take a reading between RED/WHITE stater wire and engine ground = 125 Ohms - 175 Ohms
If any of you readings are less or more than stated, Replace Stator!


Trigger Test

Make sure all wires are disconnected from Trigger to Switchboxes!

Using the Rx100 scale

Test between the BROWN Trigger wire W/O yellow sleeve and WHITE Trigger wire WITH yellow sleeve = 1100 Ohms - 1400 Ohms

Test between WHITE Trigger wire W/O yellow sleeve and VIOLET trigger wire WITH yellow sleeve = 1100 Ohms - 1400 Ohms

Test between VIOLET Trigger wire W/O yellow sleeve and BROWN Trigger wire WITH yellow sleeve = 1100 Ohms - 1400 Ohms

If an of your reading are less or more than stated, Replace Trigger.

NewYork don't try your boat on the lake with it having the issues that it has. Its not good for the engine.
 

dwyork@hotmail.com

Petty Officer 2nd Class
Joined
Jan 14, 2009
Messages
178
Re: Mercury Switchbox Wiring

Awesome! Thanks Native, I will run home and test these tonight, keep your fingers crossed for me, LOL. Update to come soon...
 

j_martin

Admiral
Joined
Sep 22, 2006
Messages
7,474
Re: Mercury Switchbox Wiring

In addition,
Disconnect the kill wire from the switchbox(s) and measure between it and ground. It should be grounded with ignition off, and wide open with no leakage when the switch is on.

If all other tests are good, take the flywheel off (using the proper puller) and look carefully for contact between the stator and the flywheel. Loose stator bolts or (hope not) bad top engine bearing can cause contact. It only has to touch lightly to kill the juice and make the engine stumble.

hope it helps
John
 

dwyork@hotmail.com

Petty Officer 2nd Class
Joined
Jan 14, 2009
Messages
178
Re: Mercury Switchbox Wiring

In addition,
Disconnect the kill wire from the switchbox(s) and measure between it and ground. It should be grounded with ignition off, and wide open with no leakage when the switch is on.

I might be confused as I have no idea what you are talking about here..? Which one is the kill wire and what do I measure it with?
 

cannonford57

Petty Officer 1st Class
Joined
Mar 5, 2008
Messages
353
Re: Mercury Switchbox Wiring

new york,sometimes a timing light can tell you volumes.hook up to water and to #1 plug,watch the light as u bring it up to 2500 rpm slowly.do it for all cyls and if it drops out or gets eratic around 1800 to 2000 hi side on stator is bad. hope that helps
 

cannonford57

Petty Officer 1st Class
Joined
Mar 5, 2008
Messages
353
Re: Mercury Switchbox Wiring

also cdi offers an internal harness for your motor for about 160.00
 

dhall95

Cadet
Joined
Mar 2, 2009
Messages
21
Re: Mercury Switchbox Wiring

my wiring was falling apart also, i had to buy a new stator and trigger for mine (85 mercury 60hp) it was about 370 for the parts, and a $100 for labor, so im looking about $500.. im just hopin it's not the swithboard that is the problem. that will cost me another $230 bucks!!
 

dwyork@hotmail.com

Petty Officer 2nd Class
Joined
Jan 14, 2009
Messages
178
Re: Mercury Switchbox Wiring

So I still haven't tested the Trigger and Stator yet because I apparently don't have the right tester, my shows the (Ω), but nothing shows the Rx that everyone refers to while doing the tests...can I make it work with the tester I have (included a pic of the tester)? But what I did notice is that when the motor is surging at 1800 + RPM that the 1st, 3rd, & 5th plug wires are not firing...so I am assuming that the top switchbox is not working correctly since the the 2nd, 4th, & 6th plugs are firing. However, all 6 are firing at idle.
 

Attachments

  • multimeter.jpg
    multimeter.jpg
    18.7 KB · Views: 0

Moody Blue

Captain
Joined
May 24, 2004
Messages
3,136
Re: Mercury Switchbox Wiring

The meter you have will work just fine. The R x 100 or R x 1000 is simply a scale setting or range. Your meter has a different scale setup but will measure the same values as any other meter.

Choose the 20000 (20K) ohm range for your measurements. For the lower value readings I would change ranges to 200.
 
Top