mudchuck
Seaman
- Joined
- Jul 29, 2016
- Messages
- 61
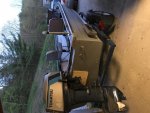
I purchased a 1969 Starcraft V hull with a 1987 Tohatsu 40HP 2-stoke motor and trailer last May for cheap - $1,000, as this is my 1st boat and didn't want to go deep debt on a new one since I wasn't sure how things would go with the time & money investment in this "addiction".
The trailer needed new wire and lights, and wheel bearings. I've since replaced them this February. I was surprised to discover that I had 2 different tire sizes, so I had to replace one of the tires too. No wonder one of the wheel bearings was wore out.
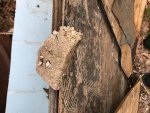
The boat had some nasty flooring and rotten in a few spots and in need of a paint job. Motor was in good condition and compression is good. Just needed some carb work and runs fine.
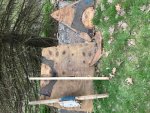
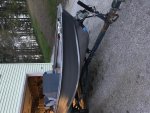
I had the boat out on the water a few times last summer and was able to get some fishing in with no real issues once I got the carb situated. Pulled the boat off the trailer this past fall and set the boat on some old tires in my garage for the winter. Built a stand for the motor and pulled it off the boat. Water tested the boat and found all the rivets to be in great shape with NO LEAKS!
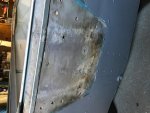
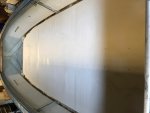
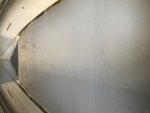
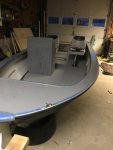
Flipped over and sanded the hull this winter after hunting season, and did a coat of GOOP Coat-It. not too impressed with the way the epoxy coating went, I sanded it and painted it with hull paint, and flip it back over and tore out the old floor. Found that one of the PO's had used PT plywood in a sectional floor repair along the way, so I went to work on pressure washing everything and scrubbing/flushing out the gunk junk that had built up. All the old foam was shot and had clogged the flutes in the ribs. Got them all cleaned out and pulled the main stringer.
I decided this hull needed a redesign for allowing the water to flow to the rear for draining better then just having flutes in the ribs so I made dual stringers so there would be a waterway down the middle.
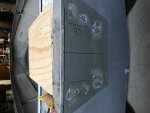
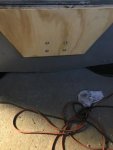
JB welded the old holes in the gunnel rails, Floor foam installed, 3/4" ACA plywood deck cut to fit and 2 coats of spar vanish on the underside and edges, Aluminum stringers installed. Floor topside primed and ready for final anti-skid deck paint tonight.
Transom in good shape, so won't replace that wood until next winter. Pulled the nasty motor mount board and replacing that tonight.
More pics to follow later as things progress.
The trailer needed new wire and lights, and wheel bearings. I've since replaced them this February. I was surprised to discover that I had 2 different tire sizes, so I had to replace one of the tires too. No wonder one of the wheel bearings was wore out.
The boat had some nasty flooring and rotten in a few spots and in need of a paint job. Motor was in good condition and compression is good. Just needed some carb work and runs fine.
I had the boat out on the water a few times last summer and was able to get some fishing in with no real issues once I got the carb situated. Pulled the boat off the trailer this past fall and set the boat on some old tires in my garage for the winter. Built a stand for the motor and pulled it off the boat. Water tested the boat and found all the rivets to be in great shape with NO LEAKS!
Flipped over and sanded the hull this winter after hunting season, and did a coat of GOOP Coat-It. not too impressed with the way the epoxy coating went, I sanded it and painted it with hull paint, and flip it back over and tore out the old floor. Found that one of the PO's had used PT plywood in a sectional floor repair along the way, so I went to work on pressure washing everything and scrubbing/flushing out the gunk junk that had built up. All the old foam was shot and had clogged the flutes in the ribs. Got them all cleaned out and pulled the main stringer.
I decided this hull needed a redesign for allowing the water to flow to the rear for draining better then just having flutes in the ribs so I made dual stringers so there would be a waterway down the middle.
JB welded the old holes in the gunnel rails, Floor foam installed, 3/4" ACA plywood deck cut to fit and 2 coats of spar vanish on the underside and edges, Aluminum stringers installed. Floor topside primed and ready for final anti-skid deck paint tonight.
Transom in good shape, so won't replace that wood until next winter. Pulled the nasty motor mount board and replacing that tonight.
More pics to follow later as things progress.
Attachments
-
 photo264206.JPG276.3 KB · Views: 4
 -
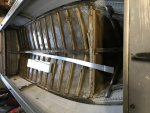 photo264207.jpg128 KB · Views: 4
 -
 photo264208.jpg129.1 KB · Views: 4
 -
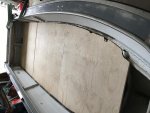 photo264210.jpg126.7 KB · Views: 4
 -
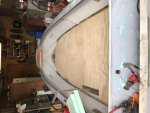 photo264211.jpg141.3 KB · Views: 4
 -
 photo264212.jpg77.5 KB · Views: 4
 -
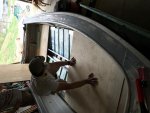 photo264213.jpg140.9 KB · Views: 4
 -
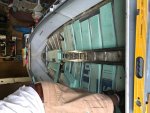 photo264214.jpg124.9 KB · Views: 4
 -
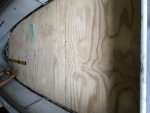 photo264215.jpg128.8 KB · Views: 4
 -
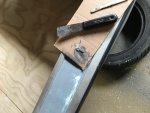 photo264216.jpg118.6 KB · Views: 4
 -
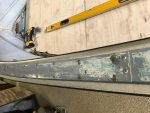 photo264217.jpg135.5 KB · Views: 4
 -
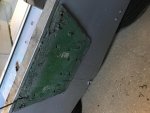 photo264218.jpg110.8 KB · Views: 4
 -
 photo264219.jpg104.9 KB · Views: 4
 -
 photo264220.jpg116 KB · Views: 4