Old Carver
Seaman Apprentice
- Joined
- Dec 12, 2006
- Messages
- 46
Refitting a Carver for our use on Lake Erie fishing and cruising.Another member asked me to bring this over and share.Not high tech lay-up but we are making it happen.
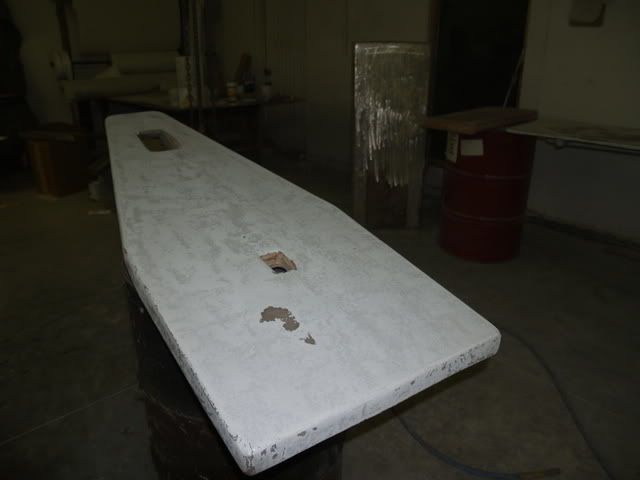
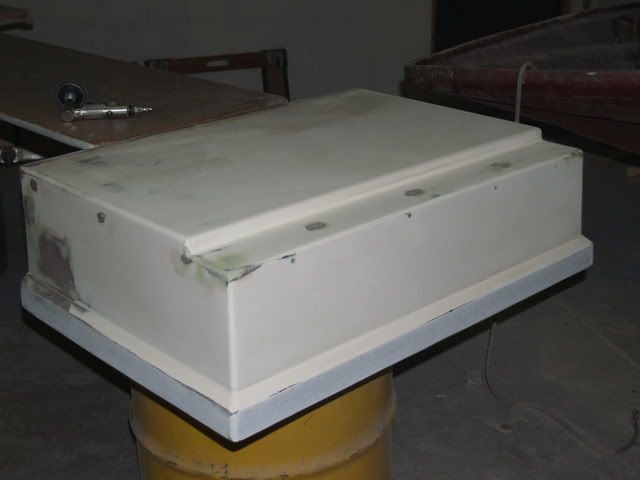
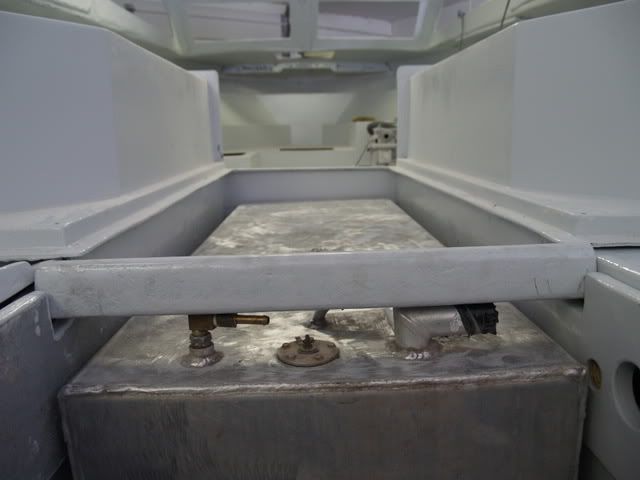
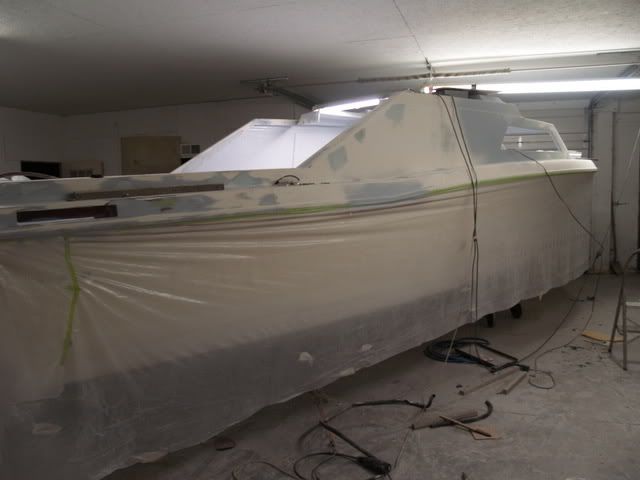
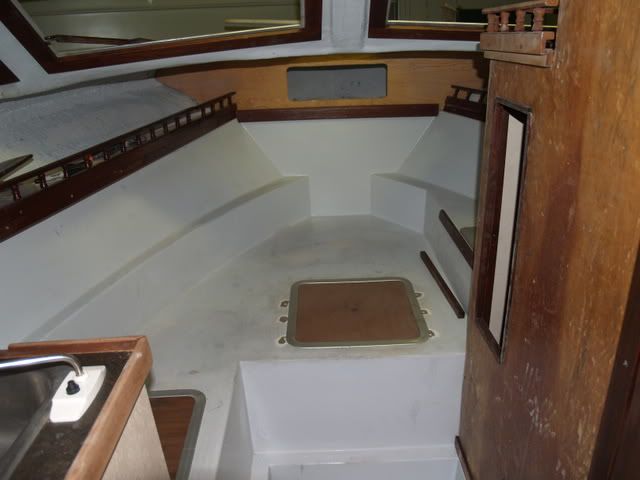
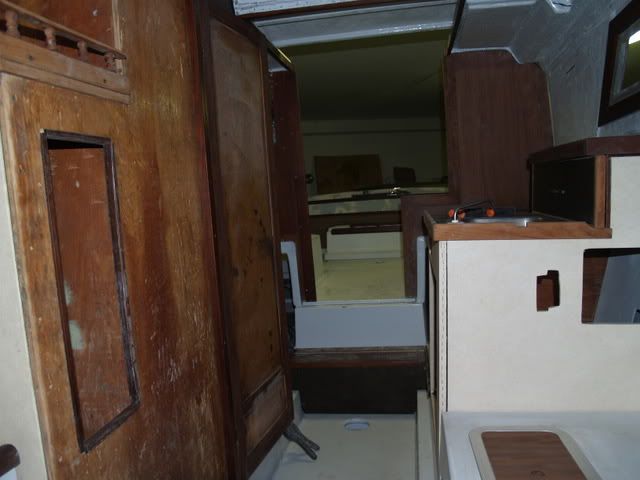
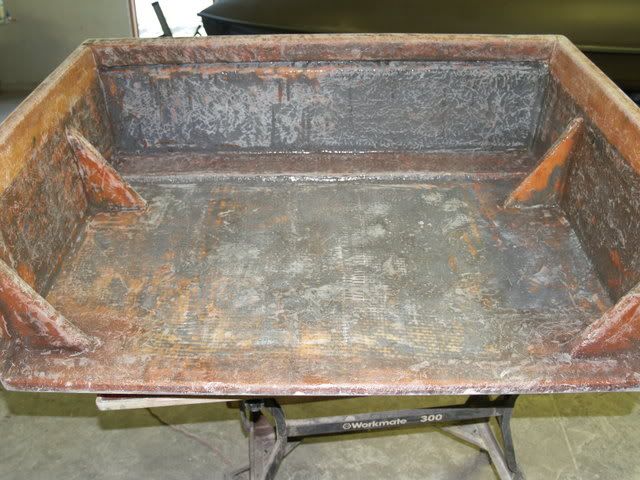
The Boat as purchased.


80 Carver Montego,fell in love with the amount of deadrise and the carolina flare,sizeable galley,midship and vee berthing,enclosed head with pump out,dual voltage fridge,stove,sink,potable water,on board charging,shore power that made this an attractive fishing/cruiser as it is hard to do both.
Found core rot on about one third of the upper deck due to an improperly bedded water fill,suspect dash and various other areas to be damaged by something like a fallen tree branch,gel cracks and laminate fracture at stress points,delamination of the glass from the motor mounts but all in all it seemed to be a good starting point on a very fresh Continental trailer with a good stringer grid and inner liner,no dock rash(26 years hard to believe!!) and a solid hull.The whole upper deck was flexing ant the boat was headed for self destruct if operated in the rough very much.
So we eventually stripped her down to a bare fiberglass shell for a complete refit.I am an auto tech by profession and work in conjunction with some fiberglass pros at Wrangler Boats in Canal Fulton so I have resources to do this cheaper other than the $600k in lost labor hours,lol...
Here the motor mounts have been cut out and the stringer grid cut to accept a splice.The whole bilge,hull and transom have been sanded for the additional lay-up.
 [/URL]
 [/URL]
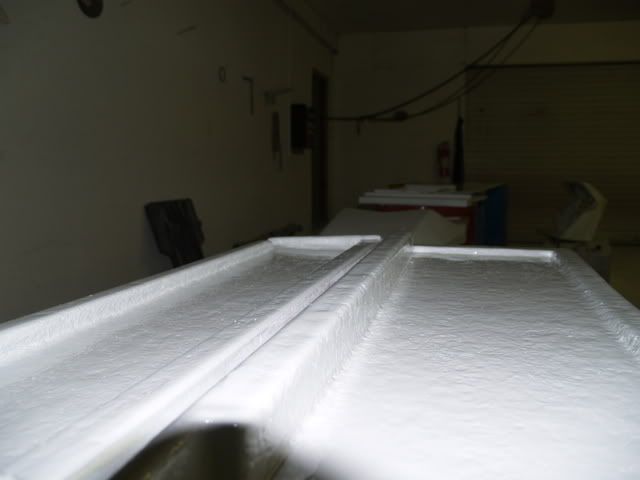
We thought the belly of the Carver was a little thin for the way I use a boat and as a result we added more laminate to the hull starting with two layers of 1.5oz mat followed with two layers of biaxial mat adding about 3/16-1/4 hull thickness at the pad.
Here is a shot of the hull after lamination.
 [/URL]
This shows the lap joint from the hull to the outer stringer if you look close you can see the lap of both layers of biaxial on the stringer.
 [/URL]
Here is the lumber cut and ready to be screwed together with resin between pieces.
 [/URL]
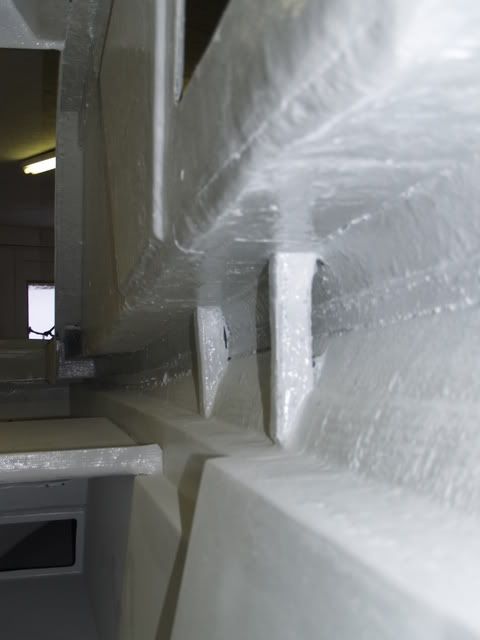
Next the mounts and stringer splice are assembled and placed in position.You will notice we capped the mounts with plywood to give the actual engine mount screws better retention from the cross laminate of the plywood.If you have to lay pieces of lumber together like we did on these mounts make sure you cut the lumber so any crown in the lumber lays together when assembled.
 [/URL]
 [/URL]
Next cut and fit the glass mat and roving to fit,remove and stack all pieces in reverse order of assembly so they are ready to wet out in sequence.
 [/URL]
 [/URL]
First we wet out the motormount stringers and to the outboard side of each I added a panel for the outdrive trim pump,trimtab pump and the opposite side for the water pumps for the washdown,transom shower and head shower just repeating the process for each addition.Once again I can not stress enough sanding if the glass has been kicked for a few days to ensure complete bond.
 [/URL]
This shot shows the backer board that is screwed and laminated to the pre-existing stringer grid to reinforce the splice.Once again start with mat and finish with roving to give the strength.
 [/URL]
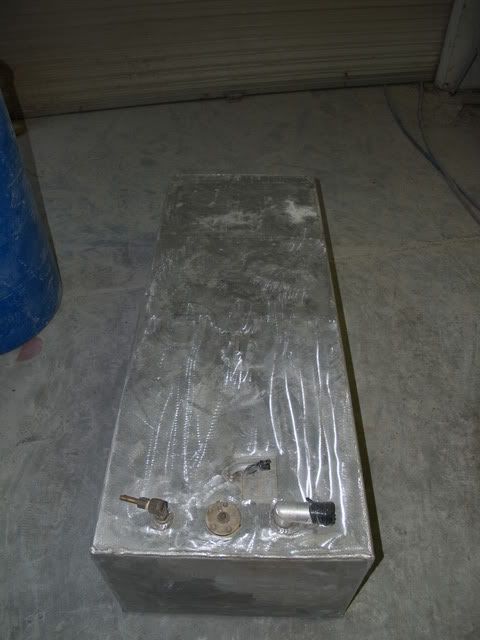
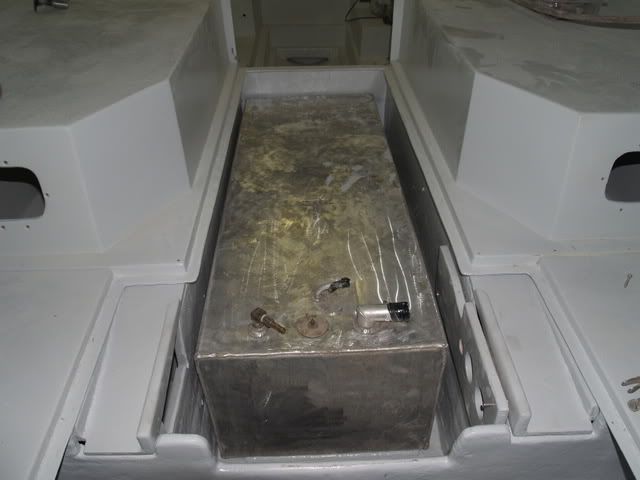
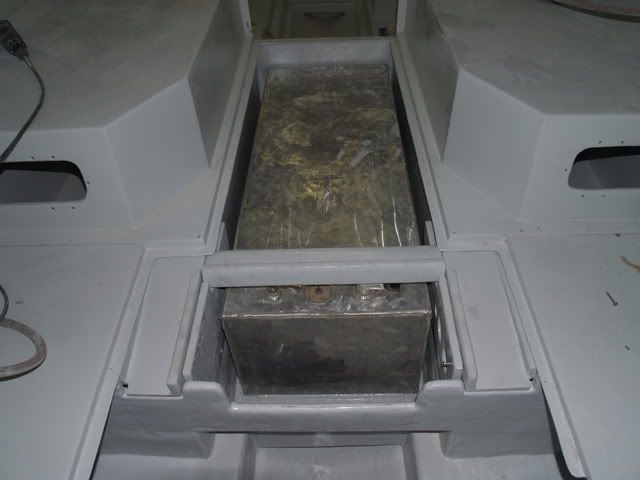
Next we added the crossbrace that locates the fuel tank ahead of the motormounts and ran biaxial once again from the hull lapped at four iinches all the way up the stringer to seal the inside of the repair.You will notice the chalky looking areas that are sanded in between operations and the glossy areas that are the current additions to the work.
 [/URL]
Next the gelcoat is applied to seal the work and harden the frays that will hang out of the lay-up making them easy to sand when deburring before the final gelcoat that will include pva surfacing agent.this coat can be kicked hotter at around 15-20cc per quart of gelcoat and applied with a brush and roller.
 [/URL]
In doing an inboard like we are you can seal the lumber at the transom cut out to help ensure water migration into the transom lumber is eliminated.Just lay it up around the perimiter and grind flush both inside and out.
 [/URL]
Upper cabin reinforcement 1/2 ULX laminated to add core stiffness,custom cut supports for the window frame corners in the front of the cabin.


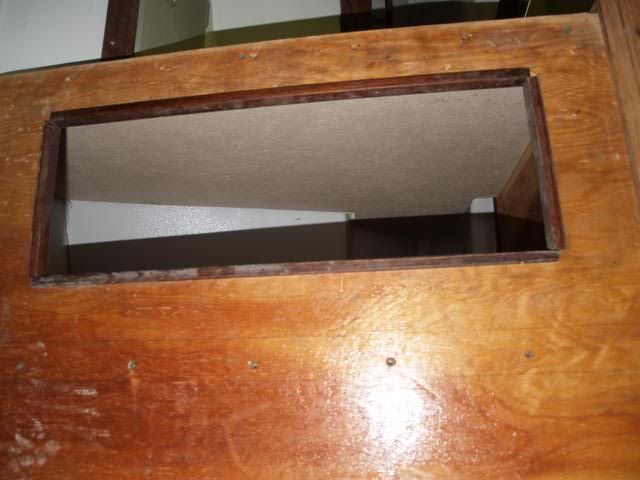
One third of the foredeck had core rot,common to balsa core laminates that see water,as I said it was an improperly bedded water fill that did most of the damage.To remove the core fisrt you remove the inner laminate then the balsa.You would think rotted balsa would mean easy removal?True where soaked but to get to good solid core the pros use an air chisel and take it a cut at a time.I criss cross cut the core almost into the outer laminate to make removal much easier aqt about 2 inch graduations.Unfortunately the air chisel can poke through at times.oops!

The hatch was left intact to keep the frame supported until restructure,Bomar cast aluminum monster,lists today at around $1600.00.That made it easier to spend $150.00 for the lexan and around 80.00 for the hardware and factory gasket plus refinish which is a tossup between durabak,polyurethane and powdercoat.Just can not decide as of yet.All the trim,custom cut wing windows,poly setting tapes and slider tracking came from Marine Glass Specialties who is the only person I found who knew what we wanted.He is stocking all Water Bonnett,Taylor and a third I can not remember from 1997 and back window systems,repairs and parts.Not cheap as it was $832.00 but we rebuilt 8 complete frames with OE quality or better where applicable.

The window frames delaminated when the glass was pulled so we ran 1.5oz mat around the perimeter ground and gelcoated to seal prior to final finish.We pulled all problems on the deck and crazing to height in the same fasion.Only around 350 spots in,out,top and bottom.I must be crazy or obsessed and will probably end up in an institution when I an done!

We had to mock build as many things are being custom fabricated here is the dash panel,wiring harness to cabin and engine and bimini frame,opted to use pvc for template rather than mis cutting $7.00 a foot stainless.All new swirches and instrumentation from Great Lakes Skipper,a great surplus marine supplier.Custom cutting dash and switch panels from a black pebble grain carbon fiberthe perimeter is trimmed in teak as Carvers are loaded with teak and Mahogany,140 plus pieces to refinish.

All Carling switches and vdo backmount gauges,Electronics panel is detachable with GM weatherpack and DIN connectors as are all the harnesses making them all removable with plugs.Nothing fancy but decent Garmin GPS chartplotter with Blue Chart cartography and a 250c color sonar.An Icom 302 VHF with DSC and all interlinked on NMEA serial line.All electronics including transducers and antennas will be backed up with old take out equiptment we already have.

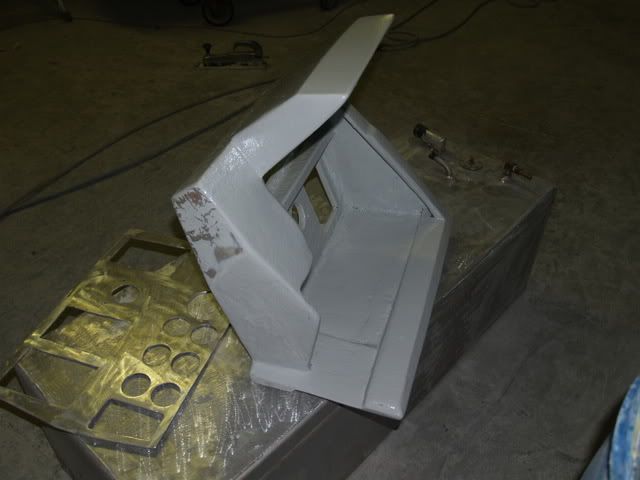
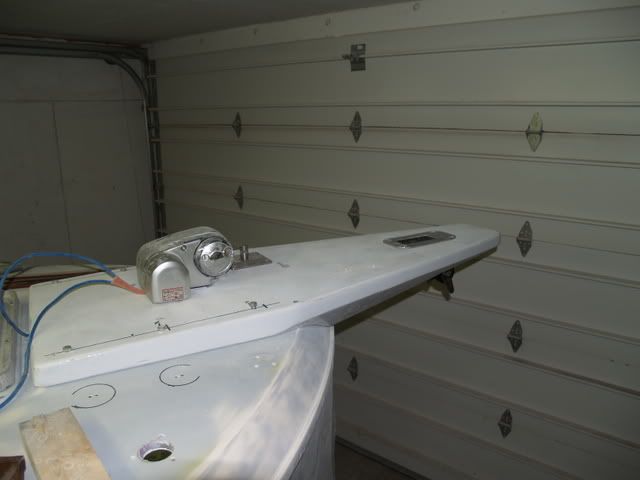
We are custom building a bow pulpit that will include a Genius 1000 horizontal windlass foot switching on deck and at the helm in the upper left of the dash,a planer board mast,anchor roller and search light.This shows the plywood core prior to lamination.

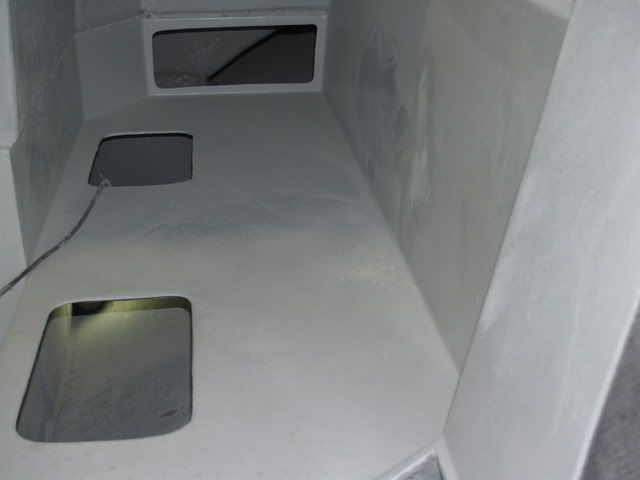
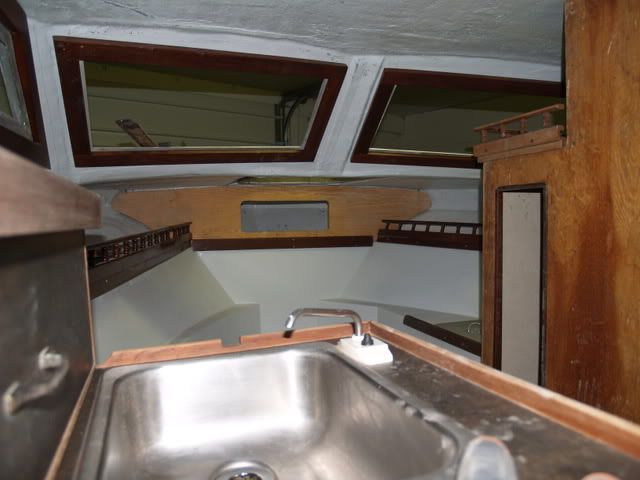
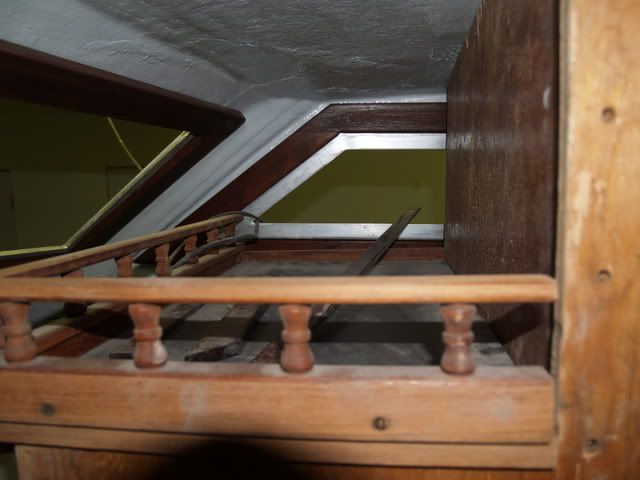
Midship berthing with long stowage below.On the starboard side we added a shower sump as we are converting the head to a shower and adding a transom shower and washdown out back.

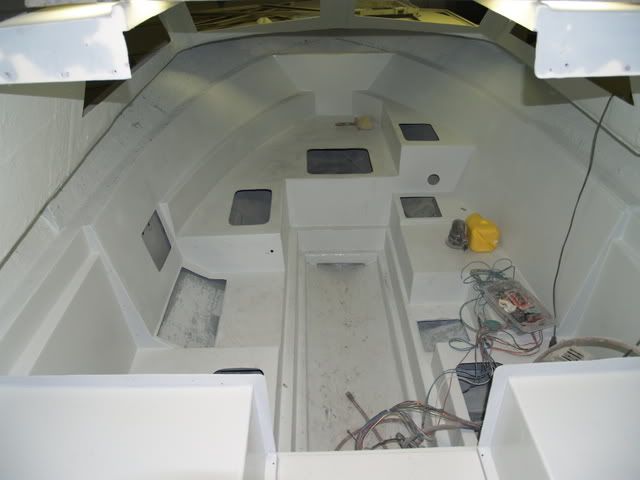
Pulling all glass repairs to height with Napa tech base polyester.You will notice that the boat is now a bare shell other than a pain wiring harness.All drillings and cutting happened in the mock build other than the window frames.


After blocking by hand 80 grit for what seemed forever we shot the whole upper deck with polyester resin primer frome Advance Coatings and threw a coat of tracer to show the imperfections on the next block coat.The tracer is basically a red/purple laquer.

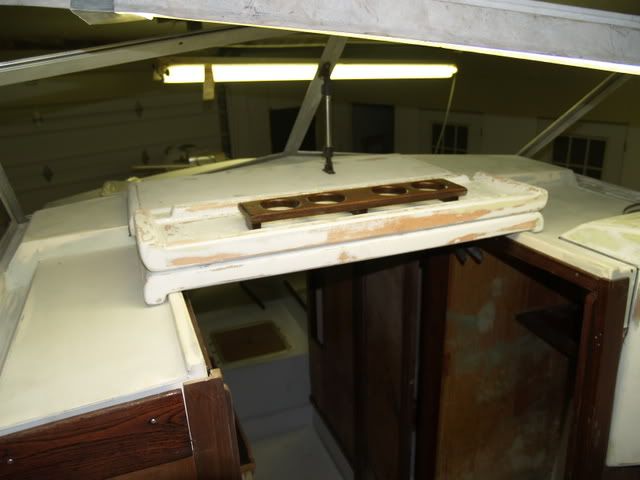
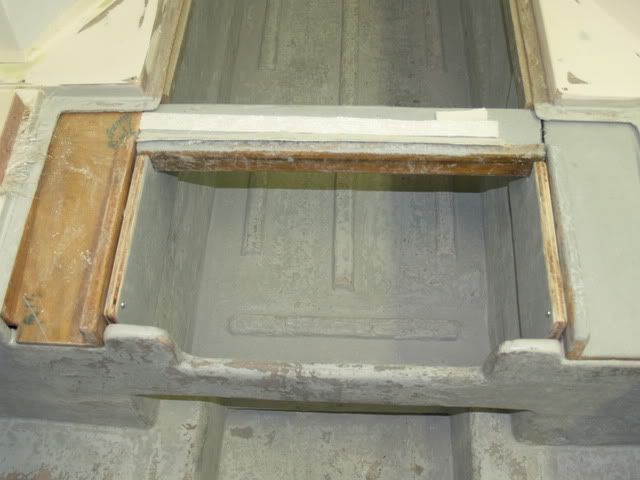
Gunnel to gunnel tackle stowage above the powertrain,took relocating the pumps for sterdrive and tabs to the in bilge shelves along with the water pumps.Tough sanding all the steps to make the corners that were crazed.The perimeter was constructed of 1/2ULX 2 lavers of 1.5 oz mat and one layer of 1708 biaxial.

The first image is a repair primed and traced and second is blocked to being ready for a glaze of USC Thin Ice Glazing polyester.


Now the whole upper deck has been blocked AGAIN!!!and all minor imperfectioms are filled and blocked AGAIN!!!That is the light blue cast that is starting to show up.It is the glazing that fills the maroon lows left from the tracer.The portside of the cabin is where the deck rot was and needed much more straightening than starboard.Fortunately the hull was good and a good buff and some minor gel repairs will get'r'done.You will notice the chalked look to the gelcoat now as it has neen sanded to deburr and take off the highs.The bilge all compartments and anchor locker will all get a waxed gel as the final finish but that is after topside paint so we dont fight overspray,infact it can be used as a cheater tracer when rough sanding prior to the application of the durabak.All the brownish fiber glass repair spoys will be gelcoat covered like the window frames prior to final finish.All exposed edges of the laminate and any lumber have been glass encapsulated and sealed.


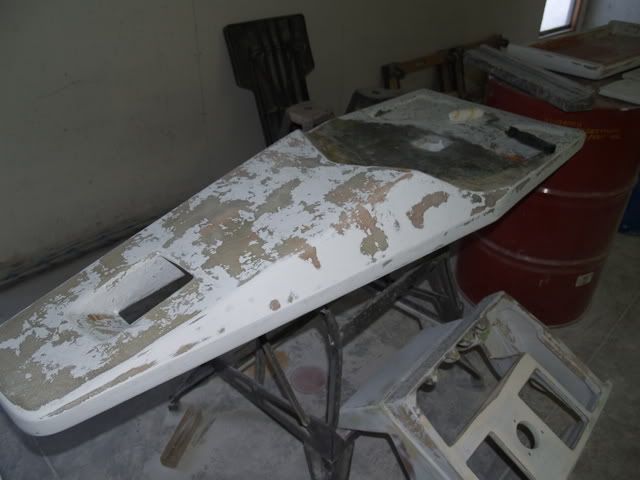
Just ate supper 2am...lol..The bottom is sanded and ready for repairs.Found some osmosis,blisters in the gelcoat from water intrusion.Just what I wanted,more work!!


Opened up the blisters and found air which is common in tight corners of a lay-up between the gelcoat and glass.Now I must decide on how to approach this,it follows the strake,outboard edge only and runs about 8 feet.


A swim platform,transducers,pitot tube,trim tabs,ventilation drain and tie downs have the transom quite busy.I'm removing all previous drillings for the transducers and pitot and adding a bilge plug,origional went through the bottom of the hull which is being removed.Area is ground to a depth of around 1/4 inch and all holes will be filled before being glassed over.Rectangles are easier to work with when cutting and grinding in my opinion,so you will notice my repairs to have that shape in most instances.

Upper deck blocking is ready for second primer coat for final block.


A heavy work load at the shop and a month long sickness have slowed progress but we are making baby steps right now.
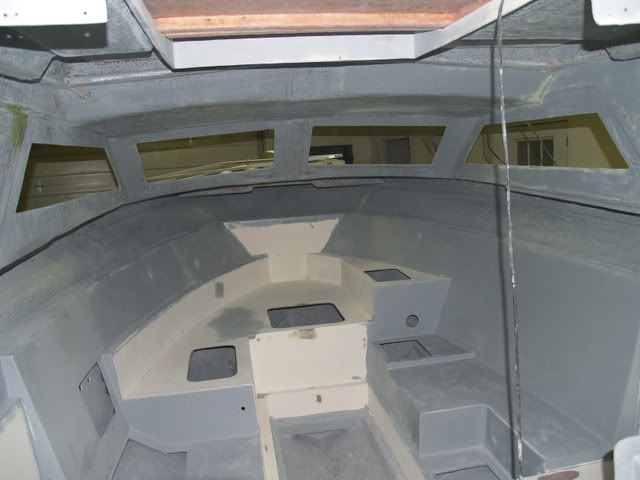
The cabin is blocked and ready for compartment and cabin gelcoat.The floor is glass laminated and needs to be drilled for hardware and gelcoated.All horizontal surfaces will be Durabak.The dust removal process is never ending but significantly better and will need to be spotless for final gelcoat and paint.

Decided to cut access holes in the rear of the midship berths,that allowed stowage to the transom for lons stuff like rods and curtains.It will also house a triple bank 30amp on board charger for starting and house batteries on the port side.On the starboard side there will be hosing to the bilge module on the outside of the stringer grid keeping them out of the engine area.

Had to cut the floor support on diagonal to maximize the compartment which necessitated strengthening with two layers of 1.5oz mat and a lay of 1708 biaxial.Everything was gelcoated with a light grey with PVA waxing added.The bummer was that we could not sand bach deep into the compartment without major surgery so we took our chances and gelcoated prepped as well as possible.

It took a three inch roller and a five foot extension to get all the way back but the gunnel,transom ant outside of the outer stringers are now gelcoat sealed.You want to watc thickness of the gelcoat as it will pinhole if applied too thick as well as being suseceptible to crazing.A little ugly because of the inability to prep but every thing will be in bags for stowage.

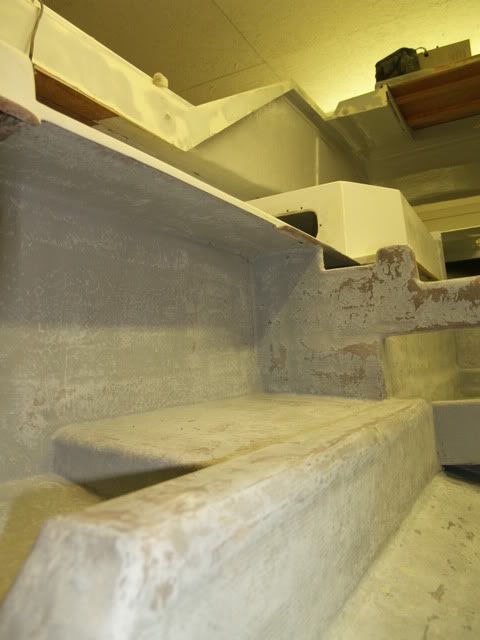
Doors will be added and carpeted like the verticals and top of the sleepers will be.It sure added alot of unused room.

Converting the enclosed head to a shower proposed a headliner issue so the approach will be to fill,block,gelcoat and Durabak for the waterproof finish.

Whats a little more sanding???...lol...

The anchor locker is ready for final pulpit fitting and drilling for it and the windlass.The pictured cutout is for the rode and you can see where we laminated 1708 to the bow to reinforce it for the pulpit as well.

Looking inside the locker to the bow eye support,this was one of the toughest areas to lay up as we added two layers of 1.5oz mat ant two layers of 1708 to completely seal the locker and structurally reinforce the nose.A drain will lead to the foward bilge module.

All of the rear deck is pretty close to be gelcoated and Durabak painted including the doghouse.

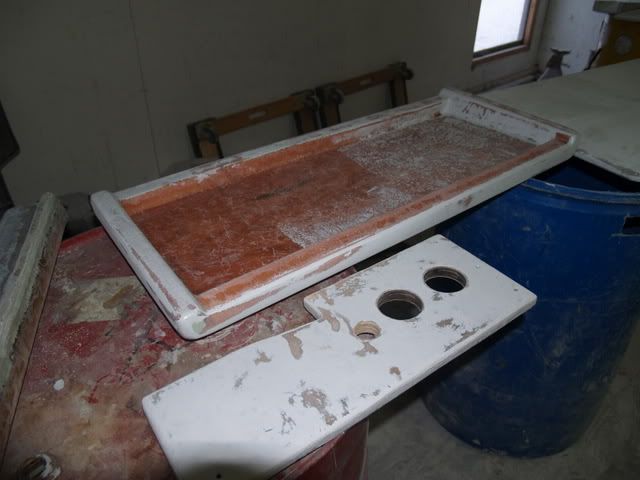
The origional hatch cover was a mess so these panels were fabricated from a wood core,chopper gunned,filled and are ready to drill for hinges,gelcoat and final sand.The topcoat will be the same two part polyeurethane the deck will see,color matched from a scan of the hull.


Time to drill and chamfer all hardware holes so the frames go back in place.We drill oversized to first apply a thinned resin to saturate the core.Then resin with microballons is "painted" into the bore and redrilled and gelcoated to seal the core.The rivit holes for the curtains and top are just gelcoated and opened to size as they do not pass through the core.


Adding full instrumentation and complete switching for all circuits required adding width to the dash.The white is origional and the woodtones are the addition.

Extensive glass and restructure was pulled to make it a rock.Fortunately much is covered and fine finish is not necessary.

The first cabin gelcoat,no PVA as it will either be final coated with waxed gelcoat or Durabak,plus as before it will act as a filler and ease deburring.

The sink,refridgerator and stove will be on the port side where the gelcoat extends to the lower part of the liner.The liner was cut and a catch basin was built on the outside of the stringer grid.

The starboard side is gelled to the liner where the closet and head will be.A shower sump was cut and built into the inner stringer grid and will pump to a thru hull.

A cutout was made to accept a PCV drainage grid found on a Lowes scavenger hunt.

The anchor locker and compartments will be final gelled in white with PVA.

You will notice the shop vac,it is used to pull fumes from tight compartments.The carbon respirator is a must but the MEKP will burn you because of the peroxide,especially your scalp.I get a dermatitis type reaction from the raw gelcoat and be wary of getting the hardener on your skin it can burn you bad.

Custom building a bow pulpit turned into a project of its own,first building a plywood core,then filling the center with foam and grinding to contour.Then applying waxed paper to the deck and building to height with fiberglass stranded filler and clamping to get the curvature.


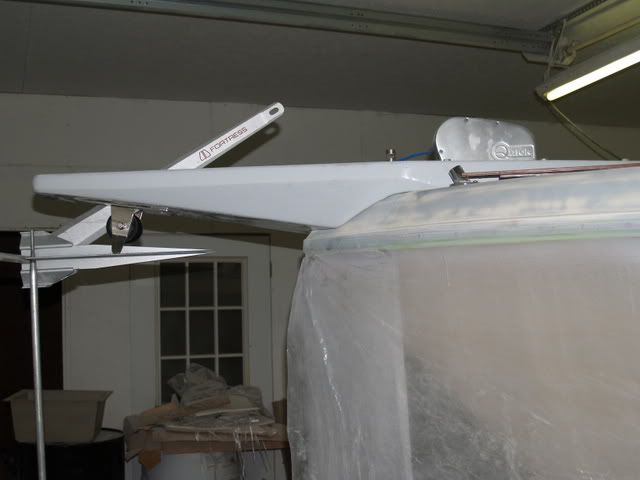
Origional idea was above pulpit anchor roller,hence the slot on the bottom of the pulpit but a great Ebay deal on a through pulpit unit will necessitate blocking and filling to accept it.Just a little more work!!!Fortress anchor pulled by a Quick Genius 1000 horizontal windlass with helm and deck controls will be the lay out.

The 180 is conduit as will be all of the deckrail mock build to obtain a template to bend it from and the foot switches will be on the deck as well as helm control.

The fit is now close enough we can drill the thru deck attaching and windlass hardware holes.Laminated the core with two layers of mat one of 1708 and topped with another of 1.5oz.

The contours came out close thanks to the waxed paper.


That windlass will help eliminate the back breaking anchor retrieval.

This weekend I started by deburring the areas gelcoated last week and prepped the cabin for gelcoating to seal the work and give a uniform base for the Durabak and carpet adhesive.
The mid berth sleepers were torture to the max.Pulling dust with the shopvac the whole time added aggrevating noise as well.
The shower area sucked up the first gelcoat as there was alot of raw polyester filler used to fair.
The underside of the deck was a real pain as well with the tight corner and lumber and bedding utilized at the hull to deck split.
The cabin bilge and floor stringers will get another coat before the final waxed gelcoat.
The underside of the deck and hatch area provided some quality entertainment...lol...
About four to five hours of rolling gelcoat and we have a sealed cabin other than compartments.The gelcoat is going to be topcoated with Durabak which lays at around 20mil per coat and is textured with granulized rubber so spraying was not necessary.Actually spraying in tight areas like this are very difficult to overcoat evenly and it was a Godsend that we are rolling.
The light grey allowed easier soptting of thin areas over the dark grey.The compartments and anchor locker will be final gelcoated in white for light reflectivity but the bilge areas will be a light grey.All final coats will have PVA to ease cleaning.Raw gelcoat is tacky and is only rolled without wax if it will be recoated.Raw gelcoat clogs sandpaper like crazy,my sandpaper bill for this project has exceeded $300.00 so far!!!
The Helm and passenger areas get their first coat of gel for deburring.
The flanges for the walls were laminated with three layers of 1708 as they seemed thin for their structural value.
Using the shopvac to evacuate fumes when rolling the sleepers was a must but a little over halfway through the process we smoked the 20 year old shopvac,guess she had all she could take...lol...Sure did blow some smoke out the discharge port.
The supports along the gunnel were bedded in to allow attachment of the stainless panel in the shower wall that will house the shower head and hose and spigot,all recessed.
The Galley area will need to be recoated as we picked up kicking gelcoat and made some extra work,at least it is hidden when the stove,sink,fridge is in!!!

The cabin is pretty much done with the exception of spotting in a few areas.
Over saturday and sunday I gelcoated the rear deck,engine bilge,transom and under the upper deck.There were just a couple fiberglass lay-ups left,on the inside of the core I laid two layers of 1.5oz chopped mat and followed up with 1708 biaxial to give a good solid pad to distribute torque from deck hardware attaching screws under all mounts.Last of the glass lay-up inside!!!
Pre-assembled all the panels that divert water from the hatch perimeter ahead of the doghouse.These are all homebrew,Carver's flat p[anels were terrible.Added angle to divert water to the enging bilge,the components are in various stages from glassing to initial deburring gel coat,the reason for multiple finishes.In the end result all will be gelled and pva added.
Then cut countersunk and mounted front floor panel back-up down each length to cabin.
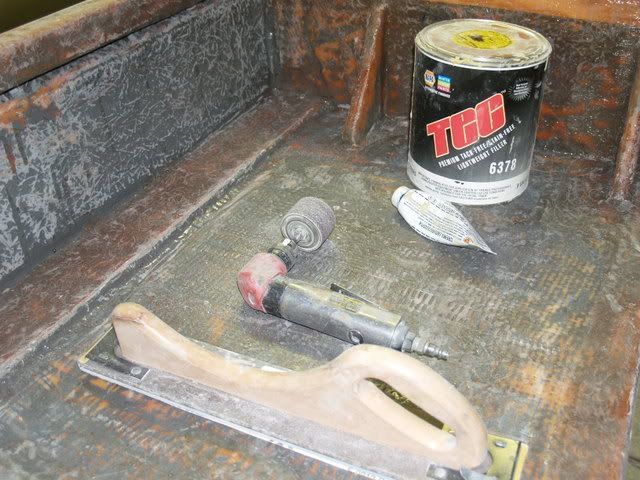
Martin Senior TEC filler used throught,not cheap but very workable product.The fast file takes board paper and is great for fairing flat where machine tools wont cut it.Sanding drums make deck fittings and access panels much easier.
In addition to the air board,die grinder with Roloc discs,7 and 4 inch grinders,dual action sander and an electric corner sander we heavily use a palm dual action sander,especially for the compartments which are next in line for final gelcoat which will be white with pva added.
All the panels that are removable have been repaired,modified or restructured and are prepped for gelcoating as is the inside of the engine cover.Lumber was added and laminated to seal along the length and the diagonal gussetts were all broken so they were restructured as well,now she is a rock.
Engine bilge is final sanded in prep for gelcoat.
All exposed surfaces are coated,there will be no un gelcoated work left to sponge water.Here you can see under the floor where the finish is the same.The compartments will recieve the same attention and all sides will be gelled including the tops.
Starboard side end result.
Transom and inner liner completely bonded and sealed.
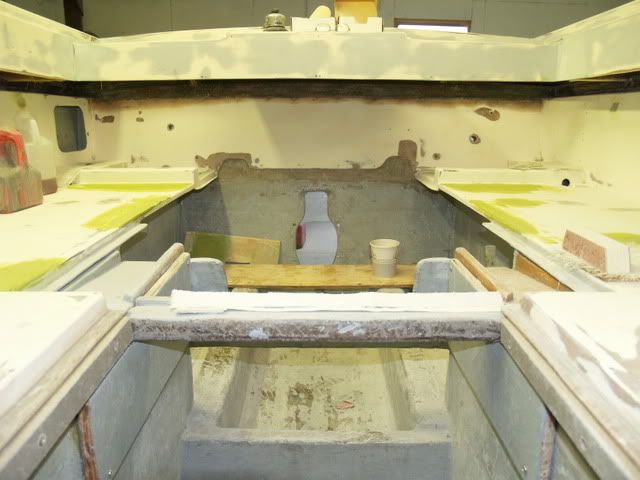
Helm and front of tank bilge area finish takes up where cabin work left off.
Engine bilge,nice and smooth but needs to be final sealed with gelcoat with pva release agent.
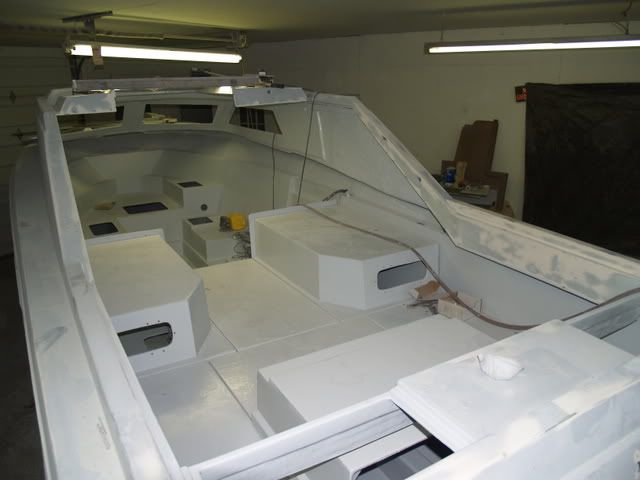
The cabin and deck ready for top coats,mosatly Durabak textured rubberized polyurethane.
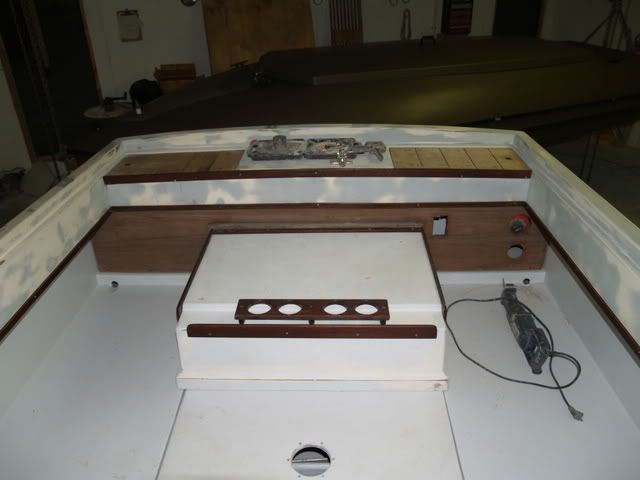
Tackle storage will run gunnel to gunnel and have a snap in sunbrella or pfiffertex bag to accept tackle storage boxes.
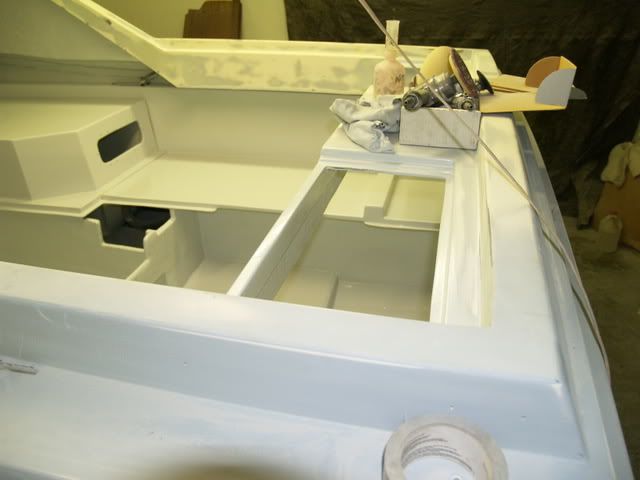
The Boat as purchased.
80 Carver Montego,fell in love with the amount of deadrise and the carolina flare,sizeable galley,midship and vee berthing,enclosed head with pump out,dual voltage fridge,stove,sink,potable water,on board charging,shore power that made this an attractive fishing/cruiser as it is hard to do both.
Found core rot on about one third of the upper deck due to an improperly bedded water fill,suspect dash and various other areas to be damaged by something like a fallen tree branch,gel cracks and laminate fracture at stress points,delamination of the glass from the motor mounts but all in all it seemed to be a good starting point on a very fresh Continental trailer with a good stringer grid and inner liner,no dock rash(26 years hard to believe!!) and a solid hull.The whole upper deck was flexing ant the boat was headed for self destruct if operated in the rough very much.
So we eventually stripped her down to a bare fiberglass shell for a complete refit.I am an auto tech by profession and work in conjunction with some fiberglass pros at Wrangler Boats in Canal Fulton so I have resources to do this cheaper other than the $600k in lost labor hours,lol...
Here the motor mounts have been cut out and the stringer grid cut to accept a splice.The whole bilge,hull and transom have been sanded for the additional lay-up.
We thought the belly of the Carver was a little thin for the way I use a boat and as a result we added more laminate to the hull starting with two layers of 1.5oz mat followed with two layers of biaxial mat adding about 3/16-1/4 hull thickness at the pad.
Here is a shot of the hull after lamination.
This shows the lap joint from the hull to the outer stringer if you look close you can see the lap of both layers of biaxial on the stringer.
Here is the lumber cut and ready to be screwed together with resin between pieces.
Next the mounts and stringer splice are assembled and placed in position.You will notice we capped the mounts with plywood to give the actual engine mount screws better retention from the cross laminate of the plywood.If you have to lay pieces of lumber together like we did on these mounts make sure you cut the lumber so any crown in the lumber lays together when assembled.
Next cut and fit the glass mat and roving to fit,remove and stack all pieces in reverse order of assembly so they are ready to wet out in sequence.
First we wet out the motormount stringers and to the outboard side of each I added a panel for the outdrive trim pump,trimtab pump and the opposite side for the water pumps for the washdown,transom shower and head shower just repeating the process for each addition.Once again I can not stress enough sanding if the glass has been kicked for a few days to ensure complete bond.
This shot shows the backer board that is screwed and laminated to the pre-existing stringer grid to reinforce the splice.Once again start with mat and finish with roving to give the strength.
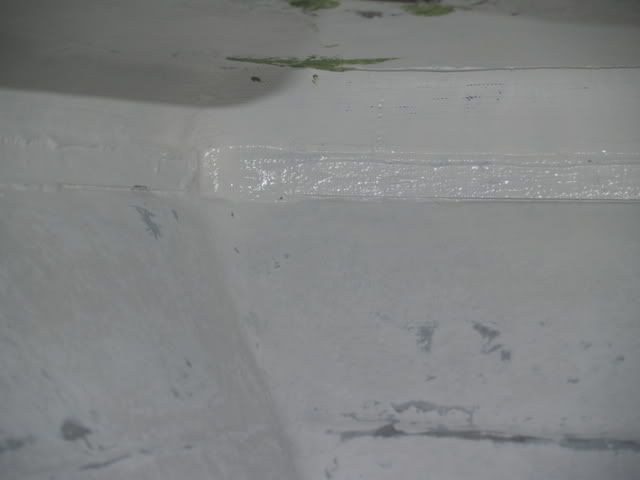
Next we added the crossbrace that locates the fuel tank ahead of the motormounts and ran biaxial once again from the hull lapped at four iinches all the way up the stringer to seal the inside of the repair.You will notice the chalky looking areas that are sanded in between operations and the glossy areas that are the current additions to the work.
Next the gelcoat is applied to seal the work and harden the frays that will hang out of the lay-up making them easy to sand when deburring before the final gelcoat that will include pva surfacing agent.this coat can be kicked hotter at around 15-20cc per quart of gelcoat and applied with a brush and roller.
In doing an inboard like we are you can seal the lumber at the transom cut out to help ensure water migration into the transom lumber is eliminated.Just lay it up around the perimiter and grind flush both inside and out.
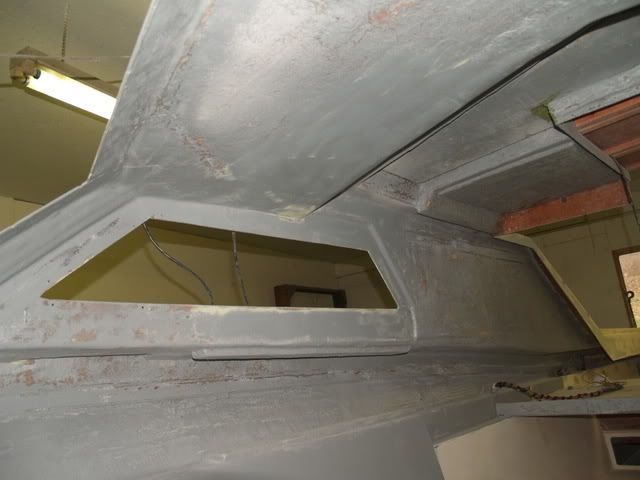
Upper cabin reinforcement 1/2 ULX laminated to add core stiffness,custom cut supports for the window frame corners in the front of the cabin.
One third of the foredeck had core rot,common to balsa core laminates that see water,as I said it was an improperly bedded water fill that did most of the damage.To remove the core fisrt you remove the inner laminate then the balsa.You would think rotted balsa would mean easy removal?True where soaked but to get to good solid core the pros use an air chisel and take it a cut at a time.I criss cross cut the core almost into the outer laminate to make removal much easier aqt about 2 inch graduations.Unfortunately the air chisel can poke through at times.oops!
The hatch was left intact to keep the frame supported until restructure,Bomar cast aluminum monster,lists today at around $1600.00.That made it easier to spend $150.00 for the lexan and around 80.00 for the hardware and factory gasket plus refinish which is a tossup between durabak,polyurethane and powdercoat.Just can not decide as of yet.All the trim,custom cut wing windows,poly setting tapes and slider tracking came from Marine Glass Specialties who is the only person I found who knew what we wanted.He is stocking all Water Bonnett,Taylor and a third I can not remember from 1997 and back window systems,repairs and parts.Not cheap as it was $832.00 but we rebuilt 8 complete frames with OE quality or better where applicable.
The window frames delaminated when the glass was pulled so we ran 1.5oz mat around the perimeter ground and gelcoated to seal prior to final finish.We pulled all problems on the deck and crazing to height in the same fasion.Only around 350 spots in,out,top and bottom.I must be crazy or obsessed and will probably end up in an institution when I an done!
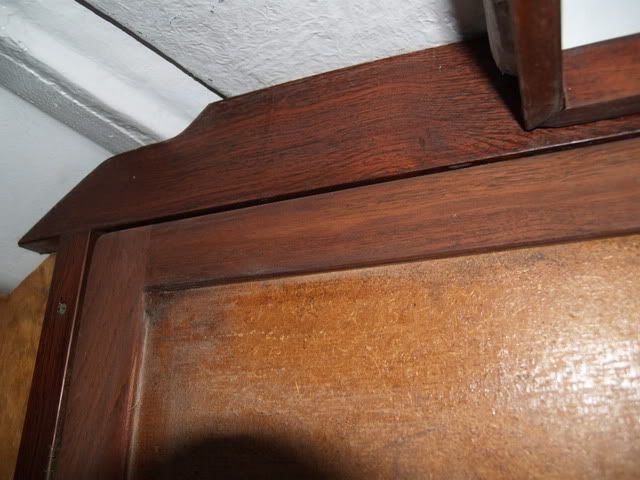
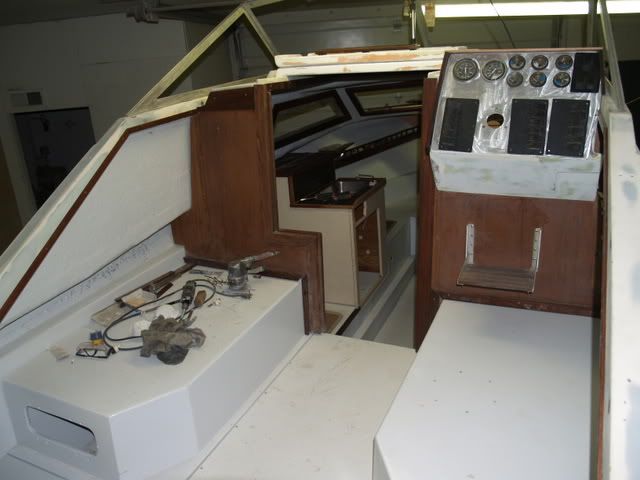
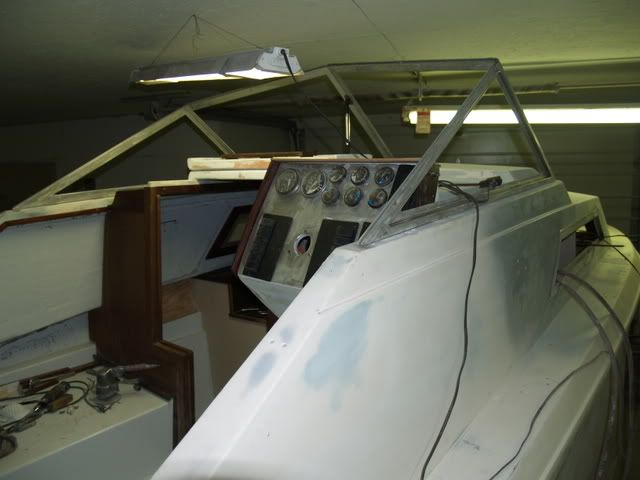
We had to mock build as many things are being custom fabricated here is the dash panel,wiring harness to cabin and engine and bimini frame,opted to use pvc for template rather than mis cutting $7.00 a foot stainless.All new swirches and instrumentation from Great Lakes Skipper,a great surplus marine supplier.Custom cutting dash and switch panels from a black pebble grain carbon fiberthe perimeter is trimmed in teak as Carvers are loaded with teak and Mahogany,140 plus pieces to refinish.
All Carling switches and vdo backmount gauges,Electronics panel is detachable with GM weatherpack and DIN connectors as are all the harnesses making them all removable with plugs.Nothing fancy but decent Garmin GPS chartplotter with Blue Chart cartography and a 250c color sonar.An Icom 302 VHF with DSC and all interlinked on NMEA serial line.All electronics including transducers and antennas will be backed up with old take out equiptment we already have.
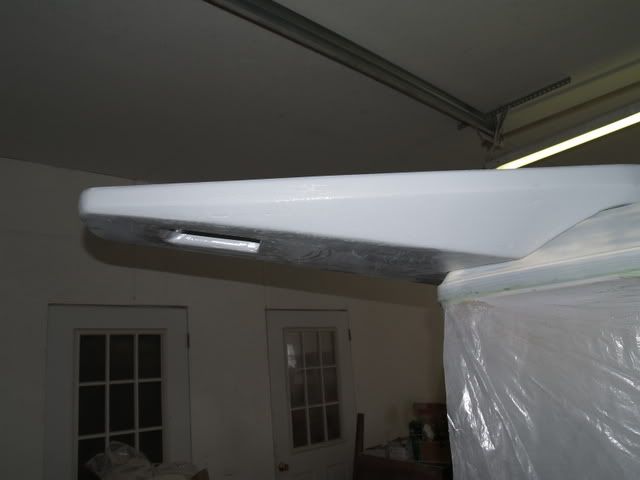
We are custom building a bow pulpit that will include a Genius 1000 horizontal windlass foot switching on deck and at the helm in the upper left of the dash,a planer board mast,anchor roller and search light.This shows the plywood core prior to lamination.
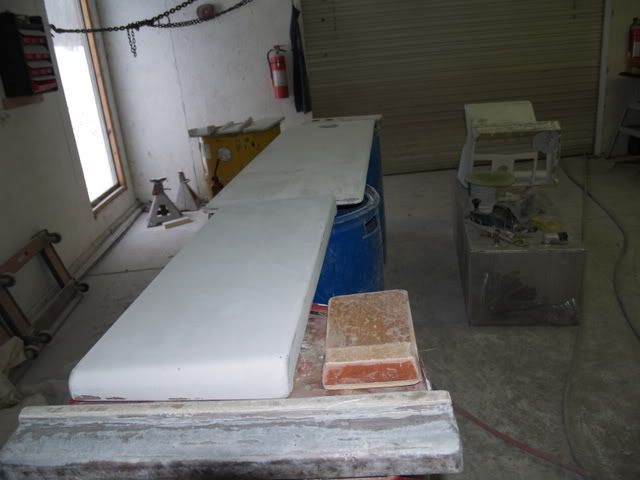
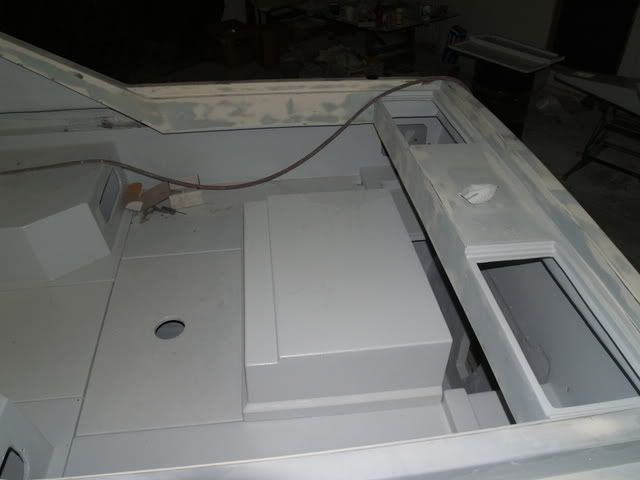
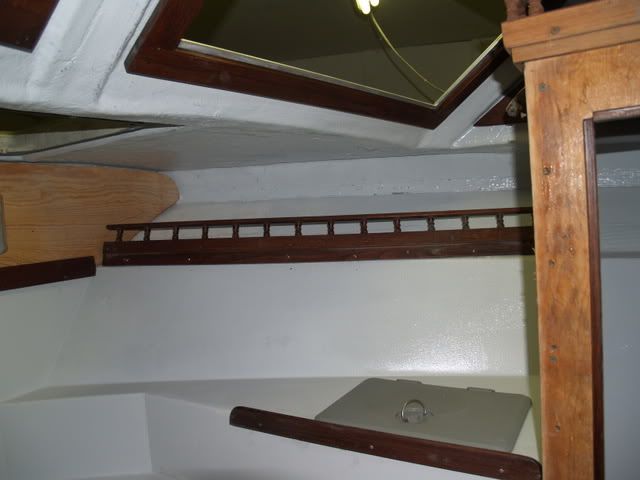
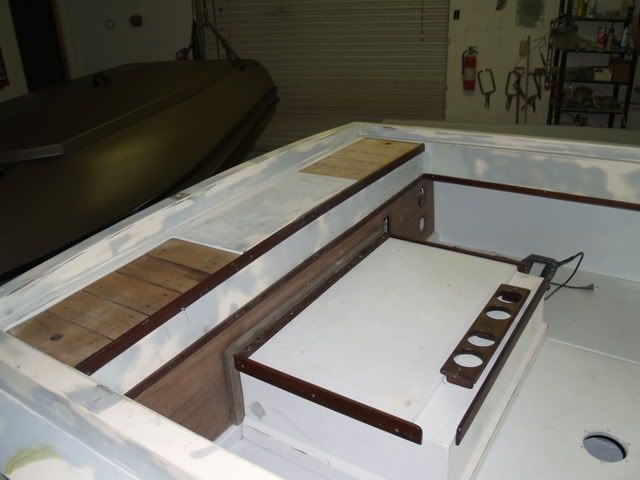
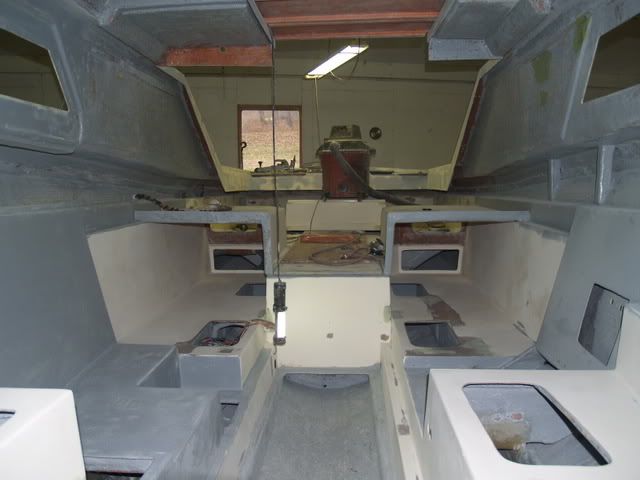
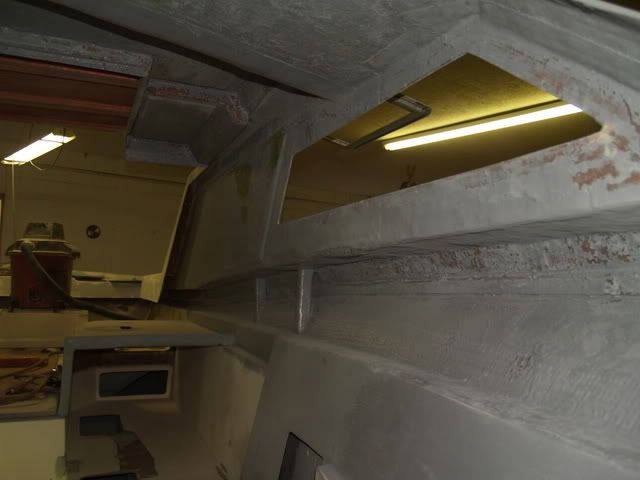
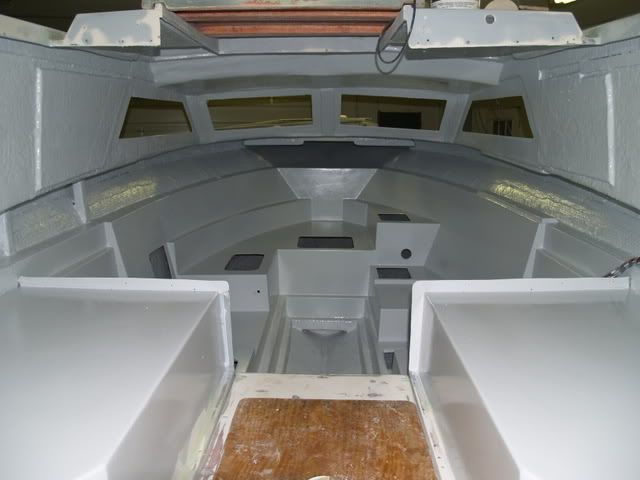
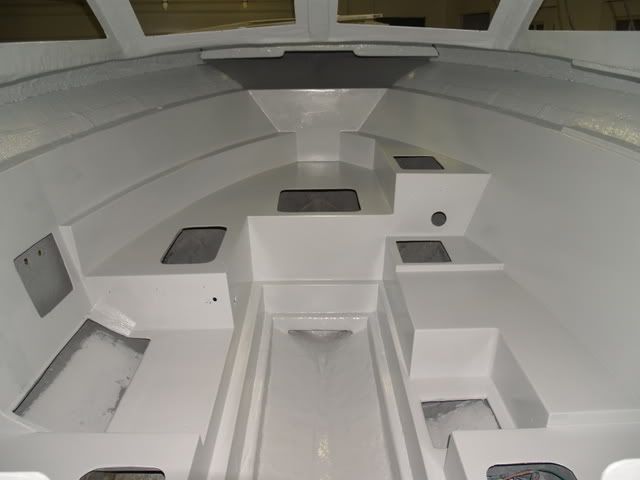
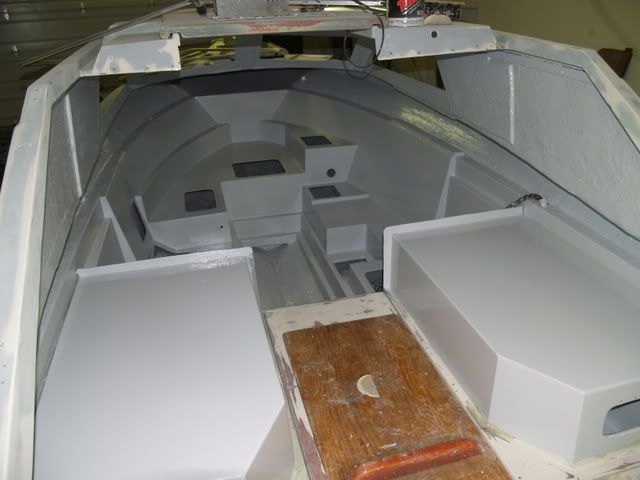
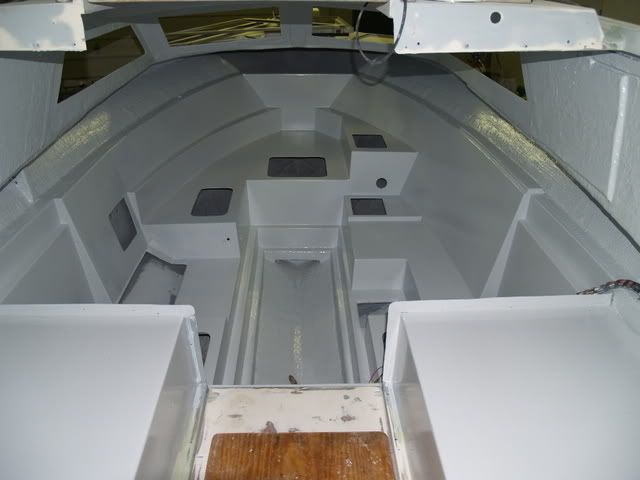
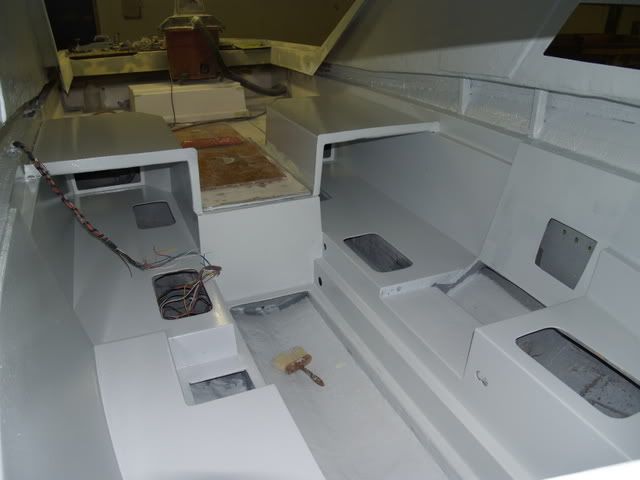
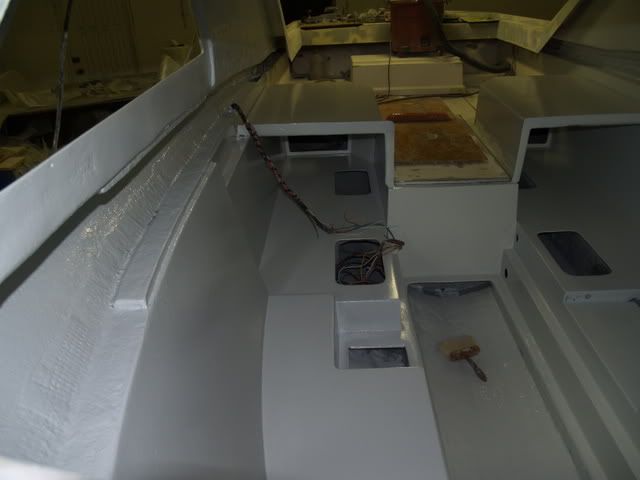
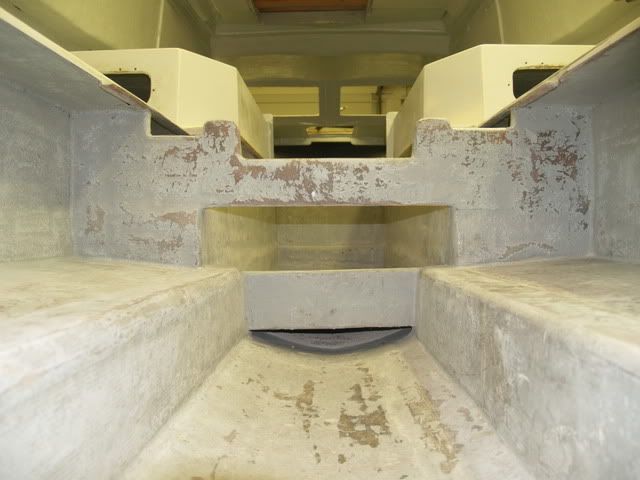
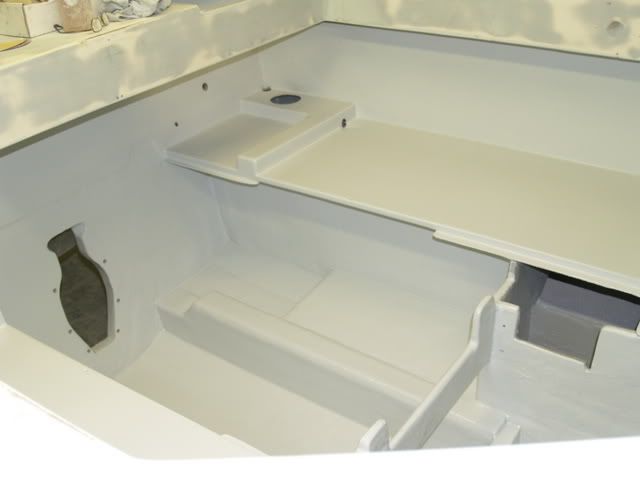
Midship berthing with long stowage below.On the starboard side we added a shower sump as we are converting the head to a shower and adding a transom shower and washdown out back.
Pulling all glass repairs to height with Napa tech base polyester.You will notice that the boat is now a bare shell other than a pain wiring harness.All drillings and cutting happened in the mock build other than the window frames.
After blocking by hand 80 grit for what seemed forever we shot the whole upper deck with polyester resin primer frome Advance Coatings and threw a coat of tracer to show the imperfections on the next block coat.The tracer is basically a red/purple laquer.
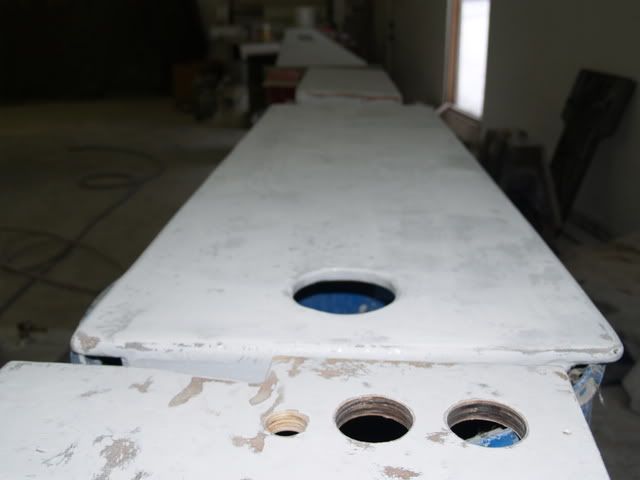
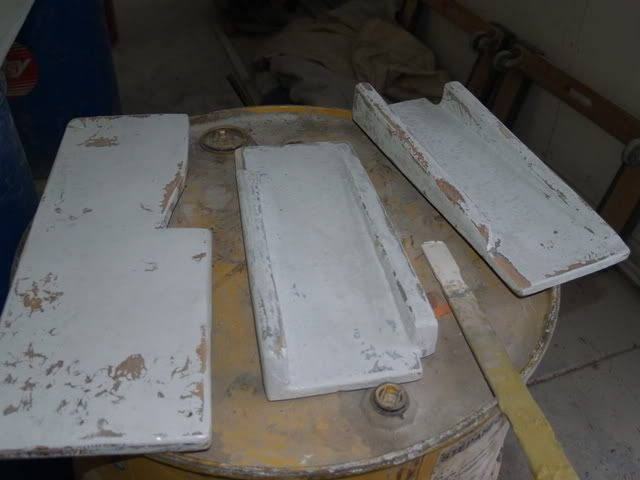
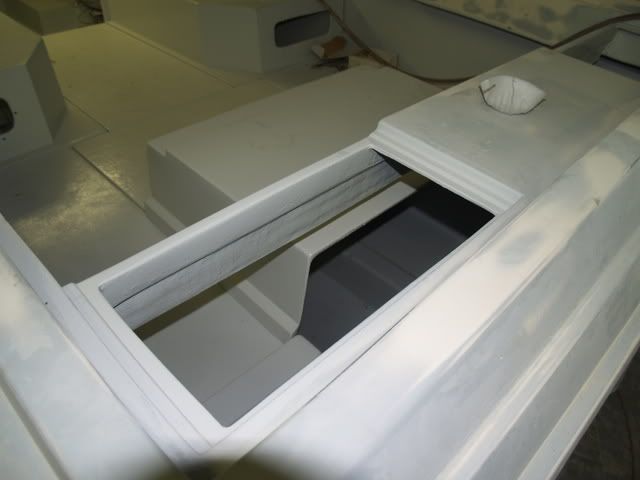
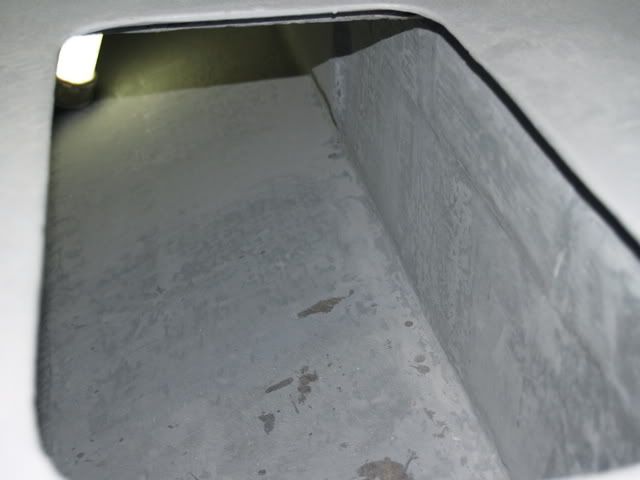
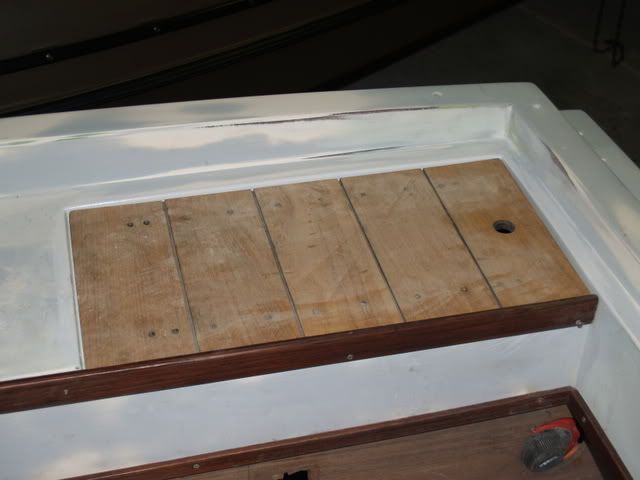
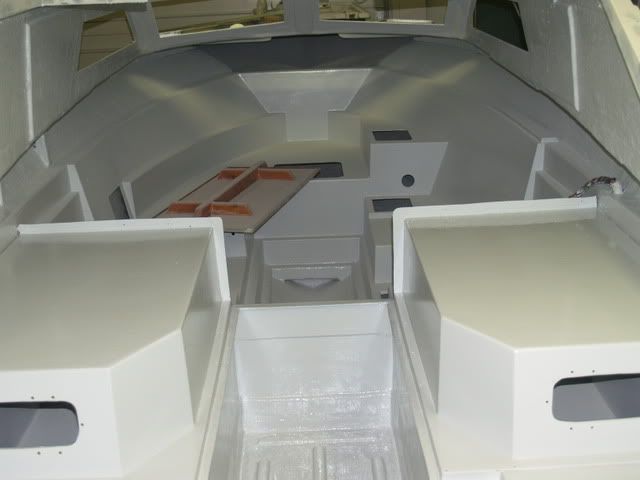
Gunnel to gunnel tackle stowage above the powertrain,took relocating the pumps for sterdrive and tabs to the in bilge shelves along with the water pumps.Tough sanding all the steps to make the corners that were crazed.The perimeter was constructed of 1/2ULX 2 lavers of 1.5 oz mat and one layer of 1708 biaxial.
The first image is a repair primed and traced and second is blocked to being ready for a glaze of USC Thin Ice Glazing polyester.
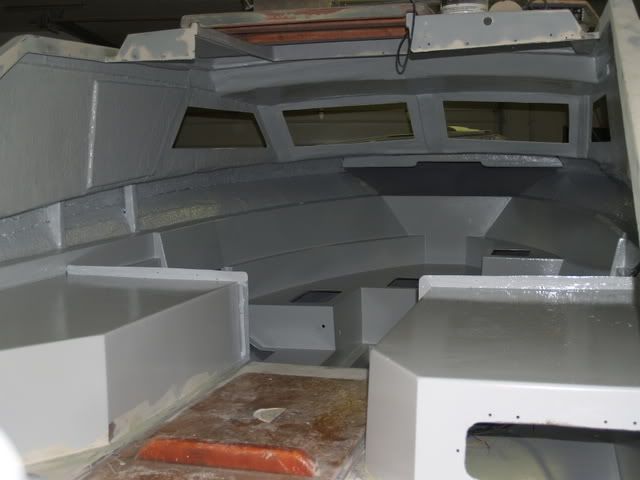
Now the whole upper deck has been blocked AGAIN!!!and all minor imperfectioms are filled and blocked AGAIN!!!That is the light blue cast that is starting to show up.It is the glazing that fills the maroon lows left from the tracer.The portside of the cabin is where the deck rot was and needed much more straightening than starboard.Fortunately the hull was good and a good buff and some minor gel repairs will get'r'done.You will notice the chalked look to the gelcoat now as it has neen sanded to deburr and take off the highs.The bilge all compartments and anchor locker will all get a waxed gel as the final finish but that is after topside paint so we dont fight overspray,infact it can be used as a cheater tracer when rough sanding prior to the application of the durabak.All the brownish fiber glass repair spoys will be gelcoat covered like the window frames prior to final finish.All exposed edges of the laminate and any lumber have been glass encapsulated and sealed.
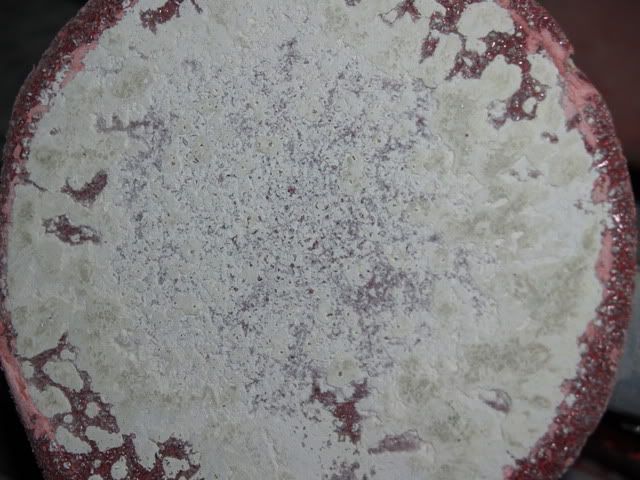
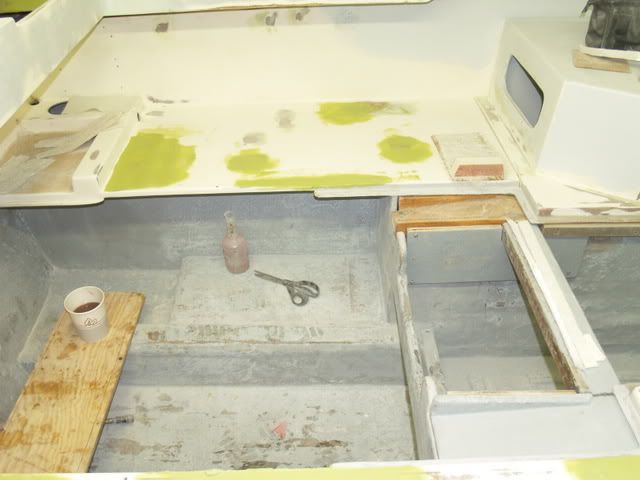
Just ate supper 2am...lol..The bottom is sanded and ready for repairs.Found some osmosis,blisters in the gelcoat from water intrusion.Just what I wanted,more work!!
Opened up the blisters and found air which is common in tight corners of a lay-up between the gelcoat and glass.Now I must decide on how to approach this,it follows the strake,outboard edge only and runs about 8 feet.
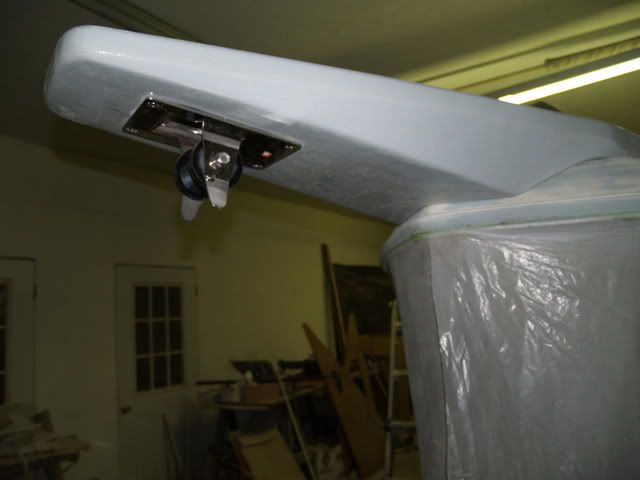
A swim platform,transducers,pitot tube,trim tabs,ventilation drain and tie downs have the transom quite busy.I'm removing all previous drillings for the transducers and pitot and adding a bilge plug,origional went through the bottom of the hull which is being removed.Area is ground to a depth of around 1/4 inch and all holes will be filled before being glassed over.Rectangles are easier to work with when cutting and grinding in my opinion,so you will notice my repairs to have that shape in most instances.
Upper deck blocking is ready for second primer coat for final block.
A heavy work load at the shop and a month long sickness have slowed progress but we are making baby steps right now.
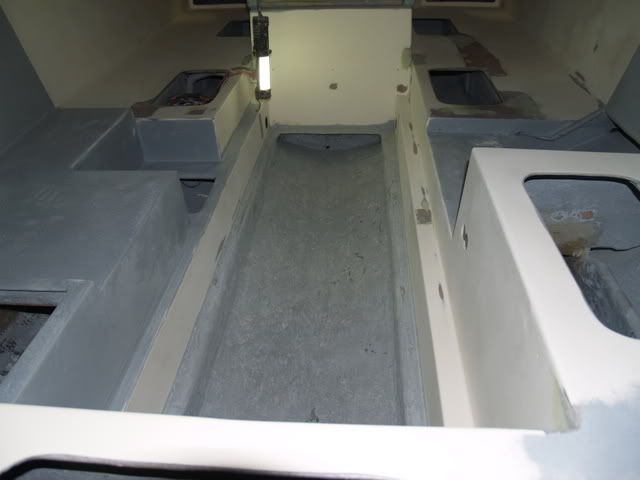
The cabin is blocked and ready for compartment and cabin gelcoat.The floor is glass laminated and needs to be drilled for hardware and gelcoated.All horizontal surfaces will be Durabak.The dust removal process is never ending but significantly better and will need to be spotless for final gelcoat and paint.
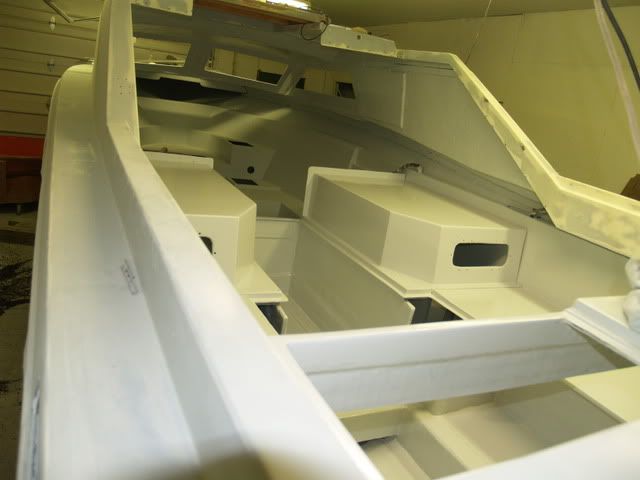
Decided to cut access holes in the rear of the midship berths,that allowed stowage to the transom for lons stuff like rods and curtains.It will also house a triple bank 30amp on board charger for starting and house batteries on the port side.On the starboard side there will be hosing to the bilge module on the outside of the stringer grid keeping them out of the engine area.
Had to cut the floor support on diagonal to maximize the compartment which necessitated strengthening with two layers of 1.5oz mat and a lay of 1708 biaxial.Everything was gelcoated with a light grey with PVA waxing added.The bummer was that we could not sand bach deep into the compartment without major surgery so we took our chances and gelcoated prepped as well as possible.
It took a three inch roller and a five foot extension to get all the way back but the gunnel,transom ant outside of the outer stringers are now gelcoat sealed.You want to watc thickness of the gelcoat as it will pinhole if applied too thick as well as being suseceptible to crazing.A little ugly because of the inability to prep but every thing will be in bags for stowage.
Doors will be added and carpeted like the verticals and top of the sleepers will be.It sure added alot of unused room.
Converting the enclosed head to a shower proposed a headliner issue so the approach will be to fill,block,gelcoat and Durabak for the waterproof finish.
Whats a little more sanding???...lol...
The anchor locker is ready for final pulpit fitting and drilling for it and the windlass.The pictured cutout is for the rode and you can see where we laminated 1708 to the bow to reinforce it for the pulpit as well.
Looking inside the locker to the bow eye support,this was one of the toughest areas to lay up as we added two layers of 1.5oz mat ant two layers of 1708 to completely seal the locker and structurally reinforce the nose.A drain will lead to the foward bilge module.
All of the rear deck is pretty close to be gelcoated and Durabak painted including the doghouse.
The origional hatch cover was a mess so these panels were fabricated from a wood core,chopper gunned,filled and are ready to drill for hinges,gelcoat and final sand.The topcoat will be the same two part polyeurethane the deck will see,color matched from a scan of the hull.
Time to drill and chamfer all hardware holes so the frames go back in place.We drill oversized to first apply a thinned resin to saturate the core.Then resin with microballons is "painted" into the bore and redrilled and gelcoated to seal the core.The rivit holes for the curtains and top are just gelcoated and opened to size as they do not pass through the core.
Adding full instrumentation and complete switching for all circuits required adding width to the dash.The white is origional and the woodtones are the addition.
Extensive glass and restructure was pulled to make it a rock.Fortunately much is covered and fine finish is not necessary.
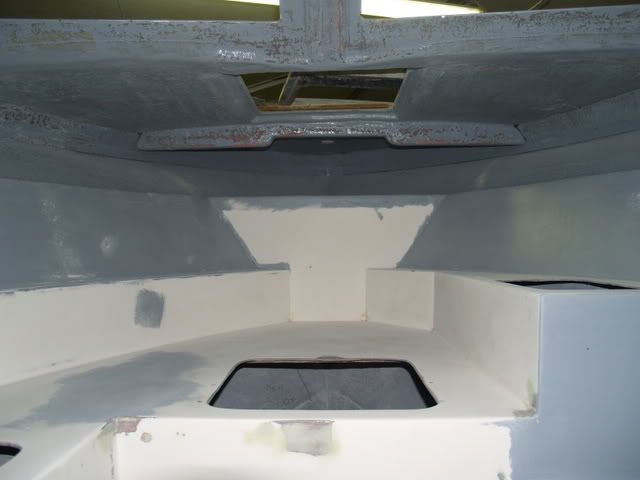
The first cabin gelcoat,no PVA as it will either be final coated with waxed gelcoat or Durabak,plus as before it will act as a filler and ease deburring.
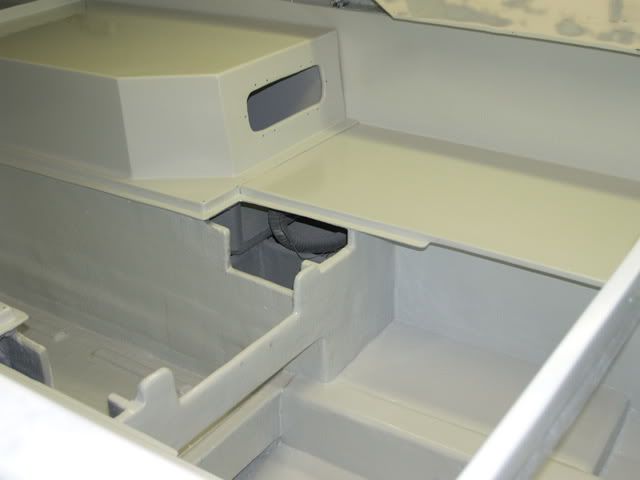
The sink,refridgerator and stove will be on the port side where the gelcoat extends to the lower part of the liner.The liner was cut and a catch basin was built on the outside of the stringer grid.
The starboard side is gelled to the liner where the closet and head will be.A shower sump was cut and built into the inner stringer grid and will pump to a thru hull.
A cutout was made to accept a PCV drainage grid found on a Lowes scavenger hunt.
The anchor locker and compartments will be final gelled in white with PVA.
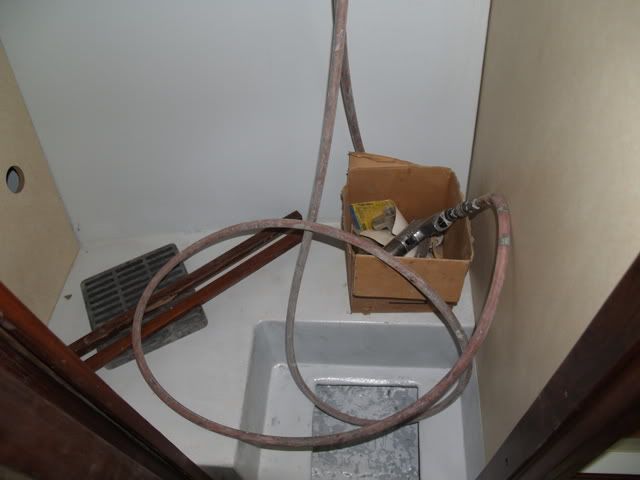
You will notice the shop vac,it is used to pull fumes from tight compartments.The carbon respirator is a must but the MEKP will burn you because of the peroxide,especially your scalp.I get a dermatitis type reaction from the raw gelcoat and be wary of getting the hardener on your skin it can burn you bad.
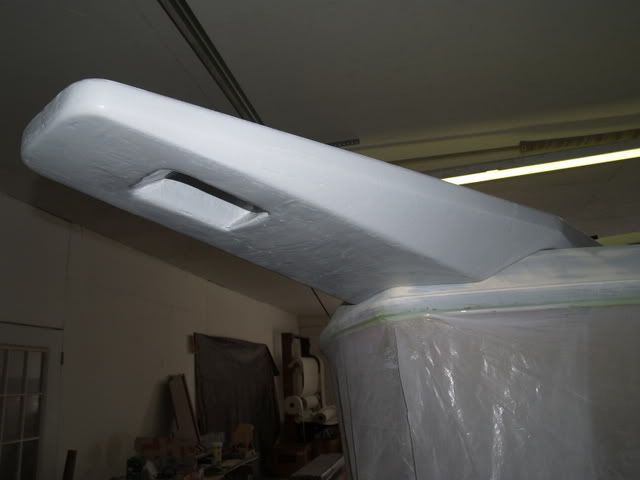
Custom building a bow pulpit turned into a project of its own,first building a plywood core,then filling the center with foam and grinding to contour.Then applying waxed paper to the deck and building to height with fiberglass stranded filler and clamping to get the curvature.
Origional idea was above pulpit anchor roller,hence the slot on the bottom of the pulpit but a great Ebay deal on a through pulpit unit will necessitate blocking and filling to accept it.Just a little more work!!!Fortress anchor pulled by a Quick Genius 1000 horizontal windlass with helm and deck controls will be the lay out.
The 180 is conduit as will be all of the deckrail mock build to obtain a template to bend it from and the foot switches will be on the deck as well as helm control.
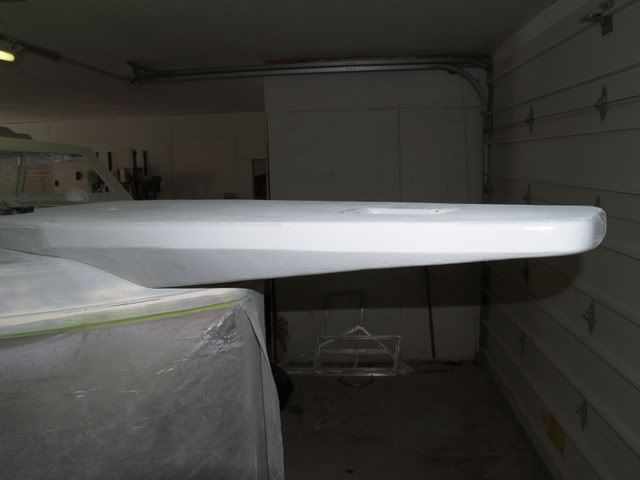
The fit is now close enough we can drill the thru deck attaching and windlass hardware holes.Laminated the core with two layers of mat one of 1708 and topped with another of 1.5oz.
The contours came out close thanks to the waxed paper.
That windlass will help eliminate the back breaking anchor retrieval.
This weekend I started by deburring the areas gelcoated last week and prepped the cabin for gelcoating to seal the work and give a uniform base for the Durabak and carpet adhesive.
The mid berth sleepers were torture to the max.Pulling dust with the shopvac the whole time added aggrevating noise as well.
The shower area sucked up the first gelcoat as there was alot of raw polyester filler used to fair.
The underside of the deck was a real pain as well with the tight corner and lumber and bedding utilized at the hull to deck split.
The cabin bilge and floor stringers will get another coat before the final waxed gelcoat.
The underside of the deck and hatch area provided some quality entertainment...lol...
About four to five hours of rolling gelcoat and we have a sealed cabin other than compartments.The gelcoat is going to be topcoated with Durabak which lays at around 20mil per coat and is textured with granulized rubber so spraying was not necessary.Actually spraying in tight areas like this are very difficult to overcoat evenly and it was a Godsend that we are rolling.
The light grey allowed easier soptting of thin areas over the dark grey.The compartments and anchor locker will be final gelcoated in white for light reflectivity but the bilge areas will be a light grey.All final coats will have PVA to ease cleaning.Raw gelcoat is tacky and is only rolled without wax if it will be recoated.Raw gelcoat clogs sandpaper like crazy,my sandpaper bill for this project has exceeded $300.00 so far!!!
The Helm and passenger areas get their first coat of gel for deburring.
The flanges for the walls were laminated with three layers of 1708 as they seemed thin for their structural value.
Using the shopvac to evacuate fumes when rolling the sleepers was a must but a little over halfway through the process we smoked the 20 year old shopvac,guess she had all she could take...lol...Sure did blow some smoke out the discharge port.
The supports along the gunnel were bedded in to allow attachment of the stainless panel in the shower wall that will house the shower head and hose and spigot,all recessed.
The Galley area will need to be recoated as we picked up kicking gelcoat and made some extra work,at least it is hidden when the stove,sink,fridge is in!!!
The cabin is pretty much done with the exception of spotting in a few areas.
Over saturday and sunday I gelcoated the rear deck,engine bilge,transom and under the upper deck.There were just a couple fiberglass lay-ups left,on the inside of the core I laid two layers of 1.5oz chopped mat and followed up with 1708 biaxial to give a good solid pad to distribute torque from deck hardware attaching screws under all mounts.Last of the glass lay-up inside!!!
Pre-assembled all the panels that divert water from the hatch perimeter ahead of the doghouse.These are all homebrew,Carver's flat p[anels were terrible.Added angle to divert water to the enging bilge,the components are in various stages from glassing to initial deburring gel coat,the reason for multiple finishes.In the end result all will be gelled and pva added.
Then cut countersunk and mounted front floor panel back-up down each length to cabin.
Martin Senior TEC filler used throught,not cheap but very workable product.The fast file takes board paper and is great for fairing flat where machine tools wont cut it.Sanding drums make deck fittings and access panels much easier.
In addition to the air board,die grinder with Roloc discs,7 and 4 inch grinders,dual action sander and an electric corner sander we heavily use a palm dual action sander,especially for the compartments which are next in line for final gelcoat which will be white with pva added.
All the panels that are removable have been repaired,modified or restructured and are prepped for gelcoating as is the inside of the engine cover.Lumber was added and laminated to seal along the length and the diagonal gussetts were all broken so they were restructured as well,now she is a rock.
Engine bilge is final sanded in prep for gelcoat.
All exposed surfaces are coated,there will be no un gelcoated work left to sponge water.Here you can see under the floor where the finish is the same.The compartments will recieve the same attention and all sides will be gelled including the tops.
Starboard side end result.
Transom and inner liner completely bonded and sealed.
Helm and front of tank bilge area finish takes up where cabin work left off.
Engine bilge,nice and smooth but needs to be final sealed with gelcoat with pva release agent.
The cabin and deck ready for top coats,mosatly Durabak textured rubberized polyurethane.
Tackle storage will run gunnel to gunnel and have a snap in sunbrella or pfiffertex bag to accept tackle storage boxes.