The_Other_Dave
Seaman Apprentice
- Joined
- Aug 30, 2012
- Messages
- 34
Replacing 6" bunks with 8" bunks - I did it and boy am I glad that I didn't wait
I was contemplating replacing my trailer bunks and discussed it in this thread
http://forums.iboats.com/trailers-t...en-bunks-6-8-pics-evaluate-inside-611409.html
Well after much contemplation I replaced them this weekend and am glad I did.
Some background (covered in earlier thread).
1. The existing bunks were 6" wide and had developing cracks and delamination.
2. I thought that 8" bunks were doable with no problems (see pictures in earlier thread).
3. I wasn't happy with the amount of flex between the vertical supports.
4. There were gaps between the center of the spans and the boat bottom.
So based on the discussion in the other thread and some evaluation of my own (plus some blind luck)
I decided to replace the 6" bunks with 8" wide bunks (which was somewhat contrary to the advice in the thread).
1. I found that the existing bunks were dimensional lumber (i.e. 6 inches wide by 2 inches - for real inches).
2. So I replaced them with S4S douglas fir which was 7.5"x1.75".
3. I decided to neck the width down from the flat section to the nose from the max width to 6" to
increase the flexibility towards the nose where it needed to be more curved to match the hull curvature.
So I measured the existing bunks as well as I could and offset the bolt holes so the distance from the internal
edge to the bolts would match the existing bunks. The extra width would go to the outboard sides.
I decided to increase the length by 1 inch on the back and 4 inches on the front.
I countersunk the carriage bolts and a washer to give 1/4 inch of distance between the bolt and the surface of
the bunk. Then I stained them with a black oil based stain on all 6 edges for some water protection.
I ordered Attwood bunk carpet 12" wide by 12' long. I attached it using Weldwood exterior carpet glue
and Monel T-50 staples on the sides an bottom (no glue on the sides or bottom). Don't forget to put the bolts in the holes w/ a washer before you put the carpet on and tighten the bolt so it stays away from the surface of the carpet.
Then I implemented a planned a redneck trailer modification. I got to my local lake early in the AM, dumped the boat in the drink, docked it and left my wife and daughter to watch it. The my Son and I went to change the bunks out in the parking lot of the dock (don't tell my Mother about trailer mods in the parking lot).
I took 4 different sockets and socket wrenches , 3 different open end wrenches, large and small screw drivers, 3 different sizes of vise grips, multiple cutting tools, hammer, sledge hammer to the party.
It went mostly smooth with the exception of one bolt which refused to loosen. I cut out the
old bunk carpet, dug into the work with hammer and screwdriver and put a vise-grip on the head and went after it......eventually the bolt twisted off. If if was to do this again I would soak the bolts/nuts with WD-40/knocker-loose or equivalent the night before.
Here is where I found out the shocker.....the old bunks were not only dimensional lumber but they were REDWOOD.
I was really shocked given the relatively low strength of redwood......I was also scared due to how much stiffer the new bunks would be.....did I just make a real mistake.
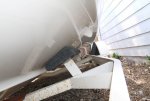
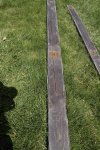
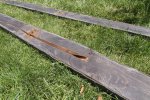
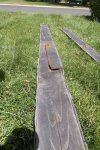
I also found that the old bunks were in really bad shape. What I thought was a de-lamination between growth rings turned out to be a set of complete cracks all the way through the bunk (see attached photos). The carpet was
also falling apart to dust.
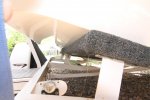
So after changing them out we went out on the lake for the day. Later we pulled the boat out
on the new bunks and I couldn't be more pleased (again see pics). There is much less deflection between the
vertical supports and it follows the hull better than before.
So I would say if you are contemplating doing something like this go for it. Just have the bunks ready and
a variety of tools ready for the change out.
Dave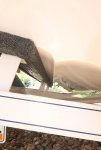





