Seacast or Plywood Seeking advice???

riden

Petty Officer 2nd Class
Joined
May 25, 2006
Messages
116
78 custom built Lund


Started my transom project today, have never done it before but I am up to it.

Wavering back and forth between Seacast and building a new plywood transom.

Am I wrong?? Would it not be fairly simple to grind away at the outer shell of glass (can I reuse it if I take it off in one piece?), remove the old plywood and tack on the new wood.


Is it that simple? Is there something I am missing. Does the plywood extend too far under the gunwalls, will that create a problem?

I am willing to go in either direction, but I feel a little more like going wood, can't explain why, but that project sounds like more fun.

I have included a few pics, what direction should I go in?

501206.jpg


501207.jpg


501208.jpg
 

Gary H NC

Fleet Admiral
Joined
Dec 1, 2005
Messages
8,972
Re: Seacast or Plywood Seeking advice???

If you are going to cut the outer skin of the transom off it will be some pretty major fiberglass work and painting. By the looks of the transom that may be a good idea..Are the black areas in the pics where the gelcoat is peeled off?
If going that route rebuild it with wood...
 

riden

Petty Officer 2nd Class
Joined
May 25, 2006
Messages
116
Re: Seacast or Plywood Seeking advice???

At some point the transom was painted/sanded??? There is no gelcoat at all, it was just paint, and it is peeling off.


The rest of the boat is in good shape and is well worth the effort
 

Gary H NC

Fleet Admiral
Joined
Dec 1, 2005
Messages
8,972
Re: Seacast or Plywood Seeking advice???

That would be a pretty easy designed transom for seacast. The risers are not much taller than the center so filling it would be fairly simple.Get the chainsaw out and have at it!
I used 2x4's across the back of mine to true up the outer skin.
 

TriadSteeler

Petty Officer 1st Class
Joined
Oct 26, 2006
Messages
237
Re: Seacast or Plywood Seeking advice???

Keep the back shell on. That way the original transom angle will be preserved.

Here are some steps you should take

1. Measure the dimensions of your bilge cavity. Then, take a circular saw, set your depth to 5/8" and cut out the splashwell area of floor (approx 2ft). This will give you a good opportunity to see what kind of shape the floor and stringers are in. If they are shot as well then replace the stringers and floor before proceeding to the next step. You want to leave the deck section intact while replacing the floor. (If you replace the floor with the deck off, you may flex the hull out to where the deck won't go back on. I digress. If the floor and stringers are shot, post a reply and we'll deal with that.
2. Remove the rub rail and then aluminum extrusion.
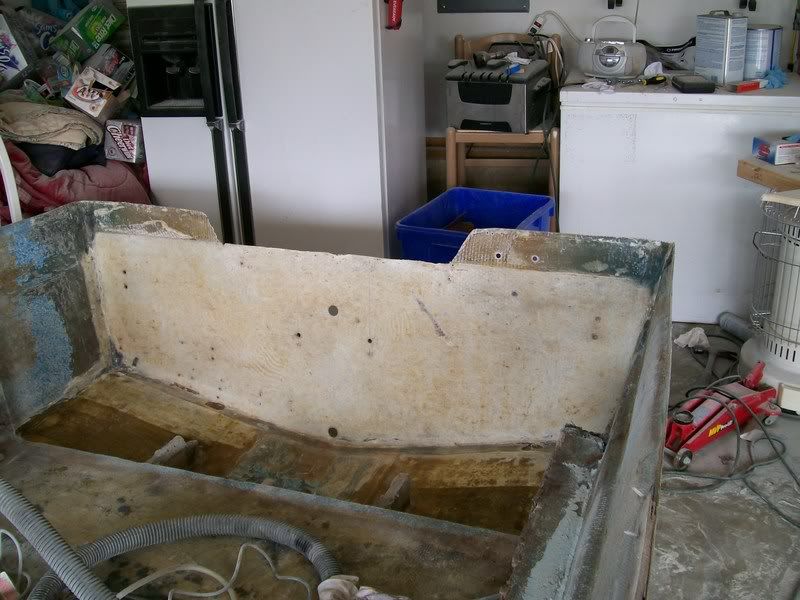
3. Separate the deck and hull sections. It may take some mallet tapping and prying but they should separate easily. Now you can get out that old transom.
4. Get an exact width of the old transom. This is important when you go to put the deck back on (too thick and the deck won't fit.)
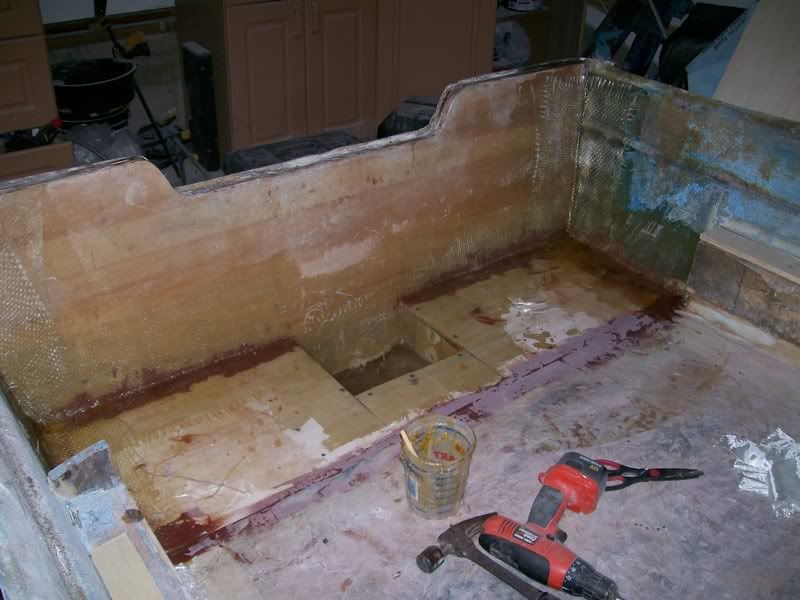
4. Remove the old transom plywood. a wonder bar is good if the transom is really rotted, if the wood is somewhat intact, use a chainsaw by driving the tip in from the top.
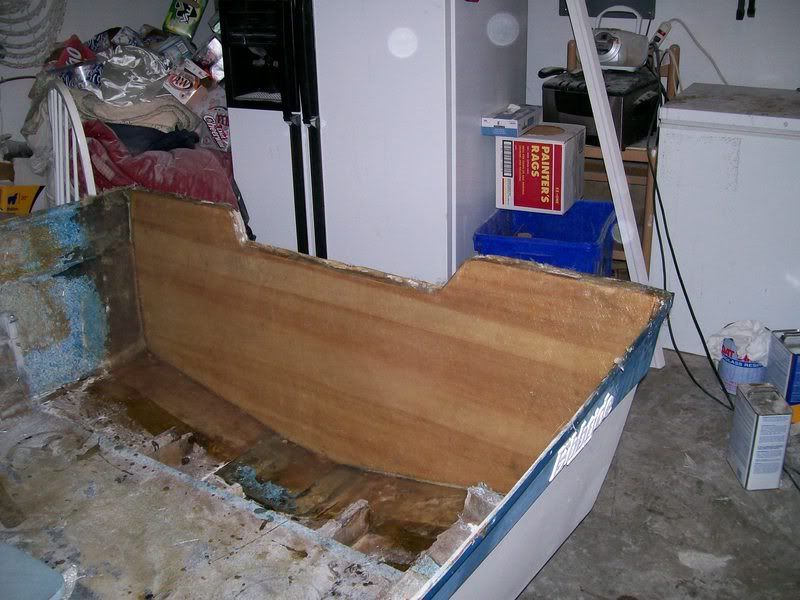
5. Grind all of the old wood out on the inner skin. It should look something like this.

TransomClean.jpg


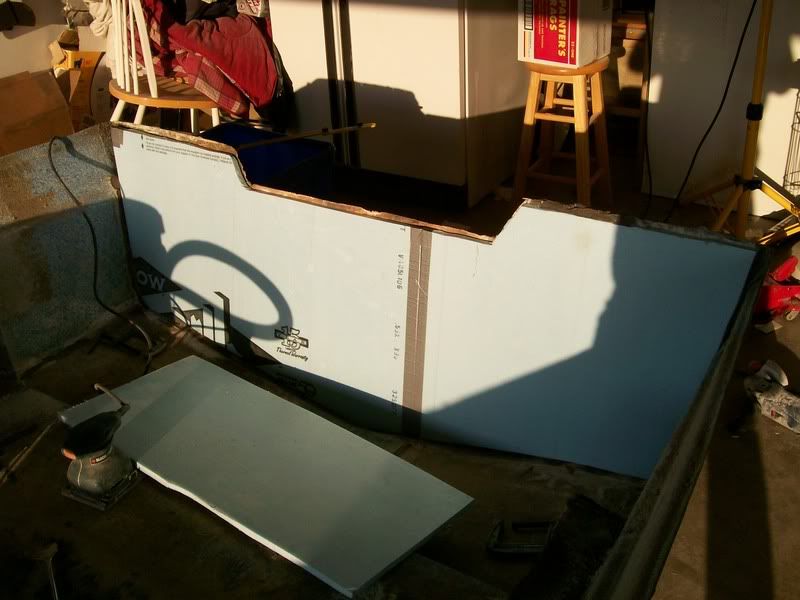
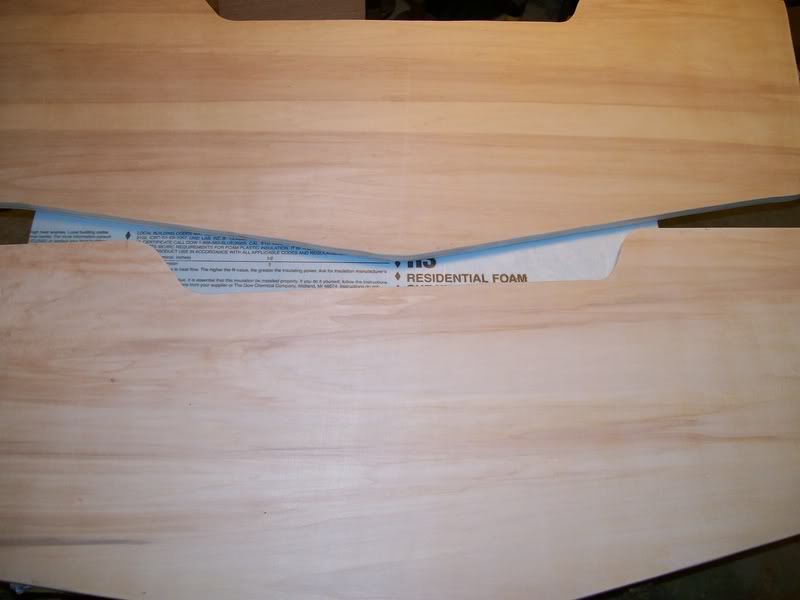
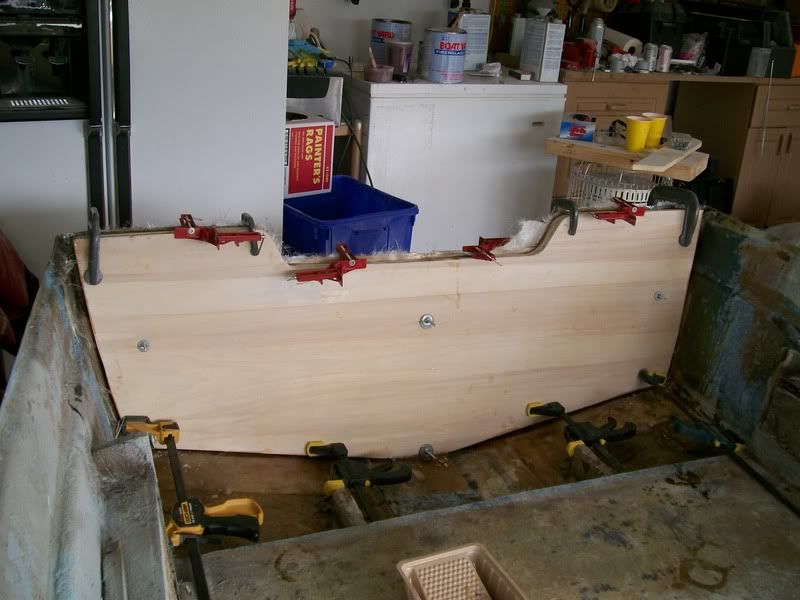
6. Then make a pattern of your transom. I used some exterior housing styrofoam. It was easy to cut with a razor knife and trim and was rigid enough to keep in place.

TransomTempl.jpg


7. You need to determine what type of plywood to use. You can use marine grade but it is $$$$$$$. I used ACX grade. I paid 59.99 for a 4x8x3/4". It has very few voids and was pretty much flawless. You'll probably have to hit the local lumberyard as I don't think Lowe's or Home Depot carry this quality of plywood. I wouldn't go any lower in quality than ACX.

You then want to cut out two identical transom pieces that fit your pattern.

TransomWood2.jpg


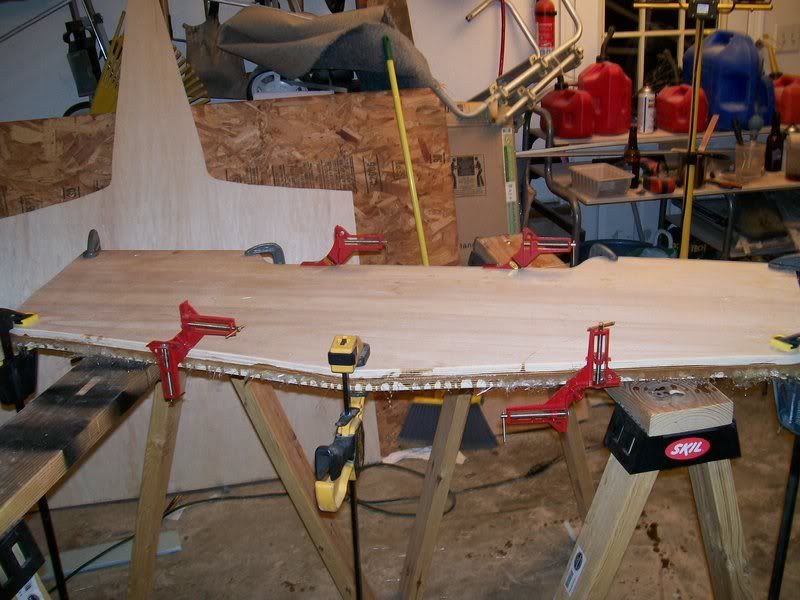
8. Make a transom sandwich with plywood and resin/chopped fiberglass mat. You have to choose what type of resin to use. Epoxy or Polyester. Epoxy by far is better, but it is way more expensive. Epoxy is more waterproof and it will adhere to anything. I used polyester because of the amount of resin I needed for the whole project, plus my boat will be trailered and garage kept. Using epoxy you wouldn't use the mat (unless it is the special epoxy mat) because mat requires styrene to dissolve. Look for other posts for working with epoxy resin if that is the route you choose.

You will want to clamp the two pieces together and put in SS screws to hold it together

TransomClamp.jpg


Let this cure for 24/48hrs.

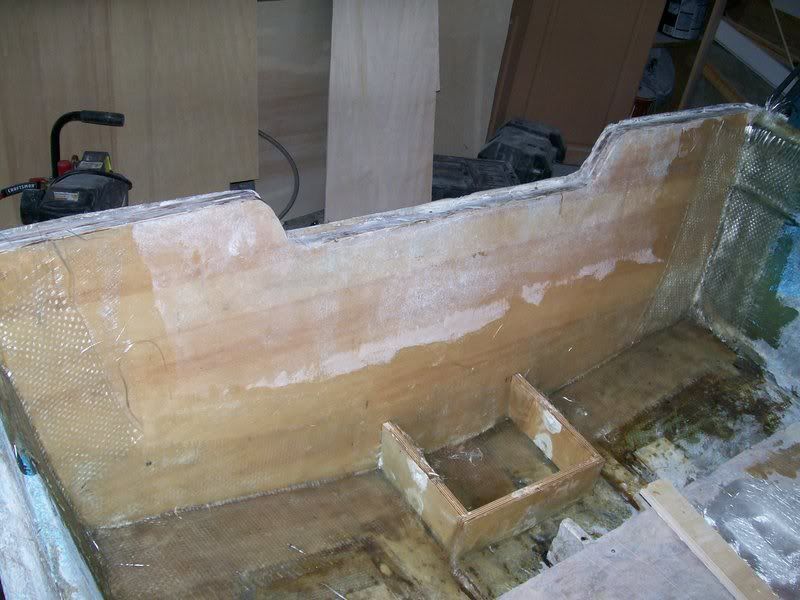
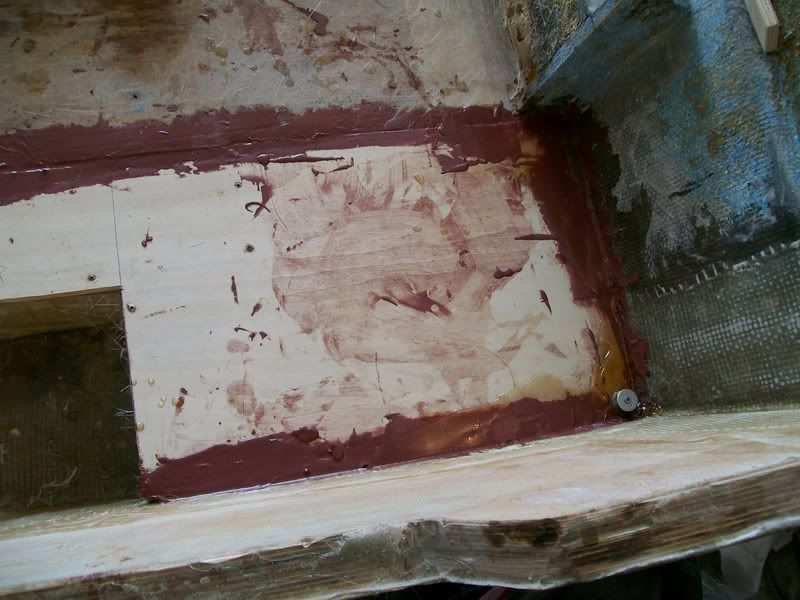
9. Install your new transom against the outer skin using Resin/chopped mat. Again clamp it at the top with C-clamps and I used spreader clamps at the bottom and also drilled a few thru-hulls where the drain and bow eyes are and put in some machine screws with washers and cranked them up good and tight. The goal here is to fill any voids completely with resin and leave no pockets where water can get in.

TransomToOuterSkin.jpg


Again, let this cure.
 

TriadSteeler

Petty Officer 1st Class
Joined
Oct 26, 2006
Messages
237
Re: Seacast or Plywood Seeking advice???

10. Install the inner skin. Remember, you have to grind any area that is dirty or dry to get proper adhesion. Also wipe down where you are putting resin with Acetone before hand.

To start with the inner skin I used a layer of mat. Then a layer of cloth tape around the hull sides and hull bottom. Then another layer of mat and a layer of woven roving. Remember, be mindful of your width at the top where the deck attaches.

TransomFinished.jpg


You will now want to install a new bilge cavity. You will want to completely glass this in on all sides. I made drains on mine with pvc pipe sections glassed in.

TransomBilgeBox1.jpg


Check to make sure your exposed stringers are still completely glassed in. Since you removed a portion of the floor you may have pulled the original fiberglass away.

11. Now reinstall the floor. You will want to totally encapsulate the floor in resin. Both sides. also put some resin on the cut portion of the original floor. Then you will want to lay up the floor with resin where it touches the floor and in the hull joints along the side and lay your new floor section in the resin . Then you will want to have a mixture of resin and some filler compound (i.e. microballoons) to fill in the cracks and gaps.

AftFloor.jpg


12. Sand down the filler and then fillet the new floor section to your new transom and the hull sides with woven roving.

SplashwellFloor.jpg


13. Put a final layer of resin/mat on top of all of it (including the new/old floor joint) and sand it smooth. You can even paint it if you wish.

14. Reinstall the deck and put it all back together.

A great resource is a book called "Runabout Renovation" by Jim Anderson. You will see the steps I outlined plus a lot that I skipped over.
 

Gary H NC

Fleet Admiral
Joined
Dec 1, 2005
Messages
8,972
Re: Seacast or Plywood Seeking advice???

Nice looking job TriadSteeler....:cool:
 
Top