I had to search around and read several posts to figure out how to remove my flywheel so I didn't end up screwing something up that cost a lot of money..like the flywheel or crank.
Here are some photos of what I used so when others search on how to remove a flywheel they can view the process I used at least.
First problem I had was I couldn't find a socket big enough that would FIT into the hole in the flywheel until I went to Napa.
They had one that fit which is in my case a 1 1/2"...the brand is Duralast and it cost around $12.
Then even after soaking the nut for days with PB blaster I still couldn't budge the thing...I tried using a flywheel holder and another person to help. Even with a long cheater bar to give me leverage I could not budge it so had to end up using a 3/4" drive air impact wrench my neighbor loaned me and it would worked with ease (I want one now).
Next was trying to figure out what puller to use and what size bolts that go into the flywheel holes.
The puller you will need is the type pictured below and both Autozone and Orielly Auto have them on their free loan a tool program I believe but you may need to buy the right size bolts. The puller in the photos is one I had but looks just like the one they loan out. You never want to try and use a puller that will pull on the edges of the flywheel..unless you want to buy new parts.
I searched for the bolt size and at first I went and bought 1/4 inch bolts with a 20 count thread since that's what I had read online. Well those are the right size bolts for my 15 horse but not my 120 HP...they took a 5/16" fine thread (can't remember the count but the finest they carried in hardened bolts that size), I bought the ones that were 2" long and two sizes of washers since I was worried the 5/16 washers may be too small.
After the main bolt was off I did spray more PB blaster around the crank shaft and let it sit a few hours while I went and got the right size bolts.
Before setting up the puller I put the main flywheel nut back on but left several threads (maybe 1/4 inch) for the flyhweel to have room to come up when it broke loose. This keeps it from flying off and protects the top of the crankshaft better.
The next steps are photos below but basically you insert the three bolts WITH the right size washers that won't pull through the gear puller into the flywheel about 10 turns or so...you don't want them in too far or you could possible damage something. I didn't even have to use a wrench on them but you might if there is rust on the threads.
Try to make the puller as level to the flywheel as possible and the center piece centered on the top of the crank shaft.
Once you get it setup right..nice and snug you will need to hold the flywheel from turning when you get ready to really wrench on it to pop it lose.
My puller has a 3/4" nut on top of it so I used a breaker bar with a couple of cheater pipes for leverage and stuck my biggest screwdriver between two of the bolts as photos so I could use that to hold the flywheel in place while I turned the puller screw.
Since I had a second pair of hands to help me I used them...my wife held the screwdriver and I applied steady pressure (quite a bit) onto the gear puller screw...basically trying to tighten it down. It only took a couple of seconds until it POPPED and scared us a bit..but all was good and it was off. Much easier than I had thought it would be.
Others have also used carefully placed wedges between flywheel and power head, raps with a hammer on the puller screw, raps with a hammer on the flywheel itself and other means to help the puller do it's job. You can search for those tips if you have one that is stubborn. You "might" also try to use an impact wrench on the puller screw if you have one...I was told to do that by one person but am not sure it's a good idea or not.
Guess that's all...good luck with your flywheel and remember I am a newbie so don't take my word for ANYTHING...lol
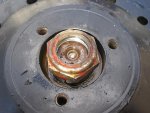
These are the holes that you will need hardened (grade 8) bolts for...mine were 5/16 fine thread.
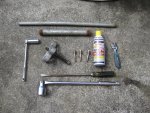
All the tools I needed for this job..except the air impact is not pictured.
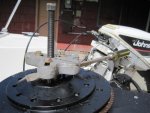
How the puller is setup, be sure to use hardened washers that will not fall or bend into the puller when pressure is applied.
A closeup of how I positioned the screwdriver to hold the flywheel from turning.
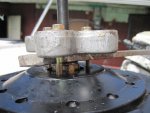
When you are ready to apply pressure you will tighten the top bolt on the puller while holding the flywheel from turning, basically put opposite force on the screwdriver while tightening the top bolt.
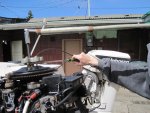
Here are some photos of what I used so when others search on how to remove a flywheel they can view the process I used at least.
First problem I had was I couldn't find a socket big enough that would FIT into the hole in the flywheel until I went to Napa.
They had one that fit which is in my case a 1 1/2"...the brand is Duralast and it cost around $12.
Then even after soaking the nut for days with PB blaster I still couldn't budge the thing...I tried using a flywheel holder and another person to help. Even with a long cheater bar to give me leverage I could not budge it so had to end up using a 3/4" drive air impact wrench my neighbor loaned me and it would worked with ease (I want one now).
Next was trying to figure out what puller to use and what size bolts that go into the flywheel holes.
The puller you will need is the type pictured below and both Autozone and Orielly Auto have them on their free loan a tool program I believe but you may need to buy the right size bolts. The puller in the photos is one I had but looks just like the one they loan out. You never want to try and use a puller that will pull on the edges of the flywheel..unless you want to buy new parts.
I searched for the bolt size and at first I went and bought 1/4 inch bolts with a 20 count thread since that's what I had read online. Well those are the right size bolts for my 15 horse but not my 120 HP...they took a 5/16" fine thread (can't remember the count but the finest they carried in hardened bolts that size), I bought the ones that were 2" long and two sizes of washers since I was worried the 5/16 washers may be too small.
After the main bolt was off I did spray more PB blaster around the crank shaft and let it sit a few hours while I went and got the right size bolts.
Before setting up the puller I put the main flywheel nut back on but left several threads (maybe 1/4 inch) for the flyhweel to have room to come up when it broke loose. This keeps it from flying off and protects the top of the crankshaft better.
The next steps are photos below but basically you insert the three bolts WITH the right size washers that won't pull through the gear puller into the flywheel about 10 turns or so...you don't want them in too far or you could possible damage something. I didn't even have to use a wrench on them but you might if there is rust on the threads.
Try to make the puller as level to the flywheel as possible and the center piece centered on the top of the crank shaft.
Once you get it setup right..nice and snug you will need to hold the flywheel from turning when you get ready to really wrench on it to pop it lose.
My puller has a 3/4" nut on top of it so I used a breaker bar with a couple of cheater pipes for leverage and stuck my biggest screwdriver between two of the bolts as photos so I could use that to hold the flywheel in place while I turned the puller screw.
Since I had a second pair of hands to help me I used them...my wife held the screwdriver and I applied steady pressure (quite a bit) onto the gear puller screw...basically trying to tighten it down. It only took a couple of seconds until it POPPED and scared us a bit..but all was good and it was off. Much easier than I had thought it would be.
Others have also used carefully placed wedges between flywheel and power head, raps with a hammer on the puller screw, raps with a hammer on the flywheel itself and other means to help the puller do it's job. You can search for those tips if you have one that is stubborn. You "might" also try to use an impact wrench on the puller screw if you have one...I was told to do that by one person but am not sure it's a good idea or not.
Guess that's all...good luck with your flywheel and remember I am a newbie so don't take my word for ANYTHING...lol
These are the holes that you will need hardened (grade 8) bolts for...mine were 5/16 fine thread.

All the tools I needed for this job..except the air impact is not pictured.

How the puller is setup, be sure to use hardened washers that will not fall or bend into the puller when pressure is applied.

A closeup of how I positioned the screwdriver to hold the flywheel from turning.

When you are ready to apply pressure you will tighten the top bolt on the puller while holding the flywheel from turning, basically put opposite force on the screwdriver while tightening the top bolt.


