nola mike
Vice Admiral
- Joined
- Apr 22, 2009
- Messages
- 5,524
Since I had nothing that needed to be done this summer, and the boat was running fine, I decided to make a few projects for myself for no good reason.
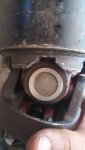
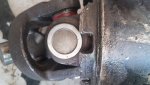
I've changed trim sensors, bellows, shift cable, water hose so far. Decided, what the hell, replace u-joints. I got a kit from my FLAPS to press out the joints. After realizing that I needed to take apart the whole input shaft assembly (no thanks, did that last year) to do it properly, I ground off a couple of the ears on the bearing carrier nut to press out the joints. Lessons learned so far:
1. Grind off the ears on opposing sides of the nut. You don't need it to get the joints out, but you do to get them back in.
2. If you think that you're pressing hard enough to break something, you probably are. If everything is aligned right, it doesn't take a ton of force to get the joints in/out
3. A prop removal socket (1 1/6"?) works PERFECTLY for pressing the joint out of the yoke. Once I figured this out, things went a lot smoother.
How I've screwed up so far:
Attempt #1. Got the new joint pressed in with difficulty, and it didn't turn right. Took it back off, and found that one of the needle bearings had broken. Bad times. Thought about using one of the bearings from the old joint, but decided against it. Will just buy another joint...
#2. Pressed the new joint almost all the way in, when "pop". Broke the bottom part of the cover off at the circlip groove. Oh yeah, also somehow broke off the grease zerk. Planning on replacing the cover with one of the ones from the other broken joint, and seeing if I can get the zerk out with an ez out, but may just replace the whole joint.
So I'm 4 hours in at this point, and basically at square one. Very frustrating. Especially since I'm not convinced that the u joints even needed replacing. Tomorrow I head to auto zone and buy a couple of new joints, hopefully fix on sunday. Goal is to have boat on the water by memorial day, and more reliable than ever!
") )
)