kaosbandit
Recruit
- Joined
- May 25, 2011
- Messages
- 1
Re: Wakeboard tower on a Stingray 18 foot
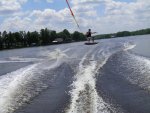
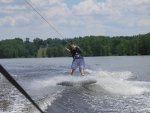
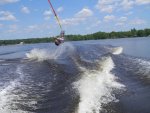
I have built a DIY pylon for my 1991 18' Stingray that did not require any holes to be drilled and leaves the completely factory.
I took a 2" piece of glavanized pipe about 8' long. I got mine at Home Depot and they put threads on both ends.
One end needs a cap and the other end will be threaded into a pipe flange.
I mounted the pipe flange to a stair tread that I cut to size. You will want to use panhead bolts to prevent damage to the floor of the boat.
Then I bought 2 large eye bolts (machine thread, NOT wood thread)
Stand your pole up and measure to the height you desire your rope to be (typically between 6-8 feet from the floor of the boat) Mine is at 7 feet.
About 6-8 inches below your rope eyebolt facing towards the back of the boat add the second eyebolt facing toward the front of the boat.
I found some 1/2" round kevlar tie off material at a rock climbing store (about 6 feet) for the front harness. I tied an overhand knot in each end of teh tie off material anf ran one end through the front D ring and brought the ends back together using a 1/2" quicklink.
I would suggest taking it this far and using a good set of ratcheting tie downs to prove out your prototype and see if you like it.
Connect one tie down to the rear left D ring and back to the lower eye bolt. Connect another tie down from the rear right D ring and back to the lower eye bolt. Connect the third tie down from the previously mentioned quicklink in the front to the lower eyebolt.
When you tighten these straps make sure you tighten them evenly so the foot of the pole will be flat on the boat floor.
The straps will carry all the load. In this configuration all the pole does is hold the rope up and give the straps a place to connect. The straps will have a little stretch and give to them, but after I proved out my prototype I added cable!
For that you will need vinyl coated cable (measure your straps to get approximate length and BUY EXTRA. You will need cable clamps that you hammer NOT the screw down kind and grommets to hold the cable loop open. Quick clips will be used on each end. I did mine so that the rear two cables are fixed length.
The front side uses a 12" turn buckle attached to a quicklink to connect to the lower eye bolt. The other end uses the same quick link we used to attach to the kevlar on the front. This will give you a single point of adjustment and makes set up and tear down easy. Not to mention consistent results.
You need to make sure you do NOT go too cheap on your parts. When you cut hard there can be a lot of load on your pylon. The weakest piece in my rig is rated for 800 pounds.
As a disclaimer, any tips you take from this post is at your own risk. I am not an engineer and I am only describing what I have built myself. I have very much enjoyed my DIY pylon. Let me know how it goes.
If you find a tower or pylon that can be used with a stingray but not require any driling or mounting let me know.
I gave up looking for a tower or pylon for my dads stingray 200ls. He doesnt want to screw into the boat at all so i tried finding some sort of pylon that could be tied down with a bow strap or some type of engineered rig. Ive seen one so far but it was home made and pretty un-sturdy.
Thanks
I have built a DIY pylon for my 1991 18' Stingray that did not require any holes to be drilled and leaves the completely factory.
I took a 2" piece of glavanized pipe about 8' long. I got mine at Home Depot and they put threads on both ends.
One end needs a cap and the other end will be threaded into a pipe flange.
I mounted the pipe flange to a stair tread that I cut to size. You will want to use panhead bolts to prevent damage to the floor of the boat.
Then I bought 2 large eye bolts (machine thread, NOT wood thread)
Stand your pole up and measure to the height you desire your rope to be (typically between 6-8 feet from the floor of the boat) Mine is at 7 feet.
About 6-8 inches below your rope eyebolt facing towards the back of the boat add the second eyebolt facing toward the front of the boat.
I found some 1/2" round kevlar tie off material at a rock climbing store (about 6 feet) for the front harness. I tied an overhand knot in each end of teh tie off material anf ran one end through the front D ring and brought the ends back together using a 1/2" quicklink.
I would suggest taking it this far and using a good set of ratcheting tie downs to prove out your prototype and see if you like it.
Connect one tie down to the rear left D ring and back to the lower eye bolt. Connect another tie down from the rear right D ring and back to the lower eye bolt. Connect the third tie down from the previously mentioned quicklink in the front to the lower eyebolt.
When you tighten these straps make sure you tighten them evenly so the foot of the pole will be flat on the boat floor.
The straps will carry all the load. In this configuration all the pole does is hold the rope up and give the straps a place to connect. The straps will have a little stretch and give to them, but after I proved out my prototype I added cable!
For that you will need vinyl coated cable (measure your straps to get approximate length and BUY EXTRA. You will need cable clamps that you hammer NOT the screw down kind and grommets to hold the cable loop open. Quick clips will be used on each end. I did mine so that the rear two cables are fixed length.
The front side uses a 12" turn buckle attached to a quicklink to connect to the lower eye bolt. The other end uses the same quick link we used to attach to the kevlar on the front. This will give you a single point of adjustment and makes set up and tear down easy. Not to mention consistent results.
You need to make sure you do NOT go too cheap on your parts. When you cut hard there can be a lot of load on your pylon. The weakest piece in my rig is rated for 800 pounds.
As a disclaimer, any tips you take from this post is at your own risk. I am not an engineer and I am only describing what I have built myself. I have very much enjoyed my DIY pylon. Let me know how it goes.


