Landscaping Wiz 808
Chief Petty Officer
- Joined
- Jun 29, 2008
- Messages
- 498
Re: Saved From the Garbage Man
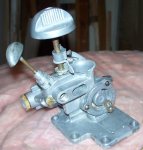
I'm not sure which bolt you're talking about. Is it one of the mounting bolts? If so I would re-tap it. The hole is so shallow that I'd worry about the helicoil coming out. I wouldn't base your decision on my opinion though.
Grab a feeler gauge and let's see some pictures of your motor running!
BOB
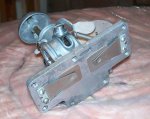
I also found that the bolt on the lower right of the carb is stripped. I am thinking about drilling it out and re-tapping it.
What are you thoughts on that vs using a helicoil?
I'm not sure which bolt you're talking about. Is it one of the mounting bolts? If so I would re-tap it. The hole is so shallow that I'd worry about the helicoil coming out. I wouldn't base your decision on my opinion though.
Grab a feeler gauge and let's see some pictures of your motor running!
BOB