My 85' Riviera Tri-hull Rebuild

Numlaar

Chief Petty Officer
Joined
Jul 9, 2009
Messages
633
Re: My 85' Riviera Tri-hull Rebuild

LOL Num I thought that was a 240 peeking out there :D.


Rick

Yeah hehe I won't hijack my own thread about it (this is a boat forum, not a car forum after all LOL), but ONE reply about the car won't hurt LOL

It's a pretty nice car. Very straight, no rust (I had to weld in new floor pans, but other than that it was straight and clean, the PO had bought factory floor pans from Nissan so they were a nice fit).

I bought three Z's all together... the one in the picture (was 500 bucks cause it was in pieces, the PO had it all apart to do a restore, so I got it for a steal, along with a ton of parts). Another one I had bought a few years before this one (thats what got me into Z's), that was a total rust bucket, but it was a daily driver (got it for 250 bucks), and a third one I had bought that wasn't running (also a rust bucket), it had a 280z motor in it, which I needed for the block, got that for 350bucks), so for a grand I got 3 Z's LMAO! God I miss the days of cheap cars! Stripped down the 2 rust buckets, and junked the unibodies... LOL You should have seen the tow truck drivers reaction from the junkyard when he came to get em... basically a rusty Unibody shell sitting on the ground, but I had the titles LMAO!

Anyway, I have around 15K in the thing so far... Complete Nismo re-build on the race engine (New pistons, rings, rods, crank, bearings, Stainless steel valves for the head, etc.). Custom ground isky cam, complete re-work on the head.

Complete new race suspension: Eibach stage 3 race springs, Tokiko 5-way adjustable struts, complete urethane bushing set, with adjustable cams for all the alignment angles. Front/rear stabilizers, including an additional race stabilizer between the front strut towers. Complete suspension was lowered 2".

New rear end (Still have the 3 stock ones), but right now it has a late model ZX rear end with 3.83 gears in it.

Racing safety equipment required by SCCA/HSR: Full roll cage, Kirkey Race seat, Simpson 5-way harness, master kill switch, quick release steering wheel.(Needs fire suppression system yet).

Race fuel system: 8-Gal. ATL fuel cell, twin electric fuel pumps, all braided high pressure hoses, threaded fittings, fuel pressure regulator, etc.

Race ignition: Mallory Unilite photocell distributor, MSD Blaster 2 coil, and MSD 6AL ignition box.

And of course since I had all the parts cars, I have 3 complete drive lines (Engine/Trans/Rear end), 3 Hoods, two rear hatches (One was shot), 3 windshields, 2 sets of doors (one set was shot), and a MINT set of original seats LOL.

Maybe one day I'll finish it... its actually mostly done. Needs some wiring tweaking, and the fire system, then seal off in the back where I mounted the fuel cell (Took out stock tank, and cut out spare tire well). Paint, then hit the track!

My dad is into racing (Not boats like my grandfather), he runs a 1963 Split window corvette in Vintage... beautiful car.. He gets a few raised eyebrows from corvette enthusiasts about why he would cut up such a classic car to make it a race car, but it was actually a REAL race car from the late 60's, (used to run in the Trans Am series at Sebring/Daytona, etc.). So he wasn't the one to originally cut it up LOL.

He keeps pestering me about my Z, and wants to know when I'm gonna finish it, otherwise, he's gonna drop a small block chevy in it, and use it! LOL (He's a big time chevy guy, plus its stored at his shop now).

Here's a little better picture of it:
ZSidePhoto.jpg


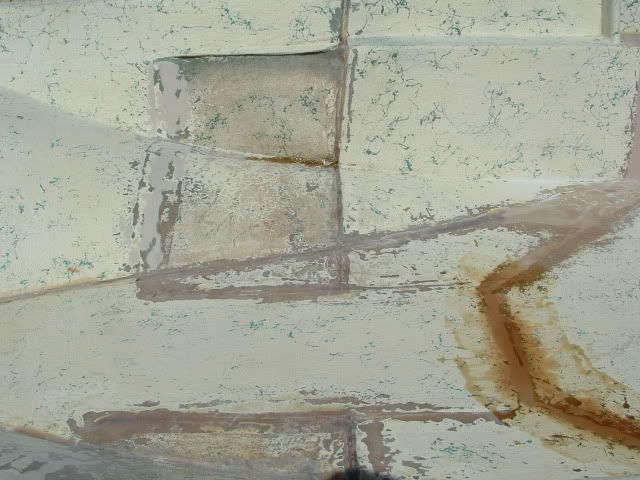
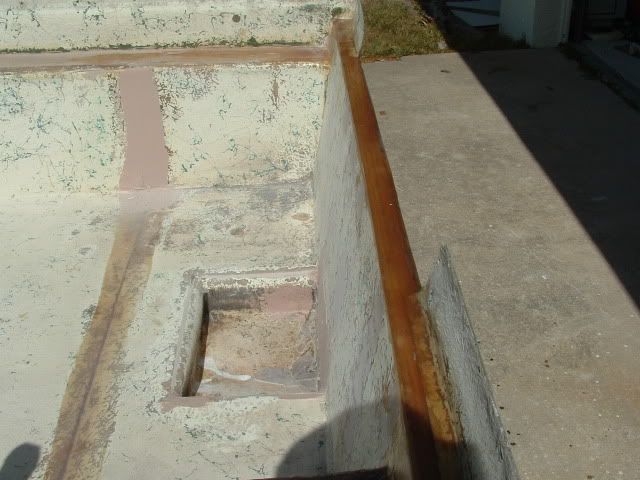
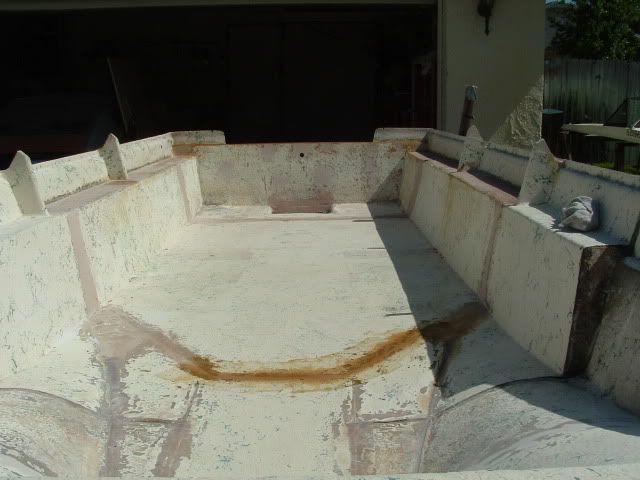
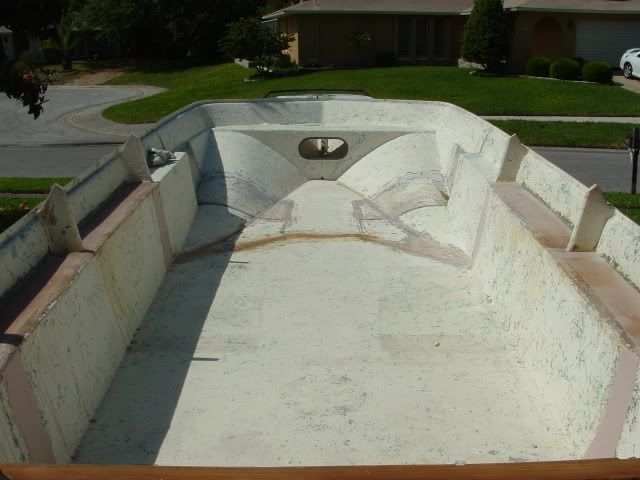
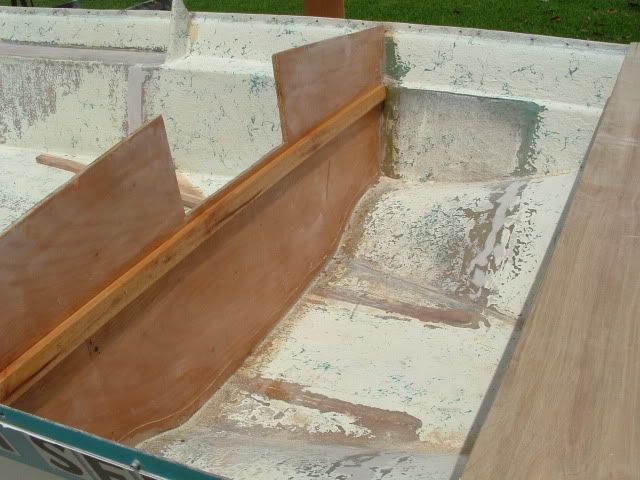
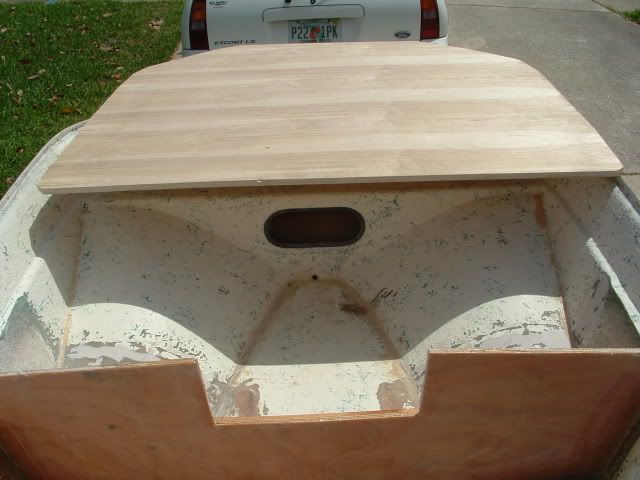
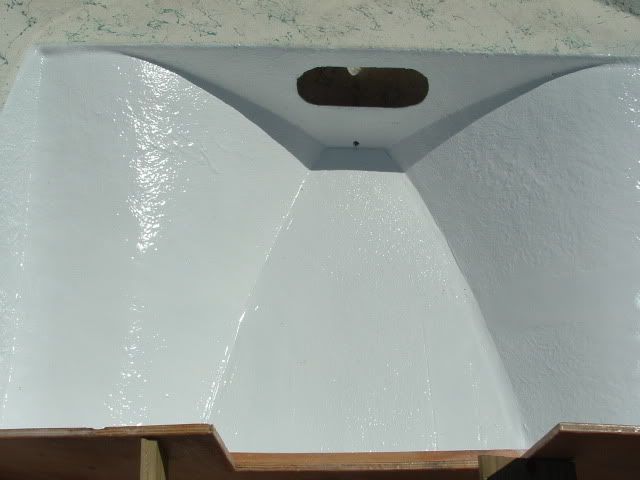
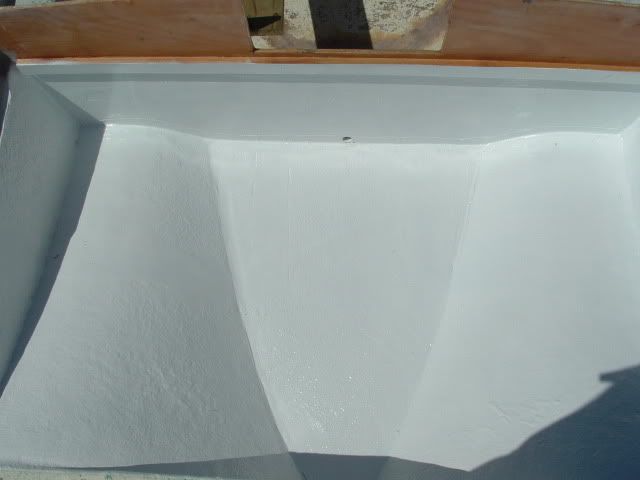
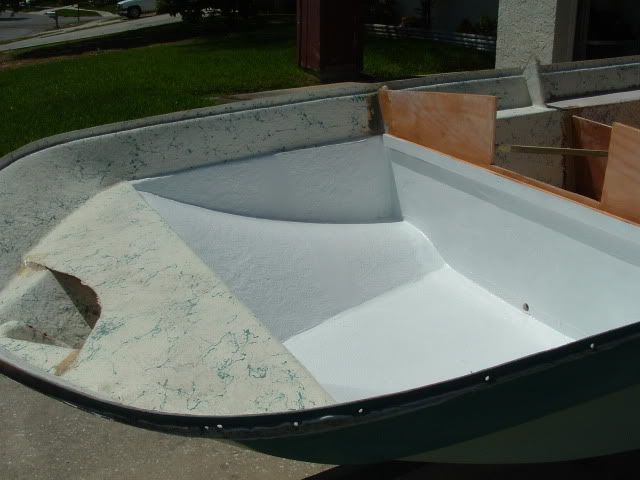
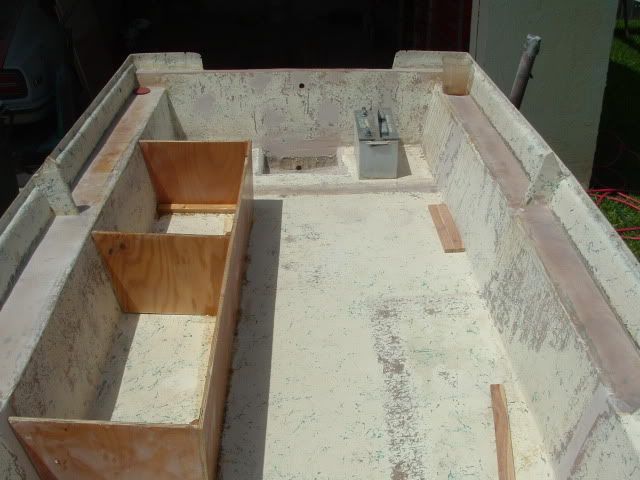
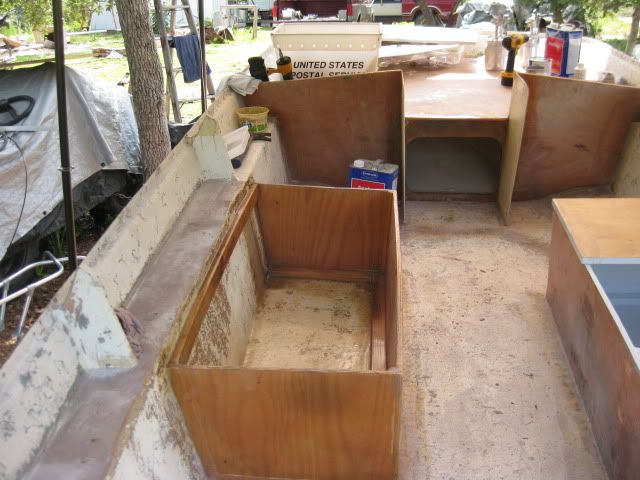
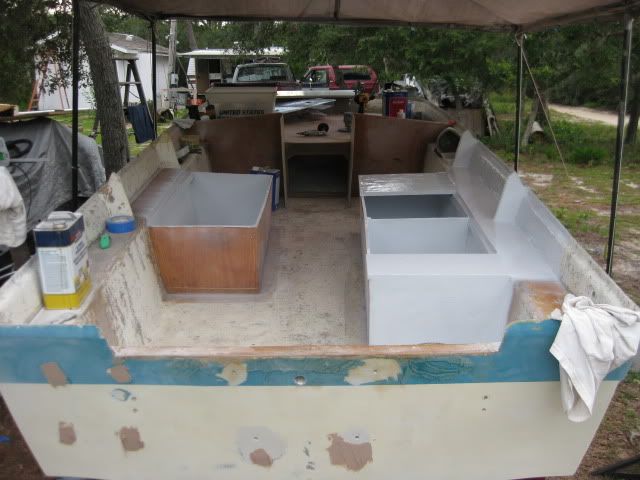
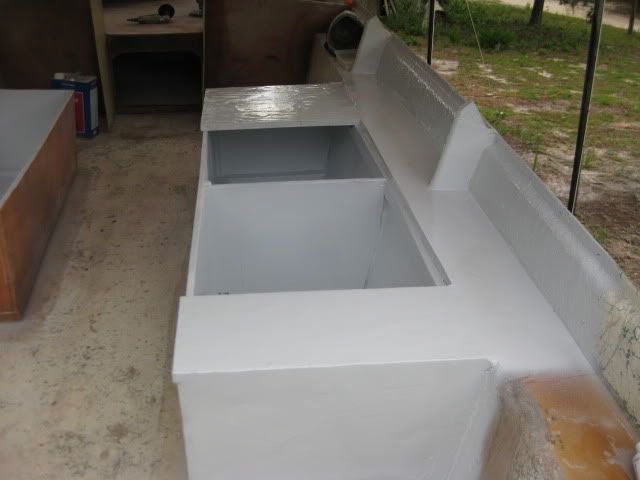
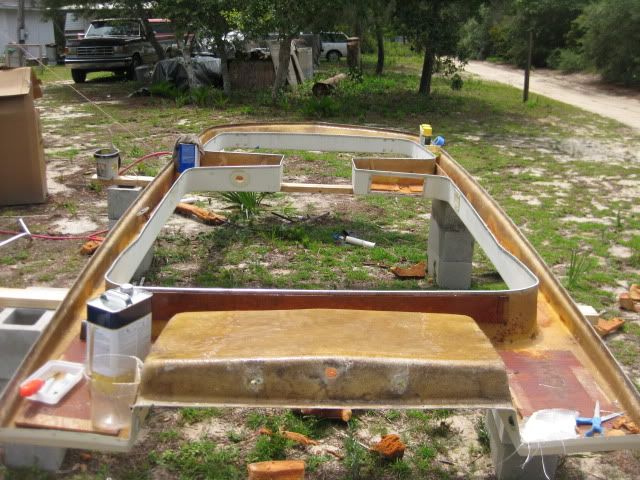
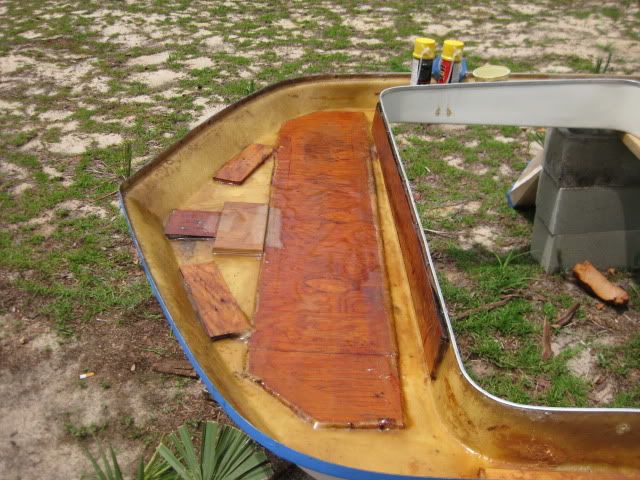
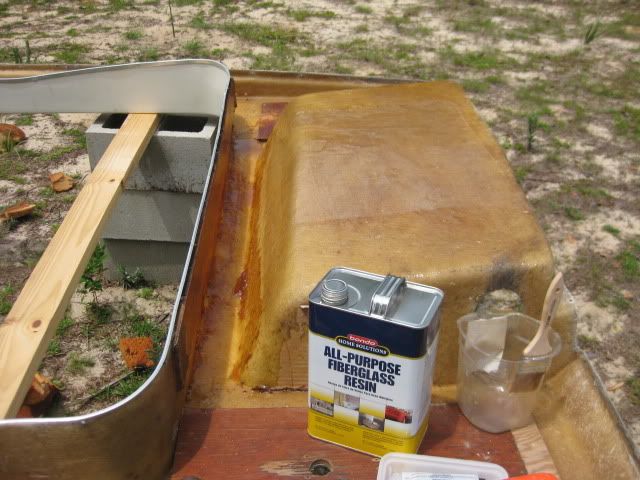
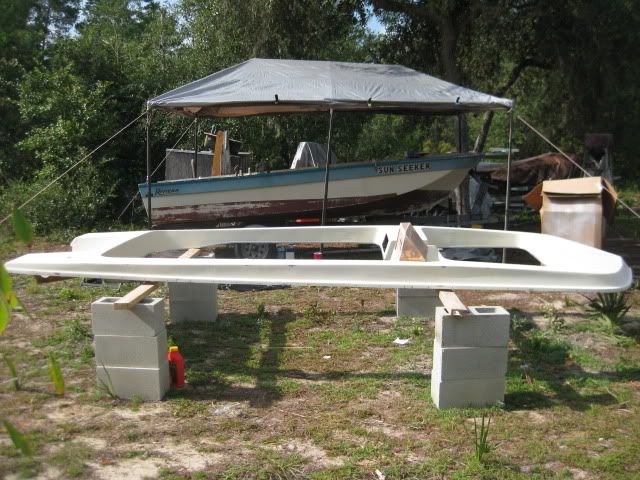
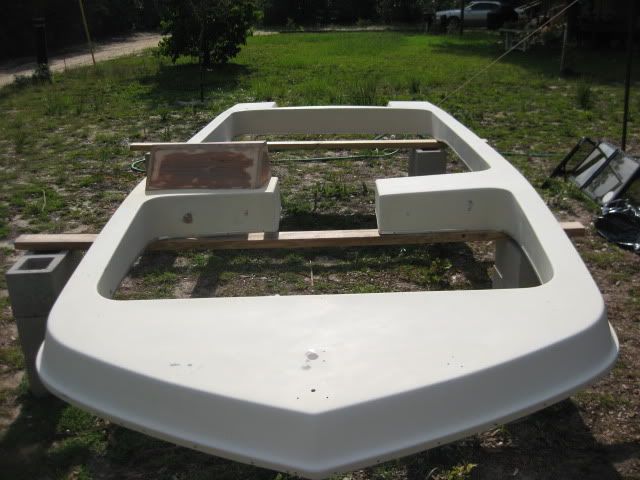
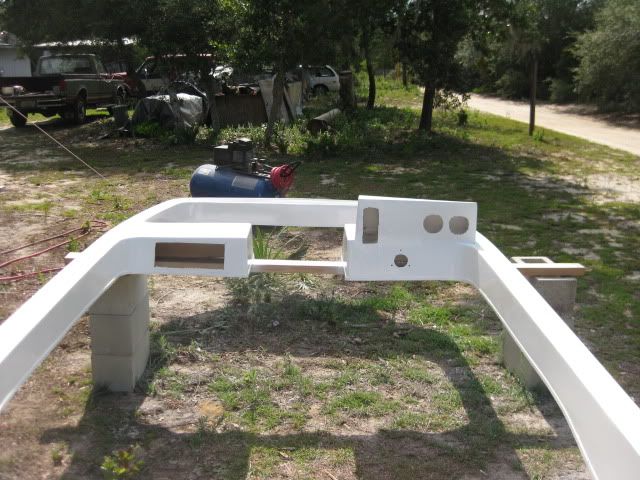
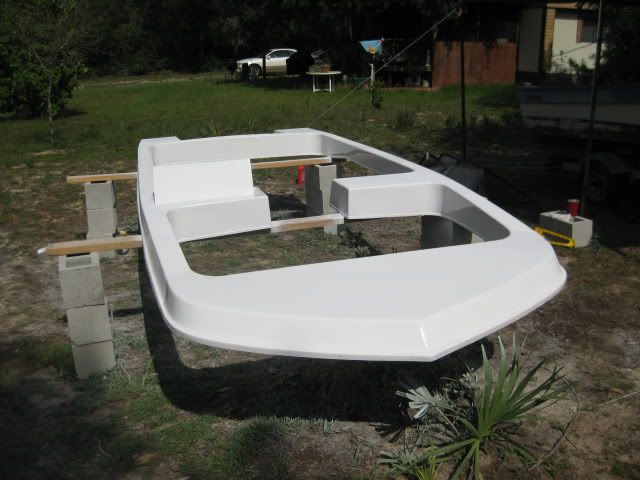
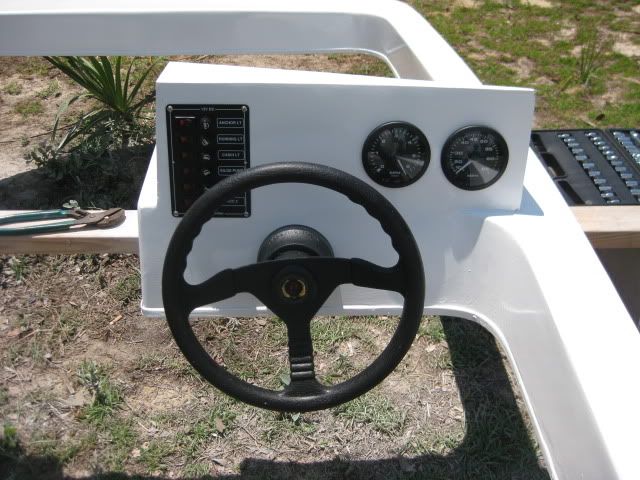
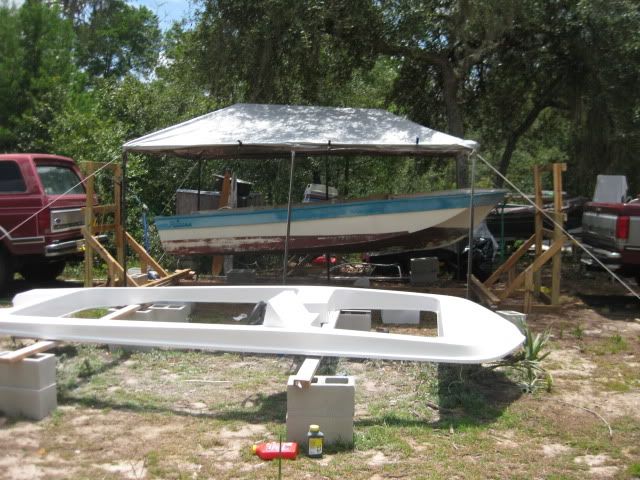
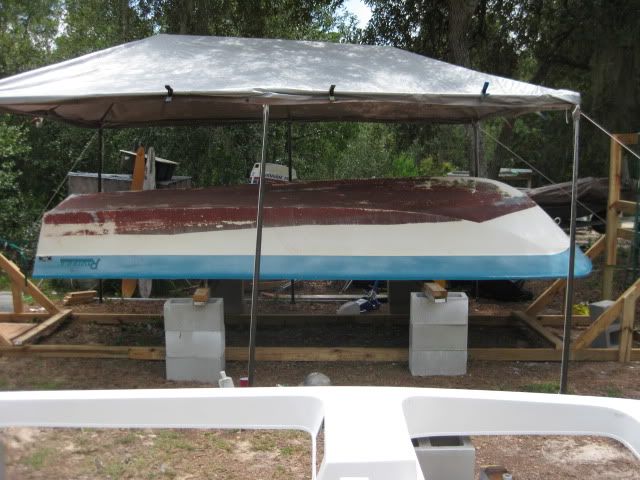
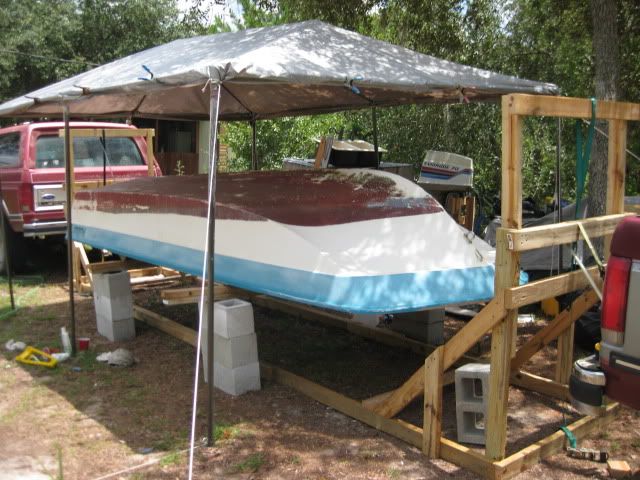
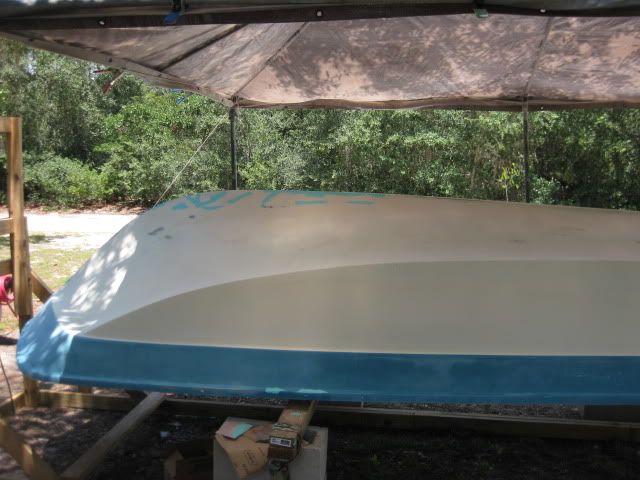
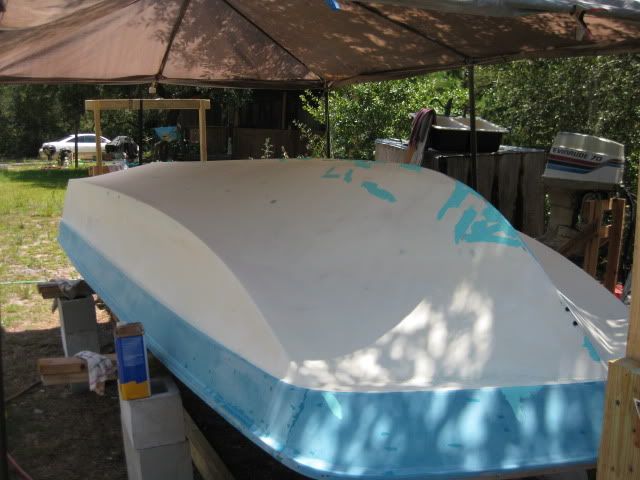
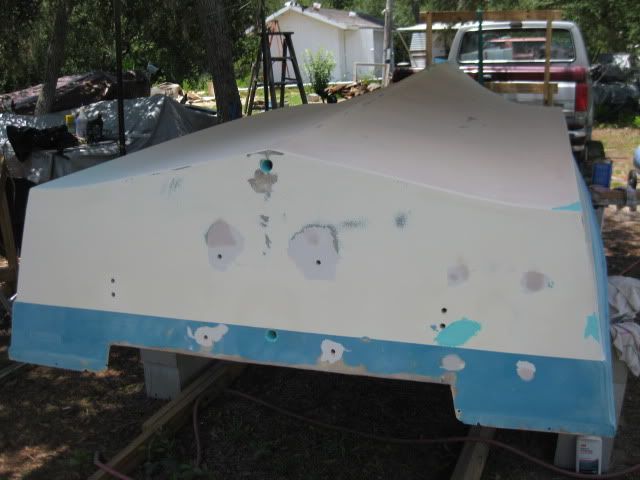
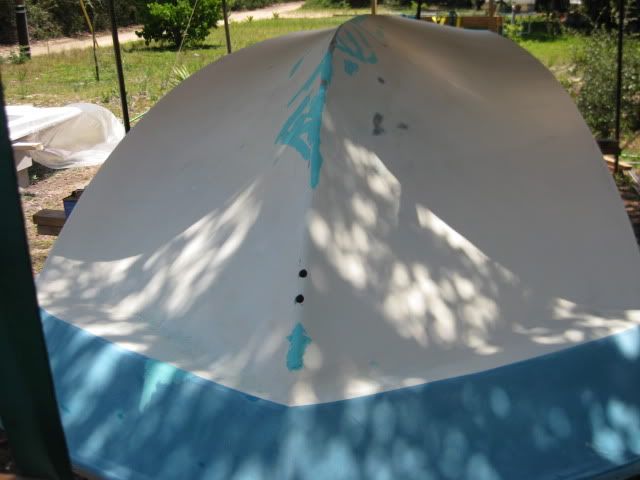
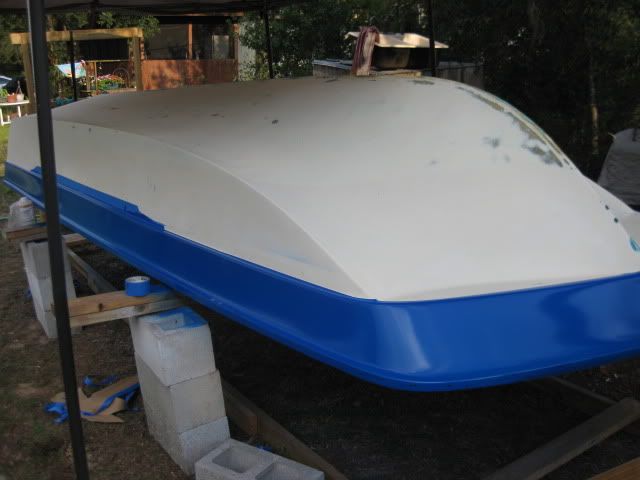
OK now that thats done, and I'm awake from my nap, here comes the rest of the boat rebuild pics up till now! Enjoy
 

Numlaar

Chief Petty Officer
Joined
Jul 9, 2009
Messages
633
Re: My 85' Riviera Tri-hull Rebuild

OK so back to boats!

After the inner hull fiberglass was laid back in and set-up, I had to tape all the seams in, and glass em up.

34gapsfilled2.jpg


35gapsfilled3.jpg


36gapsfilled1.jpg


37overviewinnerhull.jpg


So at this point the hull itself was mostly back to original. Not looking too horrible...

I knew the seams were going to be visible, but I didn't care about that as long as it doesnt come apart... If I had really wanted to do it better, I could have ground down a "channel" of sorts to lay the new seems into, and they would have ended up flush with the old glass, and been less visible, but I didn't want to spend the time doing all that... (I had lost my job, and was trying to get as much done before I completed the purchase on my small business). I only had 2 weeks to try and finish everything...
 

Numlaar

Chief Petty Officer
Joined
Jul 9, 2009
Messages
633
Re: My 85' Riviera Tri-hull Rebuild

Next I built the new piece that would go across the bow, to support the bow deck, and the two side consoles of the cap... basically before, it was two seperate pieces on each side, and the small walk through... all i did was make one big solid piece going across...

This was laid up with glass/resin then tabbed into the hull.

38frontseperationbuilt.jpg
 

Numlaar

Chief Petty Officer
Joined
Jul 9, 2009
Messages
633
Re: My 85' Riviera Tri-hull Rebuild

The next thing I did was to cut out and shape the new bow deck piece...

Shame to cover up such a beautiful piece of plywood, this particular piece had really nice graining to it!

40upperdeckcutout.jpg


Not shown in the picture, this piece was laid up with glass/resin like the rest of the wood on the boat.
 

Numlaar

Chief Petty Officer
Joined
Jul 9, 2009
Messages
633
Re: My 85' Riviera Tri-hull Rebuild

OK the next thing I did was to gel-coat the inside of the bow area... because Once I laid the deck on it, I wouldnt be able to get back in here to do the spraying...

I think it came out really nice!

(I had forgotten I had done this when I mentioned I hadn't sprayed before in my "never again" thread, but I honestly don't remember even how I did it, it was 4 years ago LOL)

Picture looking towards the bow:
39frontunderbowgelcoated1.jpg


Picture looking straight down:
41frontunderbowgelcoated2.jpg


and one from kind of an angle outside the boat:
42frontunderbowgelcoated3.jpg


There was such a HUGE difference in the new white gel-coat compared to the old nasty manilla color the boat was from age! It's so bright, it almost looks kinda gray, but it was definitely white! :)
 

Numlaar

Chief Petty Officer
Joined
Jul 9, 2009
Messages
633
Re: My 85' Riviera Tri-hull Rebuild

I also built in some seat bases...

I got the starboard side one finished. It was going to be longer than the port side, so I split it into two sections. The plan will be to build flip up lids for it to access the storage, and use swivel seat bases/seats on the bases...

I HATE back-to-back seats... all the ones I have ever seen have been vinyl/foam over raw wood, and rot out in a few years, plus I never liked having to turn around backwards to talk to the other seat occupant... I figure this way, the seat bases are sealed in (fiberglass over wood), built in, and should last a lot longer. Plus with swivel seats, everyone can spin around and face whoever they want LOL!

view from bow to stern:
43starboardseatbase3.jpg


View from stern to bow:
44starboardseatbasebuilt.jpg
 

Numlaar

Chief Petty Officer
Joined
Jul 9, 2009
Messages
633
Re: My 85' Riviera Tri-hull Rebuild

OK that pretty much sums up the first "half" of my rebuild...

What you see in the pictures, from the beginning, until above, was done in about 2 weeks, but I worked on it every day for 6-8hours a day to get that much accomplished in that amount of time.

Lots and lots and lots of sanding, itchy dusty mess, but overall, I think up till here its pretty good.

As I mentioned in my Never again thread, What you don't see is the horrible job I did on glassing the bow deck... up until this point, I had been using simple glass cloth weave... I realize in retrospect, it would probably have been better to use more CSM, but the majority of the joints I did, used 2", 4", 6" with the cloth, in 3 layers, so I feel they are pretty strong... the original boat builders, in fact actually only used ONE layer of 2" tape for all their joints, so I'm at least stronger than what they had.

The bow deck, however, I totally fubared... I tried using CSM for the first time, and messed up, the resin started gelling before I could finish, I scrambled to make more, and ended up ruining the whole thing...

At this point, I had to start working at the small business I had bought, and that job was 7 days a week, 12-14 hours a day... so the boat went into storage unfinished, and about like it looks in the last picture (except the bow deck was glassed in).

around 6 weeks ago, I pulled it out of storage, and brought it up here where I am at currently, and went back to work on the rebuild... those pics will be up next! (Need to grab some food real fast LOL, BBIAB).

Num
 

Numlaar

Chief Petty Officer
Joined
Jul 9, 2009
Messages
633
Re: My 85' Riviera Tri-hull Rebuild

Well not getting too much feedback, so I'll guess I'll just keep posting my progress. :)

More pics in a minute!

Num
 

Numlaar

Chief Petty Officer
Joined
Jul 9, 2009
Messages
633
Re: My 85' Riviera Tri-hull Rebuild

Ok ok I kept saying I would continue posting my work, but Its been decent weather so I have been outside working on it quite a bit...

Raining like cats and dogs right now, so I will get back to it!

As I mentioned, all you saw up until this point was done in about 2 weeks while I was between jobs... the new business I had bought consumed ALL my time, so the boat was parked for 4 years....

I dragged it up to where I am at now, and got back to it...

First thing I did was to spend a week sanding down my fubared up casting deck glass job... (as I had mentioned I tried CSM for the first time, and it was a disaster)...

Sorry no pics of that... (too ashamed to show you how bad it really was, plus I didn't take any pictures).

So after the casting deck was sanded back down, and re-glassed and looking halfway decent, I went back to working on my seat bases...

Got the starboard seat base final glassing done, then Gel-coated the inside of it (light gray) and started to build in the cap pieces that would be permenantly fixed (it will end up with a flip up lid to get to the storage).

47starboardseatbasecomplete.jpg


/edit You can also see the casting deck (which is my workbench in the back of the picture) lol
 

Numlaar

Chief Petty Officer
Joined
Jul 9, 2009
Messages
633
Re: My 85' Riviera Tri-hull Rebuild

In the above post you could also sort of see the port side seat bench, here is a better picture:

45portseatbasebuilt.jpg


Also in the above two pictures you can see the two little "wing" type pieces that come off of the step through to the bow, they support the two side consoles for the cap.

While mixing resin to avoid as little waste as possible, I glassed these in with tape as well... (thats how they were installed originally, and you could even see the tape lines from the original manufacturer).

NOTE:
I am not going for super "pretty". If I wanted, I could have taken the time to grind/sand down some channels to lay the tape into so they would appear seemless, but TBH I just want this thing done, I am sick of sanding/grinding, and I didn't see the need to make this part "better" than the original builder had done.
 

Numlaar

Chief Petty Officer
Joined
Jul 9, 2009
Messages
633
Re: My 85' Riviera Tri-hull Rebuild

Here you can see the starboard seat base all "finished" I used Formula 27 to fill the seams, and level it all out, then gel coated it light gray.

Also Gel coated the inside of the port seat base too so its now ready to have the cap built for it.

50AftViewWithBases.jpg


and here is a closer up view of the starboard seat base:

51starboardSeatBase.jpg


All in all, I am pretty happy with how the seat base came out... when the lid is on it, the seam to the side of the hull came out awesome! Almost looks factory.

I had already bought some SS hinges so I will be using those for the install, (I was debating on replacing them with a piano style hinge, we'll just have to see how these hold up).

The port side seat base I did 2 extra layers of glass/resin inside it, so it should be fairly watertight... later on for this one, I plan on plumbing it up so it can double as a recirculating live well.
 

mmccoy555

Petty Officer 2nd Class
Joined
Jun 3, 2009
Messages
131
Re: My 85' Riviera Tri-hull Rebuild

Comin along great. Awesome job! Gonna be a good solid boat. Keep us posted.
 

Numlaar

Chief Petty Officer
Joined
Jul 9, 2009
Messages
633
Re: My 85' Riviera Tri-hull Rebuild

While working on the seat bases (waiting for Resin to cure, gel coat, etc.) I was also working on the underside of the cap.

The cap itself was a bit flimsy IMO Plus where they had glassed in the wood on it to allow for mounting cleats, bow rail, etc. the wood was 1/2" and not sealed.

I decided to do a layer of cloth/resin on the underside of the cap to give it a little extra strength and to seal up all the exposed wood. (luckily it wasn't rotted cause it didn't really have water exposure like in the hull).

Here is a shot of the whole cap:
61completeunderside.jpg


Underside of one of the consoles:
60dashunderside.jpg


Bow:
58bowunderside.jpg


and finally the stern under the splashwell:
59sternunderside.jpg


I also glassed in a piece of wood that ran the entire gunwale length down the starboard side of the cap... I did this so I could have a place to screw in wire mounts to hold my wiring up... previously it was just kind of slopped inside and you could see it hanging down in places... this should alleviate that when its done.


/edit - Also before I did the glass work, I did rough it all up with 80grit and gave it a good acetone bath to allow the new resin to bond well. It seemed to hold very tight
 

Numlaar

Chief Petty Officer
Joined
Jul 9, 2009
Messages
633
Re: My 85' Riviera Tri-hull Rebuild

After the underside of the cap was sealed and reinforced, I flipped the cap back over and began to work on the top side.

First thing I did was to build a new dash piece. The boat had literally no dash to speak of, and no instrumentation at all... it had one old style push/pull switch for the running lights and that was it! (not even a bilge pump or bilge switch).

I built a box out of some of the extra 3/4" I had left over from the transom. (I know a bit of overkill, but I didn't have any 1/2" and my budget is shot, I didn't want to buy a whole sheet of 1/2" to make one little box).

I built the box, fastened it together, then sealed it all in resin. Screwed it onto the top of the old console, filled the seam with formula 27, then glassed over it again.

Here are some pics:

Side view (kinda far i know):
62capsideviewwithdash.jpg


Stern View facing forward:
63capaftviewwithdash.jpg


Bow view facing aft:
64capfrontviewwithdash.jpg


Also note, I cut out the holes for the gauges and switch panel prior to the final glassing job so the wood edges would get sealed up where the holes had been cut.

Also, the dash may be shaped a little funny, but that is because I designed it so that it would sit behind the windshield. I am debating whether or not I even want to put the windshield back on the boat, as it was pretty much useless... it was too low to be any benefit while operating the boat, and the driver's side glass is missing and would need to be replaced... but if I do decide at some point down the road to put it back on, the new dash won't interfere with it! :)
 

Numlaar

Chief Petty Officer
Joined
Jul 9, 2009
Messages
633
Re: My 85' Riviera Tri-hull Rebuild

The next thing I did was to rough up the old gelcoat... it had turned a nice manilla color and was well beyond saving... it had been stored outside, uncovered for at least 10+ years... I tried sanding some down to see if I could get to some "white" gel coat, but I never did before it would sand through to the glass underneath... so I used an automotive style orbital sander with some 220 grit to rough it up a bit, gave it a nice acetone bath, and then shot it with 2 coats of new nice white gel coat.

side view of it after gelcoat:
67sideviewgelled.jpg


Stern view facing the bow:
65aftviewgelled.jpg


and bow view facing aft:
66frontviewgelled.jpg


I still need to sand down the new gel coat to get rid of the "orange peel" effect, and then compound/polish/wax... (I am really not looking forward to that, so for now its going to go together as is). The gel coat hardened up pretty nice, and its not too shabby to look at.
 

Numlaar

Chief Petty Officer
Joined
Jul 9, 2009
Messages
633
Re: My 85' Riviera Tri-hull Rebuild

I went ahead and test fit the gauges, switch panel, and steering... Looks NICE! :)

68completeddash.jpg
 

Numlaar

Chief Petty Officer
Joined
Jul 9, 2009
Messages
633
Re: My 85' Riviera Tri-hull Rebuild

OK now back to the hull...

I decided it was time to start getting the outside of it done...

How to do this though... it has this nasty old bottom paint on it, (two coats in fact, one blue and the one on top of that a kind of redwood brown).

Also, the stripe on the boat is a severely faded, teal/turquoise kind of color and I hate it!!! (Bottom paint too).

And again, the gel coat that is supposed to be white is more of an old manilla color and looks terrible... also no saving it... plus to get the bottom paint off, I am going to need to sand it off or strip it down somehow anyway, so the whole hull will be re-gelcoated back to new.

I had to devise a way to flip the boat over, so I came up with my redneck boat sling/flipper apparatus...

For complete details see this thread:

Redneck boat flip

To keep at least some documentation all in one place, here is a pic of before and after the flip:

Before (hanging in the sling)
72redneckslingside.jpg


After (Side view)
76flippedside.jpg


after (bow view)
77flippedfront.jpg


Once the boat was flipped I used my orbital sander with 120grit to remove the bottom paint, then switched to 220 grit to rough up the rest. (not shown)
 

Numlaar

Chief Petty Officer
Joined
Jul 9, 2009
Messages
633
Re: My 85' Riviera Tri-hull Rebuild

OK as mentioned I had to sand off the old bottom paint, and rough up the old gelcoat...

There were also a number of fairly deep scratches (particularly in the keel area).

I filled all those scratches, and also re-glassed the keel to give it a bit more strength.

Here are some pics of this stage:

79portsideviewsanded.jpg


78sideviewsanded.jpg


80filledcracks.jpg


81filledtransom.jpg


82Keelrepair.jpg


/edit - Also for some reason the PO had installed a second bow eyelet on the boat... I never used it, and it didn't line up with the winch, so I filled it in.

In the back they had also mounted a kicker bracket... I am not sure if I will be re-installing this or not, so better to fill the holes in there as well.

(No point having extra holes in the boat that aren't needed).
 

Numlaar

Chief Petty Officer
Joined
Jul 9, 2009
Messages
633
Re: My 85' Riviera Tri-hull Rebuild

Once all the repair work, and sanding was done, I gave the hull a final acetone bath to make sure there was no residues or any problem for the gel coat...

I could tell from my sanding work, the original builders had shot the whole boat the teal color, then shot the white over the teal... seemed kinda silly to me to spray the whole boat with the non-primary color, so I masked off the white section, and sprayed the new stripe on the boat.

In keeping with the previous colors I didnt want to switch to red or something, but like I said previously, I hated the teal color, so I used neutral gelcoat with the admiral/royal blue coloring agent to give it a nice new bold color for the stripe...

I really really like this color much better!

I did 2 coats for the stripe.

85bluegelcoat.jpg
 

Numlaar

Chief Petty Officer
Joined
Jul 9, 2009
Messages
633
Re: My 85' Riviera Tri-hull Rebuild

So thats where I am at now... what you have seen for this stage of the work (after the boat was brought back out of storage) has taken me about 6 weeks of work, working on it daily for about 4-6 hours a day...

Its the middle of the summer in FL and its just too damn hot to work on it much more than that.

The majority of the time has been sanding sanding sanding and more sanding...

I have never sanded something so much in my whole life, and let's just say I am totally over it!

hehehe

As I mentioned in my never again thread, this will most likely be the only boat I ever restore. Its just way too much time, expense and work.

I have already sprayed the white gelcoat section... I did 3 coats for this (wanted it nice and thick and strong)... but no picture yet... I'll try to get some up soon as the rain stops or tomorrow weather permitting.

I am at the phase now where I have to wet sand the gel coat (220, 320,400, 600, etc.) to get the orange peel off of it. Then it will be ready for the compound/polish/wax and flip it back over!

Hope you guys are enjoying the work/progress up until now!

Peace!

Num
 
Top