Rebuilding Mercruiser 165 - GM 250 I6

Status
Not open for further replies.

ethan169

Petty Officer 2nd Class
Joined
Oct 21, 2012
Messages
137
Thanks Marc and Newbie.

Alldodge - I have adjusted the valves. I was able to slip the pulley on the crank enough to turn it by hand during the adjustment process.

I think I'll end up using a block of wood and a hammer.
 

Mark72233

Ensign
Joined
Jul 11, 2014
Messages
926
Ethan the engine is looking good as far as the balancer goes like AllDodge said I used a rubber mallet and a piece of 2x4 that had one end cut down to let it fit down into the small center hub this dispersed the impact a little. Just ease it on and slowly knock it onto the shaft until its a 1/2 inch or so on. Once its started you are good to wham it all the way home.
 

ethan169

Petty Officer 2nd Class
Joined
Oct 21, 2012
Messages
137
Thanks again for the advice on the balancer install and everything else.

This weekend I got quite a bit done. I installed the balancer (heated the center slightly with a torch and then started it with a rubber mallet then drove it home with a block of wood and a hammer.) The balancer went on a lot easier then I had expected. I also installed the fuel pump, starter, alternator, flywheel, engine coupler, flywheel housing/rear engine mount. front engine mount bracket. I then took the engine off of the stand and mounted it to a larger wooden heavy duty cart that I use around the garage. Its low to the floor and has very larger casters on it.

As for the engine couple I have 2 of them. The one that came out of the boat and the one from the donor 160hp motor. I don't really know the history on either. I was going to use the coupler that was origionally installed but looking at the front of it, it looks like it may have been spun or maybe the alignment was off. You can see the rubber around the spline area is messed up a bit. The back of the couple looks fine and it doesn't appear to have been damaged. I'm thinking its probably fine and the alignment was off putting undue stress on the rubber like that. The splines towards the opening look slightly chewed up too which I would imagine is form poor alignment.

I decided to clean up the other coupler I had and use that one instead. After cleaning it looks like its in better shape. It was just covered in oil and sludge from somoone greasing it and then letting it sit for however many years in the shed of the guy I bought it from.

Here is a pic of the original one that I ended up NOT using.


I didnt get a chance to take a pic of the coupler that I ended up putting on. Ill try to grab one tonight.

All thats left is to repair/rewire some of the electrical harness, install distributor and new points etc, fuel lines, water lines, plugs, plug wires and that's basically it.

As for the points can I use automotive points/condenser from a local parts store? The cap I have may be good or I may just buy a new sierra one. Same with the rotor. The distributor is a marine type but are the internals any different? Same question goes for plug wires. Can I use automotive type? This isn't the type of boat that I would leave in the water for extended periods of time and definitely not salt water so I don't see why it would make a difference.

I plan to try and fire it up this weekend.
 

Alumarine

Captain
Joined
Feb 22, 2005
Messages
3,738
I'm interested in what the experts have to say about your coupler.
Mine looks exactly like yours except my splines are fine.
It's got the same sort of flaky rubber bits in the same spot.
Mine worked just just fine though. Even under heavy loads.

Bt Doctor just mentioned in another thread that you can use 1964 Chevy impala 230 cu in 6 cylinder points, rotor and cap.
Points are Blue-Streak DR2240X
 

alldodge

Moderator
Staff member
Joined
Mar 8, 2009
Messages
42,561
IMO the stuff on the outside is grease and metal shavings. I agree that using the one in the pic would not be a good idea. Appears to have been run some time without any grease in it.

Your can use auto points, and wires without issue so long as wires and long enough. The issue many times is the wires need to be a bit longer so they can reach from under the manifold. Could bring the shortest and longest plug wire with you to the auto store. If they come close, they should work

Marine distributer has not vacuum advance, it's all done with fly weights inside the distributer
 

ethan169

Petty Officer 2nd Class
Joined
Oct 21, 2012
Messages
137
It does look like grease in the picture but it isn't soft at all and I cant really remove it short of cutting it off. It seems like its rubber material.

Here is a pic of the coupler I ended up using. It looks dirty in the picture as does the flywheel housing but its not really. I had to use the flash since it was later and the fluorescent lights in the shop take a while to warm up.


Thanks for the equivalent model and part numbers on the ignition parts Marc.

I have some 20% off coupons for some local parts stores so I think Ill get the points, cap, rotor and wires from them. I'll check the wire lengths before I buy but its a straight shot for these if I recall. Since the plugs are on the opposite side of the head from the manifold. I know what you mean about the exhaust manifold getting in the way though. My other boat has a merc 260 in it and its a pain even to get a socket in there to get the plugs out. I took a plug socket and turned it down quite a bit on a lathe to make it easier.

Here's some pictures of the engine as it sits on the stand that Ill use to run it. I'm mocking up the harness and working on replacing a few wires so dont mind the hanging wires etc.

[URL=http://s644.photobucket.com/user/ethan169/media/Boat/IMG_20160307_221340_zps5yyrbea3.jpg.html]
[/URL]
 

Mark72233

Ensign
Joined
Jul 11, 2014
Messages
926
That coupler looks good. One of the other couplers I had looked like that other one you had and after looking at everything it appeared that the donor boat it came out of they had the engine height adjusted wrong so it tweaked the heck out of the coupler and destroyed it so I think it's a good idea not to use the other one. The stand and engine look good. Can't wait to see it fired up.
 

ethan169

Petty Officer 2nd Class
Joined
Oct 21, 2012
Messages
137
That coupler looks good. One of the other couplers I had looked like that other one you had and after looking at everything it appeared that the donor boat it came out of they had the engine height adjusted wrong so it tweaked the heck out of the coupler and destroyed it so I think it's a good idea not to use the other one. The stand and engine look good. Can't wait to see it fired up.


I agree Mark. I'm not sure about how the engine sits in the boat but when I put it on the stand I noticed the front was much higher then the back. I had to shim the rear up a bit to make it level. I didn't think much of it as I'm not using the same rear mounting location that is used when its in the boat. Either way I wouldn't be surprised if the motor was not aligned properly. The gimbal bearing was also in rough shape but who knows how long its been in there.
 

Mark72233

Ensign
Joined
Jul 11, 2014
Messages
926
Yes the gimbal bearing on that engine was also completely fried which is what caused me to take a close look at the coupler and sure enough fried also. You will tweak the front mount once you install the engine into the boat. The final tweaks are once you install the alignment tool and get it where it comes in and out smoothly and easily leaving even spline marks on the grease at the end of the alignment tool.
 

FreeBeeTony

Captain
Joined
May 15, 2002
Messages
3,991
Just wanted to say looks great..........
​Reminds me when I rebuilt my IL6.....should run like a clock when you're done.
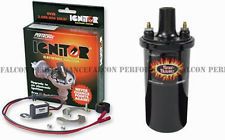
Didn't read the entire post but I would recommend the Pertronix upgrade in the points area of the ignition.
 

Mark72233

Ensign
Joined
Jul 11, 2014
Messages
926
Ethan I didn't mention it from your earlier post about the ignition. I agree with FreeBee I switched over to Pertronix on both of my engines. A bit pricey but so far I like. No more points or condenser.
 

ethan169

Petty Officer 2nd Class
Joined
Oct 21, 2012
Messages
137
id you order the pertronix through them or some other vendor like summit jegs etc? Its an electronic conversion or a whole new distributor? I'm trying to determine what pricey really is. If its under $100 I'd probably be interested since its basically a drop in the bucket at this point. I have already purchased the points and condenser and installed them. But it was like $15 for the set. Same with the cap and rotor. I think with the speed perks coupons and online discounts I got away for under $30 for points/condenser/cap and rotor. Not bad. Where did you get yours from? Mark? FreeBee? Every time I mention electronic ignition to the "old school" guys that I work with I always get the "oh but if you electronic ignition fails in the middle of lake your dead in the water. With points you can at least limp home." I really do hear this all the time. Whats interesting to me is that up until now I've never had a vehicle/vessel with points type ignition. I'm even ashamed to say that when I first opened this distributor up I didn't really know what I was looking at. I had heard of points before but never had to deal with it so I never really learned. In addition I've have literally never had an ignition module/distributor fail on me to the point where I couldn't get home or to a safe location. Especially on my boat.

So I guess If I can pick up the electronic ignition conversion without spending over $100 then I'll probably do it.

My plan is to try and get this motor started this weekend. Any suggestions on how to go about this? Like what type of oil should I use for the first run? Does it matter? I figure plain 10w30 or whatever the manual calls for is good. The cam and crank are used but the bearings and pistons/bores/rings etc are all obviously new. Is there a proper break in procedure? I'd like to run the engine on the stand for at least an hour all together. I want to dial in the timing and check for leaks etc. It will need to get up to temp and have the tstat open up so I get water flowing through the head and block. I also want to keep a close eye on the manifold and exhaust elbow. They look to be in good shape but all I was able to do was a visual inspection. With mirror and lights etc. I don't wan't to ruin this engine that I just dumped way too much money into. Im going to have fresh fuel of course and a new filter on the fuel pump as well. Im thinking of putting the oil in the engine and then priming the oil pump with a drill/flat blade with the distributor out. I'f I can get ahold of a pressure guage I'll most likely connect it and check pressure as well..

Any thing else I'm missing?
 

Fishermark

Vice Admiral
Joined
Oct 19, 2003
Messages
5,617
My plan is to try and get this motor started this weekend. Any suggestions on how to go about this? Like what type of oil should I use for the first run? Does it matter? I figure plain 10w30 or whatever the manual calls for is good. The cam and crank are used but the bearings and pistons/bores/rings etc are all obviously new. Is there a proper break in procedure? I'd like to run the engine on the stand for at least an hour all together...

Do a little research on break in procedures. You do not want to simply idle the engine while you are running it on the stand. The rings need a load to set properly. So "goose" the throttle a few times and vary your rpms.
 

Fishermark

Vice Admiral
Joined
Oct 19, 2003
Messages
5,617
id you order the pertronix through them or some other vendor like summit jegs etc? Its an electronic conversion or a whole new distributor? I'm trying to determine what pricey really is. If its under $100 I'd probably be interested since its basically a drop in the bucket at this point. I have already purchased the points and condenser and installed them. But it was like $15 for the set. Same with the cap and rotor. I think with the speed perks coupons and online discounts I got away for under $30 for points/condenser/cap and rotor. Not bad. Where did you get yours from? Mark? FreeBee? Every time I mention electronic ignition to the "old school" guys that I work with I always get the "oh but if you electronic ignition fails in the middle of lake your dead in the water. With points you can at least limp home." I really do hear this all the time. ...

If you decide to go with electronic conversion, I highly recommend the Pertronix II (part #91163A). I too have never had one fail. (I HAVE had problems with the "hotspark" brand which is much cheaper). Shop around and you can find a kit for around $100.

I know the old timers like to say that points never left them stranded.... the good news? You are replacing the points plate - as you can see in the image below. You can always keep your original points and condenser on the original plate and keep it for a spare. Easy to change out if necessary.

pnx-91163a_ml.jpg
 

Mark72233

Ensign
Joined
Jul 11, 2014
Messages
926
ethan I missed your post about the Pertronix cost. I bought 2 and they were $132 each. It was the set that included the coil since mine were both looking pretty ragged. I got them off of ebay. Pertronix Ignitor+Coil Mercruiser 6 CYL 140 150 160 165 200 w/Delco Distributor


ethan169

Petty Officer 2nd Class
Joined
Oct 21, 2012
Messages
137
Fishermark - good call on the engine break in procedures research. I looked into it and there are so many opinions on this. I'm not really sure what I will be able to do on the engine stand short of just varrying the RPM manually or setting the idle to 1-2k rpm. Any suggestions on what to do during the initial start ups? I don't have a way of putting a real load on it unless its in the water.

Mark and Fishermark - thanks for the info on the electronic ignition. Right now I have a fresh set of points and a new condenser/cap/rotor/wires/ spark plugs for my ignition setup. The points were cheap. I think Ill get it running well with these and then consider the electronic ignition after.

This weekend I spent some time and get everything wired up and basically ready to go. I got some fresh fuel lines to get those setup as well.

It took me a little while to figure out how to wire the coil. The coil I have is a mercruiser coil that appears to be good when putting an ohmmeter across it. It says to use an external resistor with it as well. I found a resistor in my box of stuff that came off of the engine that came with the boat. Its has two blade connectors on it and there was a yellow wire with two spade/blade recievers (one on each end). I didn't see where this used to go or where it was supposed to go. I looked at the schematic I have from the mercruiser manual and it basically shows a resistance "wire" in series with the 12v switched and the coil. On the coil side is the 12v power and a wire that goes to the starter slave solenoid. Prior to the resistor is a wire that looks like it goes to an internal regulator on the alternator. I added the resistor in the circuit as it is shown on the wiring schematic. I figure it cant hurt. However it does bother me that I can see to remember or figure out where it was supposed to go. I don't see it anywhere on my pictures either. You guys that have the 165's, where was your resistor located? Did you use one?

I had to replace the wire that went between the coil and the starter slave solenoid ( the one that is on the rear flywheel cover/mount not the starter solenoid itself). It was all melted at the ends. I'm not sure why or what caused this though. Obviously there was too much current flowing through it. Was it a short somewhere or was something else failing? The starter seemed to work fine when I first got the boat since I did the compression test with it. After replacing that wire and a few other ends I have hooked everything back up and the starter and accessory seems to work correctly. I turned the engine over a few times with the starter just to see.

I bought a mechanical oil pressure gauge so I can manually prime the engine and not relay on an old gauge or an old oil pressure sender. I have the engine hooked up to the harness on the boat. for whatever reason the harness plug wires are very long and can reach out of the boat and about 5' back to the motor on the stand. This way I can use the dash for control and gauges. I dont have an oil pressure or water temperature gauge though. Just warning lights. I do have 2 blank gauge openings where I plan to add them though.

Anyway before I put the distributor in I primed the oil pump by hand with a flat blade tip on a ratchet wrench with a long extension and turned it by hand. I was able to get the pressure to about 40-45psi on my new gauge. I could see oil seeping out of one of the push rods through the valve cover. I plan to prime it one more time before I actually start the thing as well.

I went to turn on my hose that was piped right into the t-stat housing like it would be in the boat and Once the block and manifold filled up with water I found a pretty big leak on the manifold end cap. The one that is just a flat plate was leaking pretty bad. The gaskets that I got said to not use any sealant so I didn't. they didn't seal too well so I added some high temp sealant to the one gasket and mounted the plate back on. I let it sit last night and will give this another go tonight.

I'll try to grab some pics or a video if I can.
 

ethan169

Petty Officer 2nd Class
Joined
Oct 21, 2012
Messages
137
Update

I have a few issues that I've found.

First off it looks like i have a small crack in my manifold on the outside towards the bottom. I ran some water through the engine to looks for any leaks and I found a few gaskets and hoses that needed to be tightened and what not. I left some water in there overnight and the next day I saw a small amount of water on my engine stand and above it was the manifold. It was just slightly damp. I dried it and it kind of seeped out and got wet again. Great.... Looks like Ill need to either try to repair this one or find a new one.

I also seem to have a bad ignition coil, Or a weak one anyway. I do get a spark from it but it seems weak I guess. I swapped it out with the MSD Blaster coil that is on the 350 in my other boat. I go to tighten the positive post down and the post breaks! Great, now I need 2 coils! I measured the resistance of the primary winding between the + and - on my old mercruiser coil and I get about 1.4 ohms. From the secondary coil tower to either of the smaller posts I get like 10.4k ohm. From my understanding the primary should be less then 1 ohm, Something like 0.4 to 0.8 ohm? I measured the MSD coil and I get 0.7ohm on the primary and 5k on the secondary coil tower to the small post. This coil came from a good running engine until I broke the threaded post. What is the proper way to test a coil? I've looked through the manual flow chart and it is a bit confusing to me.

I tried starting the engine the way it was. I first primed the oil pump by hand and was able to build 40-50psi on the mechanical gauge (brand new). I reinstalled the distributor and kept the msd coil in the ignition setup. I kept the distributor wire disconnected and cranked the engine over with the starter for a few times. I was building about 40psi oil pressure with the starter. After all of this I connected the distributor wire and tried to see if it would fire. After a getting the fuel pump primed and fuel to the carb I would get a pop and a puff a smoke coming from the carb. I didnt really notice any flame but its hard to tell since the choke was still open. It looks like fuel is getting to the carb ok. When I actuate the throttle I see fuel seep out right above the venturi cluster (I think). Is this right? I also had to replace both idle mixture screws and they are slightly different then the original. It was the closes needle I could find at Mikes Carburetor parts.

what should I check here? I dont want to harm anything since Ive already put so much money into this engine alone.

Also anyone with Mercruiser 165 parts have a good manifold they want to sell?

Ethan
 

alldodge

Moderator
Staff member
Joined
Mar 8, 2009
Messages
42,561
Puff out the carb while cranking means it's out of time. Need to crank and slowly turn the distributer a bit one way then the other until it fires up. That said, so long as you have the firing order correct
 
Status
Not open for further replies.
Top