2001 Yar-Craft 1895 Storm Cap-Off Rebuild

Slager

Petty Officer 2nd Class
Joined
Apr 30, 2014
Messages
189
Thanks for chiming in. It's actually beside the stringer, just above the gas tank deck. There seems to be a thin layer of csm over the tabbing there. I'll probably grind a little more off in the next couple days. I think I'm getting close!

I'm planning on leaving some of the original tabbing that is in good condition after taking the top layer off, unless there is a reason not too?

I'll post some more pics in a couple days after more of grinding and cleanup.
 

Slager

Petty Officer 2nd Class
Joined
Apr 30, 2014
Messages
189
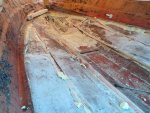
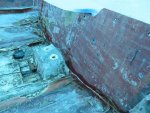
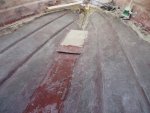
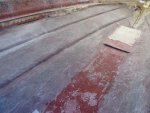
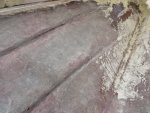
Grinding update in pictures...
Before:
IMG_0854_1.jpg

IMG_0857_1.jpg

After:
IMG_0862_1.jpg

IMG_0863_1.jpg

IMG_0864_1.jpg

IMG_0867_1.jpg

IMG_0872_1.jpg

IMG_0876_1.jpg


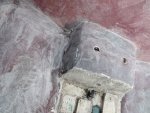
A couple places I ground all the way through:
IMG_0878_1.jpg

IMG_0881_1.jpg


I still need to get the Dremel tool out to get the corners around the transom. See anything else I should be concerned about?
 
Last edited:

Slager

Petty Officer 2nd Class
Joined
Apr 30, 2014
Messages
189
Progress,.......

I'm looking forward to this,....


Me too! It's going to be hard waiting through winter and not being able to work on it. But I don't have garage space or the budget to rent a heated space, so it will have to wait. I would love to be able to use it for part of the year next year. The fall walleye bite is just getting going on Erie and Saginaw bay, but I have to wait for the very best weather to take my little tinny out. Maybe next year will be different!
 

Slager

Petty Officer 2nd Class
Joined
Apr 30, 2014
Messages
189
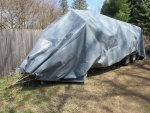
I brought the boat back to my house. I ordered some marine treated and dried plywood from a local lumber yard and it should be delivered shortly. It was a bit pricey, but I like knowing if it ever gets some water exposure it won't immediately start rotting. Work should start shortly. I'll be going pretty slow to start because the weather is still not the greatest.


I also am getting ready to order my fiber-glassing materials. Has anyone used the resin from fiberglass supply dpot? I'm considering ordering from there. based on their description, I think the resin they sell is a iso-dcpd blend. Is that good? They say it is low profile and dries to the touch without using any wax. Is that comparable to the stuff us compossites sells?


Here is the "boat cave" I'll be working in. It is dark under there. I have a little touch up grinding to do and then I'll be ready to start putting some structure back in. IMG_0954_zpseuemaudd.jpg
 
Last edited:

Slager

Petty Officer 2nd Class
Joined
Apr 30, 2014
Messages
189
Today I was working on making a template for the transom out of cardboard. Should I go back just like original, or add some wings to make the transom connect with the sides of the boat? I'm also thinking about any other ways to increase the strength of the transom a little. I believe the manufacturer recommended that jack plates not be used, but I currently have the engine on a jack plate that gives about 5.5 inches of setback. Add in the kicker engine and there is about 600 lbs total on the transom.

So, I could add wings, I could add a third layer of 1708 to the inside (I was planning on at least 2 layers), or I could add some knee braces. Any idea which will give me the best improvement in strength for the effort/cost?

I'm paranoid about this because my dad had one of these same model year boats have the transom crack when the boat came out of the water on Lake Erie, it was about 15 years old at the time and had been stored inside. And it isn't that uncommon to have the boat come out of the water from a rogue wave once in a while when running across Lake Erie chop.

Here is the template for original:
20170409_140724_zpshliswylk.jpg

And here is where I'm thinking about adding wings:
20170409_140911_zpsbiccdd4o.jpg
 
Last edited:

Slager

Petty Officer 2nd Class
Joined
Apr 30, 2014
Messages
189
The original stringers and bulkheads were interlocking with each cut halfway through so they would fit together like a puzzle piece. Anyone have any input on the relative difficulty of making the replacements interlocking, vs putting in the stringers and then putting the bulkheads between them? It seams the bulkheads and stringer wood would be easier to keep isolated from each other if I don't make them interlocking, but it could result in less strength?
 

kcassells

Fleet Admiral
Joined
Oct 16, 2012
Messages
8,738
You will hear put it back like it was.... But yes you can do exactly as you stated without issue. Just the fact that you are putting back together better than factory overides the issue.
 

Slager

Petty Officer 2nd Class
Joined
Apr 30, 2014
Messages
189
I got the transom rough cut and laminated together. I still need to trim it a little, but it is almost done. I decided not to add the wings. I'm probably just going to add some transom knees and maybe an extra layer of 1708.

For now I'm going to continue working on cutting the wood to fit. I hope to have my glass and resin by the weekend.

20170417_142950_zpsrmiywkkg.jpg
 
Last edited:

Woodonglass

Supreme Mariner
Joined
Dec 29, 2009
Messages
25,929
Yup, Butt joints for Bulkheads to Stringers with ample filleting will yield a Very Strong structure!!!
 

Slager

Petty Officer 2nd Class
Joined
Apr 30, 2014
Messages
189
Thanks Woodonglass.

Not much progress to show right now. I have just been measuring stringer height about every 3" and that is almost done. I hope to get the stringers cut this weekend. It looks like my fiberglass and resin won't be here until next week.

I'm thinking ahead. For clamping the transom, is there an advantage to making and using large clamps? I was thinking of predrilling the motor mount bolt holes and the splash well drain holes and putting some bolts through backed by 2x4s on inside and outside. Is there a reason to use one method instead of the other?
 

Woodonglass

Supreme Mariner
Joined
Dec 29, 2009
Messages
25,929
You can usually get good clamping pressure thru the outdrive keyhole and then clamp the top edge with C-Clamps. Also if you drill the Tow Eye holes you can get additional clamps on the sides as well. Building the Transom Clamps is somewhat beneficial due to the ability to apply equal pressure from top to bottom. Totally up to the builder.
 

Slager

Petty Officer 2nd Class
Joined
Apr 30, 2014
Messages
189
Time for a progress update. I got the stringers cut and I'm in the process of joining them together. I'm doing a but joint with a single 3/4" sister using epoxy to glue them together. On the big stringers, I overlapped the joint by about 24" and on the small stringers it'll be about 18". It has been pretty cold here lately, so I used some foam sheets to make a heat box. I places a small 250 w halogen lamp in it to provide heat so the epoxy will cure. I was originally planning on using the batteries to clamp both stringers at the same time, but I wasn't satisfied with the amount of epoxy squeezing out around the edges, so transferred them to one and used screws to clamp the other one which seemed to work. I used 1 5/8" screws so I may need to grind off the tips. The Temps in my heat box have only been around 60 degrees, so I left them alone 48 hours to cure.

20170501_144401_zpsilj7l8ed.jpg

20170502_143405_zpsx6pdjbho.jpg
20170502_143724_zpswe6igusb.jpg
 
Last edited:

Slager

Petty Officer 2nd Class
Joined
Apr 30, 2014
Messages
189
I got the transom installed today. It was close to a disaster, but I got it done adequately. I decided to make the large transom clamps, and I had a couple of the top glued nuts pop out and one of the bottom ones was just pulling into the 2x4. I guess I didn't use enough epoxy to hold them in place. They worked well during the dry run yesterday, but I probably wasn't as gentle to then today because of being in a hurry. I was able to hammer a wedge into the top of them which applied a suitable amount of pressure. By the time I had that under control, the extra pb had gelled, and the excess resin that oozed out was gelling. So I used a straight razor to trim anything that looked like it would cause a problem and then let it cure. I had a small amount of resin come out the edges, but there wasn't enough for the fillets. I used 2 L of resin.

I remembered to take a photo after removing a couple of the clamps. Sorry about it being a little blurry.
20170512_140448_zpsdivy3jax.jpg
 
Last edited:

kcassells

Fleet Admiral
Joined
Oct 16, 2012
Messages
8,738
Hey nice work. The transom etc. sure can get unnerving. Hope it turns out fine. Keep it up.
 

Slager

Petty Officer 2nd Class
Joined
Apr 30, 2014
Messages
189
Last night I fileted the transom. Today, I decided to try laying some glass down. I decided tab in the transom with a first layer of 1.5 Oz csm, I'll tab with 1708 next.

I had a real hard time getting the glass to lay down on some of the complex corners. Every time I tried to get it to lay down it just kept getting bunched up more. Anyone have any suggestions? I'm guessing I need to grind out the lifted glass and fill with more PB, of some more csm? Any suggestions for getting the 1708 to lay down there?

Fillets
20170512_205608_zpsgelktgwx.jpg

Tabbing
20170513_143442_zpsxzghqz7u.jpg
20170513_143341_zps1qyjpb24.jpg
20170513_143331_zpsqe46pa5a.jpg20170513_143431_zpsvtjt8gdd.jpg
 
Last edited:

Slager

Petty Officer 2nd Class
Joined
Apr 30, 2014
Messages
189
One more question should I grind every place there's a small bubble, or is there a bubble size small enough to leave?
 

kcassells

Fleet Admiral
Joined
Oct 16, 2012
Messages
8,738
1708 already has 8oz backing built into it. No need for anything else. May work easier for you. Bubbles in a possible wet area are not real good.
 

Slager

Petty Officer 2nd Class
Joined
Apr 30, 2014
Messages
189
I ground out the corners, and ended up grinding out quite a bit of the filets, so I mixed up another batch of peanut butter and redid them. I also filled some more around some of the more complex geometry. I had a hard time getting it smooth. I read up a bunch of threads and realized I was adding too much 1/4 fibers, so I will hopefully have better filets in the future. It was pretty lumpy. I was using a spoon to make them, but the peanut butter kept sticking to it. After it was hard, I used a 2" pvc pipe with 40 grit sandpaper to smother it out. I also got a 1/2x18 in band file belt sander from harbour freight to make smoothing out the tight corners easier. Today I did the 1708 tabbing on the bottom of the transom. Based on reading some of Ondarvr's posts, I did two over lapping layers at one time, but I ran out of time before I could do the rest of the transom tabbing.

20170515_202501_zps5zgw4lmm.jpg
20170515_202510_zps4flfu5zu.jpg
20170515_202452_zpskob5oj6j.jpg~original.jpg
 
Last edited:
Top