


SouthCarolina1
Petty Officer 2nd Class
- Joined
- Jun 17, 2013
- Messages
- 169
Little backgound: I have a 1989 Yamaha 115HP 2 stroke outboard, model 115ETLF. I got the motor, all the controls, gauges, etc for $300. The motor ran, pissed water, stayed cool, motor does not have a scratch on it but it had a slight knock and low compression on the #4 cylinder (92 psi). The other three cylinders had compression at 127 +/- 2 psi. Due to the condition of the motor I decided to rebuild it. I took the block off and striped it apart. I found that the #4 cylinder tie rod to crank shaft bearing was going bad and one o ring on the #4 cylinder was cracked and in two pieces. One of the bolts holding the #4 tie rod assembly to the crankshaft was loose and able to unscrew by hand. Based on my findings, I belive that one bolt became loose and caused the bearing around the crank shaft to fail. I had the piston sleeves miked and all are within the tolerance (referencing the yamaha service manual), crank shaft measured and is within tolerance, but two out of the four piston heads were below tolerance. Reed valves look brand new! Every measurement the service manual calls out I am inspecting.
I am trying to do the bare minimum for the rebuild but at the same time doing it right (walking the line, I know). For example I took the whole exhaust cover assemby off instead of breaking the outer and inner exhaust cover apart. So anything that does not need taken apart I am not breaking down. (If something should be taken and inspected please correct me)
I bought 4 new pistons, new tie rod (the #4 tie rod had damage from the bad bearing, reusing the other 3), where gaskets are required new gaskets, yamabond 6 for the rest, new rod bearings, o rings, etc. I pretty much know how to re-assemble the motor and I also took a video when I took it apart to reference if needed. (Gopro mounted to my head)
I have the official yamaha service manual, I am following it to the letter the best I can.
My questions:
1: When I am putting it back together how do I make sure the timing is right (or atleast in the ballpark)? I marked the stator and everything so I know which direction everything goes back together. If I reassemble everything back right will the timing be off? Is there any precautions I can take? Or is it inevitable that the timing will be off and I will have to re-adjust it? Right now I am under the assumption due the to fact that it is a 2 stroke, as long as I re-assemble correctly the timing will be right.
2: The upper bearing assembly has two o rings and an oil seal. If I replace the o rings and oil seal, can I re-use the bearing? I cleaned it, spun all the pins, and inspected the best I could without pressing the bearing out. I did not find any visible damage, bearings tight, and the bearing spins smoothly.
3: The bottom bearing is pressed onto crank shaft. Without removing the bearing from the crank shaft, I cleaned the bearing, spun the balls, and inspected. I did not find any visible damage, its tight, and does not wiggle, and the bearing spins smoothly. Can I re-use this bearing?
4: I am installing new bolts for the tie rod bases that hold it to the crankshaft. The bolts for the head covers, should I replace or re-use? The bolts for installing the two crank case halfs together, can I re-use these? What other bolts should I replace instead of re-using?
I included some pictures.
Attachments
-
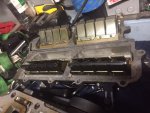 photo266973.JPG118.8 KB · Views: 0
 -
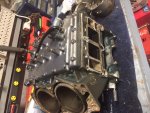 photo266974.JPG140 KB · Views: 0
 -
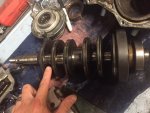 photo266975.JPG117.4 KB · Views: 0
 -
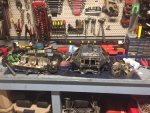 photo266976.JPG155.3 KB · Views: 0
 -
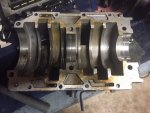 photo266977.JPG112.7 KB · Views: 0
 -
 photo266978.JPG99 KB · Views: 0
 -
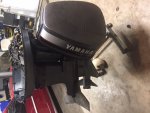 photo266979.JPG98.3 KB · Views: 0
 -
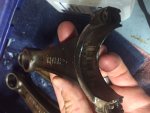 photo266980.JPG91.3 KB · Views: 0
 -
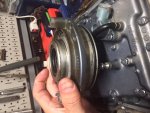 photo266981.JPG115.5 KB · Views: 0
 -
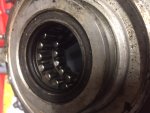 photo266982.JPG94.9 KB · Views: 0
 -
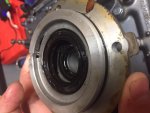 photo266983.JPG93 KB · Views: 0
 -
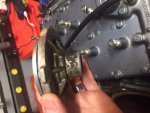 photo266984.JPG100.8 KB · Views: 0
 -
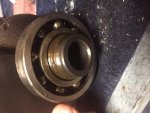 photo266985.JPG108 KB · Views: 0
 -
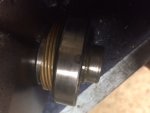 photo266986.JPG61 KB · Views: 0
 -
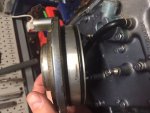 photo266987.JPG91.5 KB · Views: 0