1966 Starcraft Holiday Engine Repower

66Holiday924

Chief Petty Officer
Joined
Aug 21, 2017
Messages
586
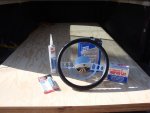
Watermann , That MarineTex is one of the more expensive items on my shopping list. I saw on their website that it has a shelf life of 2 years, So I'm only interested in purchasing what I'll need for my project. I am going to butter the back of my transom like you did the Chief. Do you recall how much you used to do that? I'm definitely going to buy it and spread it around so it will fill any pitting even if I don't see it.
 

Watermann

Starmada Splash of the Year 2014
Joined
Jan 12, 2013
Messages
13,822
I bought the size they call the kit that has the can of resin and jar of catalyst. It goes a long ways when spread on just enough to fill the pitting.

da2a8d0c-9079-4e71-bbb9-a9f5a226f3a6_1.ff8074b219af85de1214e137800502f3.jpeg
 

SHSU

Lieutenant Junior+Starmada Splash Of The Year 2019
Joined
Mar 8, 2017
Messages
1,751
SHSU thanks for stopping by! It will be a fun project when the weather breaks and I can start actually getting something done. Until then, I have to rely on reading threads on iboats to manage the "fever".

I'm considering removing the z-bar on my transom to clean up underneath it. I'm hoping my transom job will be good enough to last 2 or 3 decades. I figure if that's the case I should probably be thorough and address any corrosion that might be under there. Watermann posted a link to his very helpful sticky note about rivets, so I'm feeling good about what needs to happen. I will have to buy all of the tools involved. I will replace solid rivets where there were solid rivets, as Bondo suggested I do.

In your thread I was just asking how it went for you. I assume you're just some "dude" like me who doesn't rivet every day and was wondering how it went, especially with recruiting the Admiral to do the bucking.

Ah, that makes sense. All I can say is spend the money to get a real rivet gun. I tried a HF impact hammer, an Amazon Rivet gun, and a true Air craft grade. Defiantly spend the money on a good rivet gun (Around $100 used from Airplane stores/sites). Will make life a lot easier
 

66Holiday924

Chief Petty Officer
Joined
Aug 21, 2017
Messages
586
Some more goodies. I'm getting a little over 2" for my nominal thickness. two 3/4" sheets and one 1/2" sheet. It's Marine grade Douglas Fir.
 

Attachments

  • photo284942.jpg
    photo284942.jpg
    128.5 KB · Views: 1
Last edited:

66Holiday924

Chief Petty Officer
Joined
Aug 21, 2017
Messages
586
Nice looking ply, bet that was a bit spendy.

I'm not sure what normal cost is for Marine Grade plywood. I called 5 different vendors and this was the cheapest I could find here in Northeast Ohio. It was about $90/sheet for the 3/4" and $80 for the 1/2". It's definitely the most expensive plywood I've ever bought. I don't work with wood and I don't know much about it. During my search I learned that Marine Grade plywood is constructed using waterproof glue and a species of wood that naturally resists rot, usually a species that grows near water somewhere. The Douglas Fir is from your neck of the woods (the Pacific Northwest). It's a little heavier than some of the other species. Oh well... Understanding what exactly the wood is and why it is recommended for this application makes me feel ok with spending the money.

I shouldn't have to use very much of the 1/2"... It won't hurt to have it lying around. It will get used. I'm already considering rebuilding my dash. I want to rework it a little and get rid of as much as I can. The trim control will be on my new throttle control and the steering wheel has a horn button which allows me to eliminate that stuff from my dash. Does anybody know the rough dimensions of what my horse collar should be?
 
Last edited:

Watermann

Starmada Splash of the Year 2014
Joined
Jan 12, 2013
Messages
13,822
You'll just have to duplicate the existing collar. The toughest part for me was cutting in the beveled steering arm cutout in the transom wood.
 

66Holiday924

Chief Petty Officer
Joined
Aug 21, 2017
Messages
586
You'll just have to duplicate the existing collar. The toughest part for me was cutting in the beveled steering arm cutout in the transom wood.

I'm repowering with the engine from the Thompson. It's a glasser and I don't think it has a horse collar. The gimbal assembly that I have is pretty different from what I am going to install. I suppose I could take measurements from the Thompson's gimbal assembly and give it an extra 3 or 4 inches around it. Is that enough? How much wood do you have sticking out on the sides of your horse collar?
 

Watermann

Starmada Splash of the Year 2014
Joined
Jan 12, 2013
Messages
13,822
Yeah my A1 donor was from a glasser and the horse collar was glassed in too. Mine had a different keyhole as well. You'll have to add a half inch around the outer edge of the inner assembly is all.
 

66Holiday924

Chief Petty Officer
Joined
Aug 21, 2017
Messages
586
I'm just building a new transom and installing. The mechanic who will be installing the new engine is going to cut the new keyhole, into the installed transom. All I have to worry about is that the horse collar is centered where it needs to be and that the dimensions are enough for the new assembly.

I don't have any of the necessary tools, shop, knowledge etc. to install a boat engine and I don't know anybody who does. So, I have a good shop lined up to do that part. They want it in the winter, so that means no boat this season... This summer my plan is to rebuild my transom, have the new engine and outdrive gone over, probably rebuild my dash, and maybe re-do my floor. I'm only redoing the floor if I can afford to do it with Coosa Board and install a fuel tank in the belly. Having this new boat cover opens up the possibility for me to work on it during the winter, next year.
 

66Holiday924

Chief Petty Officer
Joined
Aug 21, 2017
Messages
586
Is there anything special to know about removing my old Gimbal Assembly? It is for the A-1 model outdrive. I guess that makes it an MC-1 model gimbal?
 

Watermann

Starmada Splash of the Year 2014
Joined
Jan 12, 2013
Messages
13,822
Being a 66 it's the old MC alright that has different bolt hole pattern and keyhole shape than the A1. Other than that it's straight forward to tear it down with some stubborn bolts that may snap off.
 

Watermann

Starmada Splash of the Year 2014
Joined
Jan 12, 2013
Messages
13,822
Not for the old MC, the bell housing hinge points has a pin holding it rather than the special torx style head the A1 has.
 

SHSU

Lieutenant Junior+Starmada Splash Of The Year 2019
Joined
Mar 8, 2017
Messages
1,751
I'm just building a new transom and installing. The mechanic who will be installing the new engine is going to cut the new keyhole, into the installed transom. All I have to worry about is that the horse collar is centered where it needs to be and that the dimensions are enough for the new assembly.

When your mechanic makes the cuts for the keyhole, is he going to seal the wood again before install of the engine?

Otherwise, great progress!!!
 

66Holiday924

Chief Petty Officer
Joined
Aug 21, 2017
Messages
586
When your mechanic makes the cuts for the keyhole, is he going to seal the wood again before install of the engine?

Otherwise, great progress!!!

Thanks, I think the mechanic will seal it if I ask him to. I plan on bringing the old timer mix in an empty paint can and talking to him about it. If he does it, awesome! If not... I guess that's why we buy that high dollar plywood. That part is kind of out of my hands.
 

kcassells

Fleet Admiral
Joined
Oct 16, 2012
Messages
8,738
The keyhole is partially below water line so I don't think the old timer brew is what you want to use. More like poly resin or poxy to seal properly.
 

66Holiday924

Chief Petty Officer
Joined
Aug 21, 2017
Messages
586
The keyhole is partially below water line so I don't think the old timer brew is what you want to use. More like poly resin or poxy to seal properly.

Thank you, do you have a product in mind? Using something else might lead to an easier conversation with the mechanic, without having to go over how volatile the Old Timer Formula is, and the danger of spontaneous combustion that comes with it... which I've been struggling to figure out how to sugar coat.
 

kcassells

Fleet Admiral
Joined
Oct 16, 2012
Messages
8,738
Thank you, do you have a product in mind? Using something else might lead to an easier conversation with the mechanic, without having to go over how volatile the Old Timer Formula is, and the danger of spontaneous combustion that comes with it... which I've been struggling to figure out how to sugar coat.

The products for poly or epoxy are available everywhere. You would want to use a "MARINE GRADE" Also most boats are built in poly. So then with epoxy as a glue for seal is a lot more difficult to gelcoat.
I use us composites for my supplies. Depends where you live etc in regards to shipping costs.
Iboats also has the products mentioned above that you can purchase from. West is another industry standard for poly or poxy.
 

Watermann

Starmada Splash of the Year 2014
Joined
Jan 12, 2013
Messages
13,822
These are the little issues you get into not being able to do the work yourself and the right way.

The keyhole may be below the waterline in part but no way should it be getting wet from the outside, if so you have a serious issue with the transom assembly and are sinking. It does need to be sealed, raw wood is not a good thing in a boat. The guy cutting the hole should know that and should be just fine with your request to seal the wood and the holes he drills through. A small can of Helmsman Spar and a chip brush, it's sealed up. I don't think you'd be better served asking him to mix up fiberglass resin.

The thing with the OT formula and the worry over combustion is same as if someone tosses any solvent based soaked rags in a trash can they could ignite after a while.
 
Top