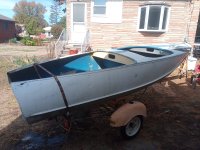
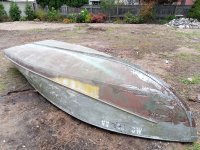
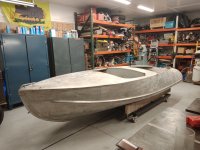
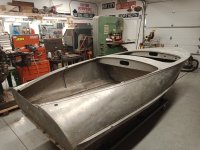
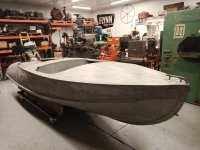
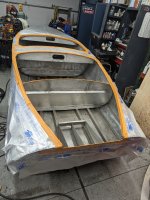
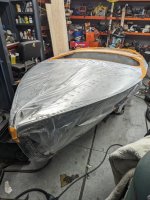
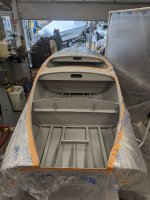
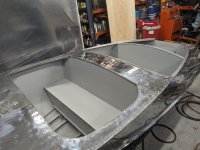
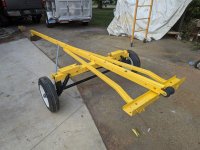
1956 Feathercraft Vagabond II

Luke000

Restoration Forum Splash of the Year 2016
Joined
Aug 19, 2013
Messages
346
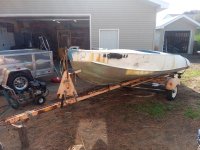
Hello Everyone! Its only been 5 years, but I'm back with the final stretch of my current project, a 1956 Feathercraft Vagabond II! It has been a busy couple years: bought my first house, built a workshop from scratch, getting a career off the ground, and a whole lot more boat projects 🚤. But the first big boat project I have done since the Lonestar I decided was going to be this Feathercraft, I bought it four years ago and pulled it out of storage about a year and a half ago and slowly started working on it between other projects.

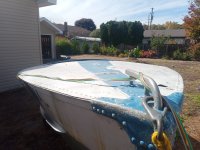
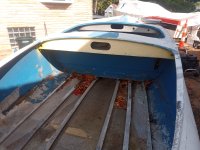
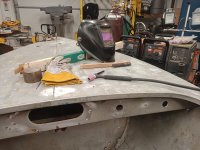
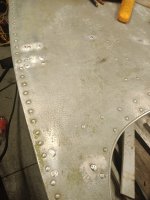
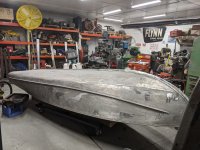
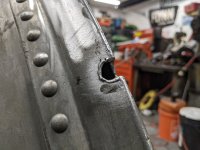
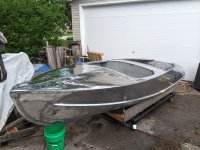
It was quite the project, lots of holes in the aluminum (over 200), caved in deck, missing the rear seat and other general old aluminum boat issues. thankfully no corrosion outside of a small area of pitting on the transom. I was also able to track down a cool Tee Nee trailer for the boat!

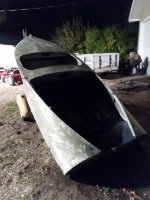
Here is where I started, getting many coats of really nasty paint stripped off. I was lucky enough to find a few gallons and spray cans of "old formula" aircraft stripper at a local closeout bargain store a few years ago that I have been hoarding for such projects.
I also built a cart with some swivel casters to move the hull around in the shop.

Fair warning, the shop get progressively more dirty and packed with old stuff šŸ˜…
IMG_20201013_131229_852.jpgIMG_20201013_131311_276.jpgIMG_20201013_131339_491.jpgIMG_20201013_131316_927.jpgIMG_20201013_204653_108.jpgIMG_20201014_140948_742.jpgIMG_20201108_195215_6.jpgIMG_20201108_233139_5.jpgIMG_20201108_233227_9.jpg
 

Luke000

Restoration Forum Splash of the Year 2016
Joined
Aug 19, 2013
Messages
346
The next step was to repair the damage to the hull: bends, dents, hole and gashes and some fused in steel on the keel (not sure how it got there)

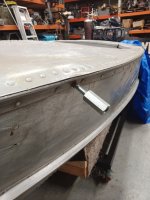
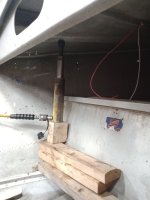
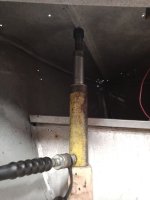
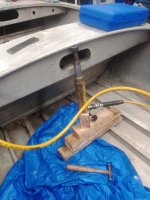
For fixing the dents I used a slide hammer around the gunwale, and to get the deck back into position from years of people walking on it, I used a series of hydraulic jacks and cribbing.

IMG_20210328_140937_8.jpg
IMG_20210328_111103_9.jpgIMG_20210328_111119_1.jpg
IMG_20210328_182806_4.jpg


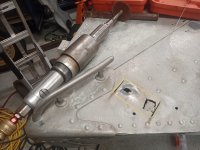
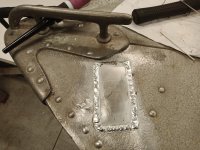
After I was able to get everything straight, I moved on to welding all the holes closed. It is no exaggeration that there was over 200 holes I had to patch. For this I used a TIG welder with either 1100 series aluminum filler metal (for cosmetic only repairs such as old screw holes) and 4043 filler for areas that required a little more strength such as the keel, and deck. Some of the areas I had to weld in patch pieces for because they could not easily be closed up otherwise, one spot on the bow I had to cut a good sized section out because it was in such bad shape, it looked like a PO used a can opener to mount something.
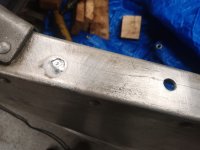
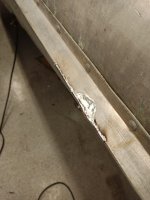
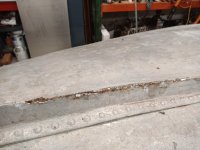
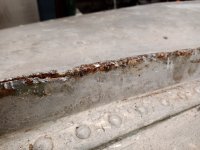
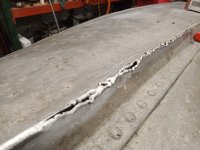
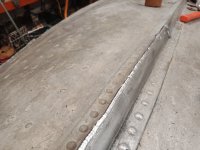
Near the transom, both sides of the chine/rub rail had a worn down section that I was able to build back up. And the keel near the bow was the strangest of all, it was worn down and it appears that someone tried, and somewhat successfully, welded it closed with steel (It was rusty and magnetic, and was actually fused to the aluminum)! But I was able to get it removed and built back up!

IMG_20210331_114404_9.jpg

IMG_20210330_115016_5.jpgIMG_20210330_104654_5.jpg
IMG_20210329_084502_6.jpg
IMG_20210411_201211_2.jpg
IMG_20210425_110653_5.jpg
IMG_20210425_135324_6.jpg
IMG_20210425_122829_5.jpg
IMG_20210424_185335_6.jpg
IMG_20210424_185343_8.jpg
IMG_20210424_193403_8.jpg
IMG_20210425_104037_9.jpg
 

Luke000

Restoration Forum Splash of the Year 2016
Joined
Aug 19, 2013
Messages
346
The next big step was to sand down and blend in all the weld repairs. For this I used a 2" right angle pneumatic grinder. I started with 36 grit and worked my way all the way up to maroon scotch-brite discs.

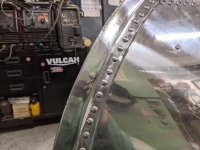
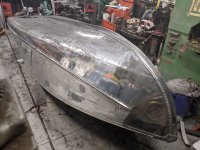
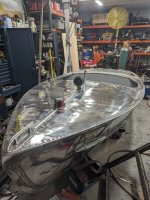
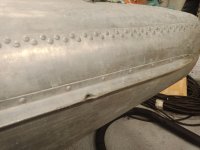
After this, it was onto everyone's favorite! sanding and polishing the aluminum! The hardest part for me was the deck was originally a textured anti glare finish from the factory, a cool etched pattern. I would have loved to have kept it, unfortunately I had to make so many repairs to the deck, there was really no way for me to make the pattern uniformed again, so the only option was to sand it all down until it was smooth. I left some of the original finish around the rivets. Starting with a 7" 50 grit fiber disc and worked all the way up through dry grinding to wet sanding at 2000 grit.

For buffing, I used a HD Milwaukee 9" grinder/sander with a custom made arbor that I installed 10" buffing wheels on. The first cut pass was black emery compound on a spiral sewn wheel, and the final polish pass was done with white rouge compound and a loose wheel.


PXL_20220124_192309447.MP.jpgPXL_20220201_001804351.MP.jpgPXL_20220201_010024946.MP.jpg
PXL_20220216_211139171.MP.jpg
PXL_20220228_232715233.MP.jpg
PXL_20220523_001136380.jpg
PXL_20220216_211345561.MP.jpg
 

jbcurt00

Moderator
Staff member
Joined
Oct 25, 2011
Messages
25,109
Luke, you need to join Feathercraft.net
Www.feathercraft.net

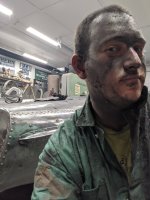
Lots of helpful knowledgeable FC owners, some have brought back much worse than yours, it's impressive, well done, black chalked face & all :cool:

FYI you'd enjoy an FC meet at Arrowhead campground coming up in May, IIRC... Look @ their site. It should be posted. Bring the Vagabond, they'll love seeing it & the work you've done
 

Luke000

Restoration Forum Splash of the Year 2016
Joined
Aug 19, 2013
Messages
346
Luke, you need to join Feathercraft.net
Www.feathercraft.net

Lots of helpful knowledgeable FC owners, some have brought back much worse than yours, it's impressive, well done, black chalked face & all :cool:

FYI you'd enjoy an FC meet at Arrowhead campground coming up in May, IIRC... Look @ their site. It should be posted. Bring the Vagabond, they'll love seeing it & the work you've done
I am a member, but I haven't posted there yet, but ill be sure to do that! I don't think Ill make it to Arrowhead this spring, but would love to head down there in the future! I also have a Ranger III as a future project!
 

Luke000

Restoration Forum Splash of the Year 2016
Joined
Aug 19, 2013
Messages
346
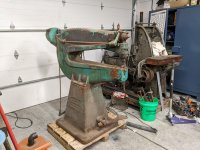
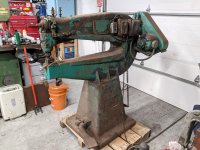
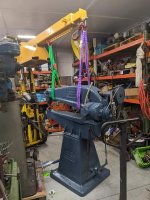
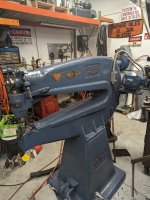
Once I got the boat polished, my focus turned to recreating the rear seat. For this I decided I needed to get a nice shear so i wasn't doing everything with a hand nibbler. I knew right where one was sitting (In the back of an old boat salvage business in Detroit) So, I bought it and did a quick mechanical and cosmetic rebuild of the machine, a 1940's Libert Hi-Speed 1036 Shear. And ill count this as part of the boat restoration.

PXL_20220823_175101631.jpg
PXL_20220824_215546103.jpg
PXL_20221029_131620412.jpg
PXL_20230122_233543267.jpg
 

Luke000

Restoration Forum Splash of the Year 2016
Joined
Aug 19, 2013
Messages
346
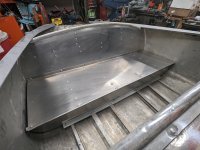
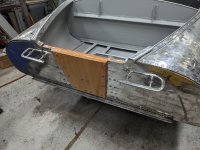
Once I got the shear up and running, I started installing the seat, constructed of some scrap .100" 5052 aluminum sheet, and 6061 extrusions, assembled with 2117-T4 rivets. Since a previous owner had, for some reason, completely removed the rear seat, it was long gone before I got the boat. I had no pattern to work from, I just went from a general location where I saw the old seat had been and started taking measurements and hand fitting each piece.
It took me about 3 afternoons of work to get it built and installed. Its not perfect copy of the OE seat, but it is what I could make with my abilities and resources. I had to make a stiffening rib for the back, so i just used my brake and bent over some leftovers and welded it together before riveting it on. I used some extruded C-channel for stringers under the seat for reinforcement, and for the edges (not pictured) I used extruded edge trim along the sides.
For floatation, I cut up a 4X8 sheet of XPS insulation and it filled the void beneath the seat well.
PXL_20230122_205510005.jpgPXL_20230122_231948342.MP.jpg
PXL_20230127_221414996.jpg
PXL_20230127_221642875.jpg
PXL_20230211_204120424.jpg
PXL_20230211_184906616.jpg
PXL_20230211_204105978.jpg
 

Luke000

Restoration Forum Splash of the Year 2016
Joined
Aug 19, 2013
Messages
346
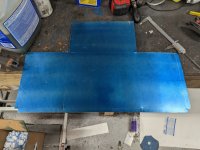
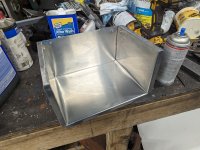
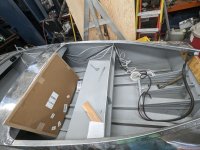
The last piece of fabrication was to recreate the front glove box. It was a pretty straight forward build and riveting back onto the dash and deck. Looking back, I should have been more patient and used a finger brake to get sharper corners, but it worked and its in the boat.
PXL_20230212_215850927.jpg
PXL_20230212_222254178.jpg
PXL_20230212_232744747.jpg
 

Luke000

Restoration Forum Splash of the Year 2016
Joined
Aug 19, 2013
Messages
346
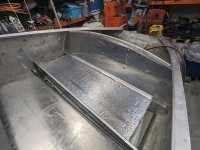
I decided to paint the interior using Tuff Coat rubberized non-skid paint. I've used this same paint for the last two aluminum boat restorations as the interior paint. I've found it to be easy to apply, durable, and not too hard on bare skin. I have plans to eventually try my hand at upholstery and make some cushions, but for now, this will work to get it splashed.
The paint is a two part system, first is a metal primer and it requires everything to be sanded with 80 grit and degreased. I used an HVLP gun to spray it. I found the primer to be extremely thin and drips easily, but it dried smooth. The last time I used this paint, it had a different formula primer.

Next was two coats the rubberized paint that I sprayed using a hopper gun, the style used for popcorn ceilings. This went on quite well. The entire interior took about a 1/2 gallon of primer and 2 gallons of the top coat.

Helpful hint, make sure you have good weather for the entire painting window. Rain came in hard and fast right before I did the final coat, so I decided to do the final spray in the garage. I built a curtain out of PVC and masking film that I moved around while I was spraying. It worked well, for managing overspray (and there is a lot with the hopper gun).

PXL_20230401_213930641.jpg
PXL_20230401_214342349.jpg
PXL_20230403_205910190.jpg
PXL_20230403_211302446.jpg
PXL_20230403_211321093.jpg
 

Luke000

Restoration Forum Splash of the Year 2016
Joined
Aug 19, 2013
Messages
346
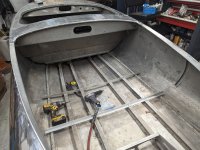
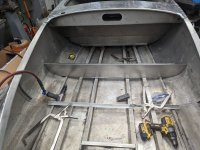
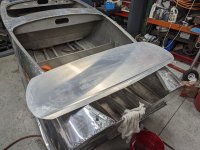
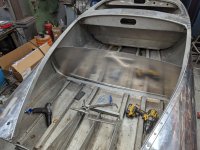
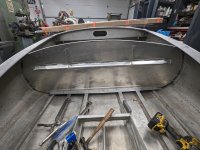
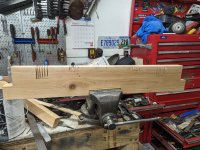
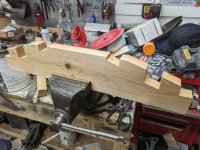
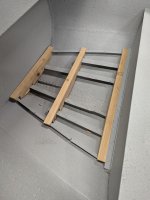
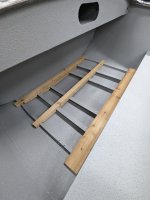
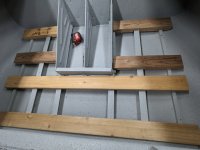
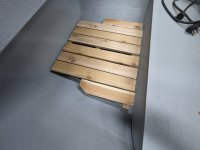
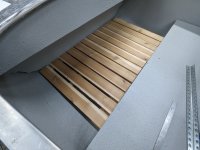
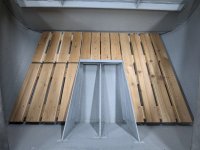
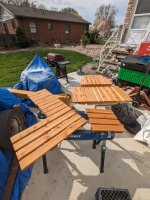
And all of that brings us to this week! I started building a floor for the boat using cedar. I used 2x4's and 2x6's as cross members. Each one I was able to fit to go around the stringers with minimal slop. I haven't used a hand saw and chisel this much in a long long time. My plan is to have 4 flooring sections be able to be removed when needed. The tops are going to be 1x4 cedar attached with stainless trim screws (they were on sale) and then coat everything in spar urethane. I'm hopeful they will hold up to use, but we will see.

Todays project is going to be to attach all of the 1x4's, sand and first coat of finish.
PXL_20230414_202441837.jpg
PXL_20230414_212002389.jpg
PXL_20230414_213448395.jpg
PXL_20230416_185431467.jpg
PXL_20230416_205210285.jpg
 

Luke000

Restoration Forum Splash of the Year 2016
Joined
Aug 19, 2013
Messages
346
Cut up the 1x4's, routered the corners, and attached with stainless steel trim screws. I am using Varathane oil based Spar Urethane, the first coat was thinned 50% with mineral spirits, the second coat was thinned about 15%, both of these were sprayed with an HVLP gun. The final few coats, I plan to brush on at full strength.

PXL_20230416_212807951.jpg
PXL_20230416_212802745.jpg
PXL_20230417_202545395.jpg
PXL_20230420_204544710.jpg
 
Last edited:

sphelps

Supreme Mariner
Joined
Nov 16, 2011
Messages
11,475
I did the same thing for decking on my Wagemaker . But plained the boards down to around a half inch thickness ..
 

SirFishesALot

Seaman Apprentice
Joined
Jan 22, 2023
Messages
35
Wow that is a lot of work you have put into that bad boy. Looking great so far too. Just curious do you find welding to be the best bet for patching holes in aluminum? I have some leaking rivets in an aluminum boat I bought and I am trying to figure out the best permanent solution.
 

Luke000

Restoration Forum Splash of the Year 2016
Joined
Aug 19, 2013
Messages
346
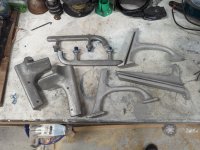
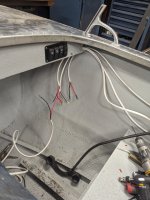
Among other things, I have gotten my aluminum castings polished and mounted, marine plywood transom finished and mounted and started running electrical.

For the electrical I decided on a 4 gang panel that has 2) detented switches for my navigation lights and bilge pump, a momentary switch for the horn, and a USB 3.0/USB-C/voltmeter. The bow light is a new Perko. And I also installed a 1/2" edge trim down the center seam.

PXL_20230422_191938674.jpgPXL_20230422_221824848.jpg

PXL_20230426_234322679.jpg
PXL_20230507_180904435.jpg
PXL_20230518_200856115.jpg
PXL_20230518_230444040.jpg
 

Luke000

Restoration Forum Splash of the Year 2016
Joined
Aug 19, 2013
Messages
346
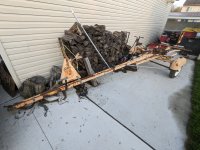
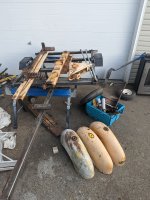
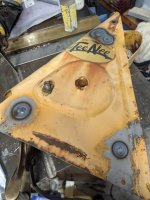
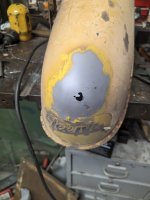
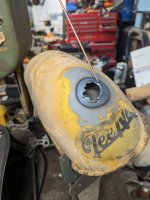
I also tore down the TeeNee trailer to get it ready for sandblasting. A previous owner made some tasteful "custom" risers for the mast, and in the process drilled quite a few extra holes in it. I also found one fender to be cracked near the mounting plate as well as quite the thin spot near the tip of the teardrop. I fired up the TIG welder and made the necessary repairs to both the fender and mast. After grinding down they came out pretty well and will require just a little bit of body filler before paint.
My other fender had a substantial dent in it. I was able to source a spare fender from a scrapper friend of mine, this fender had a similar but smaller dent. I was able to bang out the dents fairly well in both.
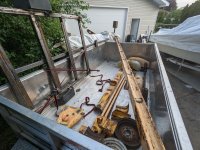
Everything is loaded up to drive around tomorrow and hopefully get some quotes on sandblasting from a few local shops.

PXL_20230508_000122123.jpg
PXL_20230512_000130166.jpg
PXL_20230514_224849115.jpgPXL_20230514_225025550.jpgPXL_20230514_225451573.jpgPXL_20230521_234052417.jpg
 

Luke000

Restoration Forum Splash of the Year 2016
Joined
Aug 19, 2013
Messages
346
The trailer restoration went great, I was able to get the entire trailer sandblasted for about $125. I painted it with Sherwin Williams Kem Kromik primer and 3 coats of SW Sher-Kem with hardener for the topcoat. The assembly was pretty straight forward, I used Grade 8 and Stainless hardware throughout. I was able to get the integrated mast/winch working again by making a new handle and new pulley, longer bumper standoff as well as new rope. I got rid of the side rollers and installed carpeted bunks instead. Brand new lights and wiring, rebuilt the OE coupler, and 2 new hubs. I found that all of the original parts for the frame were there, but the previous owner must have rebuilt it at some point and didn't have everything in the proper location and orientation, but studying some pictures, it was easy to get everything sorted. I have the fenders, OE wheels, brand new stainless hubcaps and new decals ready for installation once the work on the boat is complete to avoid damage.
PXL_20230606_220127916.jpg

PXL_20230606_220143203.jpg

PXL_20230606_231125947.jpg

PXL_20230609_002448829.jpg

PXL_20230610_234311249.jpg
 
Top