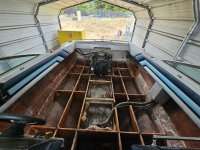
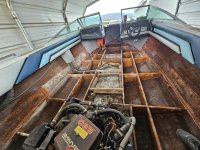
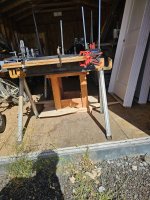
Wellcraft 210 Elite Restoration NEED HELP!!

Pmt133

Lieutenant Commander
Joined
Jan 6, 2022
Messages
1,851
Check around, you may luck out and find a relatively cheap off the shelf tank that is close enough in size to work. Or do what I did and get a custom one made. Not too many people have a large fabricator basically in their backyard though. :p
 

Elite210Captain

Cadet
Thread starter
Joined
Sep 25, 2021
Messages
18
I found a 40gallon tank thats pretty close made by RDS59182 it is about 2" taller and 3gallons smaller but there is enough room to clear. I sent a quote request for a custom tank same spec we will see
 

Elite210Captain

Cadet
Thread starter
Joined
Sep 25, 2021
Messages
18
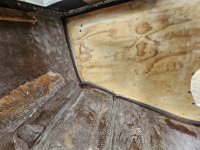
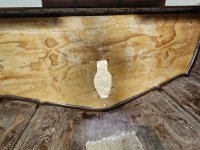
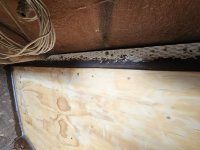
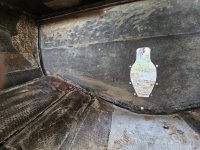
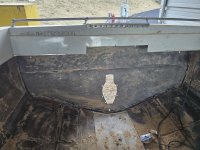
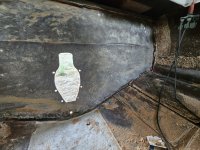
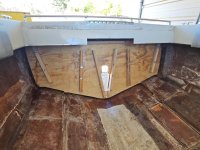
More progressive on the transom, just about done not sure if I need to sand the glass down more but I hear people say fresh pink glass im not seeing anything pink on this **** except saw dust. Using a 36grit flapper disk to knock down most of the attached plywood this is a shifty job
 

Attachments

  • 20260707_203048.jpg
    20260707_203048.jpg
    3 MB · Views: 14
  • 20260707_203042.jpg
    20260707_203042.jpg
    2.9 MB · Views: 14
  • 20260707_203051.jpg
    20260707_203051.jpg
    3 MB · Views: 15

Pmt133

Lieutenant Commander
Joined
Jan 6, 2022
Messages
1,851
It's hard to describe when you're there... but the ground glass will look clean and it will have some fiber and teeth to it when you grind it. The dirty stuff looks and feels more like smeared resin if that makes sense
 

Elite210Captain

Cadet
Thread starter
Joined
Sep 25, 2021
Messages
18
@Pmt133 so what your saying is keep grinding on that glass because it aint ready yet? Right now the glass feels smooth with no fiber but i can start to see the fiber if i grind down a little more, Should i Keep uising that 36grit flapper or go less coarse i mean it probably doesnt need to much off that smooth layer idk though?
 

MikeSchinlaub

Ensign
Joined
Jan 14, 2025
Messages
974
Yes, keep grinding. I still see bits of wood, and white spots in the glass. White is either air or spots that weren't saturated very well. You also need to grind about 6 inches away from the transom all the way around. Smooth out those indents where the stringers were.

Sometimes the glass is dark like that, instead of pink. I usually see that on older boats. Just don't grind a hole through the boat!
 

Elite210Captain

Cadet
Thread starter
Joined
Sep 25, 2021
Messages
18
@MikeSchinlaub the problem is with that 36grit flapper disk it makes dips super fast in the fiberglass mabie i should switch to a electric hand sander to flatten everything out or take off that layer
 

MikeSchinlaub

Ensign
Joined
Jan 14, 2025
Messages
974
@MikeSchinlaub the problem is with that 36grit flapper disk it makes dips super fast in the fiberglass mabie i should switch to a electric hand sander to flatten everything out or take off that layer
You have to finesse it a bit. As long as they aren't very deep, you can go back later with 36 by hand and smooth the sharp points. Or do a light coat of resin putty over as you glass.
 

Elite210Captain

Cadet
Thread starter
Joined
Sep 25, 2021
Messages
18
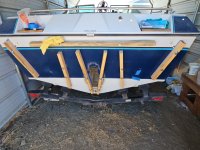
I had to pause on this while I finished my work office build also money was a little tight. Got the transom together with cabosil/ polyester resin let that cure for a couple days just got this in the boat after all that hard prep work used a notched trowel on the PB resin and installed it as backyards and none of my holes were lining up smh I got lucky it was a cool day out and was able to spin it around 180 degrees and get it on
 

Attachments

  • IMG_20260906_140716.jpg
    IMG_20260906_140716.jpg
    521.6 KB · Views: 12
  • IMG_20260906_140718.jpg
    IMG_20260906_140718.jpg
    569.8 KB · Views: 13
  • 20260830_100110.jpg
    20260830_100110.jpg
    2.5 MB · Views: 13
  • 20260830_102200.jpg
    20260830_102200.jpg
    2.5 MB · Views: 13

bakerjw

Petty Officer 1st Class
Joined
Apr 3, 2013
Messages
388
You're doing great. As I'm late to the party, my only advice would have been to use Coosa. I missed a spot on my transom 13 years ago and just got a new Coosa transom in place.
At the end of the day you can be very proud of what you've accomplished.
 

Elite210Captain

Cadet
Thread starter
Joined
Sep 25, 2021
Messages
18
You're doing great. As I'm late to the party, my only advice would have been to use Coosa. I missed a spot on my transom 13 years ago and just got a new Coosa transom in place.
At the end of the day you can be very proud of what you've accomplished.
Yea I was teetering on it, I had a couple sheets of aruco plywood left from a project i just finished up so i decided on the cheaper route. The composite guy at the airport im at could have orded me 2 4x8 sheets for just over $200 each free shipping aparently hes a high dollar client for the composite materials supplier so they get him whatever he needs free shipping.
 

bakerjw

Petty Officer 1st Class
Joined
Apr 3, 2013
Messages
388
could have orded me 2 4x8 sheets for just over $200 each free shipping
<GULP!!!>
Coosa 26 3/4" 4'x8' sheets were $373.74 for me with $250.00 freight.
you were close to hitting the motherlode.

Wood is fine enough, just have to make sure that it is very well covered. On my Stratos, I enlarged the drain holes at the transom between the stringers to 2" and the wood (CDX plywood) was dry as a bone.
 

Elite210Captain

Cadet
Thread starter
Joined
Sep 25, 2021
Messages
18
@bakerjw , @MikeSchinlaub ,@redneck joe ,@Pmt133, @Davetowz , @Drivewayboater2 , @Scott Danforth, @jbillingsley, @Wellcrafted1
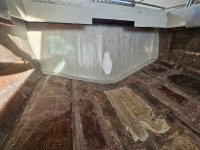
, Heres an update of where im at incase anyone was wondering that has commented on this forum, I was just talking to my wife about forums and sometimes it feels like forums in general are dying out but forums are some of the best ways to get information especially when the internet first came out! Thanks for tuning in. Got the fillet around the transom done and am going to be installing my CSM, Woven Roven layers hopefully today. Im not quite sure how the bulkheads and stringers were installed from the factory as they were all glassed over and it was hard to distinguish what was a solid piece vs stopped. From what ive read and have been told you want to keep the stringers in one solid piece, the original outside stringers were one solid piece but there where two stringers for the inside runs that were offset from transom to bilge bulklhead and forward. Ive attached a picture of before i removed everything.
 

Attachments

  • 20261003_102710.jpg
    20261003_102710.jpg
    1.8 MB · Views: 5
  • 20261004_093622.jpg
    20261004_093622.jpg
    2.7 MB · Views: 2
  • 20261004_095004.jpg
    20261004_095004.jpg
    4 MB · Views: 2
  • 20261004_095006.jpg
    20261004_095006.jpg
    3.7 MB · Views: 2
  • 20261004_095013.jpg
    20261004_095013.jpg
    3.1 MB · Views: 5
  • 20261004_082512.jpg
    20261004_082512.jpg
    3.3 MB · Views: 5
  • ChatGPT Image Oct 3, 2026, 01_40_16 PM.jpg
    ChatGPT Image Oct 3, 2026, 01_40_16 PM.jpg
    518.1 KB · Views: 6
  • ChatGPT Image Oct 3, 2026, 01_40_13 PM.jpg
    ChatGPT Image Oct 3, 2026, 01_40_13 PM.jpg
    556.3 KB · Views: 6
Last edited:

Pmt133

Lieutenant Commander
Joined
Jan 6, 2022
Messages
1,851
The offset was done to facilitate the V engine most likely, which is why it ends at the engine bulkhead. I believe friscoboaters searay was done in a similar manner. I would have no issues duplicating that structure and layup schedule.
 

MikeSchinlaub

Ensign
Joined
Jan 14, 2025
Messages
974
You need to do the csm and roving at the same time. The csm bonds better to the grinding scratches, and the roving will be chemically bonded with the csm by the resin.

In your csm dry fit picture, is that overlap onto the hull at least 6 inches? Hard to eyeball through a pic.
 
Top