14.5' Springbok Restore ! 1st Timer !

Lunker777

Cadet
Joined
Apr 13, 2009
Messages
10
Hows everyone doing tonight ?


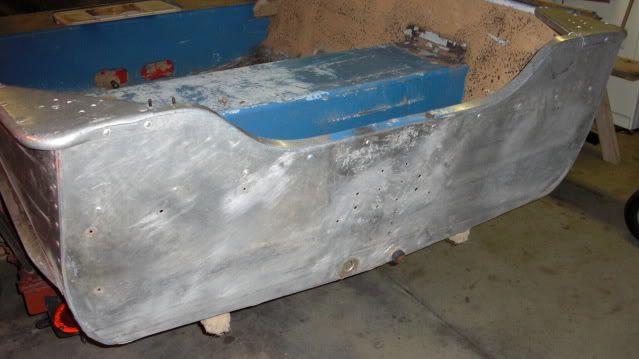
I bought this boat this passed weekend. Its a fixer upper as you will see.

I'm just going to post some pics of it and kind of let you get an idea of what I'm dealing with.

Sorry, the pics were moved !!!

What I want to end up with is a new paint job, no leaks, a flat floor and a casting deck.

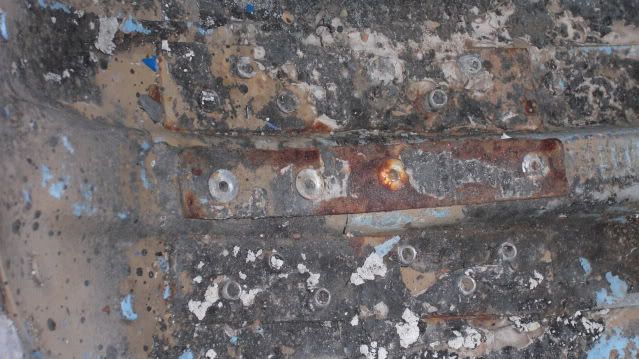
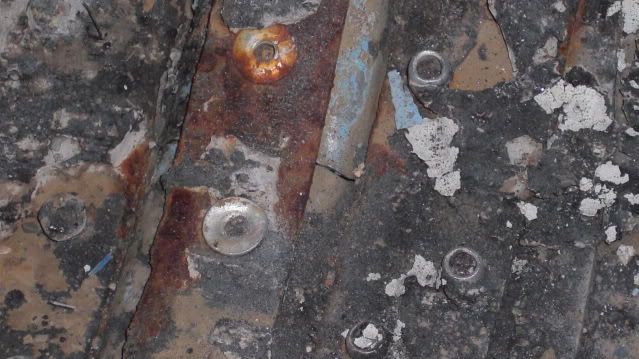
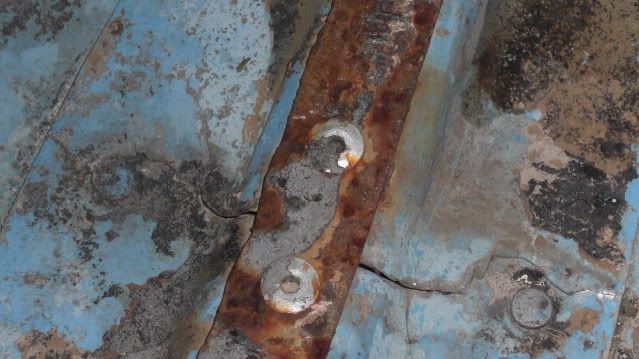
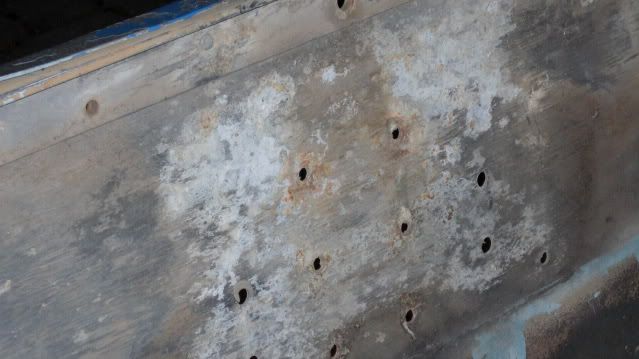
The paint that is on the boat currently is flaking pretty bad. Ive taken a power washer ( The car wash bay at sunoco ) to it and gotten rid of the flaking stuff, but Im guessing its just a matter of time till its flaking again !
Maybe I should hit it with our power washer at work... Its for heavy machinery and can get VERY hot and its WAY MORE powerful ? Shouldn't damage the aluminum ?

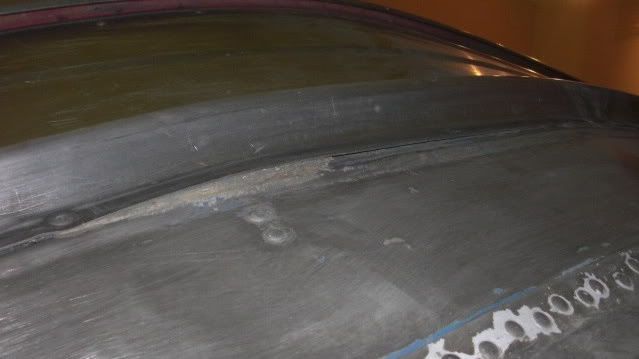
The inside of the hull has what I think is glue or adhesive from some carpet that used to be in there, Its ROCK solid and I have no idea how to clean that outta there.

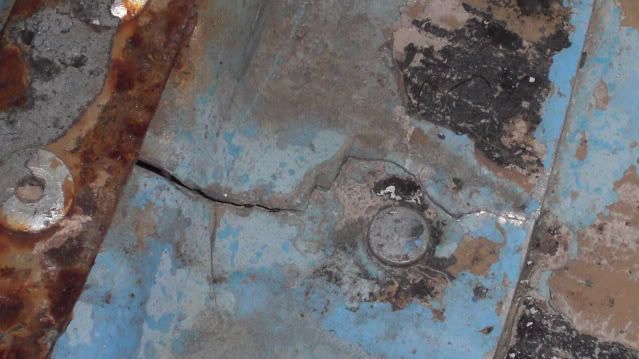
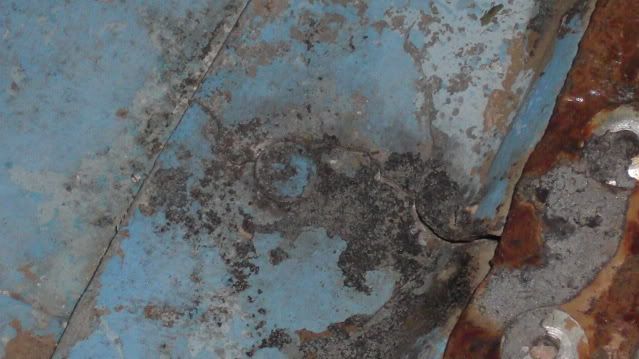
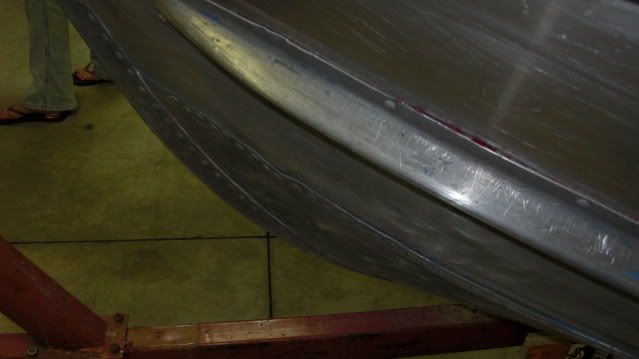
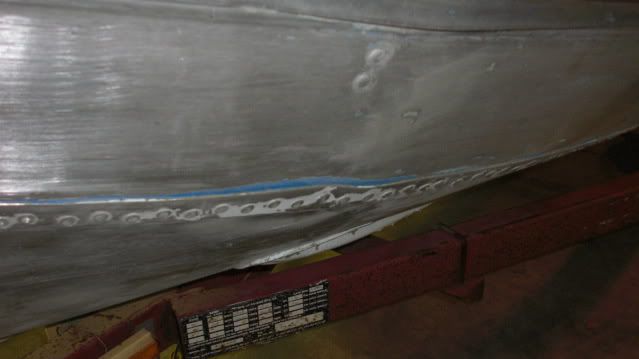
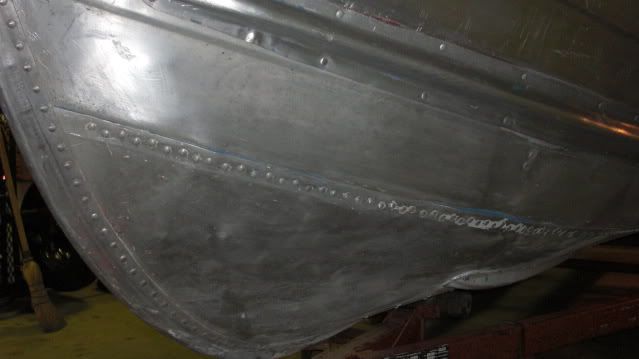
I have yet to get it in the water... the guy told me there was a leak at the front. He patched it up himself and he said that it worked great and the leak was fixed. There was a picture of it, seems to be holding good ? He said there was no leaks when he used it last.

The transom needs to be rebuilt, But I have no idea how I'm suppose to get the wood outta there ?

haha This is the first boat I've owned, and I'm not familiar with these kinds of restoration, so lots of pointers are needed ! hahah Thanks in advance
 
Last edited:

Boss Hawg

Lieutenant
Joined
Apr 9, 2009
Messages
1,433
Re: Where do I begin ? 14' Aluminum fixer'upper

Re: Where do I begin ? 14' Aluminum fixer'upper

All i can say is good luck & have fun :D
Seriously, its never as bad as it looks- :rolleyes:
 

drum23

Seaman Apprentice
Joined
Nov 25, 2008
Messages
37
Re: Where do I begin ? 14' Aluminum fixer'upper

Re: Where do I begin ? 14' Aluminum fixer'upper

Well I'm no expert, but I might be able to help a little.
1. I think you would need a higher pressure power washer than the ones used at car washes since those are designed not to be strong enough to remove paint. I don't know what pressure ratings would be appropriate though.

2. I have the same problem with the glue on my jon boat. Someone told me what to use, but now I can't remember what exaclty it was, but it was like paint thinner. I know it's something you can get an any autoparts store.

3. As for the leak, put the boat on level ground and fill it with some water (with the drain plug in). See if any water leaks from the hull.

4. I've never done a transom, so I'm reluctant to try to give any advise about that. I would think grinding down the rivets, then taking a crowbar to the wood would work. replace wood with marine grade ply.
 

5150abf

Vice Admiral
Joined
Aug 12, 2007
Messages
5,808
Re: Where do I begin ? 14' Aluminum fixer'upper

Re: Where do I begin ? 14' Aluminum fixer'upper

Welcome to iboats.

Try your power washer at work but be carefull you don't dent the boat, you will most likely be getting familiar with sand paper soon, it is really the only way to remove paint.

For the glue on the bottom I would try getting it soft with a heat gun maybe, if that doesn't get you are putting a floor in anyhow so don't worry about it.

To check for leaks put it on a pair of saw horses and put some water in it, water is really heavy so just a couple inches, mark your leaks, for rivets you can rebuck them pretty easily.

The transom looks to be held in with screws but rivets need to be drilled, try to save the old transom for a pattern when you make the new one.

One warning, DO NOT cut anything out of the boat, everything in that boat is a structural part of the boat and for the casting deck I would try to stay at seat level with that, the higher you go the more unstable it makes the boat.

Looks like a really nice first, keep postin gpics and let us know how it is going.
 

Bob_VT

Moderator & Unofficial iBoats Historian
Staff member
Joined
May 19, 2001
Messages
26,065
Re: Where do I begin ? 14' Aluminum fixer'upper

Re: Where do I begin ? 14' Aluminum fixer'upper

Clean it up..... maybe add a wood decking to cover the livewell line and that old carpet glue ;)

I would work on that keel a bit and maybe cover that area with a better patch.
 

Nippissinger

Petty Officer 3rd Class
Joined
Mar 2, 2009
Messages
94
Re: Where do I begin ? 14' Aluminum fixer'upper

Re: Where do I begin ? 14' Aluminum fixer'upper

Welcome aboard. This is the MOST informative and welcoming boat forum on the web. Lots of good experienced help in here.

The transom looks fairly thin, so do your best to remove it being careful not to damage the hull or transom rests or the transom itself as you can use it for a template. When you are ready to replace transom choose an inexpensive fir G1S ply to acquire the proper thickness. You may have to double up to obtain the correct thickness. Make sure you treat that wood with a good epoxy to seal her and assure she NEVER gets wet.
Once the transom is ready for placement, sand all aluminum lightly what you can with a fine git so you don't score the aluminum to heavily to prep it for finishing.
Once it is all prepped install transom and secure. Now you can fill boat with enough water to cover the waterline to ensure no leaking.

If you spot any leaks make a not of all of them then drain boat and allow it to dry. Now it is time to assess the leaks. Leaky rivets can be reset by using a 5lb sledge or similar on the butt end of rivet for brace and hit the head with a similar hammer to draw them tight.
The seams can be sealed from inside with your choice of brush or spray on liner.

You will want to keep those seats in as they provide stability for the hull and floatation. You can however remove them to prep and seal hull and install any flooring you like. Keep the floor low as not to alter the center of gravity.
You can also place a nice casting deck up front using the seat as support and a good place to tie into.
Make sure you treat the flooring the same way as you would the transom.
1x2 or 2x2 stringers can be run the length of your vessel for floor bracing.
attaching to boat is your choice. Stainless screws spaced sparingly into the cross ribs careful not to pierce the bottom of hull. Again ALL wood should be treated for moisture resistance.
A hint is to make panels for the floor in case you need to access the hull. Floor covering has it's options. I prefer the exterior vinyl products glued to the floor for washdown purposes, then a nice marine/exterior carpet for the casting deck as it might also be used as a seat...

I hope I haven't stepped over any bounderies here, just livin the dream of a tinny mod...I sold mine to acquire a bigger aluminum so I will have to wait to mod a tinny..

Good Luck and Keep us Posted..

Nipper
 

Bob_VT

Moderator & Unofficial iBoats Historian
Staff member
Joined
May 19, 2001
Messages
26,065
Re: Where do I begin ? 14' Aluminum fixer'upper

Re: Where do I begin ? 14' Aluminum fixer'upper

Ohhh yeah....

PLEASE resize your photos to 640 x 480 and limit the future ones to that size. It is an easy change in photobucket ;)
 

tmcalavy

Rear Admiral
Joined
Aug 29, 2001
Messages
4,005
Re: Where do I begin ? 14' Aluminum fixer'upper

Re: Where do I begin ? 14' Aluminum fixer'upper

Old-fashioned, nasty spray on oven cleaner will take all the old paint off down to bare aluminum...read the label and follow all directions.
 

mantis270

Seaman
Joined
Mar 1, 2009
Messages
68
Re: Where do I begin ? 14' Aluminum fixer'upper

Re: Where do I begin ? 14' Aluminum fixer'upper

I'm in the middle of renovating my first boat too and this site is loaded with info...take some time to really comb through the forums then ask as many questions as you like.

Like they've said already...run a leak check to get an idea of what you're dealing with. If you're going to build a floor, I wouldn't worry about the bulk of the old adhesive...sand it smooth for aestetics if you like. Some of that old goop may be acting as a seal that could eventually fail. I would take the time to get it off the interior seams and rivets, take it to a launch and float it to see if there are any leaks. Those can be dealt with when found.

To get the transom out, remove any nuts and bolts you can then drill out the rivets then carefully shear off the heads...be careful not to use too large of a drill bit and keep it straight. You don't want to remove metal from the hull, just the rivet. Try to get the wood out in once piece to use as a template and make note of the thickness when buying the new wood (I had to make a second transom because I didn't pay attention to that detail !).

When redoing mine, I doubled up regular, off the shelf Home Depot plywood with Gorilla Glue then cut to shape. I then installed the bare transom and drilled all the holes I would need for installation. After that, I removed the wood and sealed it with resin being sure to get the inner surfaces of the pre-drilled holes. Before installing for good, I gave the aluminum that the transom will contact a thin layer of resin too just to protect it from corrosion due to water that will inevitably get in. I used aluminum pop-rivets where I could with a dab of 3M 5200 sealant on the rivet before inserting. For the through fittings, I used stainless steel nuts and bolts, again with some 5200 to be sure the're sealed.
 

a whyte

Recruit
Joined
Jan 4, 2009
Messages
2
Re: Where do I begin ? 14' Aluminum fixer'upper

Re: Where do I begin ? 14' Aluminum fixer'upper

i just bought the same boat last summer. i didnt bother removing the transom plywood, i just reinforced the transom with 1/2 inch thick poly. that seems to worked very well. this is a alternative to drilling the rivets outta the stern transom support in the floor. i am also working on bow storage for my boat making the front seat backrest fold down. so i can put a deep cycle and a radio wired in and also misc semi dry storage ill try to figure out how to send pictures of my project
 

MrMarine

Petty Officer 3rd Class
Joined
Mar 9, 2009
Messages
91
Re: Where do I begin ? 14' Aluminum fixer'upper

Re: Where do I begin ? 14' Aluminum fixer'upper

As for the paint and glue. I recently bought paint stripper from Home Depot that is made for marine and other things as well. Check my thread i just started with it and it works great. I also replaced my transom. Very easy fix. My best advice for you is to take your time and do it right the first time. If you dont want to leave all the glue and muck under the floor then clean it with the stripper. Yes it stinks but it works like a dream. Remember its your boat so make the choices as you see fit. When you are all done buck any loose or leaking rivets, get some Glu-vit and coat all the rivets on the inside. Good luck with your project.

Here is a link to my project:http://forums.iboats.com/showthread.php?t=298292
 

Lunker777

Cadet
Joined
Apr 13, 2009
Messages
10
Re: Where do I begin ? 14' Aluminum fixer'upper

Re: Where do I begin ? 14' Aluminum fixer'upper

thanx for all the imput guys ! I really apreciate it !

I was told to buy a stripper call " Tal-Strip 2" ... A gentleman who refurbishes airplanes/floats for airplanes told me thats what they use in there shop for aluminum and it works GREAT ! But its about $50 (canadian) for a gallon :eek::eek:

Im going to check the Home Depot for that stuff you were talking about MrMarine... I dont know if they will carry it in Canada!

The transom is becoming a bit of a worry for me as I wasn't planning on drilling out rivets n such. With it being my first time, I dont want to mess up the hull at all ! hahah I dont have the $$$$ for mess ups !
What would be a viable alternative to removing the transom all together ?
Awhyte, you said you used poly ?? do you mean just some 1/2" plastic ?

Thanks... I plan on gettin some work done to her this weekend, Ill post pics as the progress goes on !
 

a whyte

Recruit
Joined
Jan 4, 2009
Messages
2
Re: Where do I begin ? 14' Aluminum fixer'upper

Re: Where do I begin ? 14' Aluminum fixer'upper

yah thats right i used 1/2 plastic, i bought a couple of cutting boards from crappy tire worked great
 

Arkman

Chief Petty Officer
Joined
Oct 22, 2008
Messages
400
Re: Where do I begin ? 14' Aluminum fixer'upper

Re: Where do I begin ? 14' Aluminum fixer'upper

Dont worry about messing up those rivets. Watching me work on my boat is like a monkey doing math problems, but I drilled out the rivets and it was really easy. Just find a bit thats the right size and go slow on the first one. I did one at the top of the boat so it was well above the water line. It was a piece of cake. Dont worry just get in there and give it a whirl.
 

Lunker777

Cadet
Joined
Apr 13, 2009
Messages
10
Re: Where do I begin ? 14' Aluminum fixer'upper

Re: Where do I begin ? 14' Aluminum fixer'upper

Well, I ordered the Tal-strip 2 to strip the paint off the boat and it came in today. I hopefully will get to the boat tomorrow and put a test patch down to see how she works, then fully get to work on her by this weekend.

I think I might scratch the idea of putting in a casting deck...MAYBE... I haven't decided yet.

I will take some pics of my progress tomorrow. Wish me luck !
 

Nippissinger

Petty Officer 3rd Class
Joined
Mar 2, 2009
Messages
94
Re: Where do I begin ? 14' Aluminum fixer'upper

Re: Where do I begin ? 14' Aluminum fixer'upper

Good Luck Lunker...It will be fine, just remember to take it one step at a time.

Strip everything first then wash everything down.

I see a nice idea for a nice casting deck up front.
Come straight down from bow knee bracce to top of front seat with ply to close it off. You can put a trap door in this for access and maybe an lED light for night vision.
then come straight across front seat to middle seat with ply for the deck. Making sure to brace it good.
Coat the whole bottom of boat with a spray on bed liner to seal and sound proof the tin.
Tie in the deck to the middle seat and run bracing down to the floor of boat.

Voila!!! Finish with marine carpet and your all set to mount a swivel pedastal.

Then maybe floor the remainder of the boat to give it stability and a comfortable stand...You can vinyl deck this or treat the wood well and finish with a grit coating for traction leaving it water resistant and good for wash downs....

sorry to run on Lunker, she just brought me sweet ideas to dress her up..

Enjoy the restore, she's a nice skiff to work with..

Nipper
 

Lunker777

Cadet
Joined
Apr 13, 2009
Messages
10
Re: Where do I begin ? 14' Aluminum fixer'upper

Re: Where do I begin ? 14' Aluminum fixer'upper

Good Luck Lunker...It will be fine, just remember to take it one step at a time.

Strip everything first then wash everything down.

I see a nice idea for a nice casting deck up front.
Come straight down from bow knee bracce to top of front seat with ply to close it off. You can put a trap door in this for access and maybe an lED light for night vision.
then come straight across front seat to middle seat with ply for the deck. Making sure to brace it good.
Coat the whole bottom of boat with a spray on bed liner to seal and sound proof the tin.
Tie in the deck to the middle seat and run bracing down to the floor of boat.

Voila!!! Finish with marine carpet and your all set to mount a swivel pedastal.

Then maybe floor the remainder of the boat to give it stability and a comfortable stand...You can vinyl deck this or treat the wood well and finish with a grit coating for traction leaving it water resistant and good for wash downs....

sorry to run on Lunker, she just brought me sweet ideas to dress her up..

Enjoy the restore, she's a nice skiff to work with..

Nipper

hahahah I guess great minds think alike

If I understand you correctly... I think we have the same idea. Starting from the back I wanted to make a couple spots between the transom and the first bench for the fuel tank and the battery ( when that time comes )... then I wanted to put a floor in between the first and second bench, like you said, for stability and comfort... then I was going to make the casting deck from the second bench to the last bench. I don't know what the piece of aluminum is actually called on the front of the boat... the bow cap ? haha but anyhow, I was going to make under there storage for life jackets, rope, etc.

I'm still up in the air on it though, I don't know if I should use wood for bracing or step up to aluminum... aluminum is expensive right and wood is heavy.... So the other plan was to skip the casting deck... make a floor there as well and just close up the bow and still use it for storage.... This is the "weight saver" plan haha
 

Lunker777

Cadet
Joined
Apr 13, 2009
Messages
10
Re: 14' Aluminum fixer'upper !! Updated !

Re: 14' Aluminum fixer'upper !! Updated !

Well, my grandpa and I have started work on my boat. While striping the paint, LOTS of things came to my attention... and also, I found out I have a "springbok" now as well ! haha the stickers appeared as the first layer of paint came off . The boat has a 64-65" beam... and is 14.5' long. So far we have striped the paint from the sides, sanded the surface of the boat slightly, removed the transom support and the transom, and started working on removing what we can of the left over carpet glue, the stuff is like ROCK !

Major issues that came to my attention:
#1- The rib between the first and second bench ( first bench being closest to the transom) has cracked on either side... one of the previous owners has tried to "mend" it by riveting steel pieces as braces.... BAD BAD BAD !!!!

boatupdate1084.jpg

Here you can see the main brace in the middle and he has pop rivetd to others next to it and just massacred the aluminim... Should have noticed earlier ! Rookie mistake!

boatupdate1083.jpg

Another

boatupdate1082.jpg

This is the other side... the rid has completely cracked on this side.

boatupdate1081.jpg

boatupdate1080.jpg
 

Lunker777

Cadet
Joined
Apr 13, 2009
Messages
10
Re: 14' Aluminum fixer'upper !! Updated !

Re: 14' Aluminum fixer'upper !! Updated !

#2 - The boat was at some point SMASHED into a stump or a rock... the front end has has a massive dent pounded out pretty good. The evidence became clear once the paint was off.

boatupdate1075.jpg

You can kind of see the in perfections in the lines here.

boatupdate1074.jpg


boatupdate1073.jpg

This view is looking from the underside of the seam. This was the spot that took the brunt of the hit ! You can see the bondo he tried to fill it in with. The gap next to it is about a quarter inch wide, and you can see through to the other side.

boatupdate1071.jpg

In this pic you can kind of see the hammer marks. It was tough to get a good picture of it, sorry !

#3 - The transom support was cracking near the top where it boats into the transom. I tried to take as good of a photo as I could but I couldnt stop them from coming out blurry !

boatupdate1065.jpg

Right Side
boatupdate1057.jpg

Left side

I have no idea how I can fix these things ??? I have a customer at work that welds aluminum ? would it be best to give him a call ??

Those are the major things, the rest is just stuff that comes with fixin a boat.
 

Lunker777

Cadet
Joined
Apr 13, 2009
Messages
10
Re: 14' Aluminum fixer'upper !! Updated !

Re: 14' Aluminum fixer'upper !! Updated !

Here are some pics of the overall progress of the boat now.

boatupdate1053.jpg

Transom 1" plywood.... Still debating what we are going to replace it with... Oak maybe ?

boatupdate1047.jpg


boatupdate1046.jpg

I thought there was oxidization but it sanded right off... I didn't get a picture of the transom after we sanded it though.

boatupdate1068.jpg
 
Top