15' Sport-Craft Sprint project

fire7882

Petty Officer 2nd Class
Joined
Jul 15, 2008
Messages
172
Re: 15' Sport-Craft Sprint project

I haven't gotten much done since the last post but I figured I would post a few pictures.

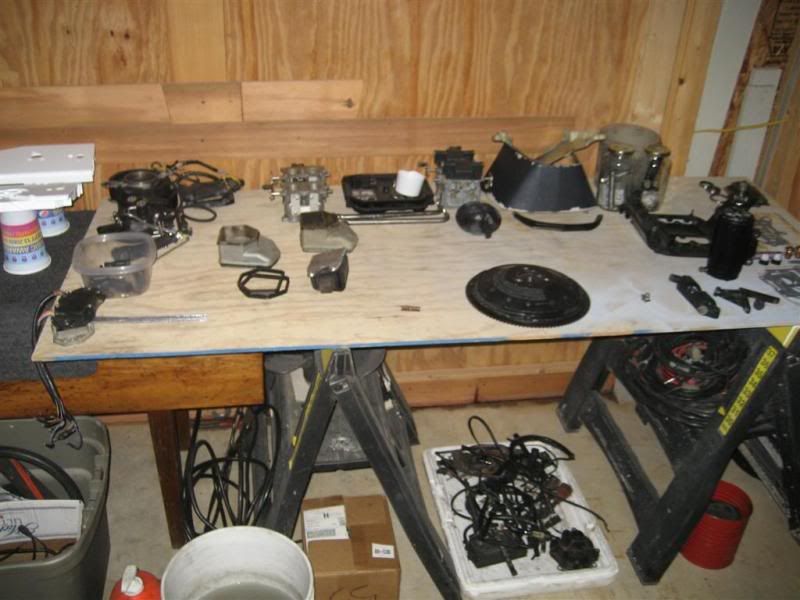
Parts table is looking a little less full. I've been sorting things out and putting all the extra stuff I'm not going to use out of the way. Still need to do a little more as you can see doubles of some parts such as carbs.
PowerHead4.jpg


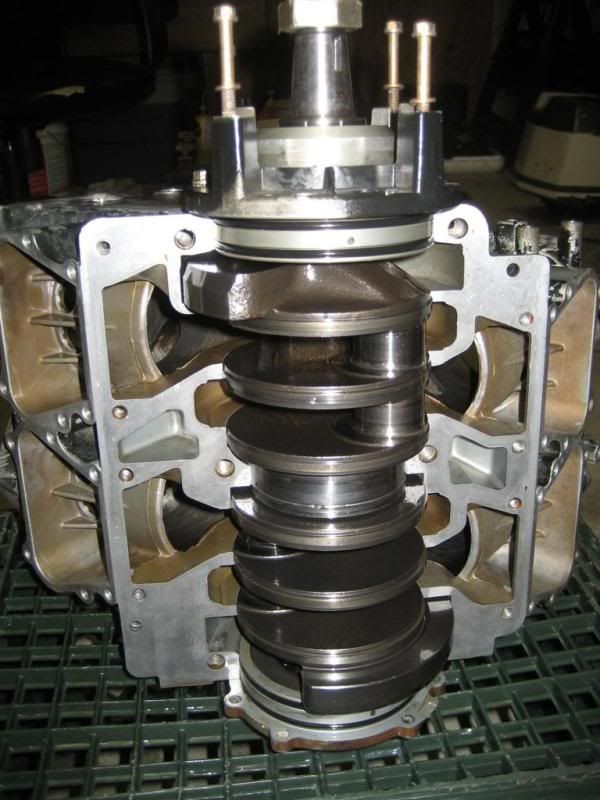
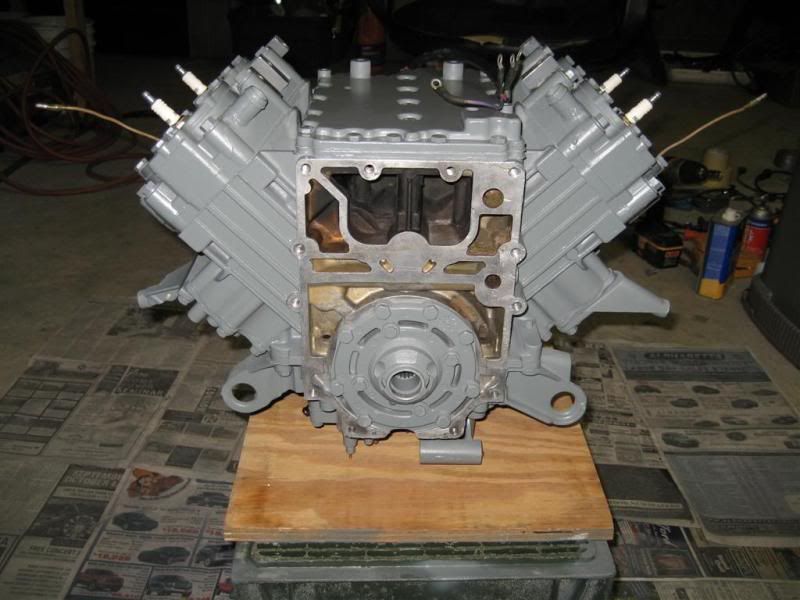
Unfortunately I don't have any assembly pictures. I couldn't find the camera, although I didn't look very hard because it was in the glove box of my car. Here is one of the crank in the block. Not sure if this was taking during the disassemble or initial assembly?
PowerHead2.jpg


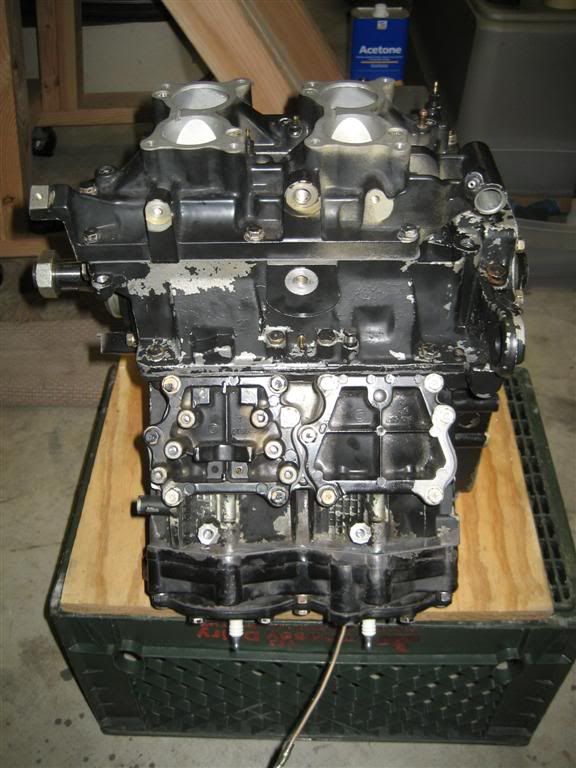
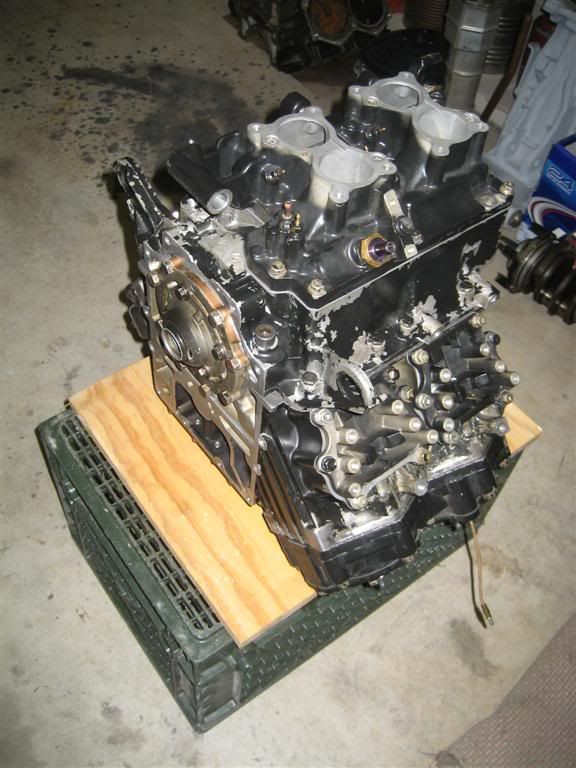
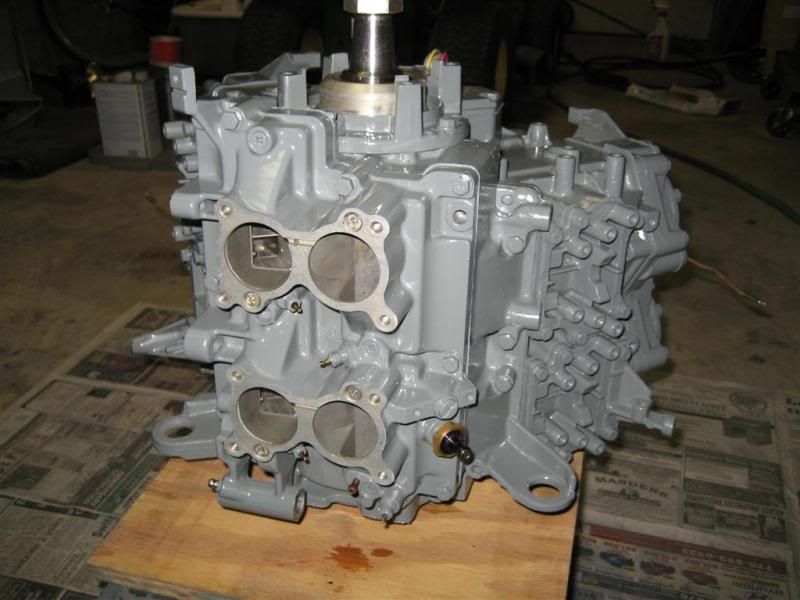
And a couple of the powerhead assembled. Still need the other head gasket and then paint.
PowerHead1.jpg

PowerHead.jpg
 

fire7882

Petty Officer 2nd Class
Joined
Jul 15, 2008
Messages
172
Re: 15' Sport-Craft Sprint project

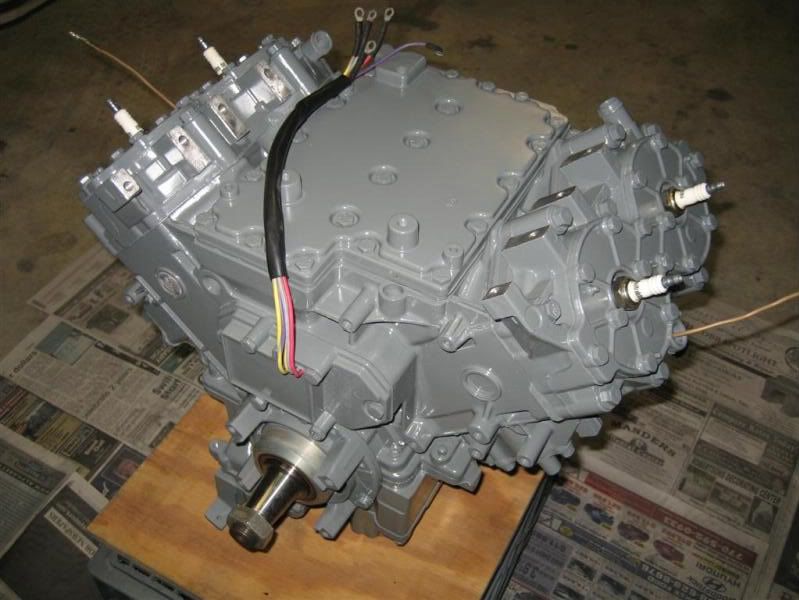
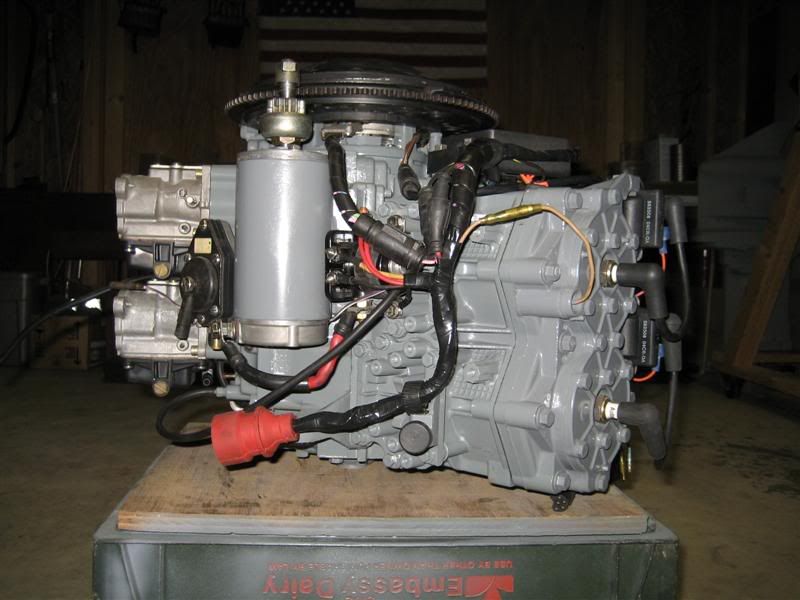
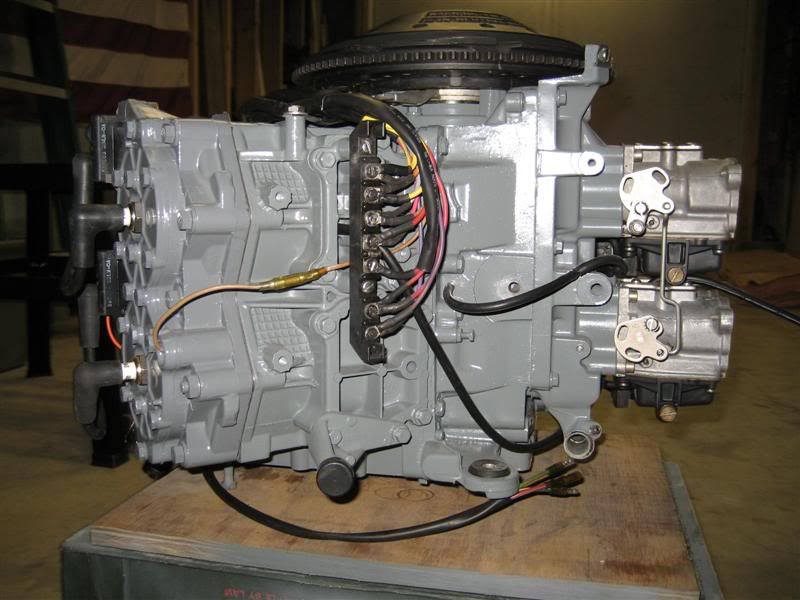
Finally got the engine painted. I painted it gray because I've never been a fan of black engine blocks. Black tends to make leaks and other problems less noticeable.

IMG_2392Large.jpg

IMG_2397Large.jpg

IMG_2398Large.jpg
 

berry79

Petty Officer 2nd Class
Joined
Jul 5, 2009
Messages
109
Re: 15' Sport-Craft Sprint project

Looking good, and I'll agree with about the black eng paint. Very difficult to see leaks. Hopefully you won't have to worry about that though.
 

fire7882

Petty Officer 2nd Class
Joined
Jul 15, 2008
Messages
172
Re: 15' Sport-Craft Sprint project

Looking good, and I'll agree with about the black eng paint. Very difficult to see leaks. Hopefully you won't have to worry about that though.

Thanks. I hope leaks won't be a problem but its always better to catch them sooner than later. Progress has been slow but I'm happy with the results so far. I'm going to try to finish the outboard within the next week and a half.
 

fire7882

Petty Officer 2nd Class
Joined
Jul 15, 2008
Messages
172
Re: 15' Sport-Craft Sprint project

This is a copy of a post I made in the Johnson/Evinrude Forum. I'm having a little trouble with the head gasket install so please chime in if anyone can help. Thanks!

This is a little long but I thought I would include as much info as possible. I think there is some head gasket installation confusion that prevents proper cooling of the lower starboard cylinder on Evinrude/Johnson V4 powerheads. My service manual doesn't give very detailed head installation instructions so I thought I would throw this out there as well as ask a few question. I just got into boating and I've acquired 3 90 hp v4 motors in the process of trying to get one good one and all three had problems with the lower starboard cylinder.

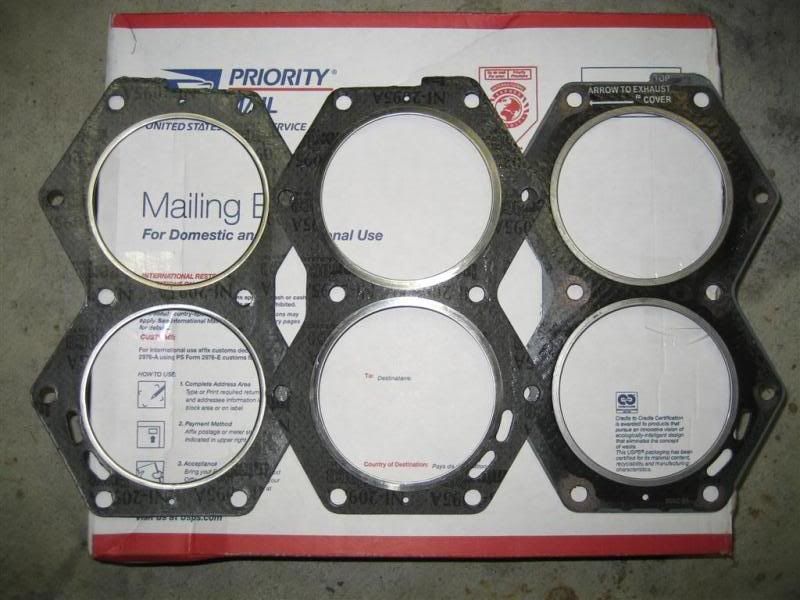
I just got finished assembling the block I have been working on in this thread.Block Damage Thread Since this block has had its problems, I have been checking and rechecking everything as I go along. I stopped by the marine parts store today and grabbed a couple head gaskets so I could go ahead and finish things up. I'm now having trouble deciding how these thing are installed. I have 2 new, never installed Mallory 9-63828 head gaskets(replaces jonny/rude # 318358) and one new but previously installed Sierra 18-2956 (also replaces jonny/rude # 318358). This powerhead is from a 1988 90 hp V4, model # E90TLCCA.

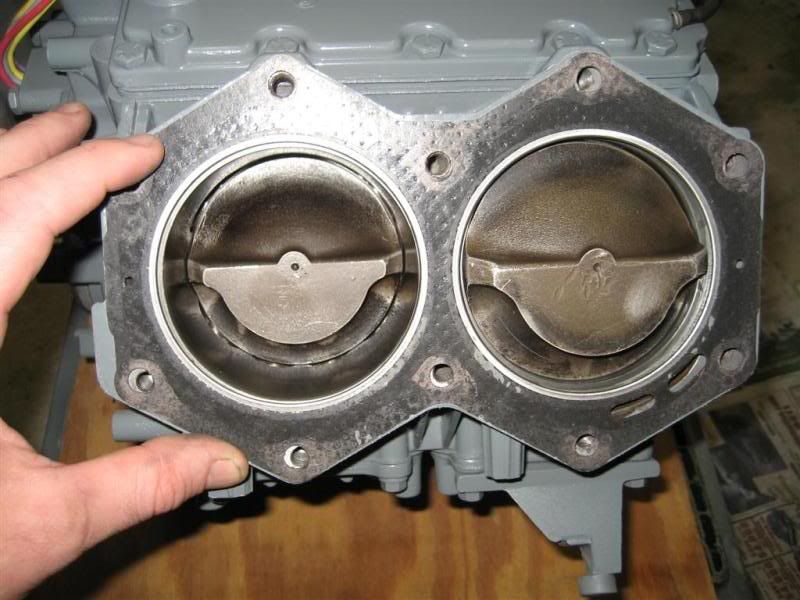
The first gasket is a Mallory with the thin side of the metal ring facing up. The second is the other Mallory with the wide side of the metal ring facing up. The last one is the Sierra with the wide side up. All gaskets are the same symmetrically.
IMG_2405Large.jpg


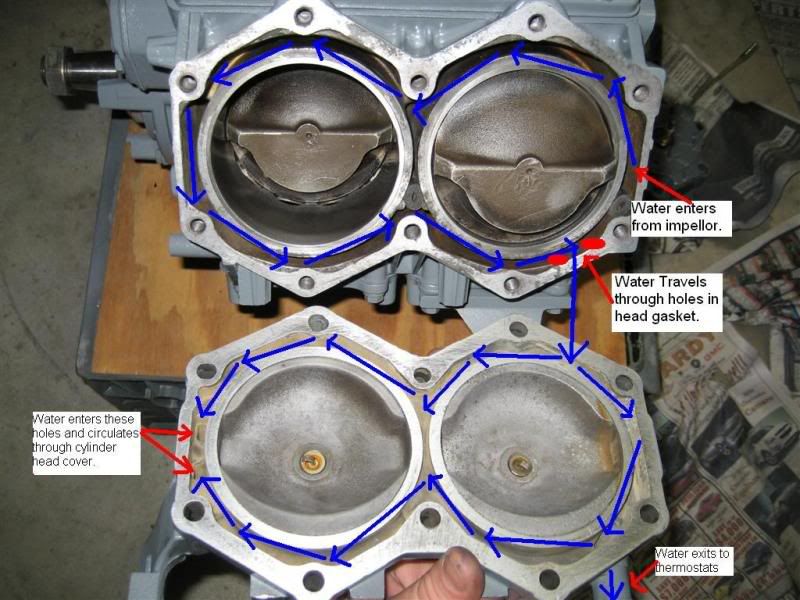
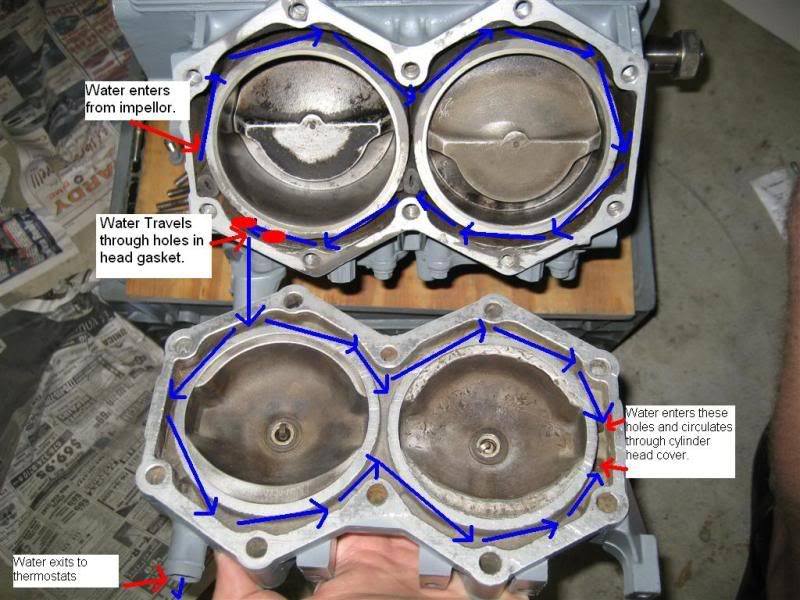
Below are a few pictures showing how I think the water should flow through both the port and starboard side of the engine. First I'll discuss the port side.

This is how I believe the flow of water should travel through the head.

IMG_2416Large.jpg


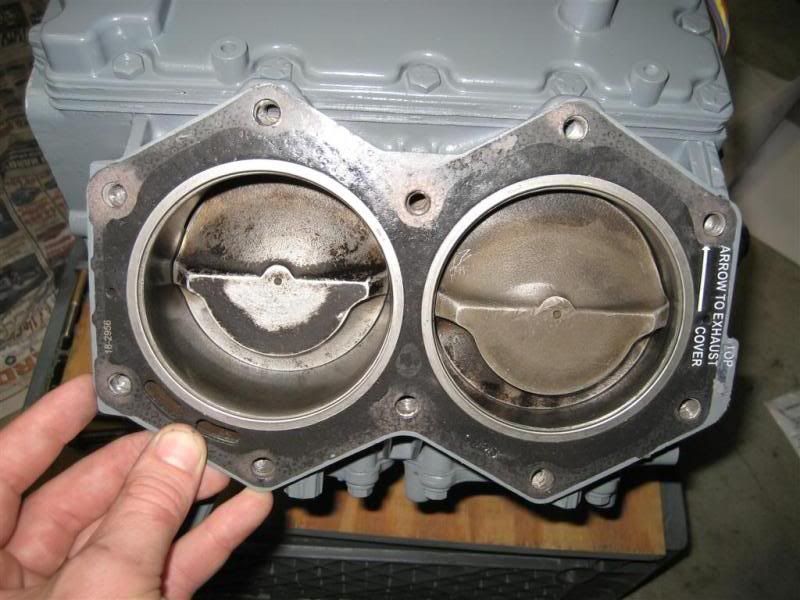
This is how the head gasket would need to be installed for the holes to end up in the correct location. The notation on the tab of the head gasket (left side in this picture) reads "Top, Arrow to Exhaust cover" You can see this wording in the picture of all the gaskets. I assume top means the top side of the block and not facing up toward the head. Also. notice that the metal cylinder sealing ring has the thin side contacting the Head.
IMG_2410Large.jpg


Now, on the starboard side, I believe the water should flow like this.

IMG_2415Large.jpg


With the holes in the proper location, the wide band is now facing up. The gasket is also installed properly according to the notation on the tab.

IMG_2413Large.jpg


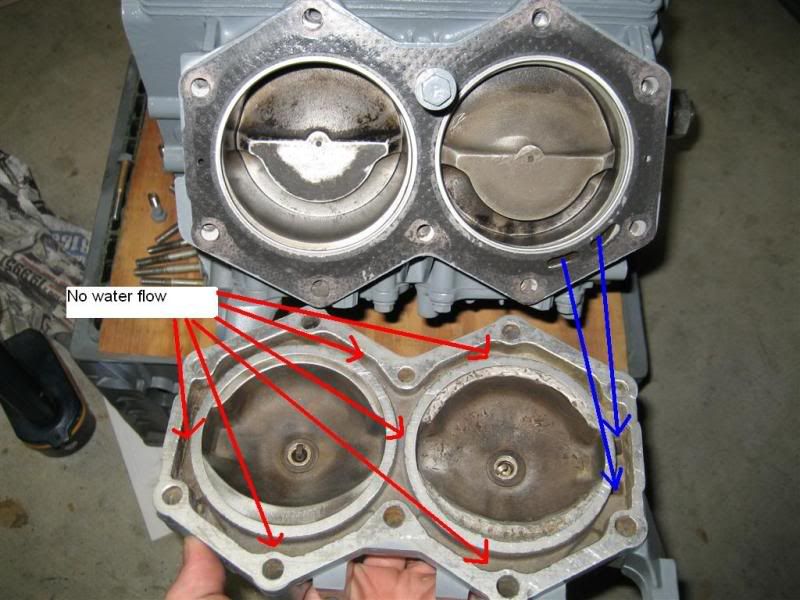
If you put the thin band up like the other side, the holes position would prevent the lower cylinder from getting proper cooling. As you can see, water would also bypass most all of the passages in the head before it reached the cylinder head cover. Here you can also see that this upper cylinder also suffered some damage.

IMG_2417Large.jpg


The Mallory gaskets I bought today didn't have any kind of installation notes on them like the Sierra gasket did. I would think this could cause some confusion to someone who hasn't worked on these motors before(like me). It wouldn't be hard to assume that the similar sides of each gasket should be making contact with the same surface, either head or cylinder.


Now a couple questions.

Does it matter which side of the metal sealing ring makes contact with the head? I assume it doesn't and the most important thing is to have the water passages in the correct place.

Have my assumption be correct? Any advice, suggestions, or additional info?
 

fire7882

Petty Officer 2nd Class
Joined
Jul 15, 2008
Messages
172
Re: 15' Sport-Craft Sprint project

I finally finished the controles tonight. I also got some more done on the motor like installing carbs, wiring, flywheel, recirculation hoses, exc. I'll try to get some pictures up this week.
 

fire7882

Petty Officer 2nd Class
Joined
Jul 15, 2008
Messages
172
Re: 15' Sport-Craft Sprint project

A little late with the pics but I haven't gotten much done in the last two weeks.

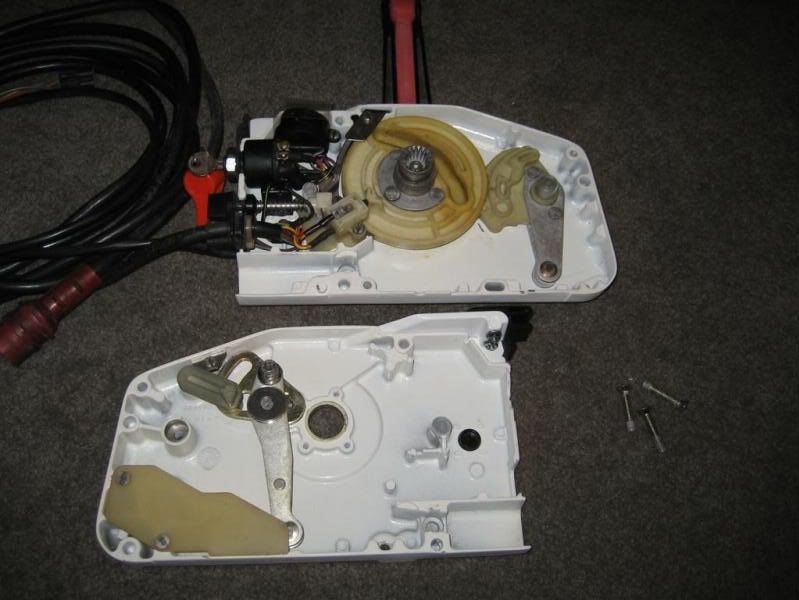
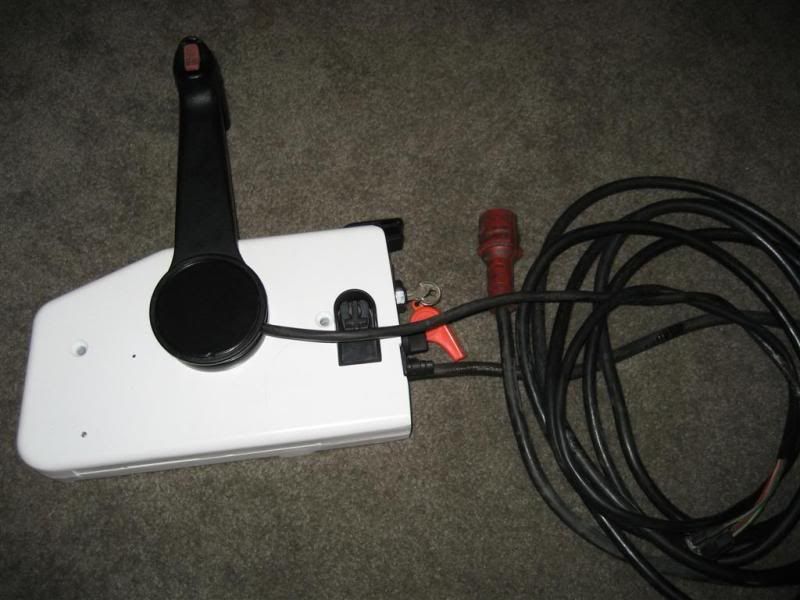
Here is a picture of the controls I rebuilt. All the parts were in great condition but there was a lot of old caked up grease built up inside. I cleaned everything and painted a few of the parts. Works like new now.
IMG_2461Large.jpg


IMG_2459Large.jpg


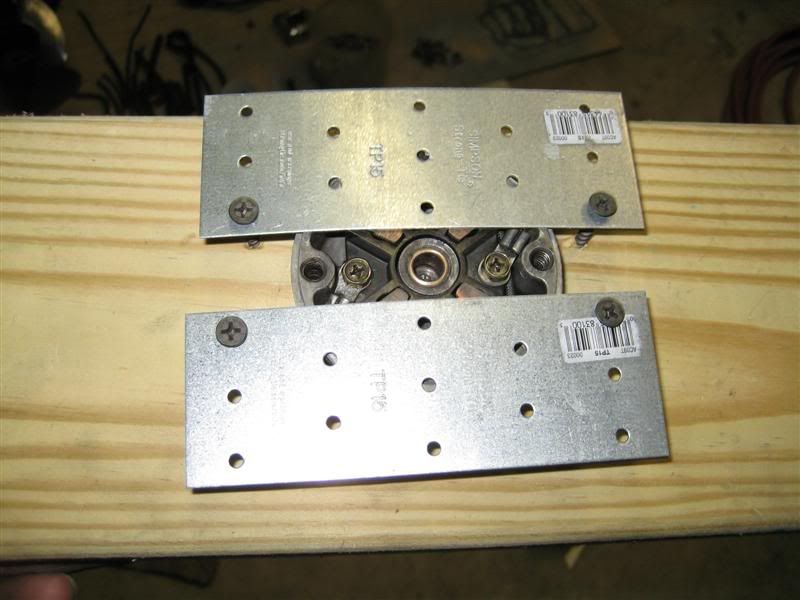
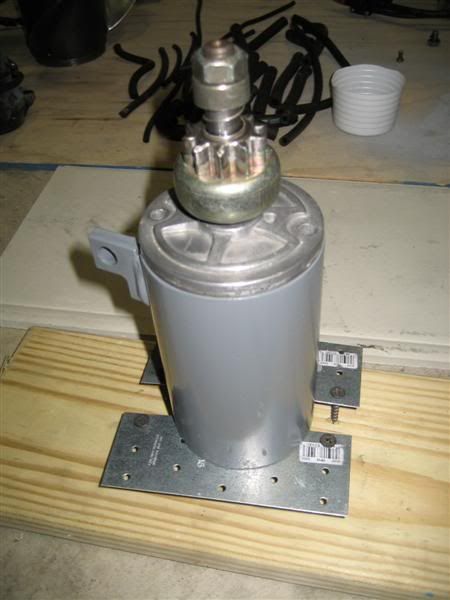
I pulled the starter apart and cleaned up the internals and inspected the brushes. While it was apart, I painted the body to match the engine. Here you can see the device I used to hold the brushes down during assembly.
IMG_2455Medium.jpg


IMG_2458Medium.jpg
 

fire7882

Petty Officer 2nd Class
Joined
Jul 15, 2008
Messages
172
Re: 15' Sport-Craft Sprint project

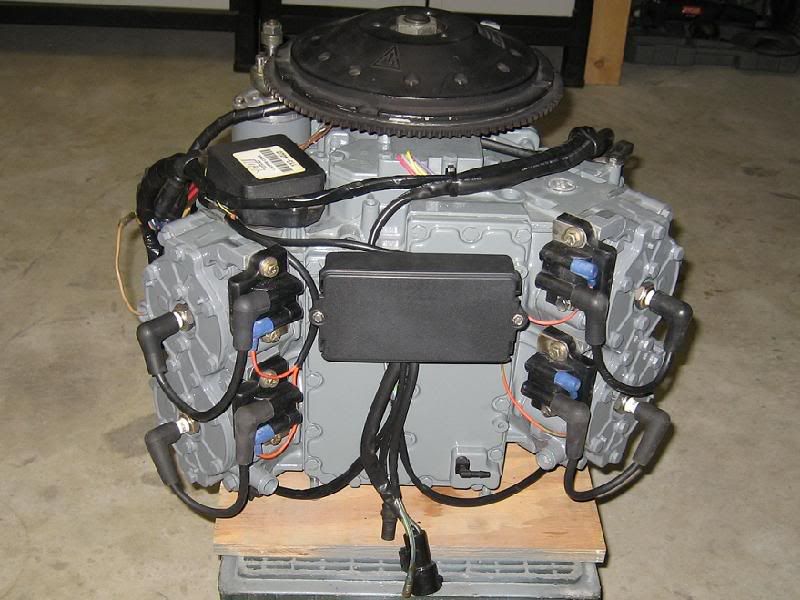
I got a new head for the starboard side since the other one had damage. I've rerouted some of the wiring in an attempt to clean things up a little but I'm not sure how successful that was. I only have to finish up a few small things on the power head before i start putting the outboard back together.
ob1-1.jpg

IMG_2481Medium.jpg

IMG_2477Medium.jpg

IMG_2476Medium.jpg
 

MidnightSpeedKC

Seaman Apprentice
Joined
Sep 11, 2009
Messages
37
Re: 15' Sport-Craft Sprint project

In your first post, you said you were looking to stay around $1500. With all the work and everything that you've done, how much do you say you have in the boat now?
 

puddleboater

Seaman Apprentice
Joined
Oct 5, 2009
Messages
38
Re: 15' Sport-Craft Sprint project

GRRRRRRR!!!!!!!

I've been reading this thread and was hoping that he fired up the motor by now! :D

Now I feel like I've been left hanging!!! :redface:
 

fire7882

Petty Officer 2nd Class
Joined
Jul 15, 2008
Messages
172
Re: 15' Sport-Craft Sprint project

In your first post, you said you were looking to stay around $1500. With all the work and everything that you've done, how much do you say you have in the boat now?

$350 for the boat
$400 for first 90hp outboard
$150 for second 90hp outboard
$200 for 5 gallons poly fiberglass resin, cloth and other related materials.
$60 for paint and primer to do hull interior
$60 for plywood to do floor(I just used regular ply and painted the bottom)
$20 for seats (still need to buy fabric to cover them)

I can't think of much else but I'll add another $200 for misc things. That puts me at just under the $1500 i had planned on spending but I still need to purchase a few more things. I could have spent a lot more if I wanted to add more glass to the floor. I only put one layer on top and painted the underside with some oil based exterior paint I had left over from another project. I wanted to keep the weight down and it will be stored indoors anyway.

I still have a ton of parts to put on ebay and could potentially recoup half of what I have spent. I might keep some stuff for potential repairs but we'll see.

GRRRRRRR!!!!!!!

I've been reading this thread and was hoping that he fired up the motor by now! :D

Now I feel like I've been left hanging!!! :redface:

Unfortunately, I have almost no time. I wanted to be done a year ago but school, work and potential relocation plans have slowed things down a lot. I also changed my plans with this motor and decided to inspect, clean, paint, and refurbish almost every individual part. If I had 3 or 4 full days, I would have the outboard looking like new and installed on the boat. I'm going to try to finish all the painting this week before it gets to cold down here.
 

MidnightSpeedKC

Seaman Apprentice
Joined
Sep 11, 2009
Messages
37
Re: 15' Sport-Craft Sprint project

That's awesome that you've stayed below your budget! I'm looking into completely re-doing my boat this winter. I'm on a $1000 budget.
 

fire7882

Petty Officer 2nd Class
Joined
Jul 15, 2008
Messages
172
Re: 15' Sport-Craft Sprint project

Taking forever to get things done has helped a lot. I have had time to wait for great deals on parts instead of just getting something because I needed it asap. The last outboard for $150 was the biggest help. I should be able to sell the extra lower unit and power T&T for arount 250 each. In adition, there are a ton of other parts I have left over such as a head, starter, powerpack, coils, complete mid-section, carbs, crank & flywheel, exc, exc, exc....

Good luck on your project and be sure to make a thread and take lots of pictures.
 
Top