15'6" Hourston Glascraft Full Rebuild

PSim

Recruit
Thread starter
Joined
Oct 17, 2026
Messages
4
Hey guys, I go by P.

I've reading the forums for years so I figured it was my time to give back in a way and hopefully give a few inspiration to go and attempt this work themselves.

Me and a good friend each bring some assets to the table so we decided to go in on this small boat as a good first rebuild project and then push on from there.

The reason we chose the 15'6" Hourston is for a variety of reasons such as being economical, relatively quick and still a sturdy boat when caught in some chop. I've been a part of a number of boat rebuilds over the years but it was time to have my own so here we are.

Feel free to comment, give pointers or words of wisdom as you see fit. Sometimes, hearing stuff from others can inspire things.

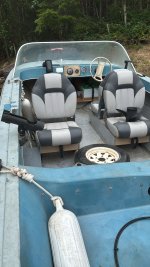
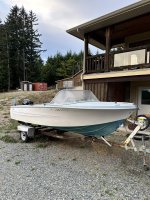
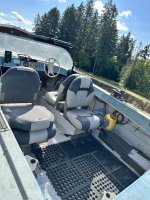
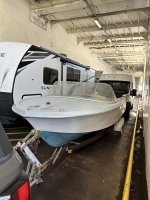
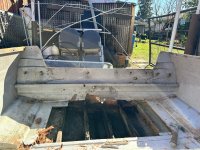
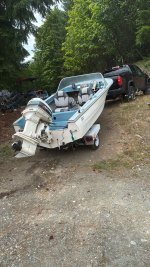
Here is the starting spot.

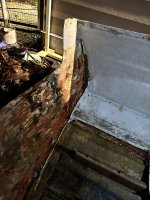
2 Stroke Johnson, won't start. Transom rot, deck rot and some stringer rot starting. Let's begin.
 

Attachments
  • 572b5154-2f36-4f8b-9b20-ce97cdd4fdc5.JPG
    572b5154-2f36-4f8b-9b20-ce97cdd4fdc5.JPG
    982.1 KB · Views: 1
  • a256438b-da3a-4822-8205-995a5f535418.JPG
    a256438b-da3a-4822-8205-995a5f535418.JPG
    457 KB · Views: 1
  • IMG_3061.jpg
    IMG_3061.jpg
    3.4 MB · Views: 0
  • IMG_3063.jpg
    IMG_3063.jpg
    2.7 MB · Views: 0
  • IMG_3101.jpg
    IMG_3101.jpg
    2.1 MB · Views: 0
Last edited:

PSim

Recruit
Thread starter
Joined
Oct 17, 2026
Messages
4
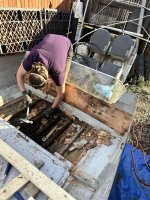
Took the top skin off to make it easier to work on the transom. Bit of a PITA since there are a bunch of rivets holding the skin on, which is after taking off all the fully rusted t-Bolts holding on the aluminum rub rail.

After that, just chipping away at the rotten transom and stringers. A bit more rot than anticipated but at this point, it makes it easier to chip away since its delaminated so I won't complain.
 

Attachments

  • IMG_3172.jpg
    IMG_3172.jpg
    573.6 KB · Views: 1
  • IMG_3178.jpg
    IMG_3178.jpg
    3.9 MB · Views: 1
Last edited:

PSim

Recruit
Thread starter
Joined
Oct 17, 2026
Messages
4
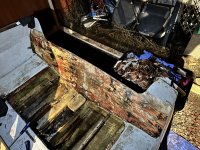
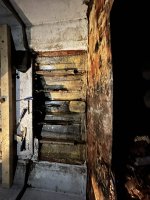
Pretty much fully ready for sanding prep before new transom and glass.

Boat is level with some supports inside to prevent any hull shift. With the floor intact, I doubt any twisting will occur but might as well play it safe anyway.

I also did not expect a keelson board but it shouldn't be too much additional work to add a new board.

One thing that I did not like about this Hourston from factory is how it was designed to eliminate any water that got in. It had no bilge and it had 2 plugs that had to be plugged during slow movement and then removed during plane for the water to drain out. The splash well would drain into the back and then the water would pool until you would move relatively quickly.

I will likely add a bilge in the centre where the lowest point is a build a short bulk head that will act as a contained sump. I will likely have to add drain holes in the corners of the stringers in order to allow water to trickle down in case it gets trapped under the floor but this is still prospective for now. First, the transom needs to be fully replaced.
 

Attachments

  • IMG_3183.jpg
    IMG_3183.jpg
    650.3 KB · Views: 1
  • IMG_3184.jpg
    IMG_3184.jpg
    2.1 MB · Views: 1
  • IMG_3185.jpg
    IMG_3185.jpg
    2.4 MB · Views: 1
Last edited:

alldodge

Moderator
Staff member
Joined
Mar 8, 2009
Messages
44,664
Welcome
Looks like you have a big job ahead of you, look forward to seeing progress
 

PSim

Recruit
Thread starter
Joined
Oct 17, 2026
Messages
4
Welcome
Looks like you have a big job ahead of you, look forward to seeing progress
Thank you. Hopefully there are some experienced members here that can offer tidbits along the way. I'm relatively seasoned DIY'er in plenty of areas but experience on details is hard to beat.
 
Top