19' Invader Project

mrdopes

Seaman
Joined
Oct 13, 2008
Messages
59
Hey guys!

Well, I had another project posted last year (23' Uniflite Hardtop Cruiser) that I intended to finish this season; but, this smaller boat was calling my name and she took priority (apparently).

Im starting this today, Monday March 30th...

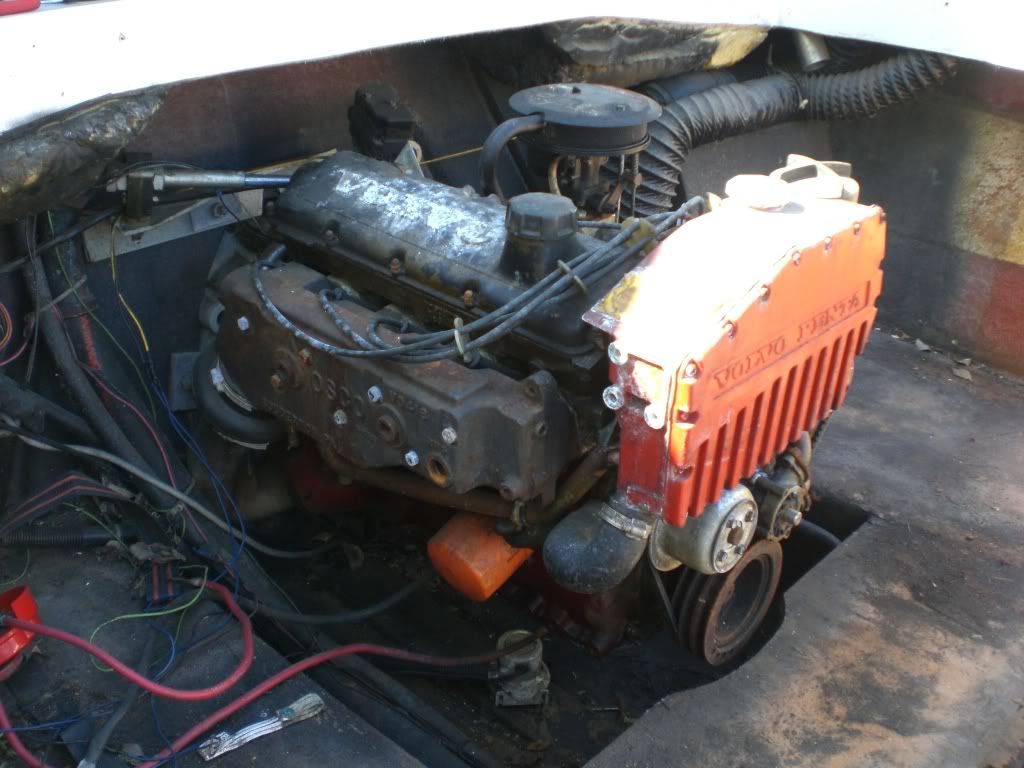
This is a 19" open bow Invader by Invader corp. She is running an AQ131D mated to a VP275 drive.

pic054.jpg


pic044.jpg


pic045.jpg


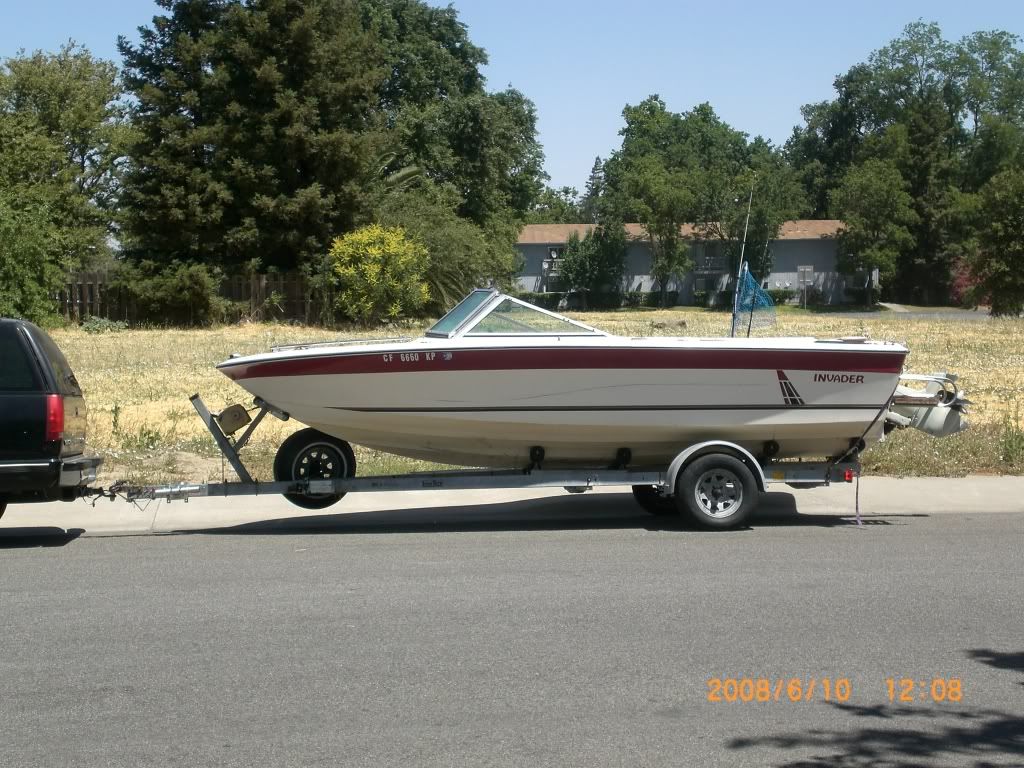
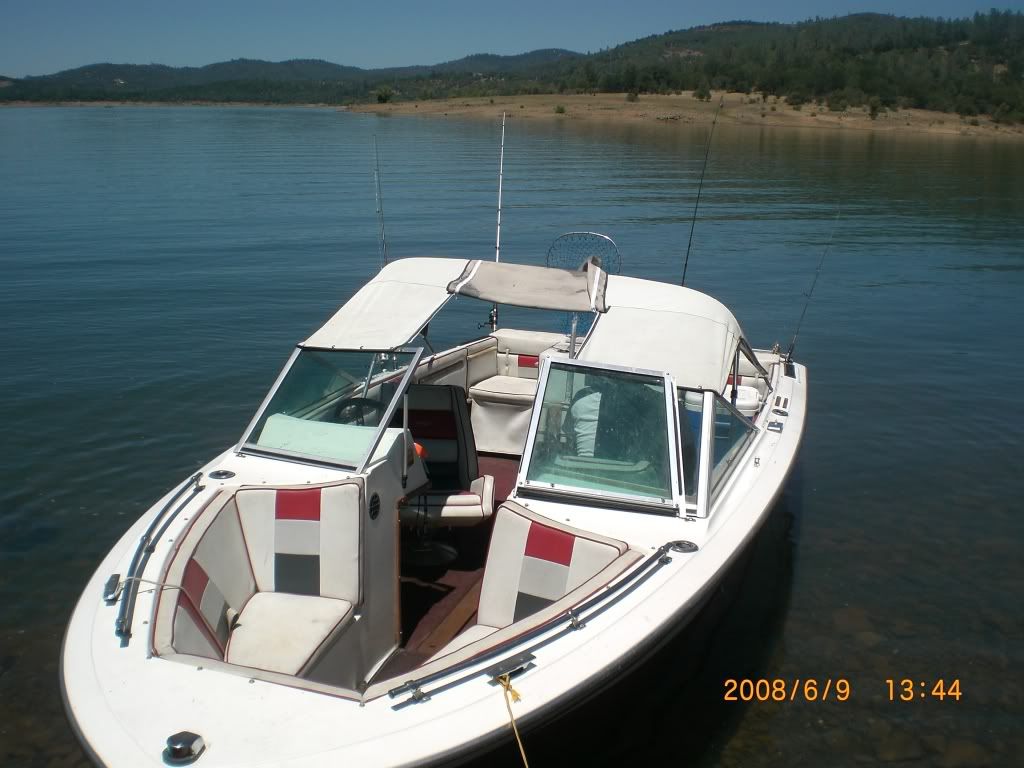
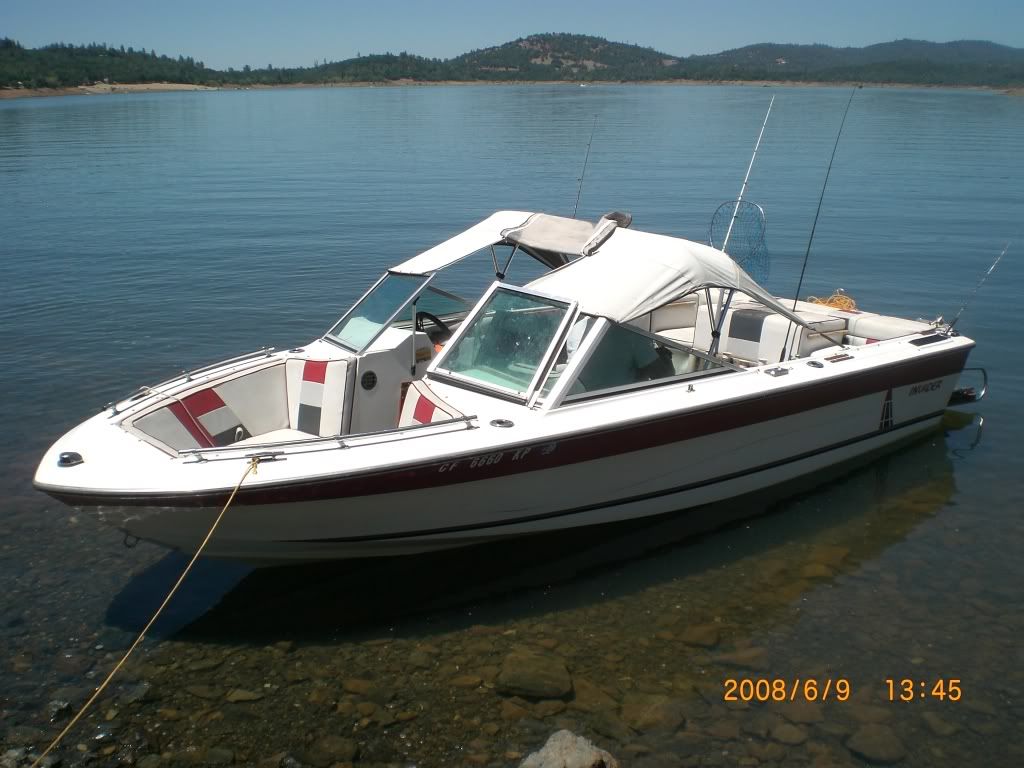
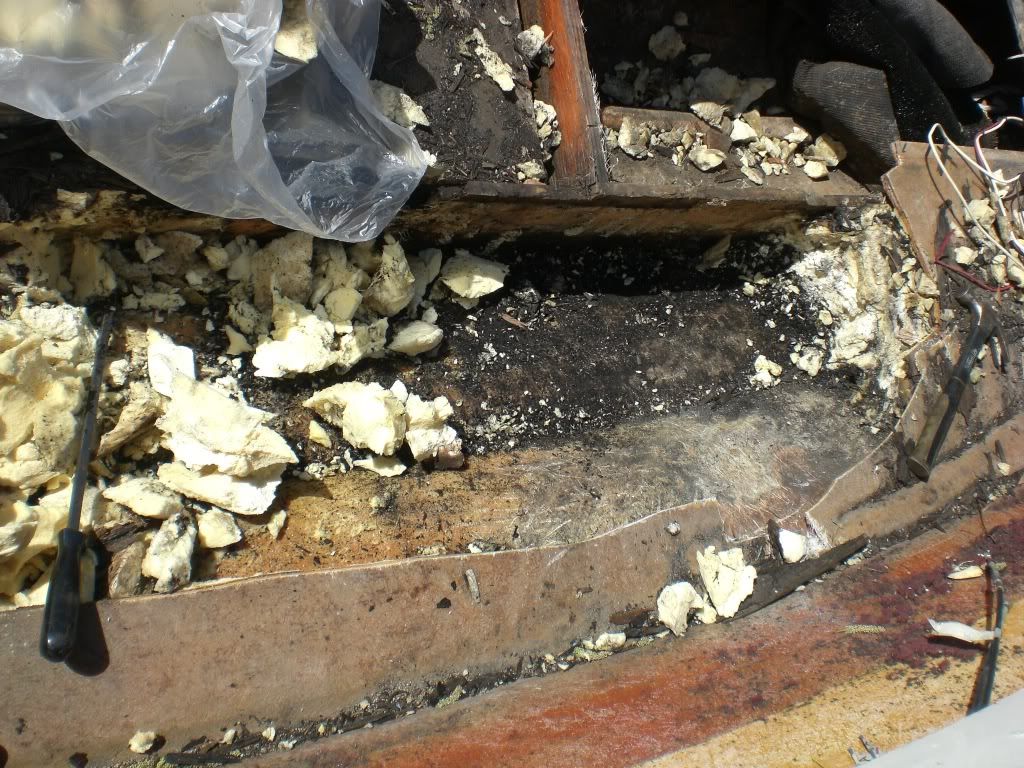
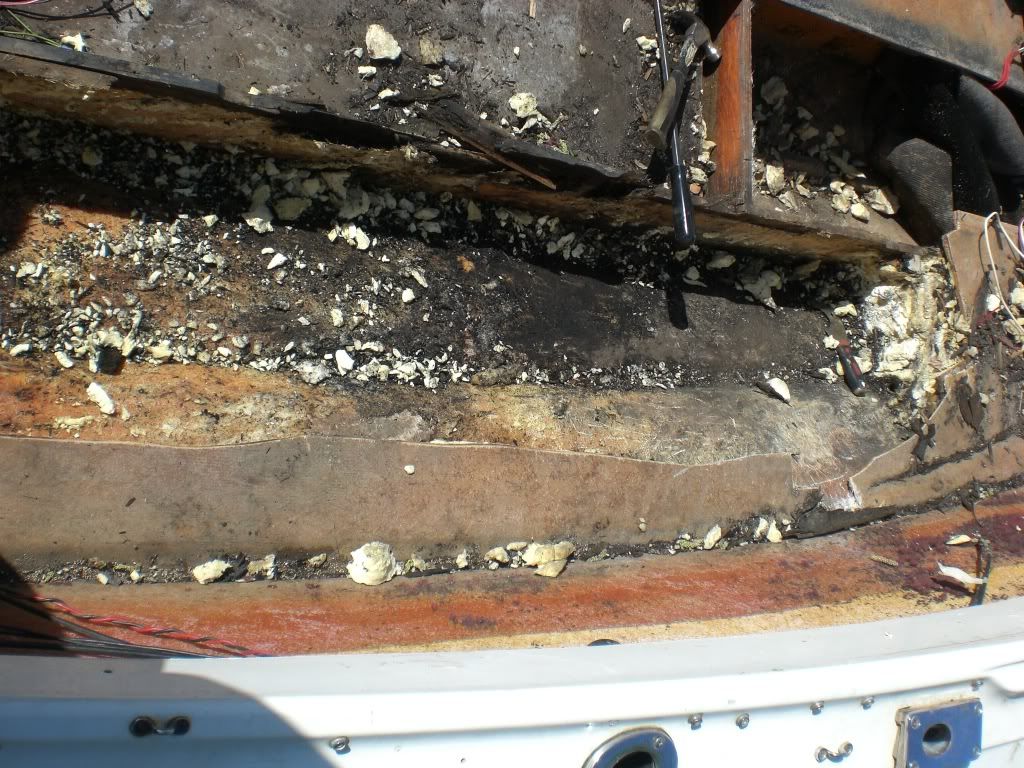
I acquired this in a trade last year for another boat, and enjoyed her all season last year. She runs great, but was seriously neglected in the past. She has obviously been left uncovered for a few seasons, as the carpet is torn, the deck is soft, and the upholstery is shot...

After winter i decided to put my other boat project on the back burner and redo the floor of the invader.....so, i pulled the covers off of her and gave her a thorough look through.... I took out my notepad and started making a list of the things that i wanted to do, and a separate list of the things that I NEEDED to do. As i am sure many of you have seen before, my 'NEED TO DO' list started getting pretty long.

So, here we go: the goal is to have her finished in time to use her for at least a month or so this season; but, if that proves to be unrealistic, I'm not worried. I'd rather do it right than fast.

My budget is pretty limited (damn recession), so i am taking my precious time so i can buy the right materials, due the job right once, and enjoy the boat for years to come.

Last year I didn't do very good job covering her. I went cheap on the boat cover, and moisture wrecked the upholstery, leaving it a mildewy disaster.

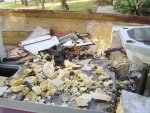
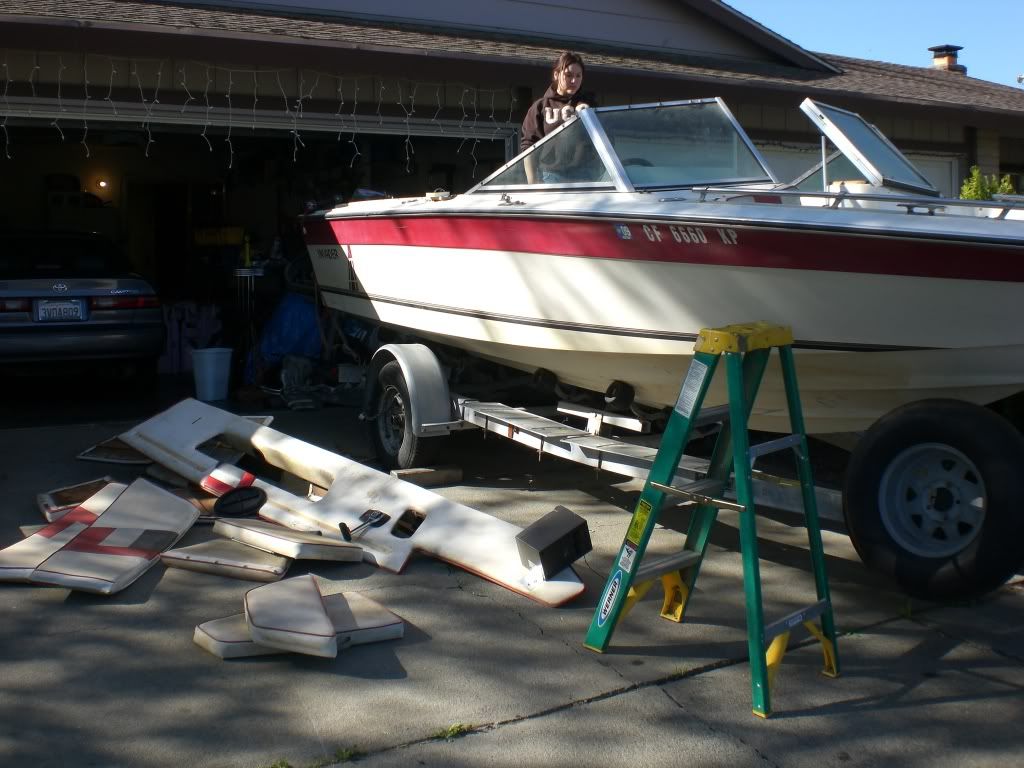
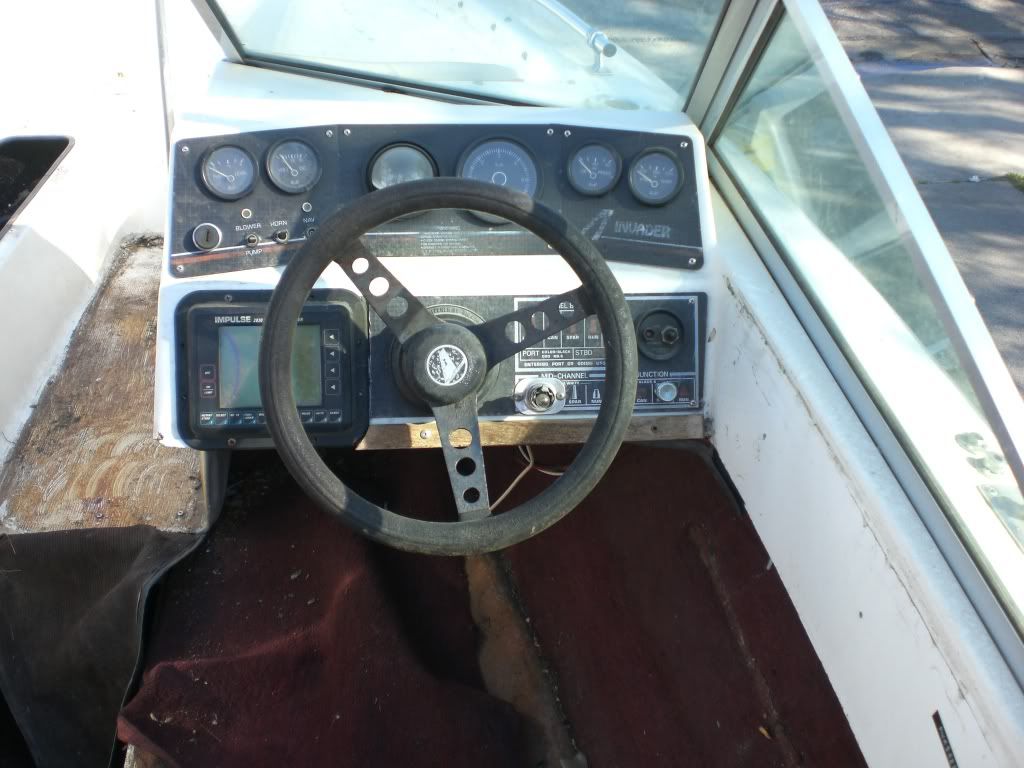
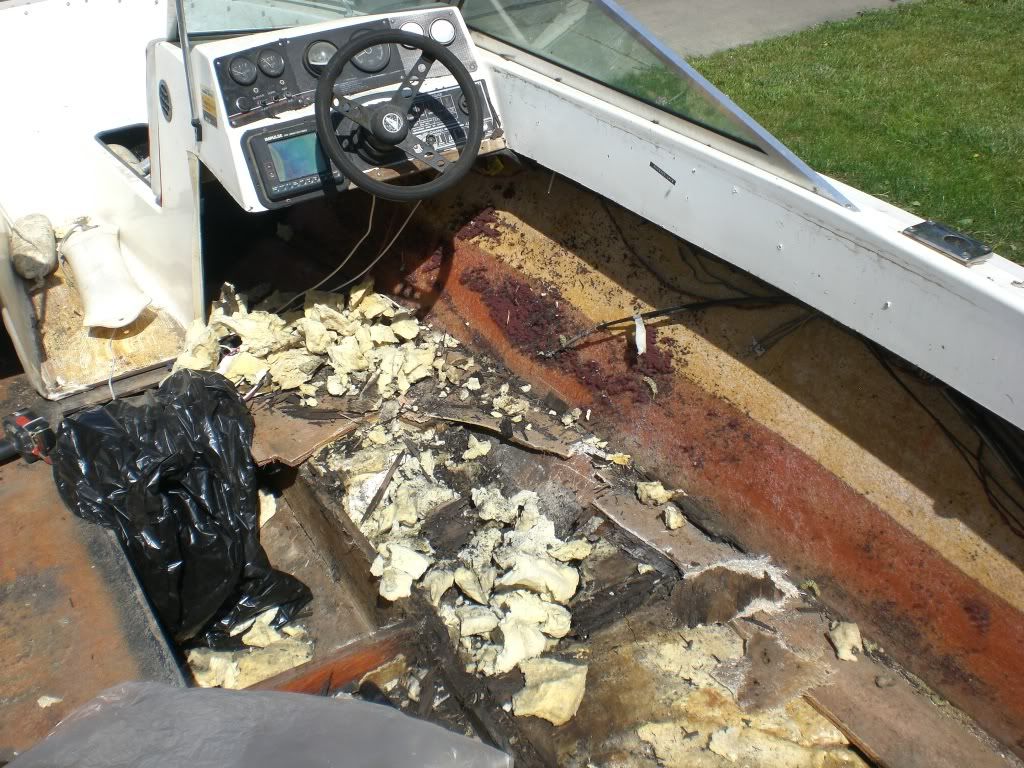
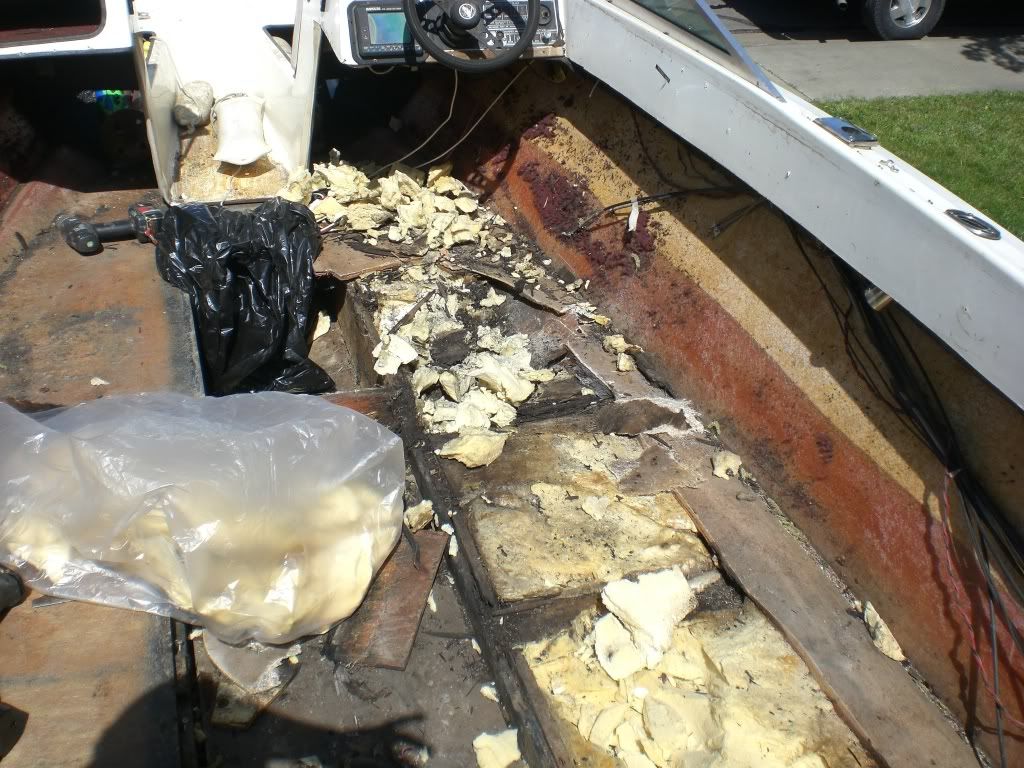
Here are some pictures of her in the driveway, as the wife is helping me strip out the interior:

march302009078.jpg


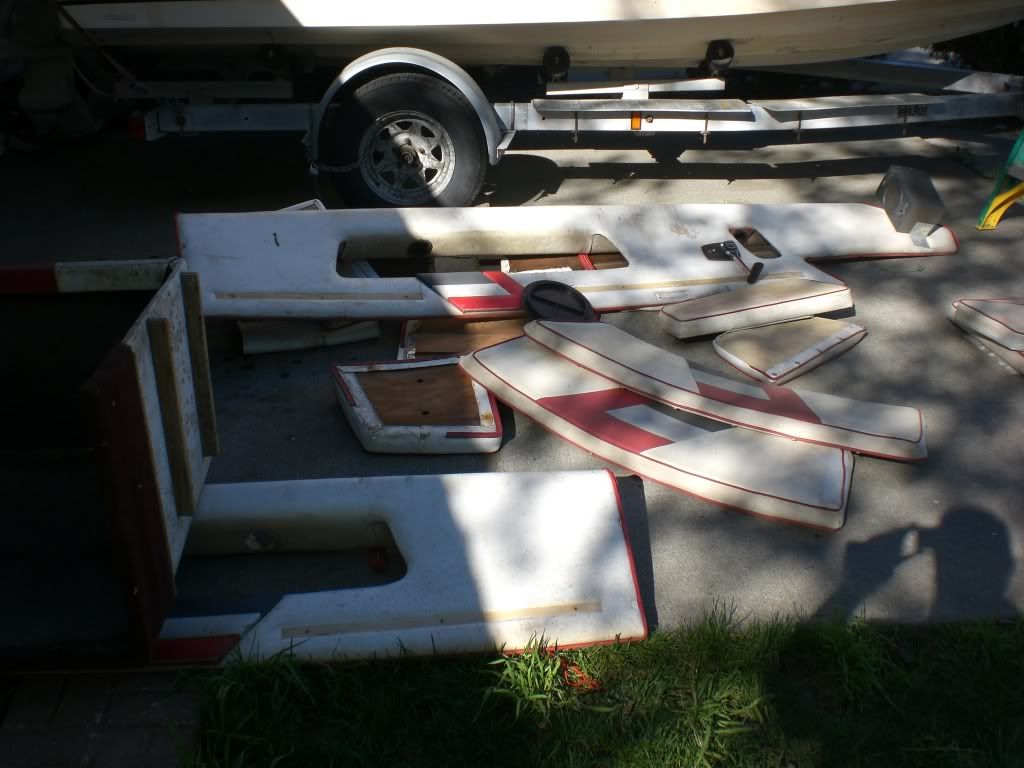
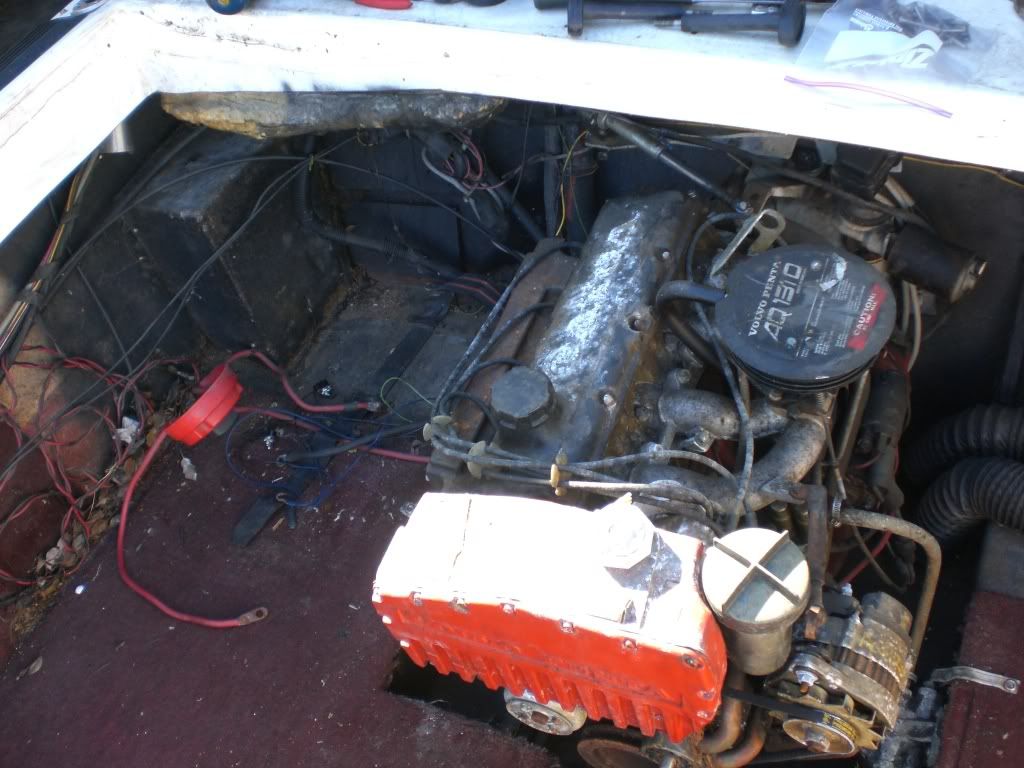
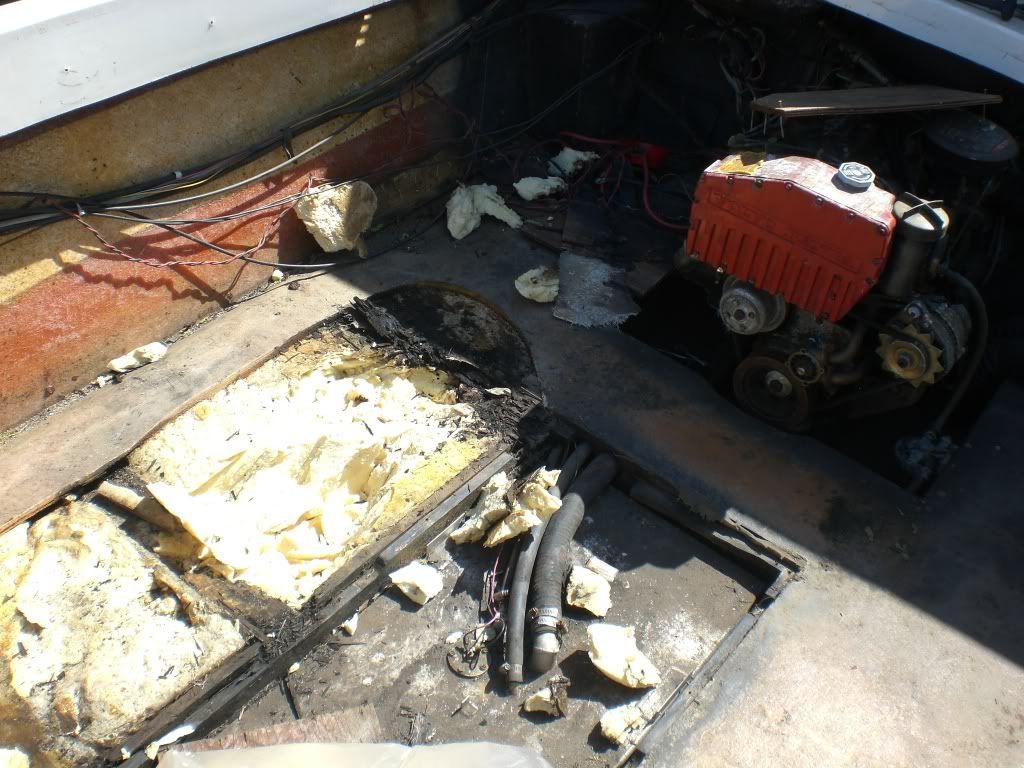
Here is a picture of the interior all out of the boat:

march302009077.jpg


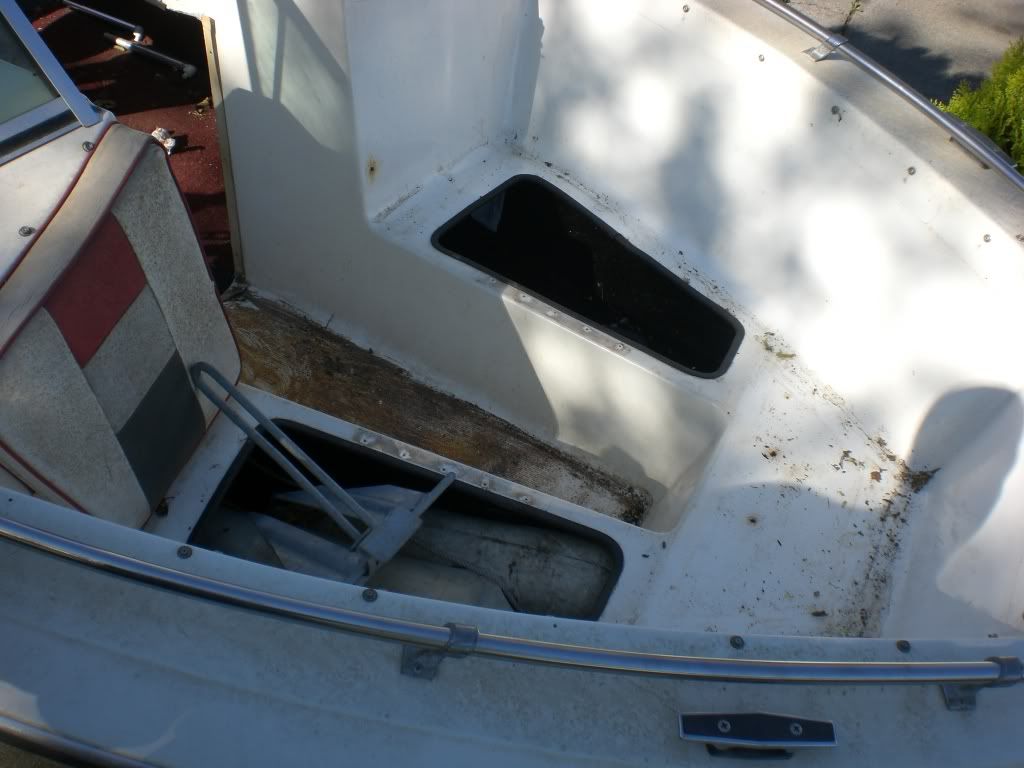
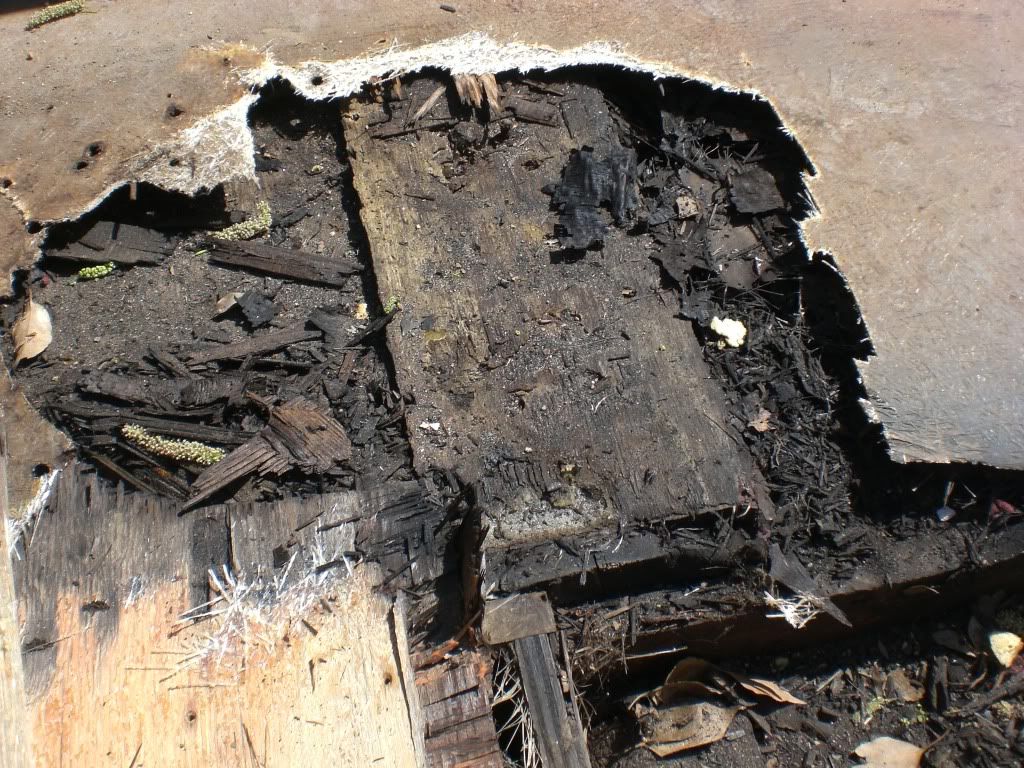
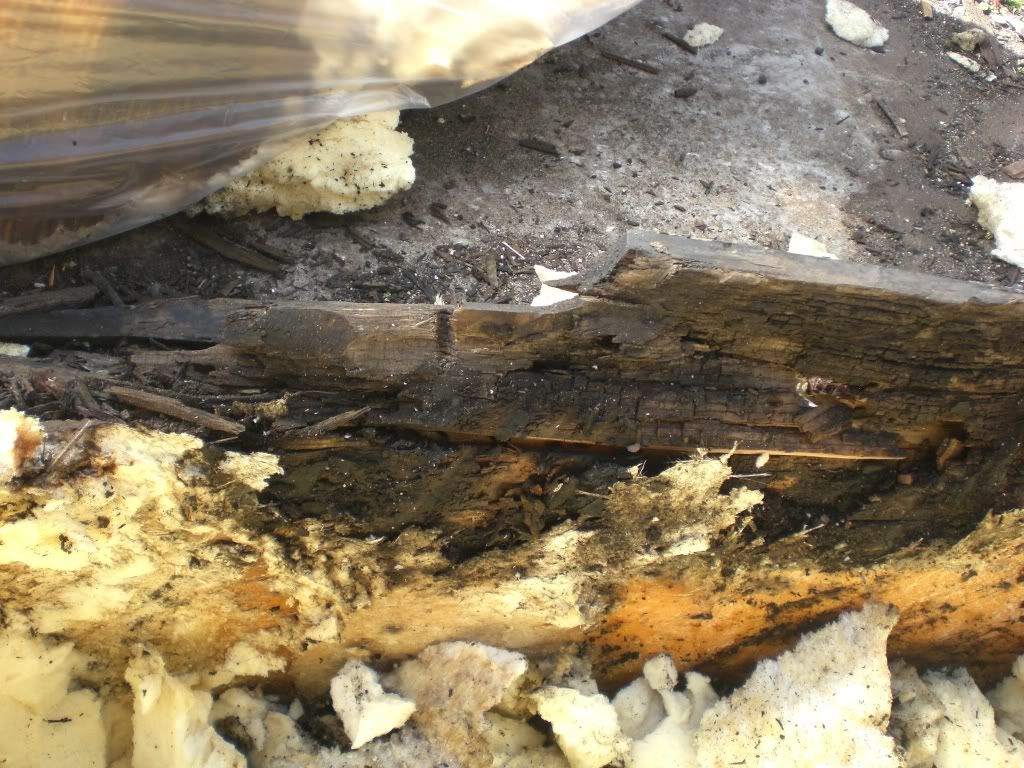
Here is the front bow:

march302009079.jpg


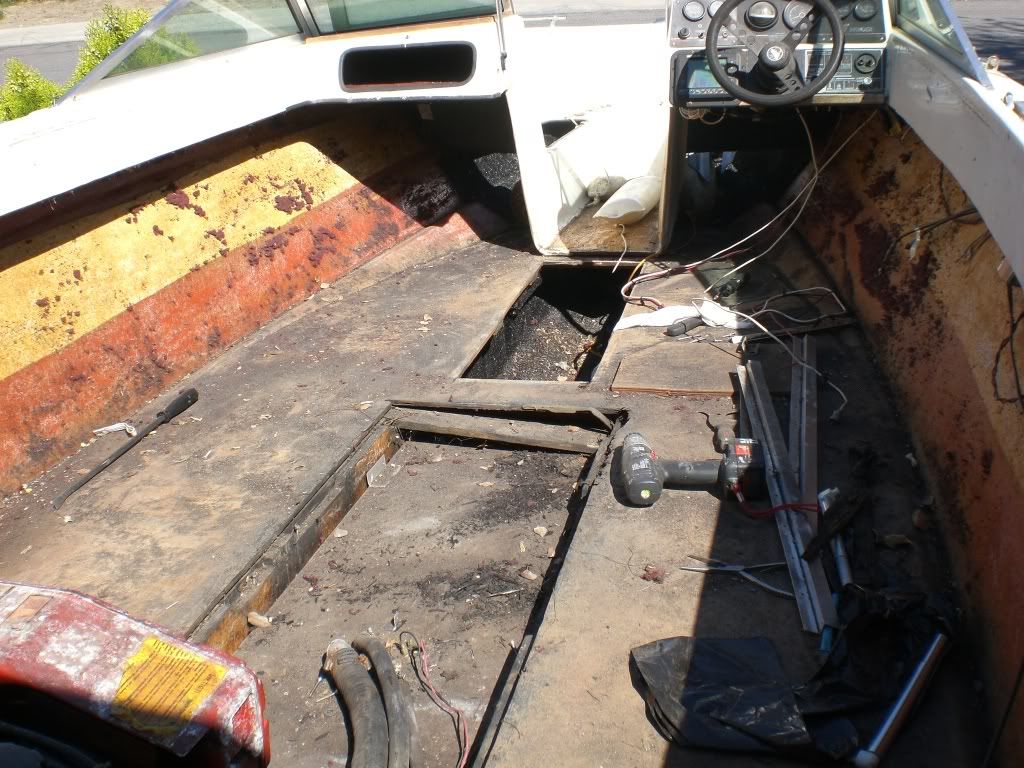
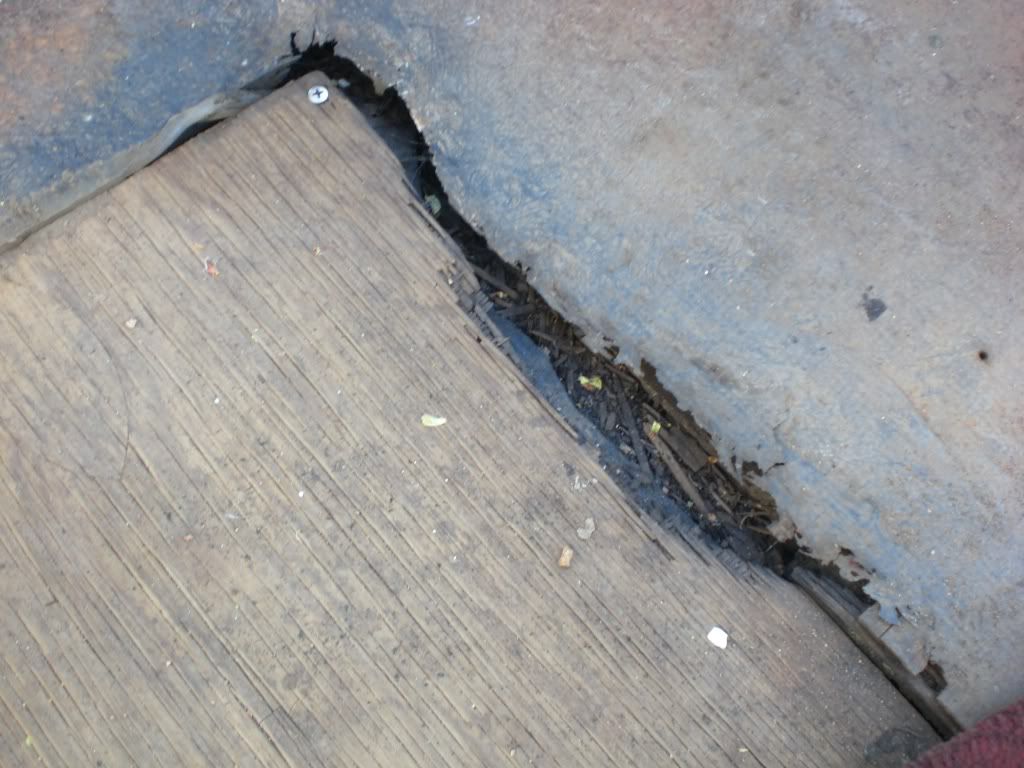
I realized here that this wasn't going to be a simple deck job.
 

mrdopes

Seaman
Joined
Oct 13, 2008
Messages
59
Re: 19' Invader Project

Here is a shot of the little misses getting her hands dirty! Yes, that is a power drill in her hands!!

march302009083.jpg


Here is the stripped down interior:

march302009087.jpg


march302009086.jpg


march302009089.jpg


march302009080.jpg


After getting all the trim and carpet out, i began to carefully inspect the deck to try and make an accurate estimate of the rot damage:

march302009084.jpg
 

mrdopes

Seaman
Joined
Oct 13, 2008
Messages
59
Re: 19' Invader Project

This one was where the driver's captain chair was placed:

march302009094.jpg


At this point i was able to see that the rot started where there were half-a55 repairs made in the past. For example, the holes drilled for the captain chairs bolts were not properly sealed, allowing water in, eventually soaking the floor and foam.

Also, the plywood above the gas tank was not glassed or treated at all. The screws holding it to the stringers were not sealed, and there was rot emanating from here and spreading out down the stringers.

The deck wood was SO ROTTEN (under the glass) that i could push my finger into it and break it apart without any effort.

It was simply disgusting.

So, i grabbed the circular saw, a reciprocating saw, a hammer and chisel, a pry bar, and a bunch of garbage bags and got down to work!

march302009095.jpg


march302009096.jpg


march302009097.jpg


Here is a close up of what used to be a stringer in some point of its existence....what it is now is unclear...

march302009100.jpg


march302009101.jpg
 

mrdopes

Seaman
Joined
Oct 13, 2008
Messages
59
Re: 19' Invader Project

Same stringer, but at a different point:

march302009101.jpg


After getting enough of the floor off, i started to pull some of the foam up, and guess what?? it was wet. Who woulda thought?

march302009098.jpg


Here is a pic of the area, deck pulled, and foam pulled...

march302009102.jpg


This is all that i was able to get done today Mon March 30th. I am off mon/tues, so my updates will most likely come once a week for those of you that look for them.

I have many questions about this process, as it is the first time that I have done it. So far, this website, and a few others like it, have been my main resource in terms of questions and answers, so.... i will post some questions for you guys in my next reply....
 

mrdopes

Seaman
Joined
Oct 13, 2008
Messages
59
Re: 19' Invader Project

and now.... any help would be very much appreciated.

1) I took some samples of the transom wood, (drilled holes and looked for moisture) and it is amazingly dry....and seems solid. Are there any other tests that you'd recommend?

2) Being that the transom is somehow miraculously dry, would it be a 'might as well do it' job? Or a 'if it ain't broken don't fix it' gig?

3) the stringers and deck are a lot worse off than i expected. So, in terms of structural integrity, what is the best way to support the engine/drive on the transom while i pull the rest of the floor/stringers up?

4) Can i use the foam that was dry (about 60% of it) as a filler when putting the new foam in later? Or should i just throw it out?

5) im not going to be able to use the old stringers as a pattern for the new ones.... they are just not going to come out in one piece.... so, what would you guys recommend for this process?

I have many more ?s, but i figure that these would be a good start.....
 

mrdopes

Seaman
Joined
Oct 13, 2008
Messages
59
Re: 19' Invader Project

there's got to be an easier way to get this foam out......

what did you guys use to do it? Im using a hand shovel...
 

lowkee

Lieutenant Commander
Joined
Dec 13, 2008
Messages
1,890
Re: 19' Invader Project

there's got to be an easier way to get this foam out......

what did you guys use to do it? Im using a hand shovel...

Hahaha! Welcome to the club! I don't think there is an easier way. I used a sawzall to cut the foam into cubes as best as I could, then removed those pieces using a 5' ice scraper (looks like a cast iron version of a floor scraper), then scraped the remaining foam from the hull using the same scraper. I tried the pick axe approach and the crow bar approach as well, the scraper sped it up at least 5 times faster.

Looks like you are making great time, though! The irony is, the more rotten the wood, the easier it is to remove, so you are in luck ;)
 

mrdopes

Seaman
Joined
Oct 13, 2008
Messages
59
Re: 19' Invader Project

an ice scraper.....that's not a bad idea. Im gonna head to the hardware store right now to try and find one. Thanks.

Another quick question: since you've done this before :), do i have to worry about the hull bowing or flexing under the weight of the engine and drive?? Would it be safer to replace the floor in sections, so it doesn't lose integrity?:confused:
 

92excel

Chief Petty Officer
Joined
Oct 6, 2008
Messages
477
Re: 19' Invader Project

1) I took some samples of the transom wood, (drilled holes and looked for moisture) and it is amazingly dry....and seems solid. Are there any other tests that you'd recommend?

2) Being that the transom is somehow miraculously dry, would it be a 'might as well do it' job? Or a 'if it ain't broken don't fix it' gig?
Well i took core samples and found that my transom was dry.. then i decided while i was there just do it and when i ripped into it i found soft spots.. so im glad i stayed away from the if it aint broke done fix it.. it would really just add time and not alot in materials..

3) the stringers and deck are a lot worse off than i expected. So, in terms of structural integrity, what is the best way to support the engine/drive on the transom while i pull the rest of the floor/stringers up?

The best way is to pull the engine and get it out of the way.. you will have to do that to do the transom (if you choose) anyways..

4) Can i use the foam that was dry (about 60% of it) as a filler when putting the new foam in later? Or should i just throw it out?

If its 100% dry.. even on the inside then yes you can use it.. but its up to you if you want to fill every nook with foam or if you are ok with gaps.. filling everynook will get you more foam for the area you are filling and add structural inegrity to the hull


5) im not going to be able to use the old stringers as a pattern for the new ones.... they are just not going to come out in one piece.... so, what would you guys recommend for this process?

You can do what is referred to as a post and scribe method.. basically get your stringer wood parallel to the hull then use somthing like a small pipe or even brool handle with a pencil taped to it.. move it along the hull and the pencil will tranfer the hull shape onto your new wood.. or string line to the stringer top and measure ever 4 to 6 inches to the hull..
 

92excel

Chief Petty Officer
Joined
Oct 6, 2008
Messages
477
Re: 19' Invader Project

Also you should adjust your photos to 640 x 480.. anything larger causes most users to have to scroll to read the post .. and they simply wont..
 

mrdopes

Seaman
Joined
Oct 13, 2008
Messages
59
Re: 19' Invader Project

thanks excel...

good advice.

ill adjust all my future pictures as well.
 

maxum247

Lieutenant
Joined
Sep 18, 2007
Messages
1,363
Re: 19' Invader Project

Reminds me of the good ole days working on my boat.
 

Attachments

  • Picture 397.jpg
    Picture 397.jpg
    51.3 KB · Views: 0

mrdopes

Seaman
Joined
Oct 13, 2008
Messages
59
Re: 19' Invader Project

Maxum,

I started laughing when i saw your picture...... the similarity is freighting! :eek:
 

Bob_VT

Moderator & Unofficial iBoats Historian
Staff member
Joined
May 19, 2001
Messages
26,065
Re: 19' Invader Project

Yup typical Invader.......

Please adjust the photos.......

I would do the transom too. If you are in for a penny.... you are in for a pound..... might as well do everything right.

Keep building upon this thread and it will make an interesting restore.
 

mrdopes

Seaman
Joined
Oct 13, 2008
Messages
59
Re: 19' Invader Project

ya, Im gonna do the transom too....

A buddy of mine is going to bring his cherry picker over in the near future, after i get an engine stand that is, and help me pull it out.

i'm excited. Its a lot of work, but it will sure be worth it when its all done and Im out on the water again enjoying the day!

ill be sure to take plenty of pictures (640 by 480 next time) and keep this thread updated.

Next week (mon/tues) ill get a lot more done, and I should have the plywood by then to start cutting the new floor sections, etc...
 

jonesg

Admiral
Joined
Feb 22, 2008
Messages
7,198
Re: 19' Invader Project

That boat looks better than mine and mines restored.!
 

E-vader

Cadet
Joined
Aug 26, 2008
Messages
7
Re: 19' Invader Project

If you haven't already tossed the bow cushion vinyl - I'd buy it all from you. It didn''t look too bad. I have an 18' Invader project - it may fit.
 
Last edited by a moderator:

sagrzmnky

Cadet
Joined
Aug 18, 2009
Messages
11
Re: 19' Invader Project

I have a 1988 Invader similar to yours. Where can I get a top like that? Mine has no top and it sure gets hot here in Texas. a Bimini top stands too high and cannot handle much more than idle speed. I need one like yours but it seems to be hard to find. Any suggestions from anyone?
 

thrillhouse700

Senior Chief Petty Officer
Joined
Aug 5, 2009
Messages
778
Re: 19' Invader Project

Im looking for the same type of oem top for my trihull. I can't find it anywhere.
 
Top