1950's Wagemaker Wolverine wooden boat restoration ...

sphelps

Supreme Mariner
Joined
Nov 16, 2011
Messages
11,475
Any clue how much epoxy I should order ? Been working 6 tens so not much time to do much ...I did get the rest of the sides of the boat sanded though .. Football taking up a good part of the day for the last 2 Sundays ..:joyous:
The Admiral made reservations down in Daytona the weekend of the Dora ACBS show in Tavares .. Not much for rooms left at the show so a little over an hour drive from DB won't be to bad ..
 

kcassells

Fleet Admiral
Joined
Oct 16, 2012
Messages
8,738
Any clue how much epoxy I should order ? Been working 6 tens so not much time to do much ...I did get the rest of the sides of the boat sanded though .. Football taking up a good part of the day for the last 2 Sundays ..:joyous:
The Admiral made reservations down in Daytona the weekend of the Dora ACBS show in Tavares .. Not much for rooms left at the show so a little over an hour drive from DB won't be to bad ..

USC says;
[SIZE=-1]30. What is the coverage of your epoxy when sealing plywood?[/SIZE]
[SIZE=-1]There will be slight variations depending on how heavy it is applied. Generally speaking, a gallon of epoxy will yield 250 square feet. Therefore a typical 4'x8' sheet of plywood would require about one quart(32oz) to seal both sides.[/SIZE]

[SIZE=-1]29. How much epoxy do do I need for saturating my fiberglass?[/SIZE]
[SIZE=-1]This is a very common and complex question. Each type of fiberglass saturates resin at different ratios. Below is a brief summary of the saturation rates for different reinforcements.[/SIZE]

[SIZE=-1]Chopped Strand Mat[/SIZE][SIZE=-1]: Approx. 2 pounds of resin for 1 pound of mat[/SIZE]
[SIZE=-1]Fiberglass Woven Cloth:[/SIZE][SIZE=-1] Approx. 1 pound of resin for 1 pound of cloth[/SIZE]
[SIZE=-1]Biaxial (1708,1208,1808)[/SIZE][SIZE=-1]: Approx. 1-1/2 pounds of resin for 1 pound of biaxial[/SIZE]
[SIZE=-1]Carbon Fiber and Kevlar Cloths:[/SIZE][SIZE=-1] Approx. 1 pound of resin for 1 pound of cloth

Your technique for application and experience will determine the exact amount needed but the ratios shown above provide a good starting point. For reference, 1 gallon of epoxy weighs about 9 pounds.[/SIZE]

[SIZE=-1]27. I'm building a canoe/kayak and want to see the wood through it, which epoxy do I use?[/SIZE]
[SIZE=-1]Our 635 Thin Epoxy Resin with our 3:1 Hardener has proven to be the most popular System for this application. Our 4 and 6oz [/SIZE][SIZE=-1]cloths[/SIZE][SIZE=-1] will wet out completely transparent when applied properly. You may have noticed an amber tint to our hardeners. When mixed with the resin and applied in thin coats over wood they will dry clear.[/SIZE]

[SIZE=-1]For better long-term performance of the epoxy follow our cleaning steps([/SIZE][SIZE=-1]see answer #13[/SIZE][SIZE=-1]) and then apply a topcoat of UV protected marine varnish.[/SIZE]
[SIZE=-1]10. How do I protect my epoxy from UV deterioration?[/SIZE]
[SIZE=-1]As none of our epoxies offer UV protection a top coat is required. The best protection is to use a quality paint. If your project calls for a clear finish we recommend a marine varnish or a clear urethane. Careful attention should be paid to watch for oxidation of the epoxy. Fresh coats of the varnish/urethane should be applied as a preventative measure to keep UV protection effective. The epoxy must be completely cured and free of blush, which we will discuss next.[/SIZE]
[SIZE=-1]11. What is blush?[/SIZE]
[SIZE=-1]Blush occurs when the discharge of carbon dioxide reacts to moisture in the air during curing. It presents itself as a greasy film and is easily removed by washing the part with warm water and a clean rag. More specifically, blush is an amine carbonate residue produced by the reaction just described. This residue must be removed before top coating or if fully cured, before re-coating with additional epoxy. Blushing is more commonly seen in stiffer, faster curing epoxy hardeners and more pronounced in cool, high humidity conditions.[/SIZE]
[SIZE=-1]12. Do your epoxies blush?[/SIZE]
[SIZE=-1]The 3:1 and 4:1 systems do. The 2:1 system is completely non-blushing.[/SIZE]
[SIZE=-1]13. How do I clean/remove the blush?[/SIZE]
[SIZE=-1]If your epoxy has blushed it must be cleaned before applying additional epoxy or a top coat finish. Follow the below steps.

1. Wash the surface of the epoxy with warm water. Using a clean rag, scrub the surface until the greasy/waxy feeling is removed.[/SIZE]


[SIZE=-1]2. Lightly sand the epoxy with 220 grit(or similar) sandpaper. This creates an etched surface that will allow for the maximum mechanical bond possible between additional layers of epoxy or between the epoxy and primer/paint top coat.[/SIZE]


[SIZE=-1]3. Wipe down the surface with Acetone or Denatured Alcohol. Again, use a clean rag to do this. Cleaning with a solvent will remove surface contaminants and slightly tack-up the surface for better bonding.[/SIZE]

Hope this helps Sam.
 

sphelps

Supreme Mariner
Joined
Nov 16, 2011
Messages
11,475
Not a lot of progress ... A little sanding on the sides and transom ..
I did get the epoxy ordered though .. Should be here Monday . Got 2 gals of the 635 and medium hardener ..
We will see how far it goes ...
Have a great Friday you all !
 

kcassells

Fleet Admiral
Joined
Oct 16, 2012
Messages
8,738
More than most considering the weather and your work schedule. Looking forward to any fix. I worked a little late today and got to see the sun in the morning here in Pa. @ 7:30 so the spring is a coming.
 

sphelps

Supreme Mariner
Joined
Nov 16, 2011
Messages
11,475
Eeeepoxy has landed at the front gate today . A little quicker than I thought it would . I guess being in state made it here faster idk .. Ok so what’s the weapon of choice for applying ? First go at epoxy so not real sure the best tools . Foam or reg nap type roller ? I also have a roll of the real thin cloth that you would use on say a strip canoe or something . Was thinking and please correct me if not a good idea ,was to dig out the old wood filler on the screws . Then epoxy pb them and glass a strip of the cloth at the hull/transom edge . That should seal the leaks at that point I would think . It’s getting paint over the area so just normal fairing before priming .. Would rather not screw things up if possible .LOL !
 

oldrem

Commander
Joined
Nov 7, 2013
Messages
2,002
Low nap and bubble rollers. If you PB those screws in, not sure you'd ever get them out if you needed to.
 

kcassells

Fleet Admiral
Joined
Oct 16, 2012
Messages
8,738
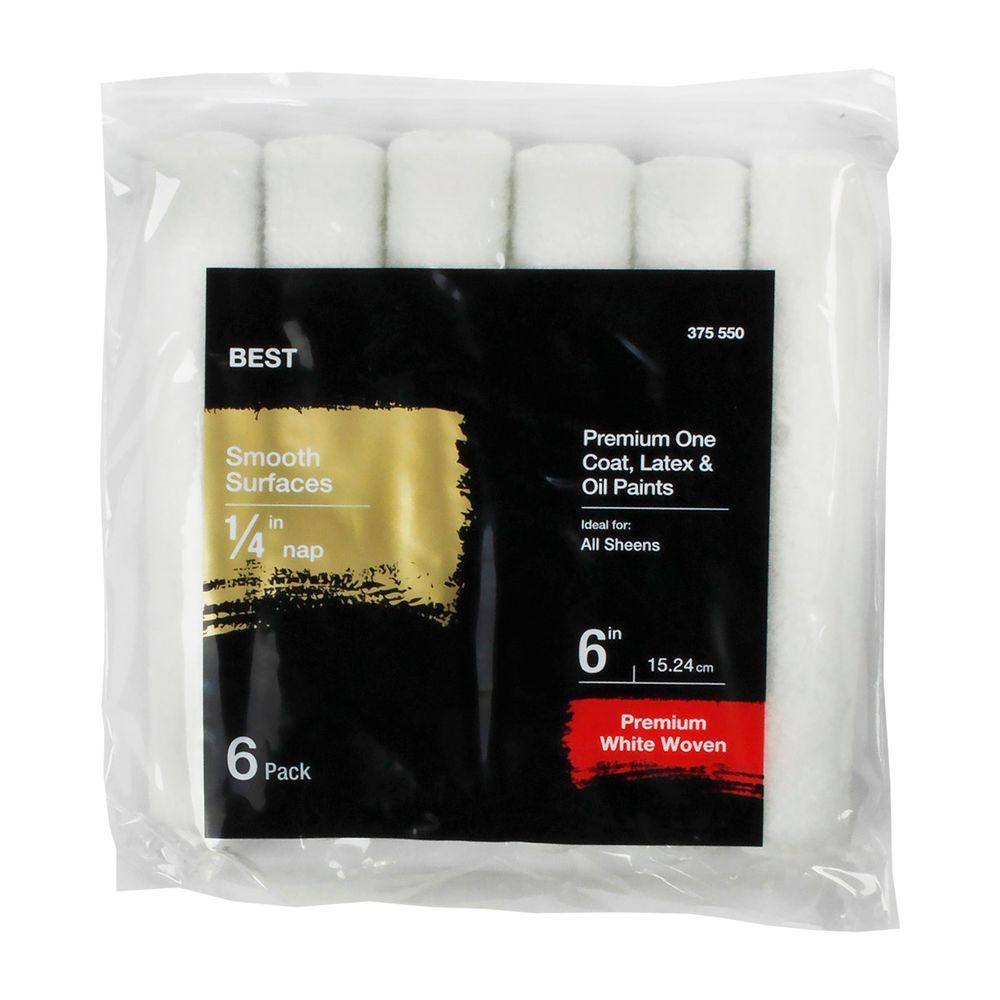
NO Foam,use reg nap type roller..................Low nap roller @6" by the bag. HD The rollers also come smaller for tight areas.
Get a bunch of chip brushes in different sizes.
The mix ratio aren't real nuts to do like poly. I ususally EYE ball it with the cup grade mark/meas. The stick mix is usually just a couple of minutes by hand. Pot life is what you'll need to get use to. If you work out of a cup or roller pan with the EEEEEppppoxxxy if it lies thick in either it will cook real fast. So best to be ready to pour it out over your work and roll it. When thinned out as a pour it will give you better work time. BTY I gave up using rolling pans and work with the pour out of cup method.
Paint Stirrers, not electric, just wood. If you make pb in any qty. then use a drill paddle.
PB: glue, then add cab. then catalyst.Mix to thickness desired, adding cab. .
Mixing cups, let the stuff set up when you're done and pop out later and reuse the cups.
Make a small 1st batch to get a feel for the time it takes to work with it. Or practice on a pc of test wood.
The usual acetone.
For your going to be gorgeous finish some tack rags.
Pb will do good. You don't want to go back in and get those screws out ...ever.
Start epoxy from top and work your way down. It will pool at the bottom so you can also expect to use that back from top down.

All said and done it's stupid easy....:joyous:
paint-roller-covers-hd-mr-100-6-6-64_1000.jpg
 
Last edited:

sphelps

Supreme Mariner
Joined
Nov 16, 2011
Messages
11,475
Thanks Oldrem / kc ! Good info !
Picked up some of those roller covers ,new frame , box of chips brushes ,box of gloves , and a few extra quart cups with the ratio printed on them .. I love those cups ..
Started digging out the old filler putty on the screws along the transom . Most were flaking out anyway and some of the screws are a little loose . I have a big bag of SS screws that are just slightly larger than the old ones . So think I will replace the loose ones as I go ..How much work time do I have with the epoxy /medium hardener ? I hear it doesn’t kick as fast as poly ..
I have over 35 yards of the thin cloth that was given to me .. Would it be a benefit to cover the whole bottom with it ? Or maybe just the leak prone joints that will get paint .. Gunna use the Delfleet with epoxy primer for the paint ..
Original was white but thinking on a different color this time . Hopefully that won’t hurt value to the old gal ..Not that it’s worth much anyway . I’ve seen other similar restored boats in the 5 grand range for sale ..
 

kcassells

Fleet Admiral
Joined
Oct 16, 2012
Messages
8,738
i had problems with plastic wood soaking up moisture and stuff

I never had that problem so I guess I was lucky. But 1x I did try to thin out the filler with water and it totally repelled it being a
{and made it useless} acetone base.
 

kcassells

Fleet Admiral
Joined
Oct 16, 2012
Messages
8,738
Thanks Oldrem / kc ! Good info !
Picked up some of those roller covers ,new frame , box of chips brushes ,box of gloves , and a few extra quart cups with the ratio printed on them .. I love those cups ..
Started digging out the old filler putty on the screws along the transom . Most were flaking out anyway and some of the screws are a little loose . I have a big bag of SS screws that are just slightly larger than the old ones . So think I will replace the loose ones as I go ..How much work time do I have with the epoxy /medium hardener ? I hear it doesn’t kick as fast as poly ..
I have over 35 yards of the thin cloth that was given to me .. Would it be a benefit to cover the whole bottom with it ? Or maybe just the leak prone joints that will get paint .. Gunna use the Delfleet with epoxy primer for the paint ..
Original was white but thinking on a different color this time . Hopefully that won’t hurt value to the old gal ..Not that it’s worth much anyway . I’ve seen other similar restored boats in the 5 grand range for sale ..

Probably wouldn't hurt plus the strength. Not sure like you about the Aesthetics,resale point of view etc...Looks like it's an everday thing for canoes/wood boats. Check out zool current wood build.
Where is Ned L
Thinking a little more on your comment since you would use it on some areas for repair I think I would do the whole thing,
Ya know with wood he is da man!
 

kcassells

Fleet Admiral
Joined
Oct 16, 2012
Messages
8,738
And IIRC, a plastic wood filler left a dark stain around the filled hole...

Not sure like I said about the aesthetics.... So also not sure what IIRC means. I'll ask my daughter, she's more in tune with slang.
All said what is your recommendations JB?
Ant filler may have odd results I guess with eeepppooxxyy so do a test on different fillers.
 

jbcurt00

Moderator
Staff member
Joined
Oct 25, 2011
Messages
25,164
If
I
Remember
Correctly
^^^^ I I R C ~ IIRC

I dont recall seeing pix of the transom (right?) having a filler flaking out of any screw holes...

I'd have to before recommending a filler....

Epoxy PB would probably be my preference...

All depends on the look you're going for or trying to avoid....

Depending on temps, it might take 24hrs for epoxy to be dry to the touch, but still not quite fully cured.... Significantly longer then Polyester

It might start to thicken in 25-30min though. Plus just like Poly, large batches in small containers will kick quicker, risk a runaway super rapid cure AND overheating, smoking and deforming the mix container.

Epoxy glassing the bottom of the hull adds some weight, but should make it water tight and stronger..
 

sphelps

Supreme Mariner
Joined
Nov 16, 2011
Messages
11,475
No epoxy filler on the screws topside just under the paint ... I do need a good filler for the top though . If staining before varnish would prefer something that will take the stain or filler mixed to tone of stain ...
 

kcassells

Fleet Admiral
Joined
Oct 16, 2012
Messages
8,738
If
I
Remember
Correctly
^^^^ I I R C ~ IIRC

I dont recall seeing pix of the transom (right?) having a filler flaking out of any screw holes...

I'd have to before recommending a filler....

Epoxy PB would probably be my preference...

All depends on the look you're going for or trying to avoid....

Depending on temps, it might take 24hrs for epoxy to be dry to the touch, but still not quite fully cured.... Significantly longer then Polyester

It might start to thicken in 25-30min though. Plus just like Poly, large batches in small containers will kick quicker, risk a runaway super rapid cure AND overheating, smoking and deforming the mix container.

Epoxy glassing the bottom of the hull adds some weight, but should make it water tight and stronger..

Thanks JB for the IIRC clarification.:)
 

sphelps

Supreme Mariner
Joined
Nov 16, 2011
Messages
11,475
Hmm I thought I had put up a pic of the transom ... Guess not but I did cover it in the video .. I'll get some up .
 
Top