1953 Wagemaker Wolverine

Chris in Utah

Seaman
Joined
Sep 25, 2019
Messages
57
Thanks Sam, that’s encouraging. I keep finding things to fix, and while the transom doesn’t leak much, I figure while I have the boat turned turtle I may as well take care of it.

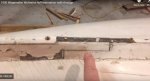
That said, let me see if I can bring us up to speed on where I’m at. I had to fix some decking damage and a rub rail that was pulling away.
full.jpg
full.jpg

  1. After unscrewing the rub rail, I treated the damaged decking and associated screw holes with CPES dispensed from a small syringe. full.jpgfull.jpg
  2. A couple days later I mixed two part epoxy with some mahogany sawdust and fumed silica (remember your respirator) to the consistency of peanut butter. I used a syringe to inject the epoxy into the screw holes and cracks on the damaged deck section and the rub rail screw holes. full.jpg
  3. I ran a ratchet strap stem to stern and then roped a 2x4 to it, resting on the deck. This let me use a set of clamps to squeeze tight the deck planking that had split once I had the epoxy injected in the cracks. (Actually set this up prior to mixing the two part epoxy.) The rope had more give than I’d like, but it worked ok. Aluminum foil placed between the rub rail and the deck planks so we didn’t accidently epoxy the rail down. full.jpg
  4. Then I re-drilled the screw hole for the rub rail using a tapered bit and screwed it back down with mostly original hardware (had to replace four screws). Sorry I forgot to get a photo before I turned the boat over. There’s video, but I haven’t got it up to YouTube yet.
  5. Then I made up a couple cradles for mid and foredecks. Harbor Freight furniture dollies let me move it around. (Stern is held on a dolly also, via motor mount section of the transom. I’ll have to change that support before I re seal the transom.) full.jpg
  6. To actually flip it, I rigged a couple block and tackle pulleys for the stern attached via a couple waterski rope attachment eye bolts my boat conveniently has on the transom. And an engine hoist at the bow. I had to reposition the engine hoist once to finish getting the trailer out, but the bow rested easily on the trailer and some seat cushions while I moved the hoist. full.jpg
    full.jpg
    full.jpg
I’ll add a YouTube clip of the flip, but it was relatively simple to lower the starboard side onto a dolly while keeping the port side suspended from its block and tackle. Then slide everything to port, swap the block and tackles and nudge it over turtle. We leveled it with the block and tackles and then lowered it onto the cradles.
full.jpg

Keel work now... but I’ve got to take a computer break for a bit before we get into that
 

Chris in Utah

Seaman
Joined
Sep 25, 2019
Messages
57
So the keel and painted bottom of the boat has a layer of fiberglass on it. In most places it seems to be only one sheet thick, but there are a couple layers at the keel and unfortunately, it was cracked and coming off in sections.
IMG_0197.jpgIMG_0192.jpgIMG_0193.jpg
It looked bad, plus I wasn't sure what condition the keel itself was in under the fiberglass, so I decided to remove the cracked fiberglass with a heat gun. I found the heat gun took the resin back to a soft/sticky state and I could easily peal it away from the keel. It may be that the adhesion wasn't good to begin with, but the rest of the hull looks good and the fiberglass seems to be in great shape, so maybe it was something about how they did the keel... don't know.
IMG_1060.jpgIMG_1063.jpg
I intended to sand a few inches to either side of the keel to remove the paint, but retain good fiberglass, then lay down a new center strip of fiberglass. I originally thought I might be able to do this with the boat on the trailer, but as I started trying to sand it, I quickly realized I needed to flip it over to do the job right.
IMG_1212.jpg
I uncovered some damage up front.
IMG_1223.jpg This doesn't match the keel joint on Sam's boat at all:
Annotation 2020-03-14 223510.jpg
Plus some the wood at the joint was bad, so I decided to take this section out.
IMG_1224.jpgIMG_1225.jpgIMG_1226.jpg

This is the current state, but I think I need to cut it back another 6 inches or so toward the stern because of some cracks in that section, plus I'd be able to better match the profile of the rest of the keel (more like Sam's, which I think is original). I think my boat got beat up by a trailer that didn't quite fit it. (The current trailer seems ok, with the keel not actually sitting on the rollers, rather the boat supported by two long boards on either side of the keel.)

I have a good piece of white oak that I think would work well for this repair.
IMG_1227.jpgI think the keel is oak, but I'm not certain. I'm also not sure about how to form the joint. This step on either side was simple to cut out, but maybe I should use a belt sander and form a more ramp/triangle shaped tapered joint surface?

I don't have much wood working experience... any suggestions?
 

Attachments

  • Annotation 2020-03-14 223510.jpg
    Annotation 2020-03-14 223510.jpg
    171.5 KB · Views: 0
  • Annotation 2020-03-14 223510.jpg
    Annotation 2020-03-14 223510.jpg
    171.5 KB · Views: 0

sphelps

Supreme Mariner
Joined
Nov 16, 2011
Messages
11,475
Just a hunch but I think some damage was from water leaking from the inside that was sitting in the bottom ..
‘With the keel glassed over any water that seeped through didn’t have a way to escape ... How do those areas look on the inside ? I think your on the right path on the repair if not replacing the whole keel .. If it were me I think I would try and tuck the new scarfed piece under the original keel at the bow then over the old section of the back .. Like a shingle roof lap , then though bolt them together with thickened epoxy .. After you get the bottom painted I would definitely add a metal stem/keel guard to it ...
‘Looks like she was painted a light green at one time !
 
Last edited:

Chris in Utah

Seaman
Joined
Sep 25, 2019
Messages
57
The interior hull is in good shape,
DBD91A86-E63D-48ED-9E5F-9426DFABABC9.jpeg

Maybe water got trapped in between the fiberglass and hull anyway, just from the cracked fiberglass on the keel.
Regardless, I like your idea of a overlapping joint and metal strip as part of the repair.

She has worn several different skirt colors over the years... looks like white, teal green, back to white, and finally blue. I’ll be adding red to the mix. 🙂
0A27BF0C-2B1F-4F30-858E-C048DA792039.jpeg
 

sphelps

Supreme Mariner
Joined
Nov 16, 2011
Messages
11,475
Yours has a cross member that mine did not have in the bow .. You’ll find that that’s the least favorite spot to get to on the boat ! :D
 

Chris in Utah

Seaman
Joined
Sep 25, 2019
Messages
57
Yeah, I'm not looking forward to varnish work up in the bow. :)

Here's the keel repair roughed in. I've got final fitting to do, but I think it will work.
Click image for larger version  Name:	IMG_1293.jpg Views:	1 Size:	288.7 KB ID:	10840038

Engine is progressing faster than I'm getting the hull list done:
Click image for larger version  Name:	IMG_4266.jpg Views:	1 Size:	139.9 KB ID:	10840039
Click image for larger version  Name:	IMG_4267.jpg Views:	1 Size:	81.8 KB ID:	10840040
Click image for larger version  Name:	IMG_4269.jpg Views:	1 Size:	88.5 KB ID:	10840041
 

Chris in Utah

Seaman
Joined
Sep 25, 2019
Messages
57
Bedding compound between the keel repair and hull, two part epoxy (thickened) on the keel mating surfaces. Will sand profile and add fasteners after this adhesives set up.
331C0BFA-5CBD-4D3C-8D44-67E6408D1DBC.jpegD603AC8F-9940-4A7E-9F44-19548422D494.jpeg
 

Chris in Utah

Seaman
Joined
Sep 25, 2019
Messages
57
Transom leak repair progress. (Thanks for the road map Sam.)
IMG_1330.jpg
I used a syringe to inject two part epoxy into all the screw holes so I can re-drill them when reassembled. Most were still tight, but enough where loose that I thought it cheep insurance. Once that sets up (hopefully later tonight) I plan to seal the transom with Boat Life Life-Calk. Not as aggressive as two part epoxy, I'm hoping it will seal/glue well, but still allow the next owner to repeat this repair (if needed) in another 50 years.
Annotation 2020-03-22 163546.jpg

There has been some progress on the engine as well:
IMG_4288.jpg
 

Attachments

  • IMG_4288.jpg
    IMG_4288.jpg
    749.2 KB · Views: 0

archbuilder

Vice Admiral
Joined
Sep 12, 2009
Messages
5,697
Looks like you are still moving along. The motor is looking great! I haven't used that caulk before, I will be interested to see how it works. Is it a polyurethane or do you know?
 

sphelps

Supreme Mariner
Joined
Nov 16, 2011
Messages
11,475
Looking good ! Moving along nicely !
Make sure you clean any epoxy that may have run through the screw holes before it dries ...It may keep the plywood from mating back up with the transom when you caulk it in place..
You probably already thought of that though ...
 

Chris in Utah

Seaman
Joined
Sep 25, 2019
Messages
57
Looks like you are still moving along. The motor is looking great! I haven't used that caulk before, I will be interested to see how it works. Is it a polyurethane or do you know?

Polysulfide... not a chemist, but apparently oil/fuel resistant. Since the fuel tank and hoses live back there, I figured it was a good alternative to 3M 4200. I'll let you know how it does for sure. (Hope I don't have to redo this any time soon!)
 

Chris in Utah

Seaman
Joined
Sep 25, 2019
Messages
57
Looking good ! Moving along nicely !
Make sure you clean any epoxy that may have run through the screw holes before it dries ...It may keep the plywood from mating back up with the transom when you caulk it in place..
You probably already thought of that though ...

Yeah... upside to the social isolation environment we find ourselves in is more garage time. :)

I waited until the epoxy had partially dried then used a hacksaw blade to trim off any high spots. Most of it ended up in the holes though. Good point just the same... I'll double check before I seal it up.
 

Chris in Utah

Seaman
Joined
Sep 25, 2019
Messages
57
Well... that took a little longer than I thought (hand driving 100 screws) but the transom should be water tight again!
IMG_1333.jpgIMG_1334.jpg
 

sphelps

Supreme Mariner
Joined
Nov 16, 2011
Messages
11,475
Good deal ! What are the clam shell vents on the bottom ? Drain plugs ?
‘Mine didn’t have a floor drain ,which seemed strange ... The only thing on the bottom was the 2 metal strips that fastened through the outer stringers ...
 

Chris in Utah

Seaman
Joined
Sep 25, 2019
Messages
57
Yes Sam, two drains in the stern. They work well, but you have to remember to close them before launch... not that I have any personal experience 😬. (Fortunately, whoever added the drain plugs also added a bilge pump... and an emergency backup bilge pump.)
1D321EA2-D37B-46A9-920F-05814D3C645D.jpeg
 

Chris in Utah

Seaman
Joined
Sep 25, 2019
Messages
57
Good deal ! What are the clam shell vents on the bottom ? Drain plugs ?
‘Mine didn’t have a floor drain ,which seemed strange ... The only thing on the bottom was the 2 metal strips that fastened through the outer stringers ...

I don’t have the metal strips, but it does have a cooling water intake for what can only guess would be an inboard engine setup?

3144686E-6EC6-474B-8949-524065F7AC36.jpegEA9D0E6E-5630-42A5-A0C4-D6AB3B11357C.jpeg
 

Chris in Utah

Seaman
Joined
Sep 25, 2019
Messages
57
Bait tank makes more sense than inboard engine... I've been away from the ocean too long. :facepalm:
 
Top