1953 Wagemaker Wolverine

Chris in Utah

Seaman
Joined
Sep 25, 2019
Messages
57
Looks like the power head will be home soon. I've got to keep moving on the hull repairs to be ready for warmer weather. (We had 4 inches of snow this morning, but I know spring is just around the corner.)
full.jpg
 

Attachments

  • full.jpg
    full.jpg
    128.9 KB · Views: 0

sphelps

Supreme Mariner
Joined
Nov 16, 2011
Messages
11,475
Wow ! Very nice !
Like it just came off the assembly line !
 

Chris in Utah

Seaman
Joined
Sep 25, 2019
Messages
57
The motor is on its way to Utah from Wisconsin now.

In the mean time I did a little more work on the keel... got a replacement layer of fiberglass laid down. First I brushed on a coat of CPES, waited a day for that so soak in and did another coat, then the following day a layer of the TotalBoat 2 part epoxy resin. The next day another coat of resin, immediately set the fiberglass cloth tape (6 oz, 6" wide) onto the wet layer, followed by another coat on top to fully wet the cloth.
IMG_1360.jpg
 

Attachments

  • Fiberglass Cloth Tape 6oz 6inch wide.JPG
    Fiberglass Cloth Tape 6oz 6inch wide.JPG
    8.9 KB · Views: 0

Chris in Utah

Seaman
Joined
Sep 25, 2019
Messages
57
Also covered the screws in the transom and used mahogany plugs to fill the four 1/2 bolt holes the previous owner had drilled through it to mount the 70hp outboard.
IMG_1363.jpg

I'll fiberglass tape the below water line transom seam also.
 

sphelps

Supreme Mariner
Joined
Nov 16, 2011
Messages
11,475
Thickened resin would work just really hard to sand .. You could buy pre-made fairing or just use glass bubbles/ micro balloons with your resin for home made fairing ...
 

Chris in Utah

Seaman
Joined
Sep 25, 2019
Messages
57
Thickened resin would work just really hard to sand .. You could buy pre-made fairing or just use glass bubbles/ micro balloons with your resin for home made fairing ...

Thanks Sam... I have fumed silica and mahogany saw dust/flour on hand for thickening agents. I know the silica is hard to sand... I wonder how difficult using just sawdust would be? :noidea:I'll see if I can get micro balloons locally first.
 

Chris in Utah

Seaman
Joined
Sep 25, 2019
Messages
57
With the power head on its way to Utah after rebuild, I needed to switch gears to the engine case for a few nights. I used glass bead to clean off the old paint. This worked well, but my air compressor can't really keep up with sand blasting for more than a few minutes at a time (even at lower pressure) so it was bead blast for 2 minutes, wait 5 for the compressor to build pressure, then repeat.
IMG_1367.jpg
This followed by some hours polishing up the unpainted aluminum and masking those same areas before paint.
IMG_1369.jpgIMG_1371.jpg
I thought the paint worked out well for rattle can. I got Sunset Orange from Repro-Tint. I'd recommend them. This photo is just prior to baking the parts in the kitchen oven for a little over an hour at 170 degrees to harden up the finish a bit. I forgot to mask the choke lever grommet... rats, but I should probably put a fresh one in anyway. I thought the original badge was is decent shape before I painted the face plate, now I'm not so sure.
IMG_1377a.jpg
All in all I'm happy with it though and after polishing up the shroud (I don't have a picture of that handy) I took everything over to the guy who rebuilt the lower unit for final assembly. We're looking at two weeks as he's the only guy locally who works on the older motors and his spring backlog has started already.
 

sphelps

Supreme Mariner
Joined
Nov 16, 2011
Messages
11,475
Gunna look sweet !
I used the Repro-tint paint on my Speeditwin also ..
Somehow they got the wrong label on one of my cans of paint . Of coarse I didn’t realize it till it was time to put the pieces back together .. They made good on it though and sent me more of the right paint at no charge ..I didn’t know you had to bake it . LOL !
 

Chris in Utah

Seaman
Joined
Sep 25, 2019
Messages
57
Baking just speeds up the drying/hardening process. If it's not very warm out, I think most spray enamels will take several days to dry to a hard state. Since I was handing it off to someone else for assembly the next day, I thought it safer to have the paint hardened up a bit.
 

Chris in Utah

Seaman
Joined
Sep 25, 2019
Messages
57
I think I know the answer to this one already, but I'd be happy to hear otherwise. I really like the unpainted look for the bottom of the boat:
191198_Front_3-4_Web.jpg191198_Side_Profile_Web.jpg
But a previous owner fiberglassed the bottom of mine. I experimented today with sanding back down to the fiberglass layer, removing the last layer of paint with 220 to try and leave the fiberglass undisturbed. I somewhat succeeded, but the wood underneath does not look like it was finish sanded before they applied the fiberglass.
IMG_1399.jpgIMG_1401.jpg
I think I would have to sand all the way through the fiberglass to fix the finish on the wood, and the plywood layup is probably so thin that I'd damage it in the process. Best to just accept the painted bottom (it's the factory layout anyway). But I'm open to suggestions.
 

sphelps

Supreme Mariner
Joined
Nov 16, 2011
Messages
11,475
I stripped mine by using epoxy paint and varnish remover .. And a pull scraper to get it close then followed up with the ro sander ... I knew from the start I was gunna repaint because I had a bit of bunk board damage that was gunna take some cloth to reinforce ...I just sanded down to wood then warmed my epoxy up in some hot water and rolled a couple coats of just the epoxy resin on . After it cured I made some epoxy fairing compound and skimmed the hole boat bottom ....
 

Chris in Utah

Seaman
Joined
Sep 25, 2019
Messages
57
Ok... Thanks Sam. I'm just going to repaint the bottom. The fiberglass resin and cloth is a nice reinforcement really. I'm changing it to red to tie in with the motor though. I'll redo the registration numbers in red or white... maybe sand. We'll see.

The mircospheres showed up and I used about equal parts this and wood flour to thicken the two part epoxy for fairing. It doesn't sand as easily as bondo, but not too bad. If I can find time tomorrow, I think I can get the first coat of paint on it.
Microspheres.JPG
IMG_1407.jpgIMG_1408.jpg
 

Chris in Utah

Seaman
Joined
Sep 25, 2019
Messages
57
26C09AEC-B7FA-41B1-B0C4-93D0D13FE128.jpeg49779915-6B45-46EF-8A4C-7C3D18F5CEDE.jpeg I’m liking the red. Need one more coat, but it has gone on easily by roller and brush. It’s West Marine BottomShield paint. Water based, so cleanup has been easy.
 

sphelps

Supreme Mariner
Joined
Nov 16, 2011
Messages
11,475
Is that anti-fouling paint ? Are you leaving it in the water for long periods of time ? Did you sand down past the paint where you used the fairing compound ? I don't think its made to go over paint .. I may be wrong idk ..
I do like the red it looks nice !
 

Chris in Utah

Seaman
Joined
Sep 25, 2019
Messages
57
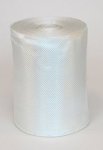
It is antifouling paint. Label says it can be applied directly over existing antifoul coating, just wipe down first. That’s the main reason I used it, existing blue (and I believe the white layer underneath that) are antifouling paint. It is probably overkill, because I don’t really plan to leave it in for extended periods, but some of our lakes around here have trouble with invasive zebra mussels and I’m told the antifouling paint helps. (Or at least the park rangers like to see it.)

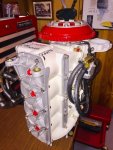
As you can probably tell from the photos, I did not fair and sand it as well as you did on yours Sam. (Keel in particular has cosmetic issues if you see it in person.) That said, I had intended to fix some broken and delaminating fiberglass on the keel, not do a full restoration at this point, so I am calling it good for now. I’m too new at the shipwright job to let myself be pulled down that rabbit hole, lthough it is frustrating to leave things undone, it is (or should be) much more water tight and the transom repairs along with the lighter engine should let us enjoy it for another season or two before I strip everything back down to bare wood.

Re-reading all that... I’m sounding defensive. :facepalm: Not really my intention. I’m enjoying the boat and the working on it. It is a classic and I’m trying to be a good caretaker, but I see the amazing wooden boat restorations online (Sam’s included) and know I’m not at that point yet. I suspect I’ll get there, but it will take a few seasons. :)
 

sphelps

Supreme Mariner
Joined
Nov 16, 2011
Messages
11,475
Don’t cut yourself short ! It looks great and I don’t think you’ll have any problems with leaks .. I think you took care of the problem area’s .. I can’t wait to see the new motor on there !
 

Chris in Utah

Seaman
Joined
Sep 25, 2019
Messages
57
Thanks Sam... I always see things I missed at this point and struggle with calling it "good enough" when I know it could be a little better. :eek:hwell:

I just realized I misread your question on fairing compound. As fairing compound, I mixed the same two part epoxy used on the fiberglass cloth in keel and transom repairs, but thickened it with microbeads and wood flour. I did sand the paint away entirely wherever I used the fairing compound so the epoxy would bond with the underlying epoxy and fiberglass coat.
 
Top