1961 Henry (Skiff Craft) Restoration Follow Along

hoytheld

Petty Officer 3rd Class
Joined
Jul 24, 2006
Messages
81
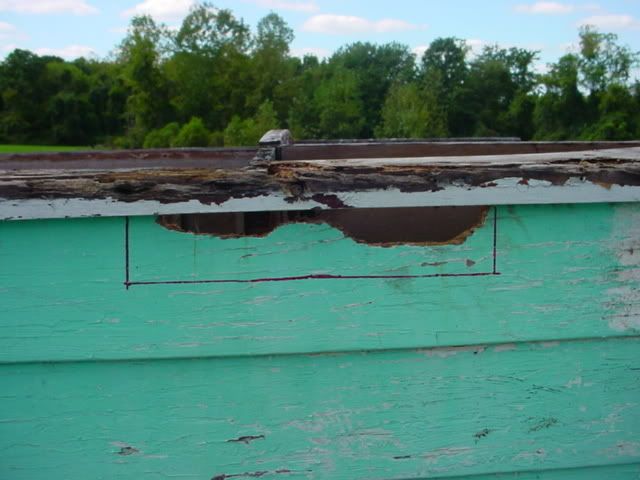
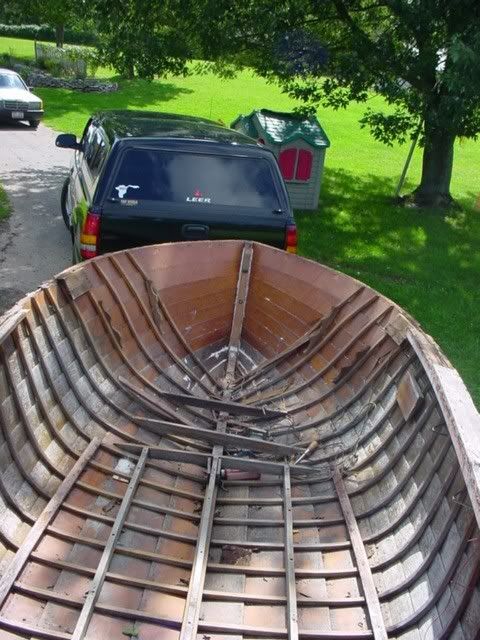
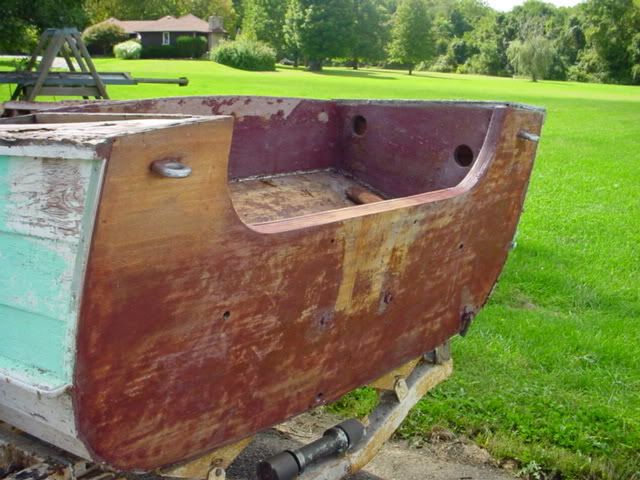
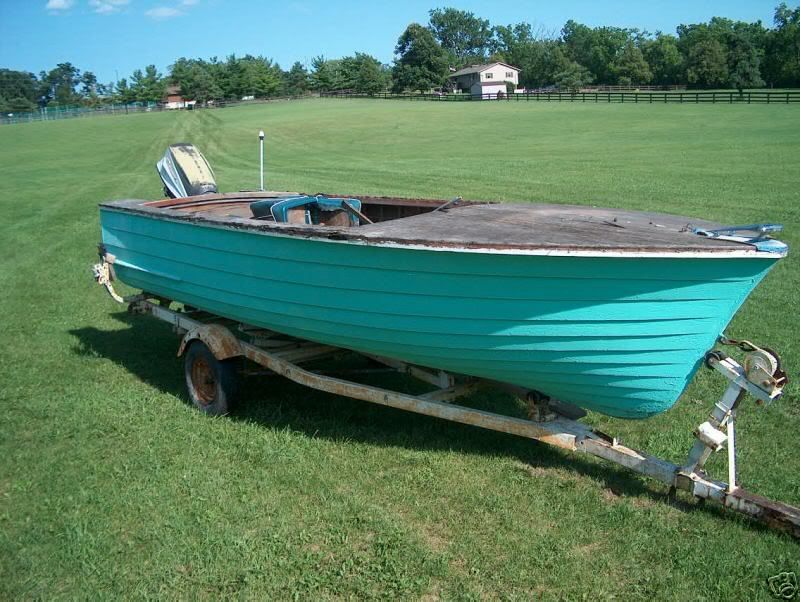
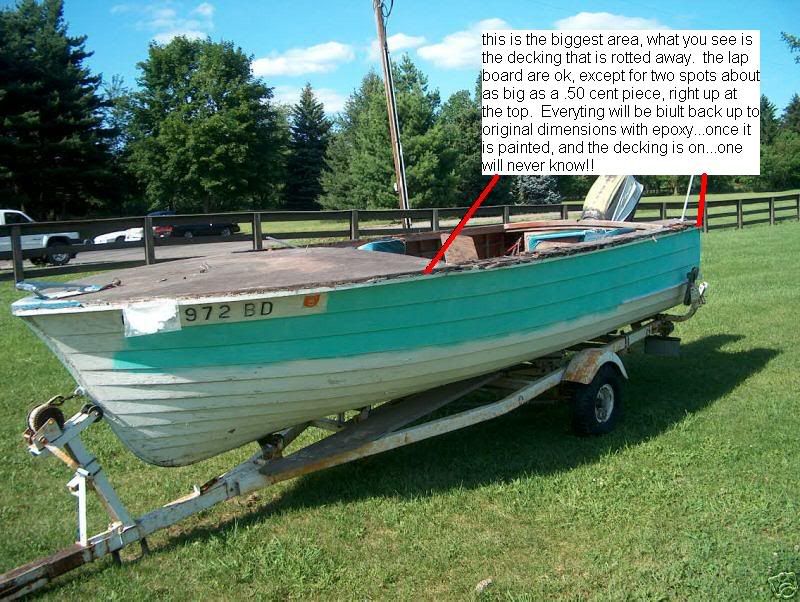
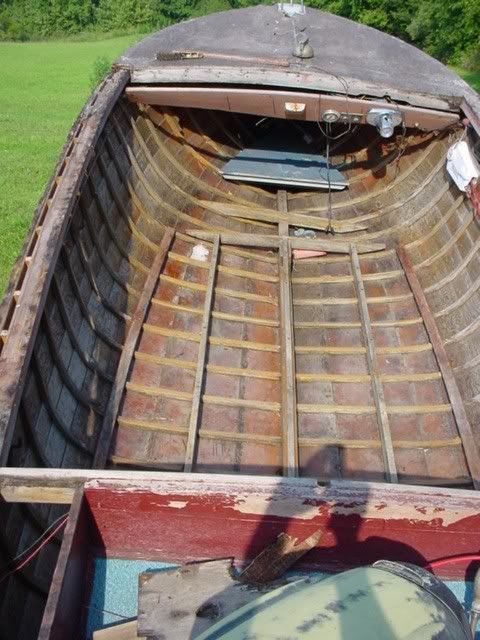
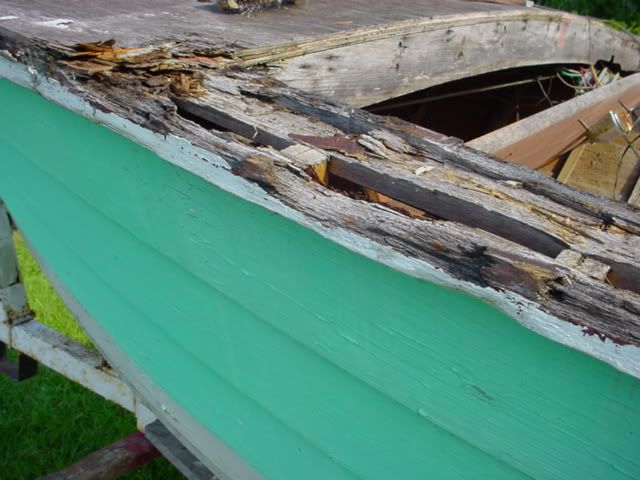
Well, I am going to start this thread...and it will be ongoing until spring of next year. I am sure some have seen my posts before on this sweet hunk of firewood I picked up from ebay for $130.00. I am going to do a restoration follow along thread...so when you see this thread surface to the top from time to time...stop in and look at the progress!
b1.jpg


Today..it officially started...and I had to start somewhere...I am going to strip and apply a new gloss white powdercoated finish to the steering wheel. You may ask why am I starting with the steering wheel...well, I am on third shift this week, and I needed something "portable" to work on here at work.
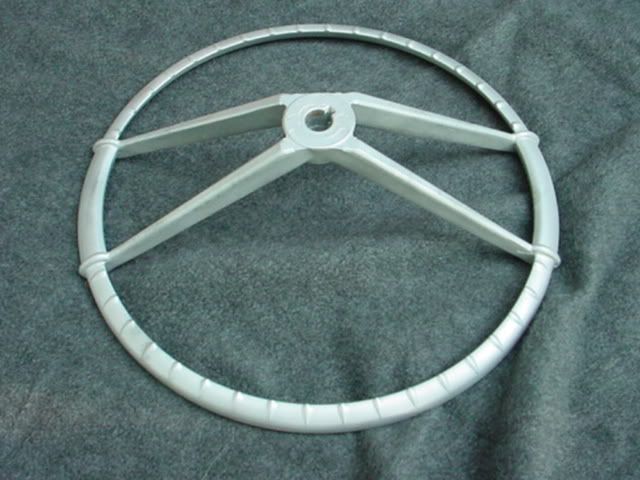
So, you can see the condition of the wheel...seems to be cast aluminum or magnesium with a painted finish...and boy it is tough!! I applied paint stripper and scotch-brite pads tonight for 45 minutes...and its almost off!
DSC03100.jpg

DSC03102.jpg

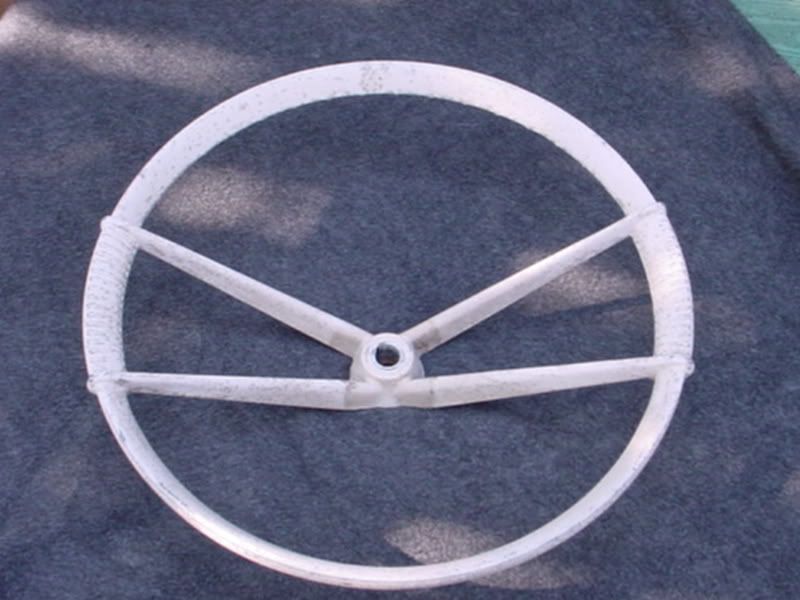
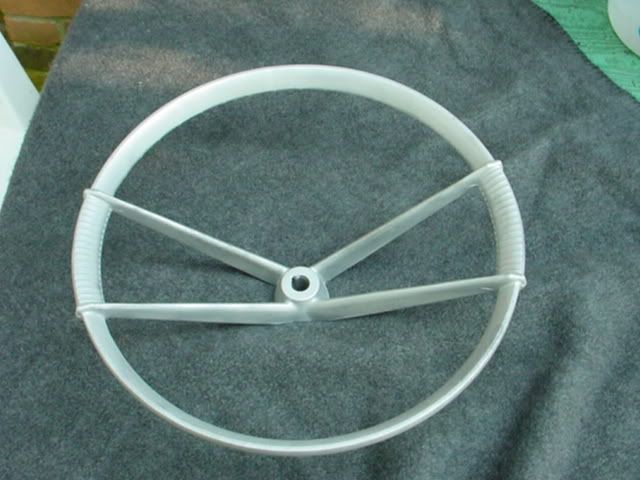
hopefully by this weekend, I will post the wheel preped (stripped and beadblasted) for the powder.

If anyone needs powdercoating done...feel free to contact me!
hoytheld@yahoo.com

So...anyway..I hope all of you enjoy the post to come....
Jason
 

oncebitten

Petty Officer 2nd Class
Joined
Jun 28, 2006
Messages
104
Re: 1961 Henry (Skiff Craft) Restoration Follow Along

I, for one, will be watching. I bet that's going to be a beautiful boat when it's done. Any pics of the interior?
 

sport15

Petty Officer 3rd Class
Joined
Jun 1, 2006
Messages
95
Re: 1961 Henry (Skiff Craft) Restoration Follow Along

PLEASE BRIGHT FINNISH THE DECK!!!!!

Is the hull glued/rivetted/clenched?

Better you than me Cap!

Dave
 

hoytheld

Petty Officer 3rd Class
Joined
Jul 24, 2006
Messages
81
Re: 1961 Henry (Skiff Craft) Restoration Follow Along

The hull is Clinched like a like a Lyman.

I will get some pics of the interior posted tomorrow...When I picked it up...it had floor boards in it of course, and I was concerned about the condition of the ribs under the floor...but, when I got her home and cleaned all the junk out and removed the floor boards (actually sheets of plywood) the ribs are in very....very great shape!!! no rot or cracks!! It is aparent that this boat was stored, if not inside...at least out of the weather.

Other than some extensive rot on the deck as seen it the pic below, the hull is great! I am going to go about this restoration in a little more unorthadox manner than some may think...instead of replacing the wood (which has no structural bearing) I have chose to "reanimate" it with epoxy mixed with wood flour. Basically, I am going to take wood that is half ate away and build it back up with epoxy. You may think this is a wrong way to go, but, again, I do not want to make a show piece from this boat...only make it functional and at the same time asthetically nice from 10' or so!!!!
I am dealing with Gerald Lapuz, a chemist from polymer Composites, INC out of Ontario, Ca. I am using this product to mix with the wood flour.
http://cgi.ebay.com/ws/eBayISAPI.dll?ViewItem&ih=017&item=270017752635
I got the wood flour from Chesapeake Light Crafts.(about 3/4 down the page)
http://www.clcboats.com/epoxy_plywood.php
On the sections that will be primarily epoxy, Gerald has instructed me to predrill and use "wood" screws to hold down the decking with. I will probablly go with stanless, square drive flat heads.

yes...the decking and seats will be from veneered plywood bought from Lowes ...varnished. The decks are from 1/2" thick material. and I plan on doing a dual, bench seat arrangement, with the seat "Skeleton" from aluminum...man...it great to have a complete fab shop at the house!!!! The interior of the hull will be striped and revarnished. All left in natural color. The hull will be white.
henrybuild1.jpg
 

hoytheld

Petty Officer 3rd Class
Joined
Jul 24, 2006
Messages
81
Re: 1961 Henry (Skiff Craft) Restoration Follow Along

Dave "oncebitten" , where did you get the caned seat backs...I really like the looks of those...would make fabbing a "walk-through" style bench seat a whole lot easier!!
 

oncebitten

Petty Officer 2nd Class
Joined
Jun 28, 2006
Messages
104
Re: 1961 Henry (Skiff Craft) Restoration Follow Along

Careful about embedding stainless screws in epoxy, especially below waterline. This is a quote about stainless without air.

"Use Stainless Steel screws cautiously below the waterline. Stainless Steel Screws cannot be in an anaerobic environment. If the screw is immersed in what is called still water, with no oxygen the corrosion-resistant film, chromium oxide, will not be allowed to form. Without the chromium oxide film the screw will suffer from galvanic corrosion and eventual failure."

But I'm a huge fan of epoxy resins, and i'm sure it will come out nice.

The caned seats... man I wish I could remember... I think it was Old Town Canoe's website. They were not cheap- $60 each. But they worked nicely for that application.

Yeah, I found them there, here's the link...

https://crab.secure-host.com/extrasport/oldtowncanoe/catalog.php?fr_sw=0&section_id=4

$80 bucks a pop now! Damn!
 

hoytheld

Petty Officer 3rd Class
Joined
Jul 24, 2006
Messages
81
Re: 1961 Henry (Skiff Craft) Restoration Follow Along

there will be none below the water line...although I really don't think one would have a problem in fresh water, maybe there is some electrolosis action in salt water... I work in a wet pet food plant here in Ohio and we have stainless immersed in fresh water for 30+ years now....
$80.00 x 4...ouch..may add a new skill set to my resume...learning how to cane seats!!!
 

oncebitten

Petty Officer 2nd Class
Joined
Jun 28, 2006
Messages
104
Re: 1961 Henry (Skiff Craft) Restoration Follow Along

Ahhh... that's exactly how I feel. Always time to learn a new skill.

Can't wait to see your progress. Best of luck!
 

hoytheld

Petty Officer 3rd Class
Joined
Jul 24, 2006
Messages
81
Re: 1961 Henry (Skiff Craft) Restoration Follow Along

Ok...the steering wheel has been chemically stripped and media blasted...luckily not pits were in the casting!!! Next comes the gloss white powder coat!!
DSC03114.jpg

DSC03116.jpg


Here is a pic of the interior...shes a beauty huh!!
DSC03118.jpg


here is a sample of the extent of the rot...like I said before, I am going to lay up a form around the areas to give me a positive section to build up to. After the epoxy "body putty" is applied and is sanded smooth, I will in a sense have a plastic board. The wood that is left is very solid, and I hope to talk to the polymer dude again...I may pour some liquified epoxy in first...let it soak in...then apply my putty...probably will be stronger in the long run.
DSC03119.jpg
 

oncebitten

Petty Officer 2nd Class
Joined
Jun 28, 2006
Messages
104
Re: 1961 Henry (Skiff Craft) Restoration Follow Along

Nice job! And those ribs look like they're in great shape.
 

hoytheld

Petty Officer 3rd Class
Joined
Jul 24, 2006
Messages
81
Re: 1961 Henry (Skiff Craft) Restoration Follow Along

Yea Dave...thank goodness they are!! A lot less work when the ribs are good!!
 

fishingdan

Lieutenant Junior Grade
Joined
Feb 12, 2005
Messages
1,045
Re: 1961 Henry (Skiff Craft) Restoration Follow Along

That is going to take a lot of epoxy to build up that wood (after you remove the rotted part - which you should). Are you sure you don't want to marry some new wood to the old in that area with epoxy?
 

hoytheld

Petty Officer 3rd Class
Joined
Jul 24, 2006
Messages
81
Re: 1961 Henry (Skiff Craft) Restoration Follow Along

fishingdan...actually, the pocket you see between the two sections, where the ribs lay, I will put wood in there to take up the space, so the epoxy doesn't fall out...so...yes...I guess there will be a little marrying of wood...
 

hoytheld

Petty Officer 3rd Class
Joined
Jul 24, 2006
Messages
81
Re: 1961 Henry (Skiff Craft) Restoration Follow Along

Well, here is the steering wheel, fresh from the oven...45 years new!!
DSC03121.jpg

DSC03122.jpg
 

sport15

Petty Officer 3rd Class
Joined
Jun 1, 2006
Messages
95
Re: 1961 Henry (Skiff Craft) Restoration Follow Along

GREAT PICS!!!
Been dormant awhile, working and goofing off to much.. ANY WAY, you might consider(?) scarphing a bit of luan or better yet okume ply ($$$:(
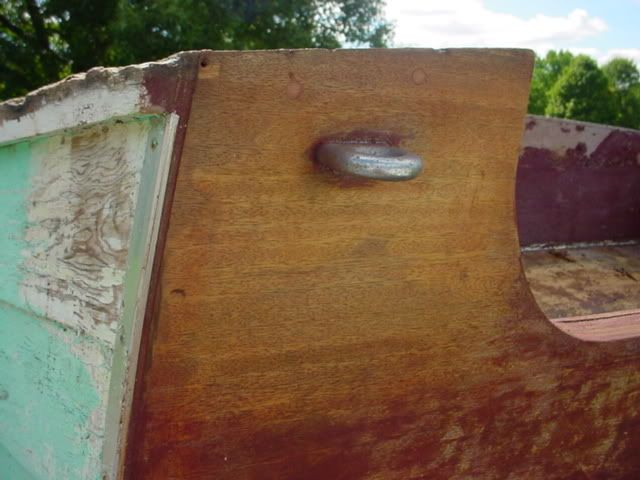
) on the hole? It would look really slick stained lightly to match and bright finished (easy for me to volenteer more work for you;).. )

Caining kits and books from woodcraft.com and woodenboat.com


What a great project! Really good article in Wooden Boat on Skiff Crafts history a bunch of years ago. I am not surprised that with marginal care that boat is in as good a shape as it is. It is well worth the effort to make her shine again.

Dave
 

tiller7104

Petty Officer 1st Class
Joined
Dec 23, 2005
Messages
352
Re: 1961 Henry (Skiff Craft) Restoration Follow Along

Wow I for one will be watching this project! Wood boats are such a labor of love and really need a patient and skilled person to do these right. The steering wheel looks great!

Good luck my man and keep the pictures coming!
 

hoytheld

Petty Officer 3rd Class
Joined
Jul 24, 2006
Messages
81
Re: 1961 Henry (Skiff Craft) Restoration Follow Along

Got the front deck off this past Sunday. Why do you suppose they used two layers of 1/4" instead of one layer of 1/2"...do you think the 1/4" bent easier ...because there is a curve to the deck??? Another spot of good news...one of the interior boards that is a deck support that runs along the length of the boat...this is a section of the worst rot...well..The worst spot is about 18" long...and what do you know...That piece was scarffed in...I was able to take out three screws and that section came out...now I have a template to make a new one!! I think that I am going to flip it over and work on the hull first...leave the epoxy work for spring!
I will post updated pics ASAP!!
 

hoytheld

Petty Officer 3rd Class
Joined
Jul 24, 2006
Messages
81
Re: 1961 Henry (Skiff Craft) Restoration Follow Along

Got all of the wiring and wood (dash and front deck supports) cleaned out. started to notch out the bad section at the rear...about a 3"x6" section of the top lap board. I am just going to replace this section with a new section of plywood...epoxy it in and epoxy filler...sand..paint...never see it or know! I will try to get a few pics tomorrow afternoon and post tomorrow evening of the progress! Planning on getting the inside sanded then flipping it bottom up for the winter...try to paint the bottom here soon...and store bottom up over the winter..then hit it hard in the spring!
I haven't confirmed...but I guess Home depot has mohogany luan 1/4" x 48" x 96" for around $10.00 a sheet...
started stripping off the burgundy paint on the transom...there is some beautiful wood under that paint...should look good.

I have decided to coat the inside of the hull and outside of the transom in epoxy mixed (thinned) with acetone...this will allow the epoxy to penetrate the wood to 1/4" or so...then go over it with a heavy second coat for a gloss top coat. Should work out good I spose! My epoxy supplier says this will far exceed Varnish...but I know there are drawbacks to this method some may say...but hey..I am not trying to restore her to make $$...I just want a safe, functional boat I can get some years out of....that's my .02$ take on it....
 

oncebitten

Petty Officer 2nd Class
Joined
Jun 28, 2006
Messages
104
Re: 1961 Henry (Skiff Craft) Restoration Follow Along

Hi Hoytheld,

I just wanted to mention that most epoxies don't have a UV inhibitor added to them, so you'll have to coat it with something to keep the UV rays from destroying the epoxy, something which happens quite rapidly if you don't protect against it.
 

hoytheld

Petty Officer 3rd Class
Joined
Jul 24, 2006
Messages
81
Re: 1961 Henry (Skiff Craft) Restoration Follow Along

Oncebitten,
Good point...I just emailed my epoxy dude to find out which product I will need!

Ok, here are some updated pics. Here you see the section that I will remove..then piece back in a new section of 3/8" plywood. This was all the wood I was a ble to remove with a screwdriver...the rest surrounding the area is solid
DSC03155.jpg


here you see what it looks like gutted out. Can you tell what section was covered by the deck??!!
DSC03158.jpg

here is what the transom is transforming into:
DSC03156.jpg

DSC03157.jpg


Actually, I got to looking at the rub rail, as seen in first pic above the "hole" it will be easier to replace this section than I anticipated...so that will lead to less epoxy work!! I am about ready to flip her over and begin on the belly...there is going to be a lot of work getting some of the old...cracked-multiple layers off. Anyone have good ideas here????? I don't need to remove "all" the old paint....help....please!!
 
Top