I don't see any cracks in the coils.One coil does look newer.I sanded the contacts with 150 grit and sprayed carb cleaner.I don't know enough about points to tell if they were good are not.I gaped them at 20.Do I need to
replace the condensers?Do I need to lightly sand the flywheel contacts on the coils and do anything to the contact on flywheel other than clean.Anyone see anything I need to address.Also what should the flywheel nut be torqued
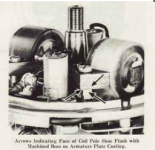
No need to do any sanding on the coils.----But the coils are NOT in the correct position.---They need to be adjusted/ set for proper clearance with flywheel.
I don't see any cracks in the coils.One coil does look newer.I sanded the contacts with 150 grit and sprayed carb cleaner.I don't know enough about points to tell if they were good are not.I gaped them at 20.Do I need to
replace the condensers?Do I need to lightly sand the flywheel contacts on the coils and do anything t
No need to do any sanding on the coils.----But the coils are NOT in the correct position.---They need to be adjusted/ set for proper clearance with flywheel.
suggest you download the manual I provided a link to
see post #6
it contains all the info you need.
condensers may be ok but at least it needs a basic OHM test and capacitance ...with a capacitance equipped VOM ... refurbing an oldy involves parts which can add up to $100+ so figure on getting 2 new capacitors... if your going to do hearth surgery on electricals may as well replace old parts before you close it up.
see video on setting points and timing properly. simple process.
the qwick way is to rotate the cam to the highest point where the point rub block rides and adjusting the points to open .020 '' using the pivo screw . when done thighten the back screw on the point see manual !!!!
I have always tightened the screw for the points FIRST.---The wee cam screw adjust them.----Never an issue.----That screw for the points has that flat washer that allows this.
Never had an issue myself if the back screw is just release a bit to allow rotation adjustement & as a means of reducing excess torquing on the pivot screw. As per video a recheck of alignment when done confirms all OK .
no need for a "timing tool" see video a plain VOM works fine ..
At START the cam follower on the carb should line up with the bar on the cam under the mag plate.
"coil gap" is the same .... just run your finger nail up-down the face. if it snags going up or down adjust coil position