1967 Starcraft Jupiter bilge discharge location

Rgetter

Cadet
Joined
Apr 5, 2015
Messages
17
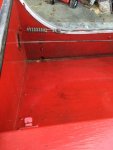
i just picked up my first boat which is a 1967 Starcraft Jupiter. For the most part it is in pretty good shape and was already semi-restored. I'm sure I will have a few questions as I finish it up. Right now I am looking to install a bilge pump but I can't figure out where the discharge hose should go. How was it normally routed on these old boats or what do most people do? I did test drive the boat when I purchased and didn't notice any water or leaks but muster wanted to be safe.

I apologize if this was already asked before. I tried looking through the forums and found some really great information but couldn't find anything on this.

Thanks
 

jbcurt00

Moderator
Staff member
Joined
Oct 25, 2011
Messages
25,166
Are there any thru hulls @6" below the gunwale just forward of the stern corner on either side of the hull?

Post some pix of your boat, we're pix junkies

Welcome to the iboats tin dry dock
 

g0nef1sshn

Lieutenant
Joined
Feb 24, 2015
Messages
1,291
images.jpg

If there wasnt already a discharge hole through the rear somewhere you could add one, ofcourse above the water line near the gunwall. I see most on the rear port or starboard corners. If you put it on the side where the switch will be youll be able to glance over and see if any water shoots out easier than putting it on the opposite side. If not there then into the splash well to drain out.
 
Last edited:

GA_Boater

Honorary Moderator Emeritus
Joined
May 24, 2011
Messages
49,038
:welcome: to TinLand, Rgetter.

Many of the Starcrafts from back in the 60's didn't come standard with a bilge pump. I added two pumps to the one in my sig. One is controlled with a dash switch and the second is only on a float switch for automatic operation. I like some redundancy.

To install the pumps/float switch, I got some aluminum strips from the Big Box store and formed a mount off the knee brace. Routed the hoses to the starboard side under the rub rail. That way I can look over my shoulder from the helm to see if the pump spits when I test them. And if I'm putting along I can hear the water splashing if the auto pump kicks on.

I don't have any pics of my set-up. I got my idea from one of the resto threads here, but can't remember which one.
 

Rgetter

Cadet
Joined
Apr 5, 2015
Messages
17
So I don't have any holes on the side of the boat. I do have 2 on the back, one on each side. But they come out on top and don't go though to the lower section where the bilge and other things would be located. I was thinking of doing a dual pump setup as well. Just because I like to be cautious and the pumps are not that much in the grand scheme of things. I have saw on some other posts for similar boats some retro-fits coming out the side like mentioned. Was just hoping I was missing something, Really don't want to drill a hole in my new to me boat :)

I have some pic's i was going to post but for some reason it won't let me upload them. Guess I will have to figure that out next.
IMG_0075_web.jpg IMG_0074_web.jpg IMG_0076_web.jpg
 

Attachments

  • IMG_0075_web.jpg
    IMG_0075_web.jpg
    142.5 KB · Views: 5
  • IMG_0075_web.jpg
    IMG_0075_web.jpg
    92.4 KB · Views: 5

jbcurt00

Moderator
Staff member
Joined
Oct 25, 2011
Messages
25,166
2 matching holes are in the SPLASHWELL from your 1st pix

The hole thats at the bottom, below the motor, at the keel, is the bilge drain. You put a drain plug in there just prior to launch and remove it after loading onto the trailer and pulling up from the ramp.

A few that don't want to drill an extra hole in the boat, run the bilge pump discharge up into the splashwell and let it run out thru the 2 drains already thru the transom. Adding a bilge pump is wise, IMO, but I wouldn't drain the water into the splashwell, I'd much rather drill a thru hole for discharge overboard.

GA is right, most vintage Starcrafts (and others) didn't have a bilge pump, manual or automatic via a float

Look thru the resto topics in the Starcraft forum, you'll see that adding a bilge pump is popular and drilling the hole isn't a huge undertaking that couldn't be accomplished by anyone w/ a drill. The hole is up high, away from water level, just make sure you know what's behind the spot you want to drill into.
 

hayko1971

Starmada Splash of the Year 2015
Joined
May 24, 2013
Messages
448
My boat didn't have any thru hull bilge holes either. I just ran a hose into the splashwell through the big hole already cut there for the gasoline to the motor. If the bilge pump kicked in, the water just drained out the 2 holes in the transom. I plan to add thru hull fittings this year.
 
Last edited:

g0nef1sshn

Lieutenant
Joined
Feb 24, 2015
Messages
1,291
Thats a purty ride there. Id find it hard to want to drill in it myself. But I also would rather not pump into the splash well. If they make the accessories in black, I think it would still look sharp with one or two evenly centered holes back in that corner.
 

64osby

Admiral
Joined
Jul 28, 2009
Messages
6,826
Buy a longer hose and clip it to the top of the transom. That way it won't pump into the splashwell. Or make something like a washing machine discharge hose that fits over the laundry sink.

Nice Starcraft.
 

GA_Boater

Honorary Moderator Emeritus
Joined
May 24, 2011
Messages
49,038
I made my through hulls about where the two sorta circular marks are. Fairly tight to the rub rail on the flat of the lapstrake. You have the cable pulley steering like I do and the rectangularish box is where the bracket for the rearmost pulley is mounted. You want to locate any through hull in that area to clear the cable and pulley arrangement. It is the same set-up on both sides


thru.PNG


Safety Tip - Get a couple of these Flush Wire Rope Clamps for about 3 bucks at a Big Box. The only thing holding your steering cable to the tiller rope spring thingy attached to the motor is a cheesy bolt and clamp arrangement. The added clamp is back-up just in case.

clamp.PNG

Here is how I used them to replace the PO's electrical tape which is on par with the twisted rope on your steering. The pic is a little fuzzy because I zoomed way in.

clamp1.PNG
 
Top