1969 Larson - Big Project

Status
Not open for further replies.

Yacht Dr.

Vice Admiral
Joined
Feb 26, 2005
Messages
5,581
Re: 1969 Larson - Big Project

How thick are your stringers going to be ?

I would glass in the stringers in one continuous run before the stiffeners go in.

YD.
 

avpaulb

Petty Officer 1st Class
Joined
Jun 19, 2011
Messages
298
Re: 1969 Larson - Big Project

How thick are your stringers going to be ?

I would glass in the stringers in one continuous run before the stiffeners go in.

YD.

I'm using 3/4" marine ply, which should be solid. My plan is to use the technique that Oops has on his thread for lengthening each stringer. I'm going to use a plunge router rather than a chisel, but it will work well. I'm debating on methods for good deck supports as far as where each sheet will meet up. Frisco has a method on his Youtube vids that seem to work well. Or, I may do the Oops method of lateral support. Either should work great.

Speaking of Frisco... if you're monitoring this thread at all: send me a PM with your website or something! We're in the same business!

Based on past woodworking experience, I have a method in mind for cutting each stringer and the bilge to height that I think everyone will find interesting. I'm probably going to video post my methodology on this. Moral of the story... my idea should result in a perfectly straight cut with the stringers glued in place.

We're having extraordinarily windy and hot weather right now which makes getting motivated to work interesting. Plus I have a short week, so I fear I'm not going to get too much done. But plugging away at least a bit a day!
 

avpaulb

Petty Officer 1st Class
Joined
Jun 19, 2011
Messages
298
Re: 1969 Larson - Big Project

Ugh! Big plans for the evening thwarted once again by uninvited guests!

Oh well. I did manage to get the stringers cut to length and scribed. Also able to wet out a couple.

I did get some pics. Will post Monday after vacation. I'm in boat withdrawal so I rented one!

Perhaps some fish pics to follow...
 

avpaulb

Petty Officer 1st Class
Joined
Jun 19, 2011
Messages
298
Re: 1969 Larson - Big Project

Fishing... decent. Nothing really picture worthy, but landed a couple nice rainbows.

So inspired by my boat rental that I promptly resumed the project last night. Two stringers glued in, starting the 3rd tonight. Pics to follow sometime today!
 

avpaulb

Petty Officer 1st Class
Joined
Jun 19, 2011
Messages
298
Re: 1969 Larson - Big Project

Thinking a couple of steps ahead... the bottom of my hull is formed such that I have strake lines everywhere. I'm kind of thinking they may present a problem for water drainage. If water gets below deck, it seems to me that it would pool up in the strake lines before it reached the drain holes.

Should I be considering filling in these lines with some PB or something to level it out?

P1030233.jpg

You can probably see what I'm talking about in this pic. It would use up a glorious amount of resin, but seems to me it should probably be done.
 

jbcurt00

Moderator
Staff member
Joined
Oct 25, 2011
Messages
25,236
Re: 1969 Larson - Big Project

I think they shouldn't be a major problem, but I'd store it bow high, esp for long periods. If they weren't filled originally, I probably wouldn't fill them. Unless you bury the filler w/ a couple of layers of CSM & 1708 to transfer any point loading of the filler across a broader area of the hull.

In fact, I'd probably treat them as scuppers to direct any below deck water & put drainage holes in any bulkheads at the strakes.

But none of that ^^^ is fact based, it's just IMHO:)
 

avpaulb

Petty Officer 1st Class
Joined
Jun 19, 2011
Messages
298
Re: 1969 Larson - Big Project

They were not filled originally because of the original structure of the stringers. It is too weird to describe.

But I like your idea of drainage at the strakes. That should work.

I think they shouldn't be a major problem, but I'd store it bow high, esp for long periods. If they weren't filled originally, I probably wouldn't fill them. Unless you bury the filler w/ a couple of layers of CSM & 1708 to transfer any point loading of the filler across a broader area of the hull.

In fact, I'd probably treat them as scuppers to direct any below deck water & put drainage holes in any bulkheads at the strakes.

But none of that ^^^ is fact based, it's just IMHO:)
 

avpaulb

Petty Officer 1st Class
Joined
Jun 19, 2011
Messages
298
Re: 1969 Larson - Big Project

Weekend update as promised.

I had to figure out a better way to support my stringers for gluing. As it turns out my tent that I attached to the boat stand worked out quite nicely:

P1030248.jpg

I must have screwed around with trying to figure out a good way to do that for 3 hours before I came up with that idea. After that rigging it up took me about 1/2 hour. Work smarter, not harder they say.

Stringers coated:

P1030303.jpg

And outer stringers glued in:

P1030301.jpg

P1030302.jpg

P1030305.jpg

Voila. I actually had some better pictures of the finished product, but my camera found a way to magically get rid of them for me. Just for reference, it took roughly 5 quarts of resin (a bit over a gallon) to get these two completely done. I'm guessing it will take probably 2-3 quarts for the middle. In total this will top off my first 5 gallons to complete the transom and initial stringer glue in. Yikes! 5 gallons left and time to order more, no doubt.

I'll be able to get to the center stringer tonight, and start thinking about bringing them to deck level. Then on to bulkheads!
 

Woodonglass

Supreme Mariner
Joined
Dec 29, 2009
Messages
25,932
Re: 1969 Larson - Big Project

A couple of these simple jigs made from 1x2's is all that's really needed to hold the stringers vertical...
stringerBraces.jpg
 

avpaulb

Petty Officer 1st Class
Joined
Jun 19, 2011
Messages
298
Re: 1969 Larson - Big Project

Yup... work smarter, than me. Ha! Next time.

Actually I was loosely copying Oops in his gigantic thread.
 

avpaulb

Petty Officer 1st Class
Joined
Jun 19, 2011
Messages
298
Re: 1969 Larson - Big Project

OK... clarification needed on an important point: FOAM.

It is really unclear to me the purpose behind foaming the deck. Is it used in case of capsizing? Buoyancy? Or both?

I only ask because everything I read on the CG specifications for floatation suggests that it is in case of capsizing. And, I'm not there yet, but getting close to the point of adding it! If it is also for buoyancy I'm going to have many more questions I'm sure.

No work done last night. Didn't feel well. No work getting done today... anniversary. I don't dare. Tomorrow a bit before the festivities!
 

jbcurt00

Moderator
Staff member
Joined
Oct 25, 2011
Messages
25,236
Re: 1969 Larson - Big Project

As I understand the US Coast Guard requirement, there is supposed to be enough flotation foam present to allow the at boat (at capacity weight) to float LEVEL (along the top of the gunwales relative to the plane of the water) to allow 'survivors' to have someplace secure to hang on to, WITHOUT the boat rolling over. That means flotation foam needs to be placed as HIGH up into the gunwale as possible, to aid in total volume of flotation & to reduce the chance of rolling over into the 'turtle' position. Being w/ the upright boat will make it much easier to spot the larger mass of boat & people.

As a 'backyard boat builder' you are not required to comply w/ that regulation. There are other threads that debate the merits or lack there of, of many different types of foam & flotation, and many opinions on the subject. Read as much as you can in those threads. And ultimately the decision to use any of the available foams or not is up to you. They all come w/ benefits & drawbacks, you need to consider them all, and make as well informed decision as you can, that suits your needs, budget & time frame. My Jet may or may not have had foam originally, see my thread for the glorious pink styro packing peanut flotation that at some point an owner used below decks. My FireFlite did not have flotation foam originally. Both will recieve flotation, types to be decided at a later date.

In some cases the expanding foam is added to increase the structural integrity of the boat &/or cavity that is foam filled. In an aluminum boat, the expanding foam is 'stuck' to the aluminum hull as a by product of the chemical makeup of the foam & it's expansion. Having the foam stuck to the hull & the backside (side that faces down) of the plywood deck, the foam also acts as a sound dampener. By adding the expanding foam the manufacturer may also then use slightly thinner materials to construct the boat, as the anti-crush properties of the foam stiffens all sides of the cavity it is sprayed into. In fiberglass boats, manufacturers can reduce the thickness or number of glass layers in the boat, since they are required to use flotation foam, they save money & make the boat lighter.

So strictly speaking, you are not foaming the deck, you're foaming the cavity below the deck. Below deck is the single largest 'cavity' on most boats that is unused & provides the bulk of most flotation in most boats.

Good luck navigating the decision of what type, how much & where to put flotation in your rig:) It's a widely debated topic, with strong opinions on both sides:facepalm:

And that ^^^ is all just IMHO anyway:cool:
 

avpaulb

Petty Officer 1st Class
Joined
Jun 19, 2011
Messages
298
Re: 1969 Larson - Big Project

SO... what you are saying is... the floatation foam has no effect on the buoyancy of the boat for normal usage? Just in the event of an emergency situation, like the boat flooding or something.
 

jbcurt00

Moderator
Staff member
Joined
Oct 25, 2011
Messages
25,236
Re: 1969 Larson - Big Project

Basically correct.

Aside from some rigidity from expanding foam, and possibly the lowered cost & weight of materials used when backed by that foam. Some consumers would probably argue the merits of the sound proofing properties as being higher priority then flotation.

Starcraft often used sheet styro below deck, for quite a long period, and that didn't add anything to the rigidity of the hull. Among other 'stuff' used by them & other builders.

My favorite original strange find was the toilet paper plastic bag that WoodOnGlass found when he pulled the original vinyl off his seats when he recovered them:facepalm: Used that packaging bag as the waterproofing to protect the seats foam from water......
 

avpaulb

Petty Officer 1st Class
Joined
Jun 19, 2011
Messages
298
Re: 1969 Larson - Big Project

My favorite original strange find was the toilet paper plastic bag that WoodOnGlass found when he pulled the original vinyl off his seats when he recovered them:facepalm: Used that packaging bag as the waterproofing to protect the seats foam from water......

Excellent.

I found a "vintage" beer pull tab, mouse nest, and a rusty old knife.
 

jbcurt00

Moderator
Staff member
Joined
Oct 25, 2011
Messages
25,236
Re: 1969 Larson - Big Project

I think my bedliner beats your knife, nest & beer tab:D
 

avpaulb

Petty Officer 1st Class
Joined
Jun 19, 2011
Messages
298
Re: 1969 Larson - Big Project

(JULY 4-6 Update)

Hey, Look! I'm back! (As if anyone REALLY cares.)

Having my anniversary, July 4th, a massive hangover, and inclement weather all on consecutive days really screws things up. But I'm back on it!

One dilemma (not really) is the matter of the local lumber yard only having 92" sheets of marine ply available. SO, I used the Oops method of "stretching" a piece of ply:

P1030306.jpg

P1030307.jpg

The process is actually quite simple. On each piece I was connecting, I made a 6" long kerf. By the way I am the kerfing master, so if anyone is interested I can make you a vid. Normally I would have used a plunge router with a good thick strait bit, but I couldn't find mine. SO... if you do a bunch of kerfs 1/8" to 1/4" apart, in a grid pattern, you can then use a hammer and chisel to cut it out. Then sand to smooth.

Depending on your patience, you can then either Gorilla Glue (24hrs) or laminate your pieces together with glass (1 hr). I'm not patient...

P1030308.jpg

I gave each cut out section a good soak in resin first, then glued together with a layer of CSM. Pretty much the same thing you might do with a multi-layered transom. Of course you end up with a bit of a gap between pieces, which I filled with a glass bubbles, cab, and resin mix. For the grand finale, I added support with a strip of CSM covered with a strip of 1708...

P1030309.jpg

Final length on this piece was 140". I can pick it up on one end and shake it! Solid as a rock.
 

avpaulb

Petty Officer 1st Class
Joined
Jun 19, 2011
Messages
298
Re: 1969 Larson - Big Project

(July 6th Update)

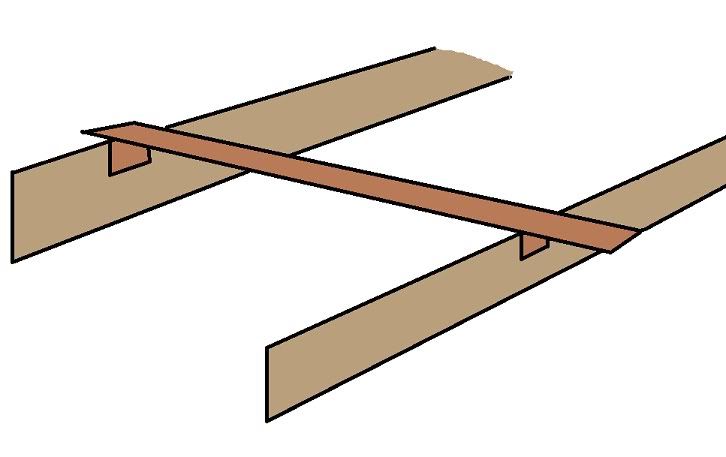
Now to put the thing in! A few posts back Wood introduced me to a much easier method of leveling out my stringers for gluing in. Check it if you missed it. I stuck with my current method for getting my mid-stringer in place...

P1030311.jpg

After that, glued in with PB...

P1030315.jpg

P1030318.jpg

Sorry about the pic quality! My digital camera is having focus issues. Back to the cam-phone, I think.

An update on supplies used for those trying to learn, like me! Thus far, I've completed my tear down and sanding, patches some holes, completed my transom, soaked and glued in my stringers. Here's my materials list thus far:

5.3 gallons resin
4 yards CSM
2 yards 1708
EPIC sanding and grinding discs
Plenty of baby powder
10 or so quart pails (you can re-use)
4 qts chopped strand
10 quarts cabosil
108 latex gloves (acetone eats them up)
1.2 gallons of acetone
2 tyvec suits (worthless)
4 air filters
Numerous chip brushes
8 4" rollers

This also doesn't count my tool upgrades and additions. I'll probably make a list of those when I'm done. To be fair, as far as my glass mat count goes, a good portion of that is still in the scrap pile. I suspect I ordered plenty! My shipment of pour-in foam arrived today, which I can't wait to play with! No doubt I'm going to have to order more resin.

IN CASE ANYONE MISSED IT: PB USES UP AN EPIC AMOUNT OF RESIN! I'll use more resin making PB than I will anything else!

ALSO, if you have to replace your deck, if you can, make DARN sure you mark out where your deck sits on the hull!!!!!! For many reasons, I didn't have the option of doing this. It's going to be a PITA, but I'm more or less going to have to guesstimate my deck height and level. I took a ton of pics during tear-down, as well as measurements, but it definitely isn't the same as marking it out on the hull. Just do it!

Dead soldier...

P1030312.jpg

My lofty goal for the weekend: Stringers, bulkheads, and bilge cut to height and glassed in. Maybe doing a deck template.

NOT.
 

Attachments

  • P1030316.jpg
    P1030316.jpg
    144.4 KB · Views: 0

Yacht Dr.

Vice Admiral
Joined
Feb 26, 2005
Messages
5,581
Re: 1969 Larson - Big Project

Looking good so far..

I would like to make a point or two..and some suggestions/observations/questions.

1. Your PB fillets are way to big. You only need little 1/2" round radi. Looks like you used up about 2 gallons of resin worth of PB which should of only have taken about 2 qts.

2.You should try to fillet and glass all in one operation. It helps with the glass working with the PB to limit air voids.

3. You might be using the wrong gloves..acetone does not eat my latex gloves at all ( always use powdered gloves ). Dont use those blue nitril jobbies.

4. Why are your tyvec suits worthless ? Yes they are hotter then hell when its already hot as hell outside. Gulp down as much water you can take before you suit up.

5. Make a "soak" .. basically a coffee can filled about 1" of acetone. You can put your brushes and rollers in there and re-use your brushes/spreaders etc. Dont let it dry up or everything in it will be going to the curb on friday with your trash.

6. 4 qts of chopped csm is way too much. In fact you dont even need to buy it. All that extra CSM in a box (scraps) can be scissored up to make your own Chop. 1.5 oz DIY chop absorbs the resin much better any ways.

7. Yup..PB takes about 1:1 resin to cabosil and only gives you as much resin per batch ( 1 qt resin + 1 qt cabosil = 1 qt PB ).

8. Marking on the hull for your stringers isnt as important as making a few Jigs before your tear out. One jig on the transom and one jig as far forward as you can should do it. If your stringers are totally toasted before the tear out..you can use string from side to side at the lower deck level and make your jigs from that.

YD.
 
Status
Not open for further replies.
Top