1972 Sea Ray rebuild

Friscoboater

Captain
Joined
Jul 3, 2009
Messages
3,095
Re: 1972 Sea Ray rebuild

Cool boat. I am with oops and Wood on this one. When I was rebuilding my Sea ray I thought of using epoxy. Once I settled onto reality, I chose quality poly.
 

Alwhite00

Master Chief Petty Officer
Joined
Apr 14, 2011
Messages
885
Re: 1972 Sea Ray rebuild

All I can say is that Sea Ray had one nice looking boat back then, Great looking lines. Nice project, Keep the pics comming.

LK
 

tinkeringwackyone

Chief Petty Officer
Joined
May 2, 2008
Messages
415
Re: 1972 Sea Ray rebuild

Good luck on the project bud, take your time and you'll be fine. Mine took two years, however looking back the time really flew. Mine was mainly due to financial issues, once over those and had the parts, it didn't take long.
 

cedarlattice

Petty Officer 2nd Class
Joined
Dec 3, 2011
Messages
104
Re: 1972 Sea Ray rebuild

I am back. I sold my house, bought a new one and moved. So I have been a little busy the last few months. If I would have know that my house was going to sell I think I would have put off the restoration until next winter. I don't have everything unpacked yet and I spend alot of time looking for my tools. Its kind of like Christmas. Everytime I open a box I find things that I forgot I had. Here is a picture of my new front yard. We are on Munoscong bay which is on the St Mary's river between Lake Superior and Lake Huron.
100_0653001.jpg
I got enough checked off my wifes list that I can work on the boat again.
100_0649001.jpg
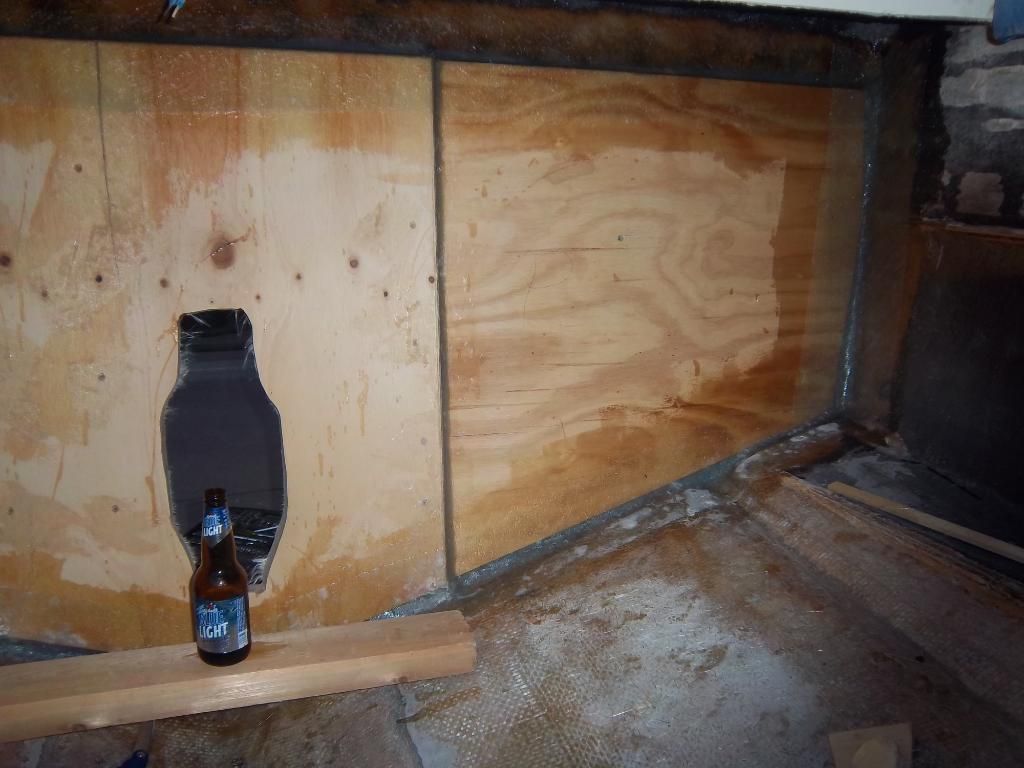
I have everything ground out. Back on the transome there was an area that was thin layers of cloth with lots of air pockets. I ground down to good glass, but there are spots that are 1/4" thinner. Should I build it up with cloth or put on a thick layer of peanutbutter on those areas when I install the transom? The picture isn't very good, but it is the area down towards the bottom with the little dark pockets.
100_0651001.jpg

Around the edges of the transome, especially at the bottom there were lots of voids. Some where filled with foam and others had water. In the bilge there was a large area that delaminated and there was a layer of oil and dirt in between the layers of cloth.
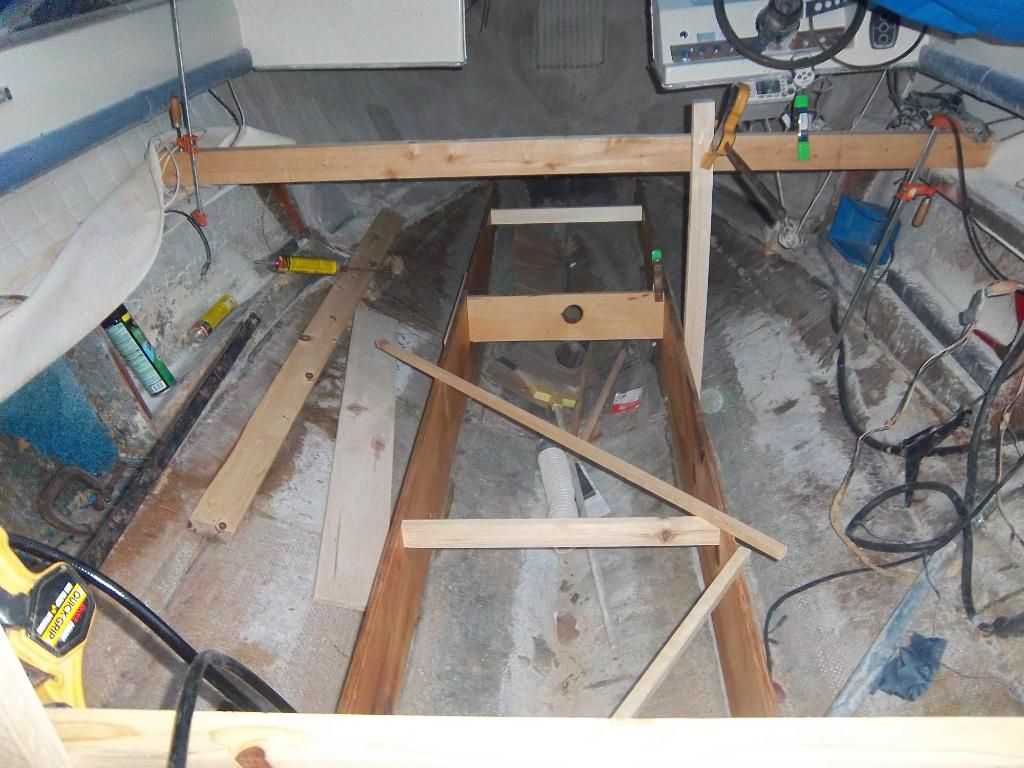
Another question I have is where the stringers meet the hull I have gropund down to where there narrow strips of the bedding material left. I would have to go down almost another 1/4" to get to bare glass. The stringers will sit dirrectly on those strips. If I use PL as a bedding material would it stick to the old bedding material?
100_0652001.jpg
 

oops!

Supreme Mariner
Joined
Oct 18, 2007
Messages
12,932
Re: 1972 Sea Ray rebuild

im in love with your shop......wow.

glad you are still with this..... it looks like you are ready for the re build now....and it goes very fast from here on in.

just before you install the new transom...use a thickened resin on the transom to fill the little hollows.....
then.....a layer of csm.......then install the transom that also has a layer of csm on it.
this is all done wet on wet.

as for the stringers.... i like to get right to the glass....but the pl will work.

i just dont like using pl due to the time that it takes to cure....(a week).
i just dont have that kind of waiting time.

seriously.....from where you are now....you could be re decking the boat in less than a week, with just a few hours each night.
 

Woodonglass

Supreme Mariner
Joined
Dec 29, 2009
Messages
25,929
Re: 1972 Sea Ray rebuild

A thick coat of PB will fill the voids in the outerskin of the transom. PB will spread smooth and fill all the areas in the bilge etc.. Stringers can go down over what you have right now. You can use PL for the stringers but I'm convinced that using PB for bedding the stringers is now the best method. Faster and easier. With PL you have a Long wait time for cure and messy.
 

cedarlattice

Petty Officer 2nd Class
Joined
Dec 3, 2011
Messages
104
Re: 1972 Sea Ray rebuild

Thanks for the encouragment Oops, Wood, and Mrdjflores. I have the resin, glass and fillers for the PB. and the transom is cut out. I also removed the old stringers in one piece for patterns. The problem is that I may have to remove the deck. It is very tight. I don't want to remove the deck and am in procrastination mode. One side of the transom butts up tight to the side of the boat and the other side was about 3/4" away from the side and had a large airpocketed fillete (If thats a word) between the transom and the side. I am thinking of putting it back the way it was but something inside of me is screaming "symetrical". Also under the stringers I ground down a good 1/2-3/4" of glue. there was no glass tabbing at all. I am thinking that what ever I do will be better than it was.
 

mrdjflores

Lieutenant Junior Grade
Joined
Apr 1, 2009
Messages
1,169
Re: 1972 Sea Ray rebuild

i'm back in the demo phase of my 73 srv...our construction is the same...but my stringers are too far gone to use as templates....they loved putting wood into the bellies of these old gems...
 

mrdjflores

Lieutenant Junior Grade
Joined
Apr 1, 2009
Messages
1,169
Re: 1972 Sea Ray rebuild

please take plenty of pics of your stringers and other layouts that you find...most of my wood cant be saved for templates, and i didn't take enough pictures of where all the extra wood supports are....so i'm keeping an eye on your progress
 

cedarlattice

Petty Officer 2nd Class
Joined
Dec 3, 2011
Messages
104
Re: 1972 Sea Ray rebuild

I installed my transom. I am not bragging about it, but it is in. I SHOULD NOT HAVE DONE IT ALL BY MYSELF. Another person mixing would have been nice. I don't know if I put enough peanutbutter on and I don't know if it was set up too much when I clamped it in place.
Here is how I did it-
Practiced installing it 5 times.
scrubbed with acetone
Rolled on a coat of resin on the wood and on the shell.
Mixed up a batch of peanut butter and spread it on the shell with a notched trowel
put a layer of csm on the wood and a layer of csm on the shell
wet out the csm on the wood
wet out the csm on the shell
clamped it in place
drank 3 Blue Lights
Both surfaces were wet and not tacky. I had just a little squeezeout around the edges. not as much as I thought I would. As far as I can tell there isn't any gaps between the shell and the wood.

Now for my question
I am tabbing next and have seen it done a few different ways. I am thinking of using 6" CSM then 8" 1708 then 2 layers of 1708 to cover everything. Would it be better to tab with the 6" then do a full layer of 1708 then an 8" 1708 tab then a final full layer of 1708?

I will take pictures and post them soon I promise.
 

cedarlattice

Petty Officer 2nd Class
Joined
Dec 3, 2011
Messages
104
Re: 1972 Sea Ray rebuild

Here are the pics of the transom
100_0655.jpg

100_0656.jpg


I peanut buttered the edges and made fillets. When I put the CSM tabbing on I had a couple of boogers that were getting hard. The white spots are where I sanded. Other than a couple of tiny bubbles I am happy with the way it is going.
I also put the forward middle stringers in. I tacked them with PL in a bunch of spots. I was running out of daylight and I wanted them in place. I spent alot of time trying to get them the right height. I got the starboard one perfect, but the port side is a little high. I would have had to take them all apart and do some trimming. I think it will be easier to take a little off the top after they are solid. Tomorrow I will finish bedding with Pl and add some narrow strips of 1708 to help hold them in place while the PL cures.

100_0657.jpg
 

mrdjflores

Lieutenant Junior Grade
Joined
Apr 1, 2009
Messages
1,169
Re: 1972 Sea Ray rebuild

wow, what a familiar looking transom...
where your stringers are joined together (length wise) how did you join them? butt joint or scarf joint?
did you take measurements of your engine mountings blocks? width, height etc...??
question: you are going to cover the rest of the transom in glass aren't you??
 

cedarlattice

Petty Officer 2nd Class
Joined
Dec 3, 2011
Messages
104
Re: 1972 Sea Ray rebuild

The stringers are butt joined. Right now I have a temporary scab holding them in place. I will make a permanant one later on. The joint is a little foreward of the stearing wheel. I do have some measurements of the engine blocks and I have one side that I can reconstruct. If I have some time later today I will make some drawings. In my move I lost a notebook. But I can reconstruct from what I have. The transom will have 2 layers of 1708. I just had to stop and let it set up so I could get rid of some globs.
 

emoney

Commander
Joined
Jul 19, 2010
Messages
2,551
Re: 1972 Sea Ray rebuild

Congrats on the new house! Oh, and the boat project of course. Nothing beats living on the water.

Now that you're back in the race, she'll be done in no time and you'll have a real winner. Look forward to watching this one to completion. Good luck!
 

mrdjflores

Lieutenant Junior Grade
Joined
Apr 1, 2009
Messages
1,169
Re: 1972 Sea Ray rebuild

from looking at the above picture, you might want to put a temporary brace under that console with the steering wheel...she is leaning quite a bit
 

Ike-110722

Chief Petty Officer
Joined
Sep 3, 2007
Messages
408
Re: 1972 Sea Ray rebuild

from looking at the above picture, you might want to put a temporary brace under that console with the steering wheel...she is leaning quite a bit
He's right. I had the same with my Sea Ray. But once it is installed, the little console that goes in the middle of the forward area of the cockpit holds the deck up and prevents it from sagging. I had put a 2 X 4 under the dash to hold it up. But once the console was in support wasn't needed. Unfortunately I do not have a good photo of it, and my boat is at the dealership getting the sterndrive repaired. But when I get it back in a couple of days I will post a photo.
 

cedarlattice

Petty Officer 2nd Class
Joined
Dec 3, 2011
Messages
104
Re: 1972 Sea Ray rebuild

One of the boards on the floor was for bracing the dash. It was in the way when I installed the stringer. It was not replaced until after the picture was taken.

I have been away from the boat for a while and I am wondering if my tabbing should be scuffed real good before adding the rest of the cloth or if a good acetone scrub will be good enough.
 

mrdjflores

Lieutenant Junior Grade
Joined
Apr 1, 2009
Messages
1,169
Re: 1972 Sea Ray rebuild

scuff and acetone wash. the tabbing that is on there now is cured, so anymore glass and resin that is applied to it will only be a mechanical bond. scuffing the tabs will expose some of the glass and also add a texture to the resin, this will give the new resin something to bite into
 

cedarlattice

Petty Officer 2nd Class
Joined
Dec 3, 2011
Messages
104
Re: 1972 Sea Ray rebuild

I have assembled the engine stringer and I am going to set them in one piece. On the bottom I attached a piece of 1” white oak to hold the lag bolts. I pb’d all of the edges and tabbed each corner with CSM. I am going to put 2 layers of 1708 on top of this. When they are PB’ed to the boat I will fillet them and tab with CSM and 1708 on the inside. Is 2 layers of 1708 overkill ? In the bilge I will put a full layer of CSM and at least 2 layers of 1708.
100_0672.jpg

I do have a problem. I have been using the mixing cup ratio for the resin and hardner. It seems to take a while to harden unless it is direct sunlight. Last night I put the PB on the stringers and tabbed them. This morning the PB and resin were still soft. The temps have fallen and I know that would be a factor, but I didn’t think after 12 hours it would still be that soft. I set them in the sun this morning and they are now hard. Also air bubbles developed. They were not there when I turned the lights out last night.
I have read OOPS! Thread about 2% ratio and using ml instead so I did some calculations. For 16 oz we are supposed to add 1/8th oz of hardener. Unless I am doing my math wrong. That is less than 1% , .78% according to my math. So for 16oz we should be using the ? oz line on measurement on the cup in order to get between 1.5 and 2%. Am I wrong?
 
Top