1977 Cruise Boats Restore

Joined
Aug 17, 2009
Messages
941
Re: 1977 Cruise Boats Restore

That's funny EZ.
I am sure there are plenty of chances coming down the pike for me to scratch some paint. :D
 
Joined
Aug 17, 2009
Messages
941
Re: 1977 Cruise Boats Restore

Next up is the wiring. I?ll start with the battery cables first. I decided to relocate the batteries forward to the bow area. They will be positioned right in front of the port side console support. The cable run distance from there to the motor is 17?. Total round trip is 34?. My motor is a 1983 Johnson 115 Hp outboard. I figured the amp draw of the starter will be about 100-150 amps on the high side. With that length run I will need a 2 AWG size cable. I safe sided it and went with 1 AWG size cable. I ordered my cables from http://gregsmarinewiresupply.com. Greg is super friendly and very helpful. His prices are very good also. I ran the cable down the port side under the gunwale and out through the cable boot in the splash well. I attached cable clamps to the screws holding on the rub rail and then used heavy wire ties to support the cables.

P1020266.jpg


P1020264.jpg


2010-10-26080829.jpg
 
Joined
Aug 17, 2009
Messages
941
Re: 1977 Cruise Boats Restore

I will install two six switch distribution panels. I know, I know, 12 switches are a lot but I got these dirt cheap on e-bay. Besides I will have plenty of room when I need additional power for lights, live wells, etc. These panels were mounted in the starboard console support just below the steering wheel.

Switchpanel-1.jpg


2010-10-25195727.jpg


2010-10-25195655.jpg


Each panel has two 3 amp, two 6 amp, one 8 amp and one 10 amp breaker for a total of 36 amps per panel. Since I knew I would not use all 36 amps I decided to use 30 amp fuses as the panel feeds. Now it was time to connect all the battery cables and feed wires to the battery switch. The panel feeds first go through separate water tight fuses and then to the separate panels. I used 12 AWG duplex wire for the panel feeds. I also installed two single ground bus bars for the negative connection points. These switch panels will have cover boxes installed over the backs when the wiring is complete.

2010-10-25195755.jpg


2010-10-25195847.jpg


2010-10-26075946.jpg
 

Damifudo

Petty Officer 1st Class
Joined
Sep 14, 2009
Messages
277
Re: 1977 Cruise Boats Restore

I am starting to catch on to this concept you have started with doing it right the first time. What a novell idea. It probably saves in the long run. I am so use to doing it over I am not sure what I would do with the spare time I save. What do you plan on doing with the extra money????

So let me ask what your thinking about as your laying in bed waiting to fall asleep? LOL


Just kidding it all looks great!
 
Joined
Aug 17, 2009
Messages
941
Re: 1977 Cruise Boats Restore

Dami,

Its kind of hard not to do it right now since its all new. Don't worry I have had my fair share of do overs. That's how I learned (slowly) that doing it right is the easiest way in the long run. :)
 
Joined
Aug 17, 2009
Messages
941
Re: 1977 Cruise Boats Restore

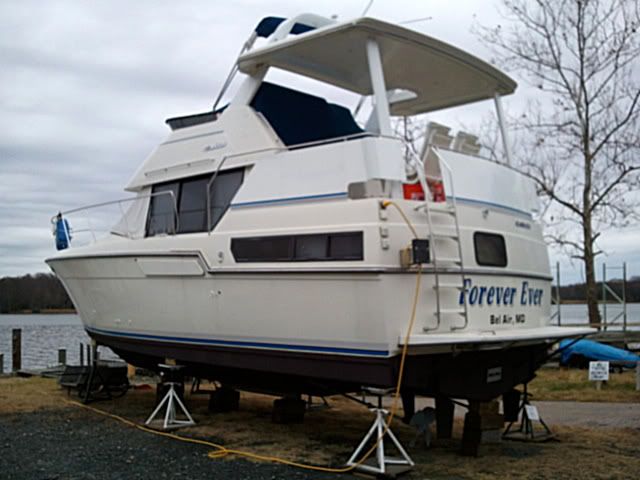
Howdy folks. Sorry for being away for awhile. I actually didn?t go anywhere. I just had to take care of a bunch of marina stuff. I am the fleet captain here and I am responsible for slip assignments and all storage for summer and winter. I also have to handle the fall haul outs. So it is a pretty intense six weeks of endless phone calls and lift operations. I got the big boat out as well. Since the weather was nice I decided to tackle the bottom work as well and save time in the spring. I hate bottom work and I am glad that it is over. Also got everything winterized. Here she is up on stands:

2010-11-30134956.jpg


But?it is finished and I am getting back to working on my project boat. Hopefully the winter will be mild and I can knock this out.

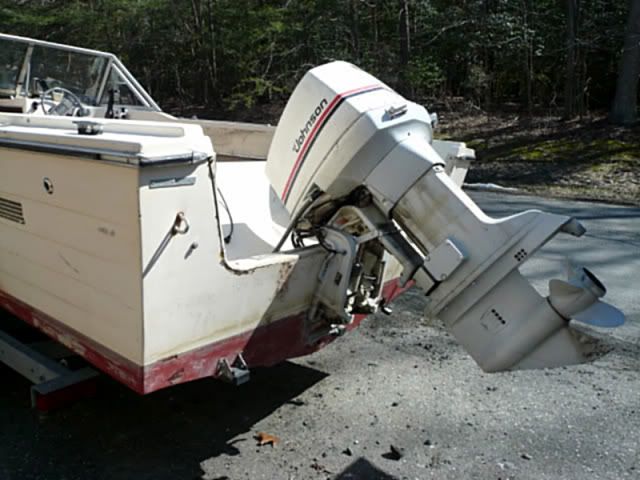
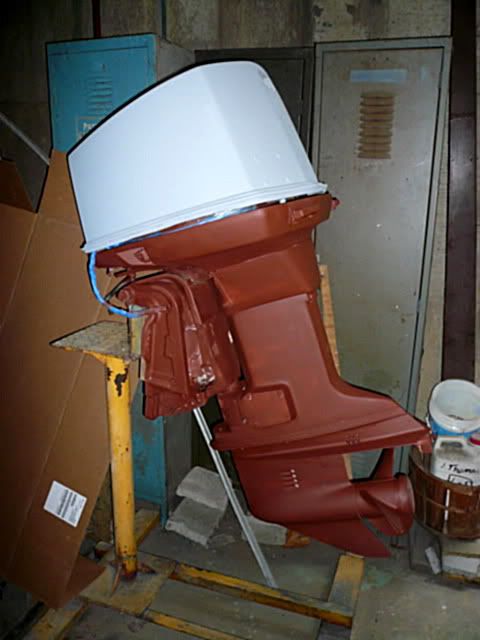
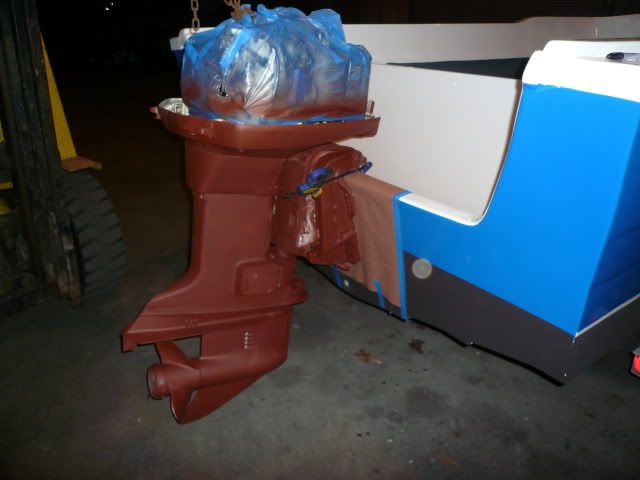
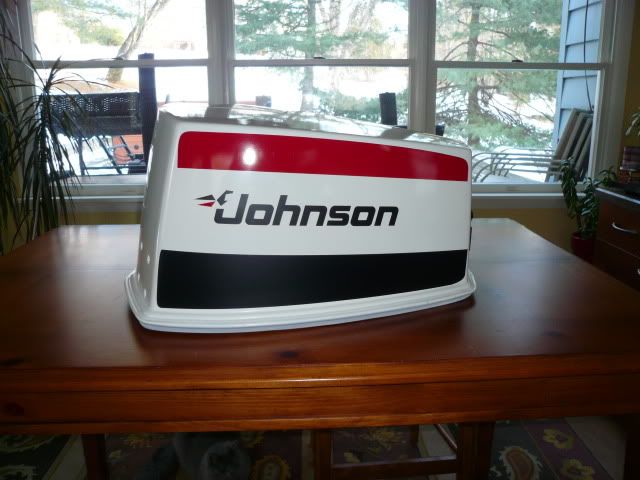
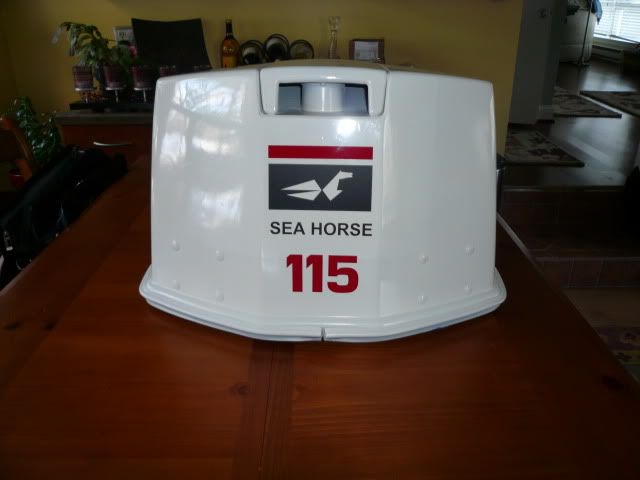
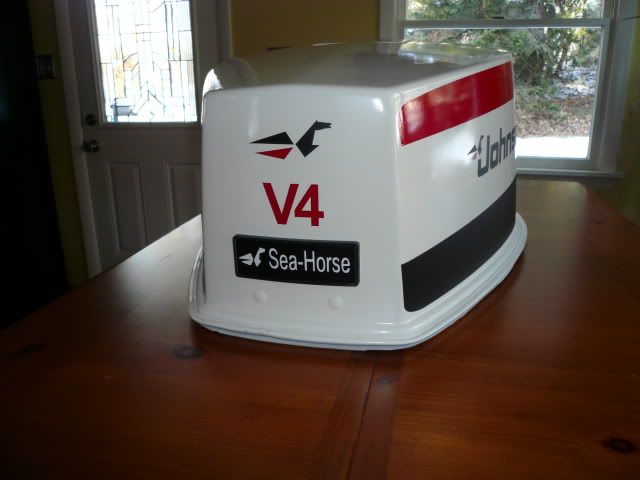
I know I left off with the electrical work but before I continue with that I wanted to touch on some other side jobs that I completed during the summer. One of things I did was give the outboard a face lift?clean-up, re-paint and new decals for the engine cowling. Here is a shot of the motor before.

P1010835.jpg


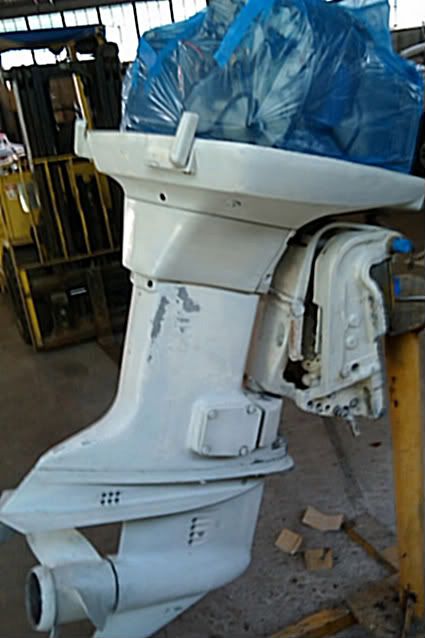
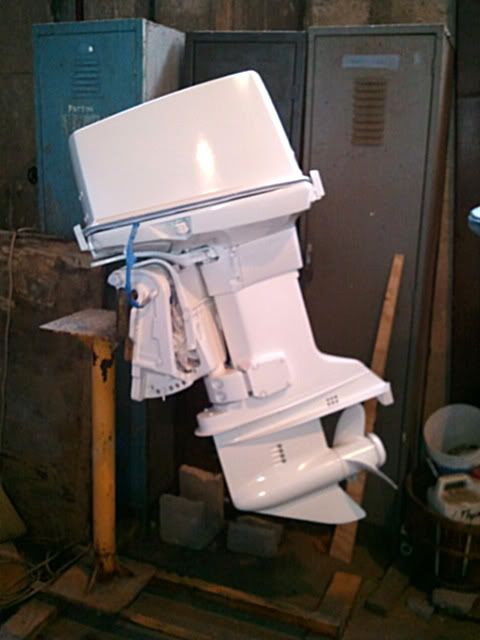
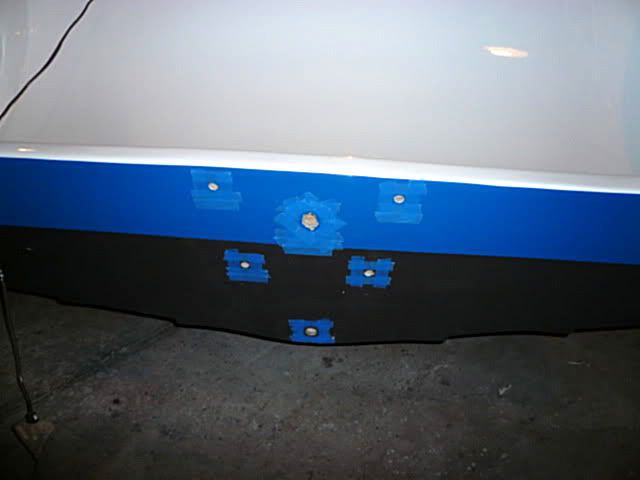
I cleaned it well and gave it a good sanding.

IMAG0027.jpg


IMAG0025.jpg


After that I primed it with metal primer.

P1020055.jpg


P1020054.jpg


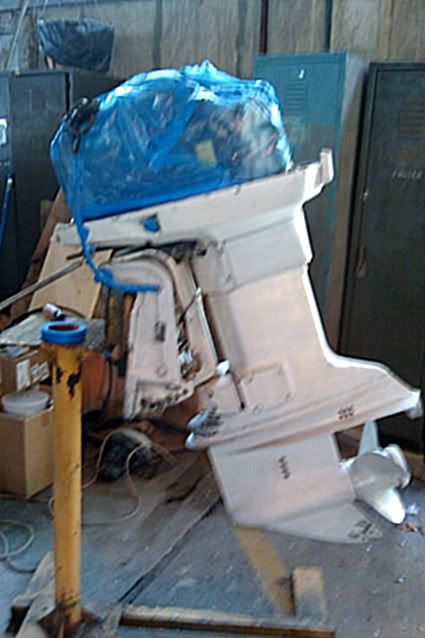
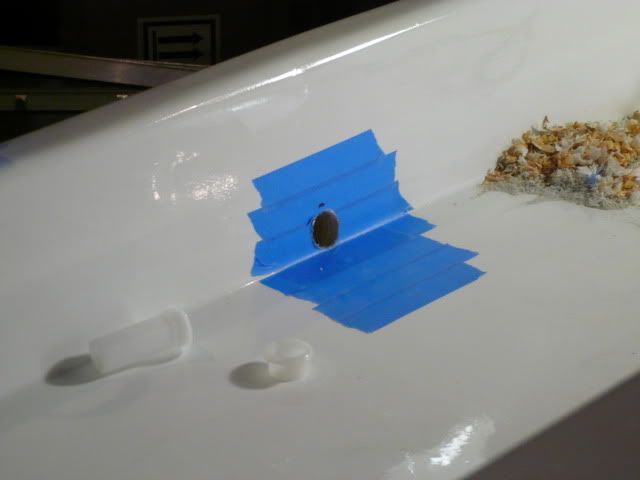
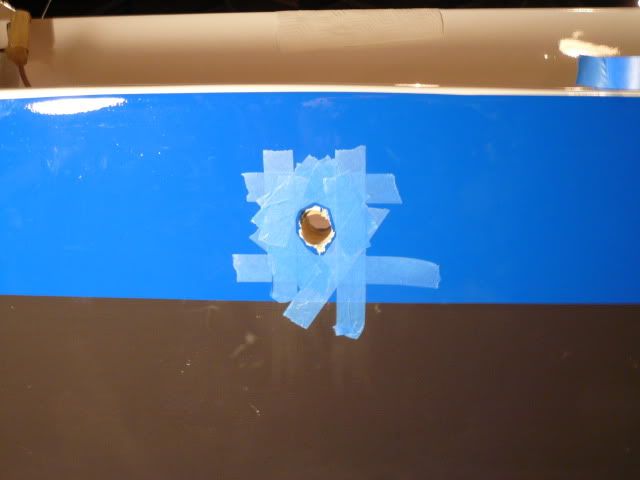
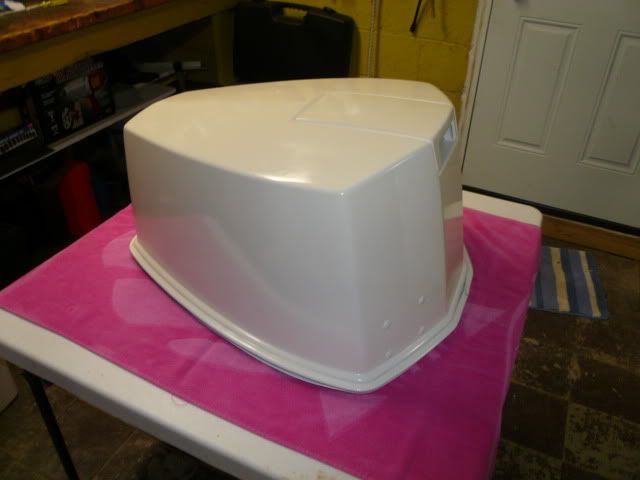
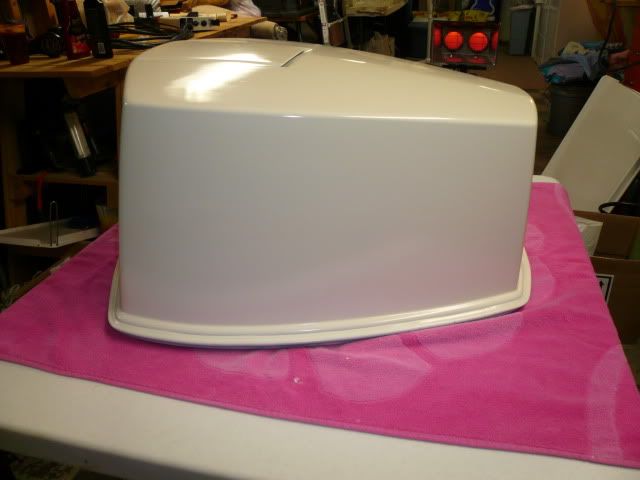
For the engine cowl, I removed the old decals, cleaned it well with a dewaxer, filled some scratches, sanded, and then primed with a sanding primer. After the primer dried I refilled any low spots again, sanded and primed a final time. Prior to painting I scuffed the surface with a fine sanding pad.
 
Joined
Aug 17, 2009
Messages
941
Re: 1977 Cruise Boats Restore

And here is a pic of the motor with paint:

2010-11-30135730.jpg


Here is what the new decal set will look like:

Johnson-v4-together.gif


Outboarddecals.jpg


I have not put the new decals on yet because I have one small spot on the cowl to fix first and of course the weather has not been conducive for painting so I will have to take it home and paint it in a warmer area.
 

drewpster

Commander
Joined
Oct 17, 2006
Messages
2,059
Re: 1977 Cruise Boats Restore

The outboard looks great. I jumped ahead a bit when I mounted mine before refinishing it. I plan to get on that during the winter after I get the fuel tank all mounted and get the rest of the deck finished.
Are you having your decals made, or do you have a source for them? I'm going to need them for my Merc. I also have to figure out how I am going to smooth out the beat up plastic on my engine cover.

Yours looks great! Now I have to get moving. Got to keep up with the Mrozinskis. :rolleyes:

BTW-Your girl has a nice bottom too!
 

ezmobee

Supreme Mariner
Joined
Mar 26, 2007
Messages
23,767
Re: 1977 Cruise Boats Restore

Greg, I used the same decals as you're planning to use for my '73 Johnson.

http://i176.photobucket.com/albums/w200/ezmobee/Boat Project/DSCF0687.jpg

As you can see, I have the decals lined up pretty well perfectly with the contours of the hood. However, inside lines of the decals then don't end up parallel. With your obvious perfectionism, this probably won't suit you. So you may want to line everything up ahead of time and trim the decals if they need it.
 
Joined
Aug 17, 2009
Messages
941
Re: 1977 Cruise Boats Restore

The outboard looks great. I jumped ahead a bit when I mounted mine before refinishing it. I plan to get on that during the winter after I get the fuel tank all mounted and get the rest of the deck finished.
Are you having your decals made, or do you have a source for them? I'm going to need them for my Merc. I also have to figure out how I am going to smooth out the beat up plastic on my engine cover.

Yours looks great! Now I have to get moving. Got to keep up with the Mrozinskis. :rolleyes:

BTW-Your girl has a nice bottom too!

Drew,

Thanks. I got my decals off ebay. There are a few folks on there making replica decals that are nice quaility. I paid around $30.00 for my set.

A good sanding and some bondo will fair out your cowling. You know how that goes right? Just like your entire tri-hull project. No problem. ;)

She thanks you for the compliment!
 
Joined
Aug 17, 2009
Messages
941
Re: 1977 Cruise Boats Restore

Greg, I used the same decals as you're planning to use for my '73 Johnson.

http://i176.photobucket.com/albums/w200/ezmobee/Boat Project/DSCF0687.jpg

As you can see, I have the decals lined up pretty well perfectly with the contours of the hood. However, inside lines of the decals then don't end up parallel. With your obvious perfectionism, this probably won't suit you. So you may want to line everything up ahead of time and trim the decals if they need it.

EZ,

Your motor looks great. I really like the bolder graphics of the earlier Johnson motors better than the minimalist stuff that was on my '83'. Thanks for the advise about the alignment. I wasn't worried about it until you mentioned it. Now I am going to obsess about it thanks to you. ;)
 
Joined
Aug 17, 2009
Messages
941
Re: 1977 Cruise Boats Restore

Those look nice also. What motor are going to put those on. Your 90 Hp Evinrude? Or do you have another motor?
 
Joined
Aug 17, 2009
Messages
941
Re: 1977 Cruise Boats Restore

Man this cold weather really bites (19 degrees here). This weather is keeping me from wrapping this thing up. So I will continue with one of the other side jobs I did this summer - mark and drill all of the transom mounting holes for the motor and the splash well and bilge drains.

The first thing I did was mark off where the splash well drain and bilge drain will go. I actually left the old holes in the outer transom skin as a guide. I then taped off both sides of the transom and carefully drilled 1? diameter holes keeping the drill bit perpendicular to the transom. Once the bit was just starting to cut though the other side I removed the drill and finished the hole by drilling from the opposite side. This helped minimize splintering of the fiberglass and left a cleaner finished hole. First went the splash well drain. UUGH! I hated to drill through my new transom.

P1020074.jpg


P1020075.jpg


In the one pic you can see the splash well drain tube that will be sealed into the hole to create a nice finished look.

Then the bidge drain.

P1020078.jpg


P1020080.jpg
 
Joined
Aug 17, 2009
Messages
941
Re: 1977 Cruise Boats Restore

Next up is the mounting holes for the motor. In order to obtain the most accurate hole positioning, I decided to hang the motor on the transom and mark the hole placements. I first covered the area with a heavy grade builder?s paper. This helped protect the paint while I positioned the motor in place. I then hung the motor on the transom, aligned it to its proper position and then clamped it into place. I then marked the center location of the four bolt holes using a sharp punch. This allowed for easy centering of the drill bit afterwards.

P1020084.jpg


P1020087.jpg


P1020089.jpg


P1020090.jpg


Once the holes where marked, I drilled them out making sure the drill bit stayed perpendicular to the transom. After that, I carefully taped off around each hole and mixed up a small batch of poly resin with ?? chopped strand. I then coated the insides of each hole with the resin mix to seal the wood and help slow down any future water intrusion.

P1020099.jpg
 

Damifudo

Petty Officer 1st Class
Joined
Sep 14, 2009
Messages
277
Re: 1977 Cruise Boats Restore

A little trick I did with my boat was to drill the holes out about 1/2 larger all the way around and then filled them with Marine text Then drilled the holes through the Marine text and not the wood and there is no exposed wood in the hole. I hope the next time my boat needs a transome I will be looking at my son and saying good luck with it.
 
Joined
Aug 17, 2009
Messages
941
Re: 1977 Cruise Boats Restore

A little trick I did with my boat was to drill the holes out about 1/2 larger all the way around and then filled them with Marine text Then drilled the holes through the Marine text and not the wood and there is no exposed wood in the hole. I hope the next time my boat needs a transome I will be looking at my son and saying good luck with it.

Dami,

Yeah I thought about doing something similar using a thickened poly resin mixture. Problem I may have now is will overdrilling the hole cause a problem with the look of the paint. I will definitely do that for the bilge drain hole and the lower motor mount holes. Not sure about the other three yet. I appreciate your thoughts and help. I will take them into strong consideration. Happy New Year.
 
Joined
Aug 17, 2009
Messages
941
Re: 1977 Cruise Boats Restore

Well winter sucks. Although we have missed several snow storms the temps won't warm up. Since working on the boat in the warehouse is tough because it is so cold I decided to bring home a few odd jobs to finish off. One was the engine cowling. In a previous post I decribed the repainting of the engine. When I repainted I got a small wrinkle on the back side of the cowl on the final coat...ggrrrrrr! So I touched up that spot and compounded the entire cowling to remove some slight over spray. I used a Meguars Ultimate Compound. This stuff worked very well. It was sort of between a polishing compound and a polish but it was a one step product that left a great smooth and even shine.

P1020359.jpg


P1020360.jpg


Now it was time to apply the new decals to finish this baby off. Here is the finished cowling ready to go back onto the motor. The decals turned out really nice. This thing looks brand new.

P1020370.jpg


P1020371.jpg


P1020373.jpg


P1020374.jpg
 

ezmobee

Supreme Mariner
Joined
Mar 26, 2007
Messages
23,767
Re: 1977 Cruise Boats Restore

That cowling came out awesome! Did you end up having to trim up the stripes to make them parallel?
 
Top