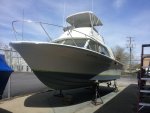
1977 Silverton Flybridge Restoration- PICS & VIDEOS

TitanTn

Seaman Apprentice
Joined
Dec 5, 2010
Messages
47
Re: 1977 Silverton Flybridge Restoration- PICS & VIDEOS

I was just in Pigeon Forge this past weekend for my best friends wedding....absolutely BEAUTIFUL weather. Stopped by Ripleys Aquarium too.

Very nice! You were about 1.5 hours from me in Chattanooga.
 

LorenHaus

Petty Officer 2nd Class
Joined
Aug 6, 2010
Messages
140
Re: 1977 Silverton Flybridge Restoration- PICS & VIDEOS

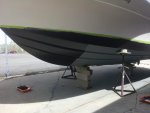
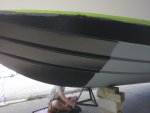
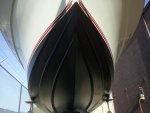
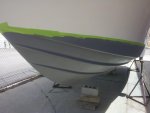
Since the busy season has started, I've put my project to the side for a couple weeks while helping to get customers boats repowered at our shop first. I set aside this saturday to prime and paint the bottom of the Silverton. Removing bottom paint and fairing the bottom to a point where it is primable and paintable was and is the biggest single project I have ever undertook on any boat. It makes repainting each and every individual component on the 318 engines look like a piece of cake.....and thats taking into consideration I walnut blasted the caked on bottom paint off! I cannot even imagine sanding it off - let alone using chemical strippers.

Before I primed the bottom, I used MarineTex to fill in any holes or gouges in the hull. After that had set for 48 hours, I sanded it smooth and degreased/dewaxed the bottom, and went over the bottom of the hull with an orbital sander with 80 grit so that the Petit Protect Epoxy Primer would adhere properly.

After removing the sanding dust from the hull, I began to tape everything...using the original bootstripe as a reference point to make sure my tapeline was strait. I dropped the tape 1/2" below the bootstripe, as that's where the paint was before i removed it and matched the water line almost perfectly.


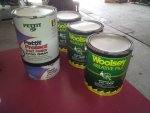
Products used:


- MarineTex (to repair pitting in hull)
- 2 Gallons of Pettit Protect Grey Epoxy Primer (only one gallon kit shown in photo, used two kits)
- 3 Gallons of Woolsey Ablative Plus Bottom Paint, BLACK. Cheap and VERY effective paint.
2013-05-04 15.35.43.jpg2013-05-04 15.31.17.jpg2013-05-04 15.41.52.jpg2013-05-04 14.15.48.jpg
 

ShowMeGuy

Chief Petty Officer
Joined
Jan 31, 2012
Messages
560
Re: 1977 Silverton Flybridge Restoration- PICS & VIDEOS

Great looking boat.. Pretty obvious you are in the marine biz and a good one... Great quality and professional looking.

Wish all marine shops were created equal....
 

LorenHaus

Petty Officer 2nd Class
Joined
Aug 6, 2010
Messages
140
Re: 1977 Silverton Flybridge Restoration- PICS & VIDEOS

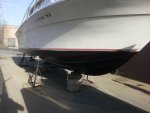
After a couple coats of the Petit epoxy primer, I waited about 5 hours and began to apply the bottom paint. Had one of my buds help paint too.
2013-05-06 13.43.20.jpg2013-05-06 13.43.42.jpg
 

LorenHaus

Petty Officer 2nd Class
Joined
Aug 6, 2010
Messages
140
Re: 1977 Silverton Flybridge Restoration- PICS & VIDEOS

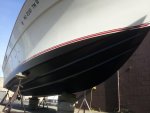
After a couple coats of bottom paint, it was off with the tape. VERY happy with the result! Now....for that bootstripe thats lookin rough.....


2013-05-06 18.35.58.jpg2013-05-06 18.26.54.jpg2013-05-06 18.27.22.jpg2013-05-06 18.27.34.jpg2013-05-06 18.27.48.jpg
 

25thmustang

Lieutenant Commander
Joined
Mar 20, 2008
Messages
1,849
Re: 1977 Silverton Flybridge Restoration- PICS & VIDEOS

Latest attachments aren't working for me, but the progress shots look awesome!
 

TitanTn

Seaman Apprentice
Joined
Dec 5, 2010
Messages
47
Re: 1977 Silverton Flybridge Restoration- PICS & VIDEOS

I'm seeing the attachments and it looks great. I'm amazed at how brand new that bottom looks. Did you really spend that much time prepping, or perhaps was it not as bad as I'm envisioning a 30+ year old boat bottom?
 

LorenHaus

Petty Officer 2nd Class
Joined
Aug 6, 2010
Messages
140
Re: 1977 Silverton Flybridge Restoration- PICS & VIDEOS

I walnut blasted 99% of everything off, and then used my dewalt orbital sander with the dust collector and a vacuum to remove the remaining dust. The vacuum was just a wet/dry shop vac, and i filled it with about 6" of water to keep the dust wet in the vac canister. Once I got 20+ coats of old non-ablative bottom paint off, I rinsed everything off tyo remove dust and residue from sanding. The, I applied MarineTex to fill in the air pockets/blisters showing through the gel coat. Then I resanded all that with 80 grit on my orbital sander. Removed dust/residue, and then began to use Pettit Protect epoxy "primer" (sealer)

Yes, I really did spend that much time on it, but it was totally worth it. Prep work makes the final product last longer.
 

ShowMeGuy

Chief Petty Officer
Joined
Jan 31, 2012
Messages
560
Re: 1977 Silverton Flybridge Restoration- PICS & VIDEOS

Looks good.. Are you planning to do the same sort of work on the topside paint?
 

LorenHaus

Petty Officer 2nd Class
Joined
Aug 6, 2010
Messages
140
Re: 1977 Silverton Flybridge Restoration- PICS & VIDEOS

No.....actually the topside gelcoat is in VERY good shape, considering the age. Minor chalking in a couple places.
 

25thmustang

Lieutenant Commander
Joined
Mar 20, 2008
Messages
1,849
Re: 1977 Silverton Flybridge Restoration- PICS & VIDEOS

I see them now! Looks great as I expected.
 

LorenHaus

Petty Officer 2nd Class
Joined
Aug 6, 2010
Messages
140
Re: 1977 Silverton Flybridge Restoration- PICS & VIDEOS

I worked all day Saturday finishing hooking up the exhaust, minor electrical on the motors, such as wiring up single wire alternators eliminating the external voltage regulators, wiring the electric chokes for the new Edelbrock 1409 carbs, etc. Got the port engine fired up and set the timing, idle, and idle mixture. Ran like a champ! Planning on running the starboard engine today.
 

LorenHaus

Petty Officer 2nd Class
Joined
Aug 6, 2010
Messages
140
Re: 1977 Silverton Flybridge Restoration- PICS & VIDEOS

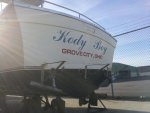
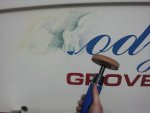
Bought an Astro pinstripe removal tool this past week to remove the bootstripe and the old name on the back of the boat. VERY impressed with how quick it came off! Basically, the round disc is a giant eraser pad and the airtool is gear reduction to operate at a lower speed so you dont burn through the paint/gelcoat.

Here's the link to the tool: Astro 1208A Composite Body Pinstripe Removal Tool

2013-05-08 09.20.58.jpg
 

LorenHaus

Petty Officer 2nd Class
Joined
Aug 6, 2010
Messages
140
Re: 1977 Silverton Flybridge Restoration- PICS & VIDEOS

Got both port and starboard engines fired up today, and running great. Set the base timing on both engines and also adjusted idle, tweaked idle mixture, and checked the total advance. Couldn't be happier! I'm grinning non-stop today. I also installed new fuel pumps and crimped some new 3/8" fuel lines on our col-o-crimp hydraulic hose crimper machine. Here's a short video of the port engine running:


TitanTn

Seaman Apprentice
Joined
Dec 5, 2010
Messages
47
Re: 1977 Silverton Flybridge Restoration- PICS & VIDEOS

Looking great. I'm sure things didn't look this great straight out of the factory.
 

ShowMeGuy

Chief Petty Officer
Joined
Jan 31, 2012
Messages
560
Re: 1977 Silverton Flybridge Restoration- PICS & VIDEOS

SKEWWWWWWW!!!! Fire in da HOLE.
 

LorenHaus

Petty Officer 2nd Class
Joined
Aug 6, 2010
Messages
140
Re: 1977 Silverton Flybridge Restoration- PICS & VIDEOS

Snapped a quick video of both running this morning! Very excited!!!


ShowMeGuy

Chief Petty Officer
Joined
Jan 31, 2012
Messages
560
Re: 1977 Silverton Flybridge Restoration- PICS & VIDEOS

Looks like AWESOME Oil pressure on those motors... very nice..
 
Top