1977 Sylvan Sea Monster Side Console Rebuild

Watermann

Starmada Splash of the Year 2014
Joined
Jan 12, 2013
Messages
13,822
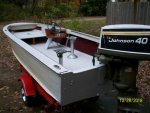
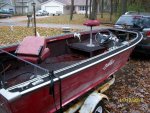
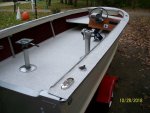
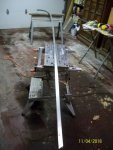
Installed the 4 cleats and secured the anchor light base, then got the wiring secured under the gunwales except the ignition harness. Admiral wanted a preview, so I did a temporary install of the seats.

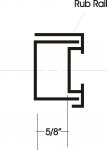
That's about as far as I can go until I get it back on the trailer and install the motor. I still need to put the rub rail on, but need to clean it up first. Ordered a new insert for it yesterday from Wefco.

fetch


I like it! :thumb:
 

oldrem

Commander
Joined
Nov 7, 2013
Messages
2,002
The bow cap and transom corner caps were pretty corroded, gouged and nicked up so I started working them on the 4 x 36 bench top belt sander with 80 grit to get the majority cleaned up then worked down to 240 grit with a sanding block. Not perfect by any means, but a far cry better than they were. Good thing the cast aluminum was heavy since a lot of stock came off in the process.

Bow and Transom corner Caps.jpg
 

kcassells

Fleet Admiral
Joined
Oct 16, 2012
Messages
8,738
BTW......Man that's looking Great! Keep da car out of the garage anutter 30 days ubdone says I
There is always the tarp and heater set up ya see. :eek:
 

oldrem

Commander
Joined
Nov 7, 2013
Messages
2,002
BTW......Man that's looking Great! Keep da car out of the garage anutter 30 days ubdone says I
There is always the tarp and heater set up ya see. :eek:

Thx Kevin. Only problem is almost everything I have left to do requires the boat be back on the trailer and the motor mounted. The trailer won't fit in the garage. My best friend is coming in town tomorrow to help me get it back on the trailer. At least I'll still be able to work on it in the car port on Sundays.
 

kcassells

Fleet Admiral
Joined
Oct 16, 2012
Messages
8,738
All I'm saying is tarp it in and get 1 of those HD heat blowers. I'm able to go from 20 temp outside to 80 plus in 15 minutes.
Lets me glass or do diddle things.
 

oldrem

Commander
Joined
Nov 7, 2013
Messages
2,002
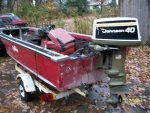
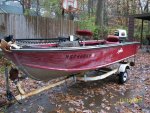
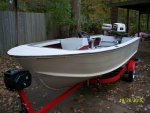
Dark dreary crappy rainy day today, but my best friend Dan came in from Burlington to help me get it back on the trailer and adjust the bunks and rollers. Got the motor back on as well. Thought it would be fun to take some "near done" photos to compare it with how it looked when it followed me home nearly a year ago.

aft port.jpgaft port 2.jpgaft starboard.jpgaft starboard 2.jpgfront port.jpgfront port 2.jpg
 

kcassells

Fleet Admiral
Joined
Oct 16, 2012
Messages
8,738
Thats some GREAT LOOKIN BOAT. Won't even need a rod the fisheeess will just jump in there. :)
 

oldrem

Commander
Joined
Nov 7, 2013
Messages
2,002
Thanks guys - wish I had more time to work on finishing it.

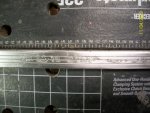
Spent a couple nights cleaning up the port side rub rail. So many dings, gouges and scratches that I could only minimize them without destroying it.

When I went to fit it, I think I found out why it was screwed on with machine screws and nuts which was a real pain to get off with the lack of access deep in the gunwales. I was hoping to use rivets but don't know if that would work with the large gap. Watermann suggestions please on how these are normally attached?

Rub Rail 1.jpg
 

Watermann

Starmada Splash of the Year 2014
Joined
Jan 12, 2013
Messages
13,822
Normally the machine screws and nuts are used but the rubrail is not structural as you can see the rail under it is solid riveted to the hull. So I used my 1" grip range large flange rivets but had to modify the heads a bit to get them to fit in right. You could use regular dome head blinds but I liked the more robust LF rivet head.

y4me7n6Idn_RHmwd04lwJ81N6Ii8pFJ2XICkb_Hf3c4C0XIaQcARBNXCWGH_-nHfuZhWPaBcMmS8J5g5AA7wCKM17qtdX9vCeHccFAqvd_0cSyNQZxQdNLWLhC_lFHTm_-zviTOQ7z5eUQ1KCdZHWGFQgf213LnkDfCA81V9cuw0hG31VLuI-6eW9QbU3UfiCcTscFb9dDeTXM3_0-8mYfTXg
 

oldrem

Commander
Joined
Nov 7, 2013
Messages
2,002
Normally the machine screws and nuts are used but the rubrail is not structural as you can see the rail under it is solid riveted to the hull. So I used my 1" grip range large flange rivets but had to modify the heads a bit to get them to fit in right. You could use regular dome head blinds but I liked the more robust LF rivet head.

[IMG2=JSON]{"data-align":"none","data-size":"full","src":"https:\/\/5vbskw.bn.files.1drv.com\/y4me7n6Idn_RHmwd04lwJ81N6Ii8pFJ2XICkb_Hf3c4C0XIaQcARBNXCWGH_-nHfuZhWPaBcMmS8J5g5AA7wCKM17qtdX9vCeHccFAqvd_0cSyNQZxQdNLWLhC_lFHTm_-zviTOQ7z5eUQ1KCdZHWGFQgf213LnkDfCA81V9cuw0hG31VLuI-6eW9QbU3UfiCcTscFb9dDeTXM3_0-8mYfTXg?width=1024&height=577&cropmode=none"**[/IMG2]

So rivets can work without distorting everything? That's great! I'll order some longer ones then! Thanks Rob.
 

oldrem

Commander
Joined
Nov 7, 2013
Messages
2,002
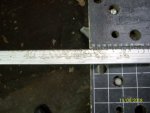
Did the best I could with one really gnarly section of the starboard rub rail.

Starboard rubrail before.jpg

This was the best I got using a portable belt sander, detail sander, palm sander and some hand sanding. Looks a little better in person, but just going to have to live with it. Not sure what happened when the PO had it.

Starboard rubrail after.jpg
 

oldrem

Commander
Joined
Nov 7, 2013
Messages
2,002
Starboard rub rail is finished. Now just waiting for my rivet order to arrive so I can get them both installed. Weather is awful outside again. Rain, high winds and cold. High temps next weekend predicted to be low to mid 30's F. Lots of temps below freezing overnight this week. We continue to run close to 10 degrees below normal.

Starboard rubrail finished.jpg
 

chevymaher

Commander
Joined
Mar 29, 2017
Messages
2,932
Looking good. Feel for you. We only a week behind in that type weather. It is supposed to snow twice in a week in a week from now. I am gather my nuts for indoor activities now LOL.
 
Top