1979 18' Starcraft SuperSport Restoration

ezmobee

Supreme Mariner
Joined
Mar 26, 2007
Messages
23,767
I used the Nautolex adhesive and it worked awesome. I will admit that I ran out when I was like 85-90% through the job and finished using the inexpensive Roberts outdoor carpet adhesive from Lowes/Home Depot and it worked flawlessly as well.
 

Watermann

Starmada Splash of the Year 2014
Joined
Jan 12, 2013
Messages
13,822
Yeah the 3M stuff is pricey but I used the 80, it's a very strong bond and it's a big can that goes a long ways actually being sprayed on.


Really though since you have the side trim it won't have a chance to delaminate over time from the edges of the decking. You can also in places underneath like the front where there isn't trim you can use SS staples. The staples around the edges of the vinyl will just disappear in the pattern even if they were visible.
 

MNhunter1

Lieutenant Junior Grade
Joined
May 12, 2014
Messages
1,077
Yeah the 3M stuff is pricey but I used the 80, it's a very strong bond and it's a big can that goes a long ways actually being sprayed on.


Really though since you have the side trim it won't have a chance to delaminate over time from the edges of the decking. You can also in places underneath like the front where there isn't trim you can use SS staples. The staples around the edges of the vinyl will just disappear in the pattern even if they were visible.


What's the approximate coverage per can, i.e. how many can did you need for your 18ft'r?
 

mbroughton02

Petty Officer 2nd Class
Joined
Jan 17, 2015
Messages
198
Today was good. Finished up the ski locker:

grrqcWil.jpg


More foam:

Epe4KrQl.jpg


And got the floor installed:

0eOVipGl.jpg


Decided to use wood glue on all the plywood doublers. God help the next person who has to take this floor out.

Hoping to get the Nautolex on the floor tomorrow. Any advice for doing it solo?
 
Last edited:

Watermann

Starmada Splash of the Year 2014
Joined
Jan 12, 2013
Messages
13,822
I rolled the vinyl up after cutting to fit and glued it down in sections as I went starting at the stern.
 

jasoutside

Supreme Mariner
Joined
Dec 20, 2009
Messages
13,269
You are doing a really nice job putting this ol SS back together, well done:thumb:
 

mbroughton02

Petty Officer 2nd Class
Joined
Jan 17, 2015
Messages
198
Thanks for all the encouraging comments.

Got the Nautolex installed today:

n8hTHg5l.jpg


Here's the method I used:

I prepped all aluminum by cleaning with acetone, and I used a damp rag to go over the plywood. I cut the vinyl to length. I drew a line straight down the middle of the floor and the underside of the vinyl. I then used that line to set the vinyl in straight.

I used several steel weights and sandbags to keep the starboard side from shifting, while marking and making any necessary cuts to the port side:

ixpvUwWl.jpg


Flipped the port side onto the starboard side, and applied contact cement to all surfaces and vinyl, right up to the center lines:

yuSuiYLl.jpg


I set it down starting in the center, both length wise and width wise, and worked my way to the stern, and then up to the bow. I used a piece of PVC pipe about 3' long as a roller. Took a break, came back, removed all weights (it couldn't shift now that one half was glued down), and flipped the starboard side onto the port side, made the cuts, and applied the contact cement:

tpcmA8Jl.jpg


Used the same method with the PVC roller to set the starboard side down. It took me about 8 hours total, including a dinner break and a trip to Lowes for more contact cement. 1 gallon was not enough after using about 1/4 of it on the ski locker.

I decided to hold off on cutting out the hole for the ski locker, because I think it will be easier to do later.

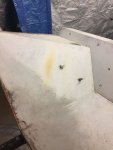
A few notes about my cuts in the bow. I set the consoles in place and marked and made these cuts so that I can later do 1 solid piece of vinyl in the areas where the vinyl will be exposed from top to bottom underneath each console:

EUXrLcjl.jpg


Everywhere else, the vinyl going up the sides is blocked either by the side panels or the bow seat.

I made these cuts along the line where the bow seat's supporting aluminum piece will attach:

8FWVZ2Ul.jpg


I did this because everything above that line will be visible, and I will add vinyl there and I want it to be one piece when I do. Below that line I still wanted vinyl because it's inside the bow "cubbies".
 

Tnstratofam

Commander
Joined
Aug 18, 2013
Messages
2,679
Really nice work, and thanks for sharing your technique. It looks like it turned out good.:encouragement:
 

No-AH

Petty Officer 1st Class
Joined
Oct 20, 2016
Messages
234
Coming along nicely MB. Well done.
That pattern of Nautolex looks like the most popular in redos of late.
When I ordered mine, I added 1 gallon of their recommended adhesive to my shipment. I hope it's enough to complete the rest of the flooring in the holi as I only got to lay the front casting deck so far and used up 1/3 of it.
 

mbroughton02

Petty Officer 2nd Class
Joined
Jan 17, 2015
Messages
198
Starting to strip the splash well. What are these? Maybe a fuel tank breather and ???

IF5xZfHl.jpg[\img]
 

Attachments

  • UocH8Rwl.jpg
    UocH8Rwl.jpg
    39.5 KB · Views: 34
  • mocsORrl.jpg
    mocsORrl.jpg
    38.8 KB · Views: 0
  • IF5xZfHl.jpg
    IF5xZfHl.jpg
    30.5 KB · Views: 0

jasoutside

Supreme Mariner
Joined
Dec 20, 2009
Messages
13,269
That second photo looks like what would be used to vent a fuel tank.

The third photo, dunno? Maybe hydraulic inlet for a high powered turkey sandwich builder possibly?
 

Decker83

Commander
Joined
Apr 5, 2011
Messages
2,593
If the PO had a fuel tank stored under the splash well, then one is clearly a vent and the other could be a barb to allow a fuel line..:noidea:
 
Top